
Overview
When composing an email in Outlook, you may sometimes want to include an inline image within the body of the message to enhance its visual appeal or provide additional context. An inline image is one that is displayed directly within the text, rather than appearing as an attachment. This allows recipients to view the image without having to open any attachments separately.
In this tutorial, we will guide you through the steps to insert an inline image in an Outlook message. We will cover different methods to achieve this, including dragging and dropping an image, copying and pasting an image, and inserting an image from a file. We will also discuss how to resize and format the inline image to ensure it fits seamlessly within the email message.
By following these instructions, you will be able to create visually appealing emails that effectively convey your message to recipients. Whether you’re sending a business proposal, a personal invitation, or a marketing campaign, incorporating inline images can make your emails more engaging and memorable.
So, let’s dive into the details and learn how to insert an inline image in an Outlook message.
Step 1: Compose a New Email Message
The first step in inserting an inline image in an Outlook message is to compose a new email. Open Outlook and click on the “New Email” button, typically located in the top-left corner of the application. This will open a blank email message window where you can enter the details of your email, such as the recipient’s email address, subject, and the main content of your message.
Compose your email as you normally would, adding any text or other elements you want to include. Make sure to leave some space in the body of the email where you want to insert the inline image. You can add your text, greetings, and salutations before or after the image, depending on your preference.
Once you have finished composing the main text of your email, you are ready to move on to the next step, which is inserting the inline image. Now, let’s explore the different options available to insert an inline image in an Outlook message.
Step 2: Insert an Inline Image
Now that you have composed your email message in Outlook, it’s time to insert an inline image to make your message more visually appealing. Outlook offers several options for inserting an inline image, depending on your preferred method. Let’s explore these options:
Option 1: Drag and Drop the Image
The first option is to simply drag and drop the image directly into the body of the email message. To do this, locate the image file on your computer or in a folder. Click and hold the left mouse button on the image file, then drag it into the email message window and release the mouse button. The image will be inserted at the cursor’s location within the email body.
Option 2: Copy and Paste the Image
An alternative method is to copy the image from another source, such as a website or image editing software, and paste it directly into the email message. To do this, right-click on the image and select “Copy,” or use the keyboard shortcut Ctrl+C. Then, move to the email message window, place your cursor at the desired location, right-click, and select “Paste” or use the keyboard shortcut Ctrl+V. The image will be pasted into the email message as an inline image.
Option 3: Inserting an Image from a File
If you prefer, you can also insert an image from a file on your computer or network. To do this, click on the “Insert” tab at the top of the Outlook ribbon, then select “Pictures” or “Online Pictures” depending on the source of the image. Browse your computer or search for an image online, select the image file, and click “Insert” to add it to your email message as an inline image.
Now that you have inserted the inline image into your email message, let’s move on to the next step: resizing and formatting the inline image to ensure it fits seamlessly within the email.
Option 1: Drag and Drop the Image
One of the simplest ways to insert an inline image in an Outlook message is by using the drag and drop method. This method allows you to easily add an image from your computer or another source directly into the body of the email message. Here’s how you can do it:
- Locate the image file on your computer or in a folder.
- Click and hold the left mouse button on the image file.
- Drag the image file into the email message window.
- Release the mouse button to drop the image in the desired location within the email body.
When you drag and drop the image, Outlook will automatically insert it as an inline image at the cursor’s location. You can then position and resize the image as needed to fit your email message layout.
This method is especially convenient when you have the image file readily available on your computer or when you want to quickly include an image from a website or another program. It eliminates the need for multiple steps and allows for a seamless integration of the image into the email body.
Once you have successfully dragged and dropped the image, you can proceed to the next step of resizing and formatting the inline image to ensure it blends harmoniously with the rest of your email content.
Option 2: Copy and Paste the Image
Another convenient way to insert an inline image in an Outlook message is by using the copy and paste method. This method allows you to easily add an image from various sources, such as websites or image editing software, directly into the body of the email message. Here’s how you can do it:
- Right-click on the image you want to include in your email.
- Select “Copy” from the context menu that appears, or use the keyboard shortcut Ctrl+C.
- Open the email message in Outlook where you want to insert the inline image.
- Place the cursor at the desired location within the email body.
- Right-click and select “Paste” from the context menu, or use the keyboard shortcut Ctrl+V.
By copying the image from its original source and pasting it into your email, Outlook will automatically insert it as an inline image at the cursor’s location. You can then adjust the image’s size and position within the email to ensure a seamless integration with the surrounding text.
This method is useful when you want to include images that are already accessible on your computer or from other programs. It allows for quick and efficient insertion of inline images, eliminating the need to save the images separately and navigate through complex menus.
Now that you know how to copy and paste an image as an inline element in Outlook, you can move on to the next step: resizing and formatting the image to enhance its appearance within the email message.
Option 3: Inserting an Image from a File
If you prefer to insert an image from a file on your computer or network, Outlook provides a method to accomplish this. This option allows you to browse your computer or search for an image online and seamlessly insert it as an inline image in your email message. Here’s how you can do it:
- Click on the “Insert” tab at the top of the Outlook ribbon.
- Select “Pictures” or “Online Pictures” from the options available, depending on where your desired image is located.
- If you choose “Pictures,” a file explorer window will open. Browse your computer or network for the image file you wish to insert and click “Insert” to add it to your email message.
- If you select “Online Pictures,” you will have the option to search for and insert images directly from online sources like Bing or stock photo websites. Enter keywords to search for the desired image, choose an image, and click “Insert” to add it to your email message.
Once you have inserted the image from a file, Outlook will automatically place it in the body of your email as an inline image. You can then adjust its size and position to ensure it fits harmoniously within the email message.
This method allows you to incorporate images that are stored on your computer or available online without the need for manually downloading and saving them. It offers convenience and flexibility when selecting images to include in your email messages.
Now that you understand how to insert an image from a file, you can proceed to the next step: resizing and formatting the inline image to further enhance its presentation within your email.
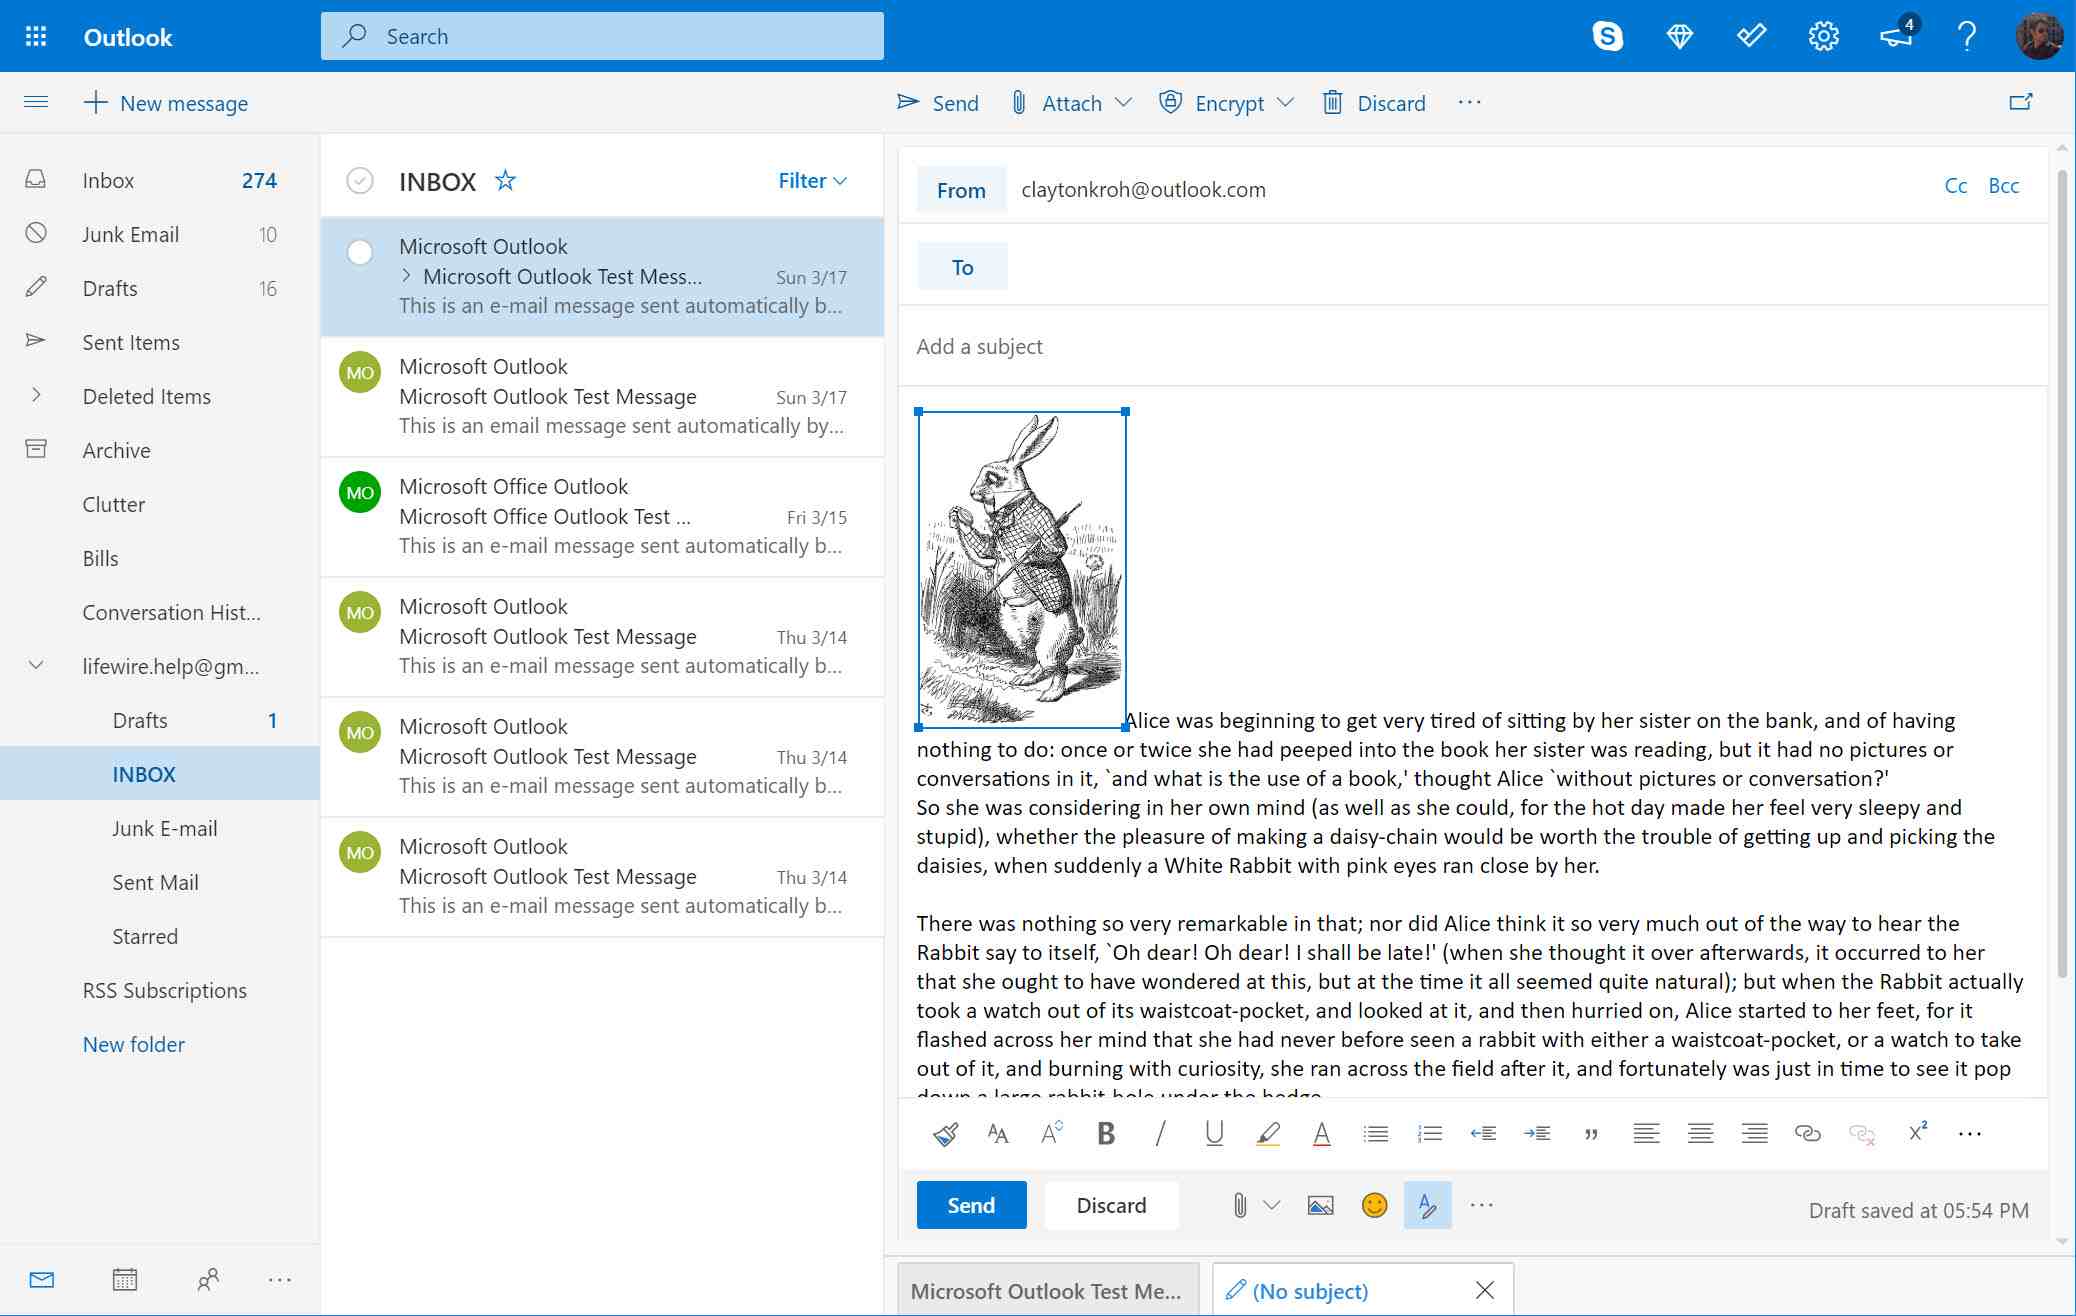
Step 3: Resize and Format the Inline Image
After inserting an inline image in your Outlook message, it’s essential to resize and format the image to ensure it blends seamlessly with the rest of your email content. This step allows you to control the appearance and placement of the image within the email. Here’s how you can resize and format the inline image:
- Select the inline image by clicking on it. Handles or bounding boxes will appear around the image.
- Place your cursor on one of the handles and click and drag to resize the image proportionally. Hold the Shift key while dragging to maintain the image’s aspect ratio.
- Alternatively, you can right-click on the image and select “Size and Position” from the context menu. In the dialog box that appears, enter specific dimensions for the image or adjust the scale percentage to resize it.
- To adjust the image’s position within the email, click and drag the image to the desired location within the email body.
- You can also apply additional formatting options to the inline image. Right-click on the image and select “Format Picture” from the context menu. In the formatting options window, you can adjust properties such as brightness, contrast, and color to enhance the image’s appearance.
By resizing and formatting the inline image, you can ensure that it fits appropriately and aligns with your email’s overall design and layout. Adjusting the image’s dimensions and position will help maintain the visual aesthetic and readability of your message.
Continue to the next step to learn how to finalize and send your email with the inline image accurately.
Step 4: Send the Email with the Inline Image
Once you have inserted, resized, and formatted the inline image in your Outlook email, you are ready to send it to your intended recipients. Follow these steps to ensure the seamless delivery of your email:
- Review your email message to ensure that everything looks as intended. Take a moment to double-check the text, image placement, and any other elements in the email.
- If necessary, make any final adjustments to the email, such as proofreading for grammar or spelling errors.
- Click on the “Send” button, typically located at the top left of the Outlook interface.
- Outlook will send the email with the inline image included, and it will be displayed directly in the recipients’ email clients or software.
It is recommended to send a test email to yourself or a colleague before sending the final version to ensure that the inline image displays correctly for the recipients as intended.
Remember to consider any size limitations or restrictions that may apply to the email server or recipient’s email client. Large image file sizes or excessively large email messages may cause issues with delivery or display. If necessary, consider compressing the image or reducing its dimensions before inserting it into the email.
Sending an email with an inline image can enhance the impact of your message and engage your recipients visually. It allows you to communicate your ideas, demonstrate products, or share visuals seamlessly within the email body, without the need for additional attachments.
By following these steps, you can ensure that your email with the inline image is delivered successfully, making it more appealing and effective for your recipients.