
Check Available Storage Space
Before taking any steps to increase the storage on your laptop, it’s important to assess the current storage situation. Checking the available storage space will give you a clear understanding of how much space is being used and how much is still available.
To check the available storage space on your laptop, follow these steps:
- Open File Explorer by either clicking on the folder icon on the taskbar or pressing the Windows key + E.
- In the File Explorer window, navigate to “This PC” or “My Computer” on the left-hand side.
- Under “Devices and drives,” you will see a list of drives available on your laptop, including the main hard drive (usually labeled C:).
- Right-click on the main hard drive and select “Properties” from the context menu.
- A window will appear, showing the used and available storage space on the selected drive.
Once you have determined the available storage space, you can proceed with optimizing and increasing the storage capacity on your laptop. It is advisable to have at least 10-15% of free space on your hard drive to ensure smooth functioning of your system.
If you find that the available storage space is insufficient, don’t worry. There are various steps you can take to free up space and increase the storage capacity on your laptop. Let’s dive into the different methods you can use to achieve this.
Delete Unnecessary Files and Programs
One of the most effective ways to increase storage on your laptop is to delete unnecessary files and programs. Over time, we tend to accumulate a lot of files and install numerous programs that we no longer need or use. By decluttering your system, you can free up valuable storage space. Here’s how you can go about it:
- Start by going through your files and folders and determine which ones are no longer needed. Look for duplicates, old documents, and files you no longer use.
- Select the files or folders you want to delete and press the delete key, or right-click and choose “Delete” from the context menu. Alternatively, you can drag and drop them into the Recycle Bin. Remember to empty the Recycle Bin afterward to permanently delete the files.
- Next, uninstall programs that you no longer use. To do this, go to the Control Panel on your laptop and click on “Programs” or “Programs and Features.” You’ll see a list of installed programs. Simply select the program you want to remove and click “Uninstall.”
- During the uninstallation process, you may be prompted to confirm your decision or choose additional options. Follow the on-screen instructions to complete the uninstallation process.
It’s essential to exercise caution when deleting files and uninstalling programs. Make sure you only remove files that are truly unnecessary and programs that you no longer need or use. Double-check before deleting any important documents or uninstalling any critical programs that may be required for your laptop’s functionality.
Deleting unnecessary files and uninstalling unused programs can significantly increase the available storage space on your laptop. It’s a simple yet effective method to optimize your system’s performance and ensure that you have ample space for important files and programs.
Clear Temporary Files and Caches
Temporary files and caches can accumulate on your laptop over time and take up valuable storage space. These files are created by various applications and are used for temporary tasks. Clearing them regularly can help free up storage space and improve your laptop’s performance. Here’s how you can clear temporary files and caches:
- Press the Windows key + R to open the Run dialog box.
- Type “%temp%” (without the quotes) and press Enter. This will open the Temp folder.
- Select all the files in the Temp folder by pressing Ctrl+A and then delete them by pressing Shift+Delete. If you encounter any files that cannot be deleted, skip them and proceed to the next step.
- Next, open the Run dialog box again by pressing the Windows key + R.
- Type “temp” (without the quotes) and press Enter. This will open another Temp folder.
- Repeat the same process of selecting all files and deleting them permanently.
- Now, open the Run dialog box once more and type “prefetch” (without the quotes) and press Enter. This will open the Prefetch folder.
- Select all the files in the Prefetch folder and delete them.
- In addition to clearing temporary files, it’s also beneficial to clear the cache of your web browsers. Open each browser you use (e.g., Chrome, Firefox, Edge) and go to its settings. Look for the option to clear browsing data or cache and follow the prompts to clear it.
By regularly clearing temporary files and caches, you can regain significant storage space on your laptop, eliminate unnecessary clutter, and improve overall system performance. It’s a quick and simple process that can have a noticeable impact on your laptop’s storage capacity.
Move Files to an External Hard Drive or Cloud Storage
If you find that your laptop’s storage is running low, one efficient solution is to move your files to an external hard drive or utilize cloud storage services. This allows you to offload files that you don’t frequently access, freeing up space on your laptop’s internal storage. Here’s how you can move files to an external hard drive or cloud storage:
- Connect your external hard drive to your laptop using a USB cable or any appropriate connection method.
- Once connected, your external hard drive will be recognized as a removable storage device.
- Open File Explorer or any file management software and navigate to the location of the files you want to move.
- Select the files or folders you want to move by either dragging and dropping them onto the external hard drive or using the cut-and-paste method.
- Depending on the size and number of files, the transfer process may take some time.
- To ensure the files have been successfully transferred, safely disconnect the external hard drive by ejecting or unplugging it from your laptop.
- If you prefer using cloud storage services, sign up for a reliable and secure cloud storage provider such as Google Drive, Dropbox, or OneDrive.
- Install the necessary applications or access the cloud storage through their respective websites.
- Upload your files and folders to the cloud storage by either dragging and dropping or using the upload function.
- Organize your files and folders within the cloud storage service to your preference.
Moving files to an external hard drive or cloud storage not only frees up storage space but also provides a safe and accessible way to store files. It allows you to access your files anytime and from any device connected to the internet. Remember to keep your external hard drive or cloud storage account properly organized to easily locate and manage your files.
Use Disk Cleanup Tool
The Disk Cleanup tool is a built-in utility in Windows that helps you free up storage space on your laptop by removing unnecessary files and system files. It scans your computer for various types of files that can be safely deleted, such as temporary files, system files, and old Windows installations. Here’s how you can use the Disk Cleanup tool:
- Press the Windows key and type “Disk Cleanup” in the search bar. Click on the “Disk Cleanup” app from the search results.
- Once the Disk Cleanup window opens, it will ask you to select the drive you want to clean up. Choose the drive where you’re running low on storage space, usually the C: drive, and click “OK.”
- The tool will analyze your selected drive and calculate the amount of space you can free up.
- In the Disk Cleanup window, you’ll see a list of file categories that you can clean up. These categories include temporary files, system files, Recycle Bin, and more.
- Select the file categories you want to clean up by checking the checkboxes next to them. Be sure to review the descriptions to understand what each category contains.
- Click the “OK” button to start the cleanup process. Disk Cleanup will prompt you to confirm your selection, so double-check that you’ve selected the correct categories.
- Let the Disk Cleanup tool do its work. The duration of the cleanup process depends on the amount of data to be removed.
- Once the cleanup is complete, you’ll see a summary of the space that has been freed up. You can also click on the “View Files” button to see a detailed list of the files that were deleted.
The Disk Cleanup tool is a convenient and efficient way to remove unnecessary files and reclaim storage space on your laptop. It’s recommended to run this tool periodically to keep your system optimized and free from unneeded files.
Uninstall Unused Programs
Uninstalling unused programs is an effective way to free up storage space on your laptop. Over time, you may have installed various applications that are no longer needed or used. These unused programs take up valuable space on your hard drive. By removing them, you can optimize your laptop’s storage capacity. Here’s how you can uninstall unused programs:
- Open the Control Panel on your laptop. You can access it by pressing the Windows key and typing “Control Panel” in the search bar.
- In the Control Panel window, click on “Programs” or “Programs and Features” depending on your version of Windows.
- A list of installed programs will appear. Scroll through the list and identify the programs that you no longer use or need.
- Select the program you want to uninstall and click on the “Uninstall” or “Change/Remove” button at the top of the list.
- Follow the prompts and instructions provided by the uninstallation wizard to remove the program from your system. Depending on the program, you may be asked to confirm your decision or select additional options during the uninstallation process.
- Repeat the same steps for each unused program you want to remove.
- Once the uninstallation process is complete, it’s recommended to restart your laptop to ensure that any remaining files or registry entries associated with the uninstalled program are properly removed.
By uninstalling unused programs, you can declutter your laptop’s storage and create more space for important files and applications. This not only helps optimize your system’s performance but also allows for a more organized and efficient workspace.
Disable Hibernation
Hibernation is a power-saving feature on laptops that allows you to save the current state of your system and resume from where you left off. Although hibernation can be useful, it requires a significant amount of storage space to store the hibernation file. If you’re running low on storage, disabling hibernation can help free up valuable space on your laptop. Here’s how you can disable hibernation:
- Open the Start menu and search for “Command Prompt”. Right-click on “Command Prompt” and select “Run as administrator.”
- In the Command Prompt window, type the following command and press Enter:
powercfg /hibernate off - Once the command is executed, hibernation will be disabled on your laptop.
Disabling hibernation will remove the hibernation file from your system, freeing up storage space equivalent to the amount of RAM installed on your laptop. However, it’s important to note that disabling hibernation means you won’t be able to use this feature anymore.
If you change your mind and want to re-enable hibernation in the future, you can follow these steps:
- Open the Command Prompt as administrator again.
- Type the following command and press Enter:
powercfg /hibernate on - Hibernation will be re-enabled on your laptop.
Disabling hibernation can be a practical solution to maximize storage space on your laptop. However, consider the trade-off between storage capacity and the convenience of using the hibernation feature before making a decision.
Disable System Restore
System Restore is a Windows feature that creates restore points, allowing you to revert your laptop’s operating system to a previous state if any issues arise. While it can be helpful in certain situations, it also consumes storage space. Disabling System Restore can free up significant storage space on your laptop. Here’s how you can disable System Restore:
- Open the Control Panel on your laptop. You can access it by pressing the Windows key and typing “Control Panel” in the search bar.
- In the Control Panel window, click on “System” or “System and Security,” depending on your version of Windows.
- Click on “System protection” or “System and Maintenance” and then select the “System Protection” tab.
- In the “Protection Settings” section, you will see a list of available drives on your laptop.
- Select the drive where you want to disable System Restore and click on the “Configure” button.
- In the new window that appears, select the option “Disable system protection.”
- Click on “Apply” and then “OK” to save the changes.
Once System Restore is disabled, any existing restore points will be deleted, and future restore points will not be created. This can help free up storage space on your laptop, especially if you have limited storage capacity.
It’s important to note that disabling System Restore means you won’t be able to use this feature to restore your system to a previous state in case of any issues. Therefore, it’s advisable to only disable System Restore if you have a reliable backup solution in place or if you desperately need additional storage space.
Disable Virtual Memory or Adjust Virtual Memory Settings
Virtual memory, also known as the paging file, is a space on your laptop’s hard drive that is reserved for storing data when the physical RAM (Random Access Memory) is full. While virtual memory can help your system handle large amounts of data, it also occupies disk space. Adjusting or disabling virtual memory settings can potentially free up storage space on your laptop. Here’s how you can adjust or disable virtual memory:
- Open the Control Panel on your laptop. You can access it by pressing the Windows key and typing “Control Panel” in the search bar.
- In the Control Panel window, click on “System” or “System and Security,” depending on your version of Windows.
- Click on “Advanced system settings” or “System and Maintenance” and then select the “Advanced” tab.
- In the “Performance” section, click on the “Settings” button.
- In the new window that appears, select the “Advanced” tab.
- In the “Virtual memory” section, click on the “Change” button.
- If you want to adjust the virtual memory settings, select the “Custom size” option and specify the Initial size (MB) and Maximum size (MB) for the virtual memory. It’s recommended to keep the sizes within the recommended range or let the system manage the size automatically.
- If you want to disable virtual memory entirely, select the “No paging file” option.
- Click on the “Set” button and then click “OK” to save the changes.
- Restart your laptop for the changes to take effect.
Adjusting virtual memory settings allows you to optimize the allocation of disk space for virtual memory. By setting appropriate initial and maximum sizes, you can potentially free up storage space on your laptop, especially if you have a large amount of physical RAM.
However, it’s important to note that disabling virtual memory entirely is not recommended unless you have a specific reason to do so. Your laptop’s performance may be significantly impacted if there is not enough physical RAM available to handle the current workload. It’s generally advisable to let the system manage the virtual memory size automatically or adjust it according to your specific needs.
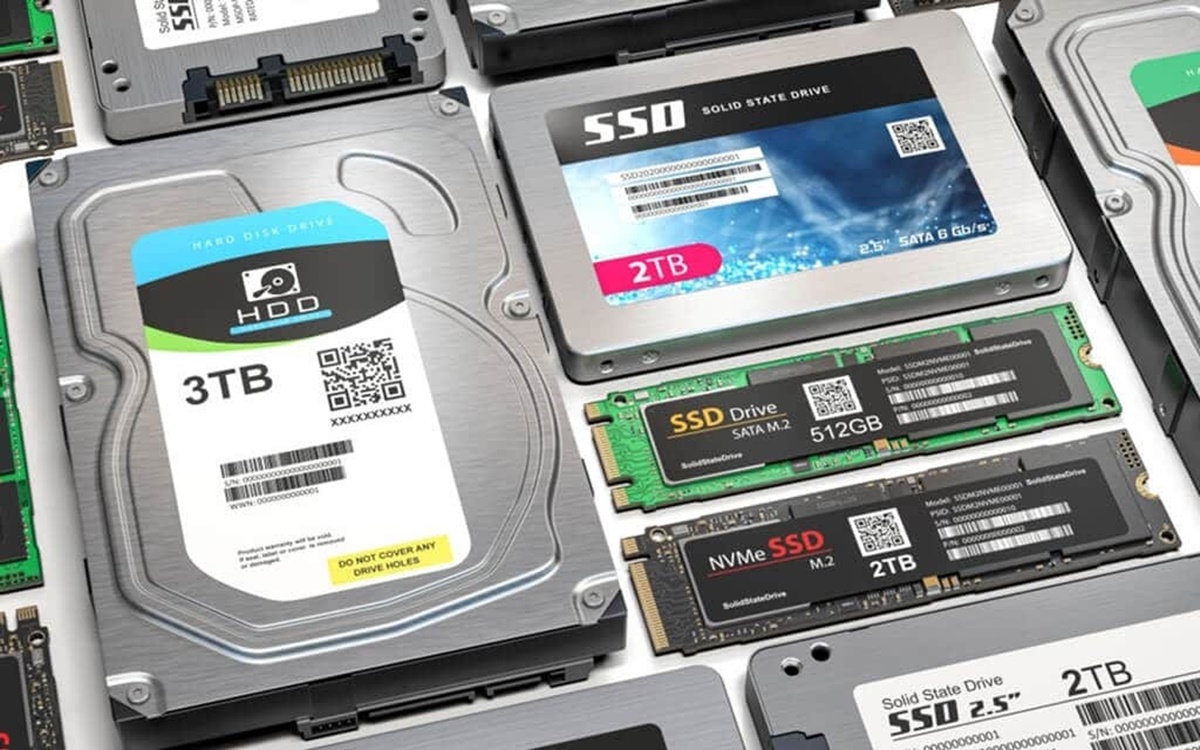
Upgrade Hard Drive or SSD
If your laptop’s storage space is consistently running low and you have exhausted other options, upgrading your hard drive or solid-state drive (SSD) can provide a long-term solution. A larger and faster storage drive can accommodate more files and applications, improving overall performance. Here’s how you can upgrade your hard drive or SSD:
- Determine the type of storage drive your laptop currently has (e.g., HDD or SSD) and the available storage capacity.
- Check the laptop’s documentation or search online for compatible hard drives or SSDs that can be installed in your specific model.
- Consider the storage capacity and transfer speed you require. Determine the optimal size and type of drive for your needs, keeping in mind your budget.
- Purchase the new hard drive or SSD from a reputable vendor or manufacturer.
- Back up all your important files and data to an external storage device or cloud storage service before proceeding.
- Consult your laptop’s documentation or search online for instructions on how to replace or upgrade the hard drive or SSD. Every laptop model is slightly different, but most require opening the laptop and replacing the drive by disconnecting cables and removing screws.
- Once you have installed the new drive, reconnect all the necessary cables and screws, ensuring they are securely fastened.
- Depending on the type of drive you installed, you may need to format or partition the drive before use. Follow the appropriate steps provided by your operating system.
- Restore your backed-up files and data onto the new drive using the backup solution you previously used.
Upgrading your hard drive or SSD provides a significant boost in storage capacity and can enhance your laptop’s performance. It’s important to follow proper procedures and consult reliable resources or seek professional assistance if needed to ensure a successful installation.
Keep in mind that upgrading storage drives can be more challenging on some laptops compared to others. If you’re unsure about the process or concerned about voiding warranty, consider consulting a professional technician who specializes in laptop hardware upgrades.
Use External Storage Options (USB, SD Card, etc.)
If you require additional storage space but do not want to undergo the process of replacing your laptop’s internal storage, using external storage options can be a convenient solution. External storage devices such as USB drives, SD cards, and external hard drives allow you to expand your storage capacity without modifying the internals of your laptop. Here’s how you can utilize external storage options:
- Identify the type of external storage device that suits your needs. USB drives are compact and portable, while SD cards are often used with laptops that have built-in card readers. External hard drives provide larger storage capacities.
- Purchase an external storage device that meets your requirements. Ensure it is compatible with your laptop’s interface (e.g., USB 3.0, SD card slot) and has sufficient storage capacity for your needs.
- Connect the external storage device to your laptop using the appropriate cable or by inserting it into the corresponding slot, depending on the device type.
- Your laptop should detect the external storage device automatically. If not, you may need to manually access it through File Explorer or Disk Management.
- To transfer files to the external storage device, simply drag and drop them onto the device or use the copy and paste method.
- You can organize your files within the external storage device as you would on your laptop’s internal storage.
- When you need to access the files on the external storage device, ensure it is connected to your laptop and navigate to the appropriate drive or folder in File Explorer.
- When you are finished using the external storage device, safely eject it from your laptop to avoid data loss or corruption. This can be done by right-clicking on the device in File Explorer and selecting “Eject.”
By using external storage options, you can easily and conveniently expand your laptop’s storage capacity. This allows you to store additional files, media, and applications without the need to upgrade your laptop’s internals. Keep in mind that external storage devices may have different transfer speeds and performance characteristics, so it’s important to choose one that meets your specific requirements.
Clean Up Desktop and Downloads Folder
The desktop and Downloads folder on your laptop can quickly become cluttered with files, documents, and downloads. Cleaning up these areas not only helps to organize your files but also frees up valuable storage space. Here’s how you can clean up your desktop and Downloads folder:
- Start with the desktop. Go through all the files and folders on your desktop and determine which ones are necessary and which ones can be removed.
- Select the files or folders you want to remove and either press the delete key or right-click and choose “Delete” from the context menu. Alternatively, you can drag and drop them into the Recycle Bin.
- To empty the Recycle Bin, right-click on the Recycle Bin icon on your desktop and select “Empty Recycle Bin.” Confirm the action when prompted.
- Next, move on to your Downloads folder. Open File Explorer and navigate to the Downloads folder.
- Sort the files by date or type to make it easier to identify and manage them.
- Delete any files that you no longer need or have already backed up. Be cautious and double-check before deleting important or sensitive files.
- Consider organizing the remaining files into appropriate folders within the Downloads folder. This can help keep things organized and make it easier to find files in the future.
Regularly cleaning up your desktop and Downloads folder can help keep your laptop organized and improve overall efficiency. It reduces the clutter and ensures that important files are easily accessible. Additionally, by removing unnecessary files, you can create more storage space for new files and applications.
Remember to periodically go through your desktop and Downloads folder to keep them tidy. Make it a habit to delete or move files to appropriate locations as soon as you are done with them. By maintaining a clean desktop and Downloads folder, you can optimize your laptop’s storage and make file management a breeze.
Use Disk Compression
Disk compression is a feature that allows you to compress files and folders on your laptop’s storage drive. By compressing files, you can reduce their size and free up additional storage space on your system. Here’s how you can use disk compression to optimize your laptop’s storage:
- Open File Explorer on your laptop by clicking on the folder icon on the taskbar or pressing the Windows key + E.
- Navigate to the drive or specific folder that you want to compress.
- Right-click on the drive or folder and select “Properties” from the context menu.
- In the Properties window, click on the “General” tab.
- Under the “Attributes” section, click on the “Advanced” button.
- In the Advanced Attributes window, check the box next to “Compress contents to save disk space.”
- Click on “OK” to save the changes.
Once disk compression is enabled, your laptop will start compressing the selected files and folders. The compression process may take some time, depending on the size and number of files being compressed.
It’s important to note that disk compression can affect the performance of your laptop, as compressed files need to be decompressed before they can be accessed. Therefore, it is typically recommended to use disk compression for files that are not frequently accessed, such as archived files or less frequently used applications. For files that are regularly accessed and require quick performance, it may be better to leave them uncompressed.
Keep in mind that not all files can be effectively compressed. Certain file types, such as already compressed files (e.g., JPEG images, MP3 audio), may not substantially reduce in size when compressed further. It’s also important to regularly maintain and defragment your compressed files to ensure optimal performance.
By utilizing disk compression, you can gain additional storage space on your laptop’s storage drive. However, it’s essential to carefully consider which files and folders to compress, as well as evaluate the trade-off between storage savings and potential performance impact.
Delete Duplicate Files
Duplicate files can accumulate on your laptop over time and significantly contribute to storage space consumption. These duplicates may result from file transfers, backups, or accidental copies. Deleting these unnecessary duplicates can help free up valuable space on your laptop’s storage drive. Here’s how you can identify and delete duplicate files:
- Start by organizing your files into logical folders or categories within your laptop’s file explorer. This will make it easier to identify duplicate files.
- Manually go through your folders and compare files visually. Look for files with identical or similar names and content.
- If you have a large number of files or want to streamline the process, consider using third-party duplicate file finder software. Many reputable applications are available that can scan your laptop and identify duplicate files based on various criteria, such as file name, size, and content.
- After identifying duplicates, carefully review the results to ensure that you are not deleting any important or necessary files.
- Select the duplicate files you want to delete and either press the delete key or right-click and choose “Delete” from the context menu.
- Double-check the Recycle Bin to ensure that the deleted duplicates are not taking up additional space. Empty the Recycle Bin to permanently remove them from your laptop’s storage.
It’s recommended to exercise caution when deleting duplicate files, especially if you are using software to identify them. Pay attention to file extensions, ensure that you are not removing important duplicates (e.g., system files), and always have a backup of critical files before proceeding.
Regularly deleting duplicate files can help keep your laptop’s storage organized and free from unnecessary clutter. By eliminating duplicates, you can reclaim valuable storage space and make it easier to find and manage your important files.
Use Storage Optimization Tools
To effectively manage and optimize your laptop’s storage space, you can utilize storage optimization tools. These tools offer various features designed to help you analyze, clean, and organize your storage. Here are some ways you can use storage optimization tools to maximize your laptop’s storage:
- Use Disk Cleanup or Storage Sense: Windows operating systems come with built-in tools like Disk Cleanup or Storage Sense that help you clean up unnecessary files, temporary data, and system files. These tools can identify and remove files that are consuming storage space, allowing you to free up valuable room on your laptop.
- Manage Storage Settings: Some operating systems provide storage management settings that offer insights into what’s using storage space and provide recommendations to optimize it. These settings allow you to easily identify and delete large files, manage app storage, and review storage usage trends.
- Install Storage Optimization Software: Third-party storage optimization software, such as CCleaner or WinDirStat, can offer more advanced features and customization options. These tools can help you analyze disk usage, identify large files and folders, and even securely delete sensitive files.
- Utilize Storage Visualization Tools: There are storage visualization tools available that visually represent how your laptop’s storage space is allocated. These tools create visual maps that show the sizes and locations of files and folders on your storage drive. By visualizing storage usage, you can easily identify large files or folders that can be managed or deleted.
- Enable Compression and Deduplication: Some storage optimization tools offer options to compress files or deduplicate them. Compressing files reduces their size, freeing up storage space, while deduplication identifies and eliminates duplicate files, reducing storage consumption.
- Automate Storage Cleanup Tasks: Storage optimization tools often provide automation options, allowing you to schedule regular cleaning tasks or perform certain actions automatically. These automated tasks can help keep your storage organized and optimized without manual intervention.
By using storage optimization tools, you can easily analyze, clean, and organize your laptop’s storage. These tools provide valuable insights and features to help you manage your files and folders more efficiently. Whether utilizing built-in operating system tools or third-party software, storage optimization tools are a valuable asset in maximizing available storage space on your laptop.
Manage Media Files Efficiently (Photos, Videos, Music, etc.)
Media files, such as photos, videos, and music, can take up a significant amount of storage space on your laptop. To efficiently manage these files and optimize storage, it’s important to implement effective strategies. Here are some tips to help you manage media files efficiently:
- Organize Files in Folders: Create separate folders for different types of media files, such as photos, videos, and music. Within each folder, you can further categorize files based on events, dates, or genres. This will make it easier to locate specific files and keep your media library organized.
- Delete Unnecessary Files: Regularly review your media files and delete ones that are no longer needed or are of low-quality. This includes blurry photos, duplicate videos, or songs you no longer listen to. Deleting unnecessary files will not only free up storage space but also make it easier to find and enjoy your favorite media.
- Back Up Files: Create backups of your important media files to ensure they are protected from accidental deletion or system failures. You can use external hard drives, cloud storage services, or online backup platforms to securely store your files and access them from anywhere.
- Utilize Online Streaming: Instead of downloading and storing large media files on your laptop, consider using online streaming services for music and video content. This eliminates the need to store these files locally and saves valuable storage space.
- Optimize File Formats and Quality: If you’re running low on storage, consider converting high-resolution photos or videos to smaller file formats without compromising significantly on quality. Also, when downloading music or videos, choose lower quality options to reduce file sizes.
- Use External Storage: If your media library is extensive, consider using external storage options, such as external hard drives or network-attached storage (NAS). These devices provide additional space to store and easily access your media files without overcrowding your laptop’s internal storage.
- Cloud Storage for Photos: Take advantage of cloud storage services that offer specific features for storing and managing photos. These services often provide options for organizing, sharing, and even automatically backing up your photos, reducing the need for local storage.
By implementing effective management strategies for your media files, you can maintain a well-organized and optimized storage system on your laptop. Regularly assess and organize your media library, delete unnecessary files, and leverage external storage or cloud services to keep your laptop’s storage free for new media and other essential files.
Use Portable Apps
Portable apps are software applications that can be run directly from a USB drive or other external storage devices without the need for installation on your laptop. Using portable apps can be beneficial in several ways, including saving storage space and providing flexibility to use your favorite applications on multiple devices. Here are some advantages and tips for using portable apps:
- Save Storage Space: Portable apps are stored on external devices, meaning they don’t take up space on your laptop’s internal storage. This can be particularly useful if you have limited storage capacity or want to free up space for other files and applications.
- Flexibility and Portability: Portable apps allow you to carry your favorite software and tools with you wherever you go. You can run these apps on any computer with compatible operating systems, without the need to install or configure them each time.
- Data Privacy: As portable apps run directly from external storage, they don’t leave behind traces or personal data on the computer you use. This can be advantageous when using public or shared computers, as your data remains secure and private.
- Easy Updates: Many portable app packages come with built-in update utilities that allow you to easily update the apps to the latest versions. This ensures you have access to new features, bug fixes, and security updates without the hassle of manual installations.
- Popularity and Availability: A wide range of popular and commonly used software applications offer portable versions. From productivity tools like word processors and spreadsheet software to image editing tools and media players, there are numerous portable apps available to cater to different needs.
- Organize and Customize: You can create a personalized portable app toolkit by selecting the apps that are most relevant to your workflow. This allows you to have easy access to the tools you use regularly while keeping your portable storage organized.
- Security Considerations: While portable apps offer convenience and flexibility, it’s important to exercise caution. Ensure that you download portable apps from trusted sources to avoid potential security risks. Regularly update the portable apps to stay protected and vigilant against potential vulnerabilities.
By utilizing portable apps, you can enhance the functionality and versatility of your laptop without consuming excessive storage space. They provide the convenience of using familiar software on multiple devices, making it easier to work or be productive wherever you go. Remember to keep your portable apps and their accompanying files organized and regularly update them for the best experience.
Utilize Windows Storage Spaces
Windows Storage Spaces is a powerful feature available in Windows operating systems that allows you to combine multiple physical drives into a single logical volume. Utilizing Windows Storage Spaces can help you maximize storage capacity, increase data redundancy, and improve overall performance. Here’s how you can take advantage of this feature:
- Ensure you have multiple physical drives connected to your laptop, either internally or externally.
- Open the Control Panel on your laptop and click on “System and Security” or “System.”
- Select “Storage Spaces” or “Storage and Backup.”
- Click on “Create a new pool and storage space.”
- Select the drives you want to include in the pool. You can choose drives of different sizes and types.
- Choose a resiliency type according to your needs. Windows Storage Spaces offers options such as “Simple” (no redundancy), “Mirror” (data redundancy), and “Parity” (data redundancy with efficient storage utilization).
- Specify the size and format of the storage space. You can allocate all available capacity or reserve some capacity for future use.
- Assign a drive letter or mount point to the storage space.
- Format the storage space with your preferred file system (e.g., NTFS).
- Once created, the storage space will be available for use like any other drive on your laptop.
Windows Storage Spaces offer numerous benefits for managing and optimizing your storage:
- Increased Storage Capacity: By combining different physical drives, you can create a single storage space with a larger total capacity than any individual drive.
- Data Redundancy: With certain resiliency options like “Mirror” or “Parity,” Windows Storage Spaces can protect your data by creating duplicate copies or using error-correcting codes.
- Improved Performance: Windows Storage Spaces support striping, which allows data to be distributed across multiple drives, resulting in faster read and write speeds.
- Expandability and Flexibility: You can easily add more drives to your storage pool or upgrade existing ones without losing data or reformatting the entire storage space.
To effectively utilize Windows Storage Spaces, it’s important to regularly monitor the health of your drives, keep backups of critical data, and replace or repair any malfunctioning drives promptly. Windows Storage Spaces provide an effective way to manage and leverage your storage resources, improving both capacity and data integrity.
Clear Browser Cache and Cookies
Over time, your web browser accumulates temporary files, known as cache, and cookies, which are small text files used to store website data. Clearing your browser cache and cookies periodically can help improve your browsing experience, protect your privacy, and free up storage space on your laptop. Here’s how you can clear your browser cache and cookies:
- Open your web browser, such as Google Chrome, Mozilla Firefox, or Microsoft Edge.
- Access the browser’s settings by clicking on the menu icon (usually three vertical dots or horizontal lines) located in the top-right or top-left corner of the browser window.
- In the settings menu, look for “History,” “Privacy,” or “Browsing Data.”
- Click on the appropriate option to access the browsing history and privacy settings.
- Depending on your browser, you may see options to clear browsing data, delete cache, or remove cookies.
- Select the types of data you want to clear, such as cache, cookies, browsing history, and download history.
- You may also have the option to choose the time range for clearing the data (e.g., past hour, past day, entire history).
- Click on the “Clear” or “Delete” button. Note that clearing your browsing data cannot be undone, so review your selections carefully.
- Once the process is complete, the browser cache and cookies will be cleared. You may need to restart your browser for the changes to take effect.
Clearing your browser cache and cookies regularly offers several benefits. It enhances your browsing speed by removing stored website data, ensures you are accessing the latest versions of web pages, and protects your privacy by deleting information that websites may have stored on your device.
It’s important to note that clearing your cache and cookies will sign you out of websites, remove saved passwords, and delete customized settings on some websites. As a result, you may need to re-enter login credentials and reset certain preferences after clearing the cache and cookies.
By clearing your browser cache and cookies, you can maintain a clean browsing environment, improve web performance, and contribute to better security and privacy on your laptop.
Use Storage Visualization Tools
Storage visualization tools are powerful applications that provide visual representations of your laptop’s storage space, allowing you to easily understand how space is allocated and identify areas where storage optimization is needed. These tools present graphical representations, such as charts or heatmaps, to visually display the distribution of files and folders on your storage drive. Here’s how you can benefit from using storage visualization tools:
- Understand Storage Usage: Storage visualization tools provide a comprehensive overview of how your storage space is utilized. By visually representing files and folders, you can quickly identify which ones are taking up the most space.
- Identify Large Files: These tools enable you to easily locate large files or folders that may be consuming a significant portion of your storage. By identifying these files, you can determine whether they need to be moved, deleted, or properly organized to optimize storage.
- Discover Storage Hogs: Storage visualization tools effectively highlight storage-hungry applications, temporary files, or system folders that are consuming excessive space. This enables you to target these areas for cleanup and better management of your storage resources.
- Organize Files Efficiently: By visualizing your storage, you can better organize your files and folders, creating a more structured and logical storage system. This can help you easily locate and access your files, improving overall efficiency.
- Plan for Storage Expansion: If you’re running low on storage, storage visualization tools can help you plan for future storage expansion. By understanding how your storage is currently allocated, you can make informed decisions about adding additional storage devices or upgrading existing ones.
- Compare Storage Usage Over Time: Some visualization tools offer the ability to compare storage usage over time, allowing you to analyze trends and identify changes in how storage is utilized. This can help you identify patterns, assess storage consumption, and make adjustments as needed.
- Choose the Right Tool for You: There are various storage visualization tools available, both free and paid. Explore different options and select a tool that aligns with your needs, preferences, and the operating system of your laptop.
By utilizing storage visualization tools, you can gain valuable insights into your laptop’s storage, efficiently manage space, and make informed decisions regarding storage optimization. These tools empower you to take control of your storage resources, enhancing performance, and ensuring that storage is allocated effectively.