
Checking for Software Updates
Keeping your iPad updated with the latest software is essential for ensuring optimal performance and security. Regular software updates often include bug fixes, feature enhancements, and improvements in stability. Here’s how you can check for software updates on your iPad:
- Connect your iPad to a Wi-Fi network to ensure a stable internet connection.
- Go to the Settings app on your iPad. You can find the Settings app on your home screen.
- Scroll down and tap on “General.”
- In the “General” section, tap on “Software Update.”
- Your iPad will check for available updates. If an update is available, you will see a message indicating the availability of the update.
- Tap on “Download and Install” to start the update process. Make sure your iPad is connected to a power source to prevent it from running out of battery during the update.
- Follow the on-screen instructions to download and install the update. The process may take some time, so be patient.
- Once the update is complete, your iPad will restart, and you will be running the latest version of the software.
It’s crucial to regularly check for software updates as they can improve the overall performance of your iPad and provide you with new features and functionalities. By staying up-to-date, you can ensure that your device remains secure and fully optimized for your needs.
Making a Backup of Your iPad
Before performing any reset or restart on your iPad, it’s essential to create a backup to ensure you don’t lose any valuable data. Here’s how you can make a backup of your iPad:
- Connect your iPad to a Wi-Fi network to ensure a stable internet connection.
- Open the Settings app on your iPad.
- Scroll down and tap on “General.”
- In the “General” section, tap on “Backup & Update.”
- Tap on “Backup Now” to initiate the backup process.
- Ensure that your iPad is connected to a power source to prevent the backup process from being interrupted.
- Wait for the backup to complete. The time taken for the backup may vary depending on the amount of data on your iPad and the speed of your internet connection.
It’s important to note that you can also set your iPad to automatically back up to iCloud. To enable this feature, go to the “Backup & Update” section and toggle on the “iCloud Backup” option. With iCloud backup enabled, your iPad will automatically back up regularly as long as it is connected to Wi-Fi and charging.
Creating regular backups of your iPad helps protect your data and ensures that you can restore it in case of any issues or when setting up a new device. By having a backup, you can have peace of mind knowing that your important photos, videos, documents, and settings are safely stored.
Resetting Your iPad with the Power Button
If your iPad is unresponsive or experiencing software issues, you can perform a reset using the power button. Here’s how you can reset your iPad using the power button:
- Press and hold the power button located at the top or side of your iPad, depending on the model.
- Continue holding the power button and the home button (for iPads with a physical home button) or the volume up button (for iPads without a physical home button) simultaneously.
- Keep holding both buttons until you see the Apple logo appear on the screen. This usually takes about 10 seconds.
- Release both buttons when the Apple logo appears, and your iPad will restart.
After the restart, your iPad should be responsive and ready to use. Please note that this method of reset does not erase any of your data. It simply restarts the device and clears any temporary software issues that may be causing problems.
Resetting your iPad with the power button is the first step to try when you encounter any software-related issues. If the problem persists, you may need to explore other reset options or seek further assistance from Apple Support.
Resetting Your iPad with the Settings App
If you want to reset your iPad and start with a clean slate while keeping your personal data intact, you can use the Settings app to perform a reset. Here’s how you can reset your iPad using the Settings app:
- Open the Settings app on your iPad.
- Scroll down and tap on “General.”
- In the “General” section, scroll down again and tap on “Reset.”
- You will see various reset options. To perform a full reset and erase all content and settings, tap on “Erase All Content and Settings.”
- A warning message will appear, informing you that all your data will be erased. If you are sure you want to proceed, tap on “Erase Now.”
- You may be prompted to enter your passcode or Apple ID password to confirm the reset. Follow the on-screen instructions to complete the process.
Once the reset is complete, your iPad will restart, and you will be back to the initial setup screen. You can then set up your iPad as new or restore from a previous backup.
It’s important to note that performing a reset with the Settings app will erase all your data and return your iPad to its factory settings. Make sure to back up your data before proceeding with this reset method.
Resetting your iPad with the Settings app is useful when you want to start fresh, remove all personal data, or troubleshoot software-related issues effectively.
Resetting Your iPad by Restoring from iTunes
If you are unable to reset your iPad using the Settings app or encounter significant software issues, you can reset your iPad by restoring it through iTunes on your computer. Here’s how you can do it:
- Make sure you have the latest version of iTunes installed on your computer. If not, download and install it from the official Apple website.
- Connect your iPad to your computer using a USB cable.
- Open iTunes on your computer.
- Click on the device icon located in the upper-left corner of the iTunes window.
- In the device summary page, click on “Restore iPad.”
- A pop-up window will appear, asking if you want to back up your iPad before restoring it. Choose whether to back up your device or not. It’s recommended to create a backup to ensure you don’t lose any important data.
- Click on “Restore” to start the restore process.
- Follow the on-screen instructions to complete the restore process. This may involve downloading the latest software for your iPad if necessary.
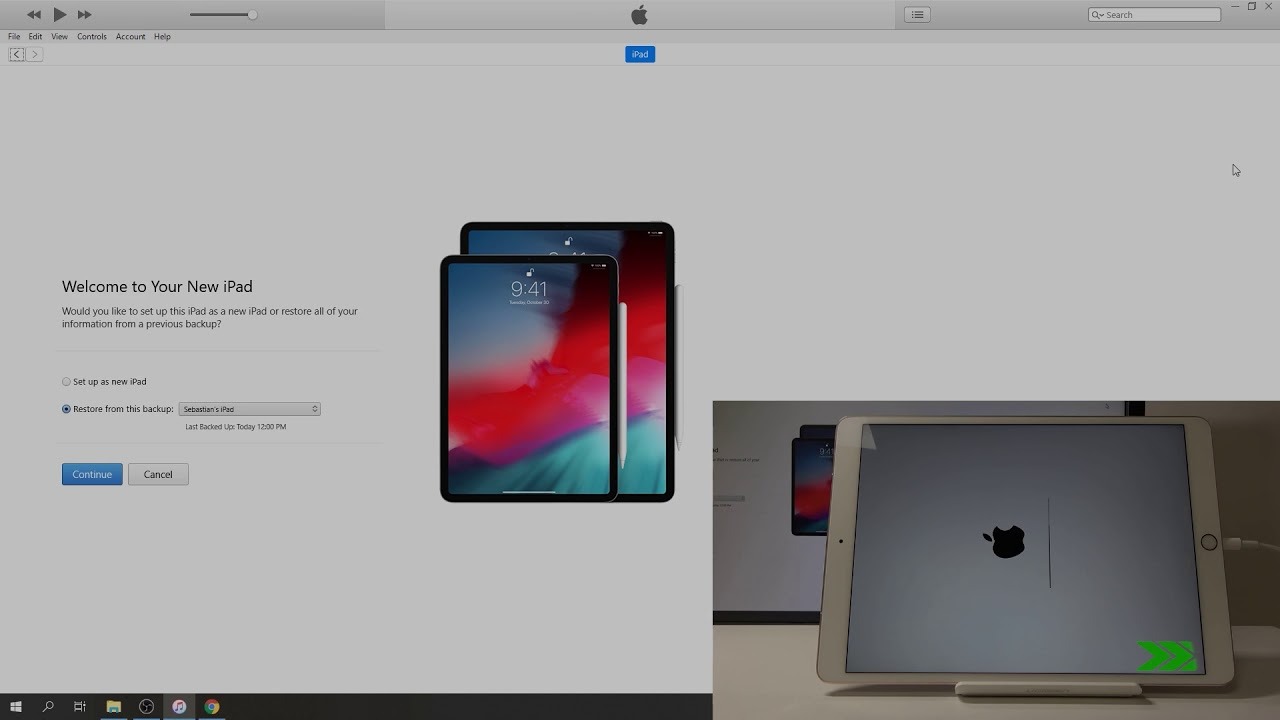
- Once the restore is complete, your iPad will restart, and you can set it up as new or restore from a previous backup.
Restoring your iPad through iTunes is useful when you need to completely reset your device, especially in cases where the software is severely corrupted or when other reset methods are not working.
It’s important to note that restoring your iPad using iTunes will erase all the data on your device. Therefore, it’s crucial to have a recent backup of your iPad to restore from after the reset.
If you encounter any issues during the restore process or have any questions, don’t hesitate to reach out to Apple Support for further assistance.
Resetting Your iPad with Find My
If you have lost your iPad or it has been stolen, you can use the Find My feature to not only locate it but also remotely reset it to prevent unauthorized access to your personal data. Here’s how you can reset your iPad using Find My:
- Using a computer or another iOS device, open a web browser and go to icloud.com/find.
- Sign in to your Apple ID using the same credentials associated with the lost or stolen iPad.
- In the Find My interface, click on “All Devices” at the top center of the screen and select your iPad from the list of devices.
- If your iPad is online and connected to the internet, you will see its current location on the map.
- Click on “Erase iPad” to remotely wipe all the data from your device.
- A confirmation dialog will appear, informing you that the erase process will delete all the content and settings on your iPad. If you’re sure you want to proceed, click on “Erase.”
- If your iPad is offline or not currently connected to the internet, the erase command will be applied as soon as it comes online.
Once the erase command is executed, all your personal data will be permanently deleted from the device, making it inaccessible to anyone who may have found or stolen it.
Using the Find My feature to remotely reset your iPad is a powerful tool to protect your privacy and prevent unauthorized access to your sensitive information. However, please note that this action is irreversible, and you will not be able to retrieve any data from the device once it has been erased.
If you happen to find your iPad after performing the erase, you can restore your data by using an iCloud backup or other means of data retrieval.
Resetting Your iPad in Recovery Mode
If your iPad is experiencing serious software issues and none of the previous reset methods have resolved the problem, you can try resetting it in Recovery Mode. Here’s how you can reset your iPad in Recovery Mode:
- Connect your iPad to your computer using a USB cable.
- Open iTunes on your computer. If you have a Mac running macOS Catalina or later, use Finder instead of iTunes.
- Put your iPad into Recovery Mode by following these steps:
- For iPads with a physical home button: Press and hold the power button and the home button simultaneously until you see the recovery mode screen.
- For iPads without a physical home button: Press and release the volume up button, then press and release the volume down button. Finally, press and hold down the power button until the recovery mode screen appears.
- In iTunes or Finder, you will see a message indicating that your iPad is in Recovery Mode and needs to be restored.
- Click on the “Restore” button to start the restore process.
- Follow the on-screen instructions to complete the restore process. This may involve downloading the latest software for your iPad if necessary.
- Once the restore is complete, your iPad will restart, and you can set it up as new or restore from a previous backup.
Resetting your iPad in Recovery Mode can help resolve more severe software issues, such as a device that is stuck on the Apple logo or experiencing constant crashes. However, it’s important to note that this method will erase all the data on your iPad, so make sure to have a recent backup to restore from.
If you encounter any difficulties during the restore process or need further assistance, don’t hesitate to contact Apple Support for guidance.
Resetting Your iPad in DFU (Device Firmware Update) Mode
If you are facing severe software issues with your iPad and need to completely reinstall the firmware, you can try resetting it in DFU (Device Firmware Update) Mode. This mode allows you to restore your iPad to factory settings and resolve persistent software problems. Here’s how you can reset your iPad in DFU Mode:
- Connect your iPad to your computer using a USB cable.
- Open iTunes on your computer. If you have a Mac running macOS Catalina or later, use Finder instead of iTunes.
- Put your iPad into DFU Mode by following these steps:
- For iPads with a physical home button: Press and hold the power button and the home button simultaneously for 8 seconds.
- For iPads without a physical home button: Press and quickly release the volume up button, then press and quickly release the volume down button. Finally, press and hold down the power button and continue holding it while the screen turns off. After 5 seconds, release the power button but keep holding the volume down button for another 10 seconds.
- In iTunes or Finder, a message will appear, indicating that your iPad has been detected in Recovery Mode.
- Click on the “Restore” button to start the restore process. This will reinstall the firmware on your iPad and erase all data.
- Follow the on-screen instructions to complete the restore process, which may involve downloading the latest firmware.
- Once the restore is complete, your iPad will restart, and you can set it up as new or restore from a previous backup.
Resetting your iPad in DFU Mode is a deeper level reset that can address specific software issues by completely reinstalling the firmware. However, please note that this method will erase all the data on your iPad, so make sure to have a recent backup to restore from.
It’s important to follow the steps carefully and accurately when entering DFU Mode, as any mistakes may result in an unsuccessful reset. If you encounter any difficulties during the restore process or need further assistance, reach out to Apple Support for guidance.