
What is Oci.dll?
The Oci.dll file is an essential component of the Oracle Database and Oracle Client installation. It is a dynamic link library (DLL) file that contains functions and data required for the proper functioning of Oracle applications. The acronym “OCI” stands for Oracle Call Interface, which is a programming interface used by developers to interact with Oracle databases.
The oci.dll file is typically located in the “Bin” directory within the Oracle client installation folder. It is responsible for facilitating communication between Oracle applications and the underlying database engine. Without this file, Oracle-related software may malfunction or fail to run at all.
The Oci.dll file enables various functionalities, including connecting to Oracle databases, executing SQL statements, managing transactions, retrieving and modifying data, and handling errors during database operations. It acts as a bridge between the Oracle software and the operating system, ensuring seamless interaction between the two.
It is worth noting that the oci.dll file may have different versions depending on the specific version of the Oracle client or database installed. Upgrading or reinstalling the Oracle software may result in changes to the oci.dll file.
In summary, the oci.dll file is a crucial component of the Oracle infrastructure, enabling the smooth functioning of Oracle applications and facilitating communication between these applications and the Oracle database engine.
Possible Causes of Oci.dll Errors
Oci.dll errors can occur due to various reasons, causing inconvenience and disruption to Oracle-related software. Understanding the potential causes of these errors can help in diagnosing and resolving the issue effectively. Here are some common factors that can lead to oci.dll errors:
1. Missing or Corrupted Oci.dll File: The most common cause of oci.dll errors is when the file itself is missing or corrupted. This can happen due to accidental deletion, file system issues, or malware infections.
2. Incompatible Oracle Client Version: If you have installed an incompatible version of the Oracle client software, it can result in oci.dll errors. Using an outdated or mismatched version of the Oracle client can lead to compatibility issues with the oci.dll file.
3. Incorrect Oci.dll File Location: If the oci.dll file is not located in the correct directory specified by the Oracle software, it can result in errors. The file should be placed in the “Bin” directory within the Oracle client installation folder for proper functioning.
4. Conflicting Software: Other software or applications installed on your system might conflict with the Oracle client software and cause oci.dll errors. These conflicts can arise due to incompatible software versions, conflicting DLL files, or incompatible settings.
5. Registry Errors: Issues within the Windows registry can also contribute to oci.dll errors. Invalid or corrupted entries related to the Oracle software can disrupt the functioning of the oci.dll file and trigger errors.
6. Malware Infections: Malicious software can infect system files, including the oci.dll file, causing errors and instability. Malware infections can lead to the corruption or replacement of the oci.dll file, resulting in errors when running Oracle applications.
7. Hardware Issues: In rare cases, hardware-related problems, such as faulty RAM or hard drive errors, can trigger oci.dll errors. These issues can interfere with the proper functioning of the oci.dll file and lead to application crashes or errors.
In summary, oci.dll errors can stem from various causes, ranging from missing or corrupted files to compatibility issues and malware infections. Identifying the underlying cause is crucial for effective resolution and restoring the proper functioning of Oracle-related software.
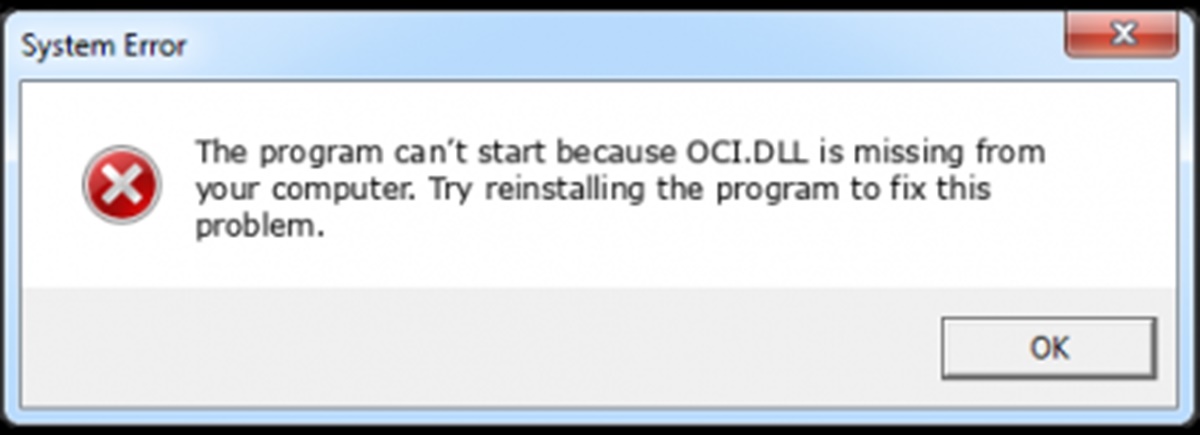
How to Fix Oci.dll Is Missing or Not Found Error
Encountering an “Oci.dll is missing or not found” error can be frustrating, but there are several solutions to resolve this issue. Try the following methods to fix the oci.dll error and get your Oracle-related software up and running again:
1. Reinstall or Upgrade Oracle Client: If the oci.dll file is missing or corrupted, reinstalling or upgrading the Oracle client software can replace the damaged file with a fresh copy. Download the latest version of the Oracle client from the official Oracle website and follow the installation instructions.
2. Restore Oci.dll from the Recycle Bin: If you have recently deleted the oci.dll file, check the Recycle Bin to see if it can be restored. Simply locate the file in the Recycle Bin, right-click on it, and select “Restore” to return it to its original location.
3. Restore Oci.dll from System Restore: If you have enabled System Restore on your computer, you can use this feature to revert your system to a previous state when the oci.dll file was working correctly. Access the System Restore utility, choose a restore point before the error occurred, and follow the prompts to restore your system.
4. Update Device Drivers: Outdated or faulty device drivers can cause compatibility issues and lead to oci.dll errors. Update your device drivers, especially those related to your graphics card, sound card, and network adapter, to ensure compatibility with the Oracle client software.
5. Run a Full System Scan for Malware: Malware infections can corrupt system files, including the oci.dll file. Use a reliable antivirus program to perform a full system scan and remove any malware that may be causing the error. Afterward, restore or reinstall the oci.dll file.
6. Repair the Windows Registry: Invalid or corrupted registry entries can disrupt the proper functioning of the oci.dll file. Use a trusted registry cleaner tool to scan and repair registry errors. Be cautious when modifying the registry, as incorrect changes can cause system instability.
7. Reinstall Windows Operating System: As a last resort, if none of the above solutions work, consider reinstalling the Windows operating system. This will provide a clean slate, ensuring that all system files, including the oci.dll file, are in proper working order.
Remember to create a backup of important files and data before attempting any major changes to your system. Additionally, consult professional assistance if you are unsure about any of the troubleshooting methods.
By following these steps, you will be able to address the “Oci.dll is missing or not found” error and restore the proper functionality of your Oracle-related software.
Solution 1: Reinstall or Upgrade Oracle Client
Reinstalling or upgrading the Oracle client software is a common and effective solution to fix the “Oci.dll is missing or not found” error. This method ensures that the oci.dll file is replaced with a fresh copy, resolving any issues related to corruption or missing files. Follow these steps to reinstall or upgrade the Oracle client:
1. Uninstall the Existing Oracle Client: Before reinstalling or upgrading, it is important to uninstall the current Oracle client software. Go to the Control Panel on your Windows computer, select “Programs” or “Programs and Features,” locate the Oracle client software, and choose to uninstall it.
2. Download the Latest Version of Oracle Client: Visit the official Oracle website and download the latest version of the Oracle client that is compatible with your operating system. Make sure to choose the appropriate version (32-bit or 64-bit) depending on your system configuration.
3. Run the Installer: Once the download is complete, run the installer file to start the installation process. Follow the on-screen instructions to proceed with the installation. You may be prompted to provide certain details, such as the installation path and components to install. Choose the options according to your requirements.
4. Complete the Installation: After configuring the installation settings, the installer will begin installing the Oracle client software. Wait for the installation process to complete. This may take some time, depending on your system specifications.
5. Test the Application: Once the installation is finished, launch your Oracle-related application to ensure that the “Oci.dll is missing or not found” error is resolved. The fresh installation or upgrade should have replaced the oci.dll file with a working version, allowing the application to function properly.
If the error persists even after reinstalling or upgrading the Oracle client software, it may indicate a deeper issue. In such cases, consider trying other solutions or seeking assistance from a technical expert.
Reinstalling or upgrading the Oracle client software is a straightforward process that can resolve issues related to oci.dll errors. By obtaining a fresh and working copy of the oci.dll file, you can ensure the proper functioning of your Oracle-related applications.
Solution 2: Restore Oci.dll from the Recycle Bin
If you have recently deleted the oci.dll file, there is a chance that it might still be in the Recycle Bin. Restoring the file from the Recycle Bin can quickly resolve the “Oci.dll is missing or not found” error. Follow these steps to restore the oci.dll file:
1. Open the Recycle Bin: Double-click on the Recycle Bin icon on your desktop to open it. Alternatively, you can access the Recycle Bin by searching for it in the Start menu or File Explorer.
2. Locate the Oci.dll File: In the Recycle Bin window, you will see a list of deleted files. Use the search bar or scroll through the files to locate the oci.dll file. You can also sort the files by name or date modified to find it easily.
3. Restore the Oci.dll File: Once you have found the oci.dll file, right-click on it and select “Restore” from the context menu. This action will restore the file to its original location. Be patient, as the restoration process may take a few moments.
4. Test the Application: After restoring the oci.dll file, launch your Oracle-related application and check if the error is resolved. The application should now be able to locate and use the oci.dll file correctly.
If the oci.dll file is no longer in the Recycle Bin or if restoring it does not fix the error, it is recommended to try other solutions to address the issue. These may include reinstalling the Oracle client software or seeking professional assistance.
Restoring the oci.dll file from the Recycle Bin is a simple and convenient solution if the file was accidentally deleted. By quickly recovering the file and placing it back in its original location, you can effectively resolve the “Oci.dll is missing or not found” error and resume the smooth functioning of your Oracle-related applications.
Solution 3: Restore Oci.dll from System Restore
System Restore is a built-in feature in Windows that allows you to revert your system to a previous state. If you have enabled System Restore and created a restore point before encountering the “Oci.dll is missing or not found” error, you can use this feature to restore the oci.dll file. Here’s how to restore the oci.dll file using System Restore:
1. Open System Restore: Type “System Restore” in the search bar or open the Control Panel and search for “Recovery.” Select “System Restore” from the list of available options.
2. Select a Restore Point: In the System Restore window, you will see a list of restore points created on your system. These are snapshots of your computer’s configuration at specific points in time. Choose a restore point that predates the occurrence of the oci.dll error.
3. Start the Restoration: Once you have selected a restore point, click on “Next” and then “Finish” to begin the restoration process. Note that system restore may take some time to complete, and your computer will restart during this process.
4. Test the Application: After the system restore is finished and your computer has restarted, launch your Oracle-related application and check if the “Oci.dll is missing or not found” error is resolved. The oci.dll file should be restored to its previous working state.
If you did not create a restore point before encountering the error or if the system restore does not fix the issue, consider trying other solutions such as reinstalling the Oracle client or seeking assistance from technical support.
System Restore is a powerful tool that allows you to reverse system changes and restore your computer to a previous working state. By utilizing this feature and selecting a restore point prior to the oci.dll error, you can effectively restore the missing or corrupted oci.dll file and resolve the error.
Solution 4: Update Device Drivers
Outdated or faulty device drivers can often cause compatibility issues and contribute to the “Oci.dll is missing or not found” error. Updating your device drivers, especially those related to your graphics card, sound card, and network adapter, can help resolve this issue. Here’s how you can update your device drivers:
1. Identify Outdated Drivers: Start by identifying which device drivers might be causing the issue. Focus on drivers related to your graphics card, sound card, and network adapter, as these are commonly associated with compatibility problems. You can check for outdated drivers in the Device Manager or by using specialized driver update software.
2. Use Windows Update: Windows Update can automatically search for and install the latest drivers for your system. Open the Settings menu, go to “Update & Security,” and select “Windows Update.” Click on “Check for updates” and allow Windows to download and install any available driver updates.
3. Visit Manufacturer Websites: If Windows Update doesn’t find the latest drivers for your devices, visit the websites of the manufacturers to manually download the updated drivers. Look for the support or downloads section on their websites and search for the drivers specifically related to your hardware. Make sure to download the correct drivers for your operating system and hardware version.
4. Update the Drivers: Once you have downloaded the latest drivers, run the installer files and follow the instructions provided. Usually, this involves accepting the license terms and clicking “Install” or “Next” to proceed with the installation. Restart your computer if prompted to do so after the driver installation is complete.
5. Test the Application: After updating the device drivers, launch your Oracle-related application to check if the “Oci.dll is missing or not found” error is resolved. Updating the drivers can improve compatibility and ensure that the oci.dll file is accessible to the application.
If updating the device drivers doesn’t fix the error, consider trying other solutions or seeking assistance from technical support. It’s also important to regularly keep your device drivers up to date to minimize compatibility issues and improve system stability.
Updating device drivers is an effective way to address compatibility issues and resolve the “Oci.dll is missing or not found” error. By ensuring that your drivers are up to date, you can enhance the performance of your system and allow your Oracle-related applications to function smoothly.
Solution 5: Run a Full System Scan for Malware
Malware infections can cause various system issues, including the “Oci.dll is missing or not found” error. Running a full system scan for malware can help identify and remove any malicious software that may be interfering with the oci.dll file. Follow these steps to perform a thorough malware scan:
1. Update your Antivirus Software: Ensure that your antivirus software is up to date with the latest virus definitions. This will ensure that it can effectively detect and remove the latest malware threats.
2. Schedule a Full System Scan: Open your antivirus software and access the scan options. Choose the option for a “Full System Scan” or a similar scan type that scans all files and folders on your computer. Start the scan and allow it to run until completion. Note that the scan may take some time depending on the size of your hard drive and the number of files.
3. Quarantine or Remove Detected Malware: Once the scan is complete, review the scan results and take appropriate actions for any detected malware. Your antivirus software will offer options to quarantine or remove the identified threats. Follow the prompts to clean your system from any malware infections.
4. Restore or Reinstall Oci.dll: After removing the malware, it is advisable to restore or reinstall the oci.dll file. If the file was infected or corrupted by the malware, it may still trigger errors even after the malware is removed. Restore the oci.dll file from a backup or reinstall the Oracle client software to ensure you have a clean and functioning copy of the file.
5. Test the Application: Launch your Oracle-related application to verify if the “Oci.dll is missing or not found” error is resolved. With the malware removed and a clean oci.dll file in place, the application should function properly without any error messages.
It’s important to note that running a full system scan for malware is a precautionary measure that should be part of your regular system maintenance routine. Keeping your antivirus software up to date and performing scans periodically can help prevent malware infections and address any issues that may arise.
By running a full system scan for malware, you can identify and remove any malicious software that could be causing the “Oci.dll is missing or not found” error. This ensures that your system is clean and free from any malware interference, allowing your Oracle-related applications to run smoothly.
Solution 6: Repair the Windows Registry
Issues within the Windows registry can often contribute to the “Oci.dll is missing or not found” error. The registry contains critical system information and settings, and when it becomes corrupted or contains invalid entries, it can affect the proper functioning of the oci.dll file. Repairing the Windows registry can help resolve the error. Here’s how to do it:
1. Backup the Registry: Before making any changes to the registry, it’s crucial to create a backup in case something goes wrong. To do this, type “regedit” in the search bar and open the Registry Editor. Click on “File” and choose “Export” to create a backup file of the registry. Save it to a safe location on your computer.
2. Open the Registry Editor: Type “regedit” in the search bar and open the Registry Editor. You may be prompted for administrator permission. Click “Yes” to proceed.
3. Locate the Oci.dll Entries: In the Registry Editor, navigate to the following key: HKEY_LOCAL_MACHINE\SOFTWARE\Oracle (for 32-bit) or HKEY_LOCAL_MACHINE\SOFTWARE\WOW6432Node\Oracle (for 64-bit). Look for any oci.dll related entries within these keys.
4. Delete Invalid Entries: To delete an entry, select it and press “Delete” on your keyboard. Exercise caution while deleting registry entries, as removing incorrect keys can cause system instability. Only delete entries related to oci.dll that are invalid, corrupted, or outdated.
5. Repair the Registry: If you are not comfortable manually editing the registry, you can use a trusted registry cleaner tool to scan and repair registry errors. These tools can automatically detect and fix invalid or corrupted registry entries related to the oci.dll file.
6. Restart Your Computer: After repairing the registry, restart your computer to allow the changes to take effect.
7. Test the Application: Launch your Oracle-related application and check if the “Oci.dll is missing or not found” error is resolved. The repaired registry should ensure that the oci.dll file is properly accessed by the application.
It’s important to note that modifying the registry can have serious consequences if not done correctly. Always exercise caution and consider creating a system restore point before making any changes. If you are uncertain or uncomfortable performing registry edits, it is recommended to seek assistance from a knowledgeable professional.
Repairing the Windows registry can eliminate invalid or corrupted entries that may be causing the “Oci.dll is missing or not found” error. By ensuring the registry contains accurate information, you can restore the proper functionality of your Oracle-related applications.
Solution 7: Reinstall Windows Operating System
In extreme cases where all other solutions fail to fix the “Oci.dll is missing or not found” error, reinstalling the Windows operating system can be considered as a last resort. Reinstalling Windows provides a fresh start for your system, ensuring that all system files, including the oci.dll file, are in proper working order. Here’s how you can reinstall Windows:
1. Backup Your Data: Before proceeding with a Windows reinstallation, it is crucial to backup all your important files, programs, and personal data. This will prevent any data loss during the reinstallation process. Save your data to an external storage device or a cloud storage service.
2. Prepare Windows Installation Media: Obtain a copy of the Windows installation media that matches your version of Windows. This can be a DVD or a bootable USB drive. Make sure it is a legitimate, licensed copy to avoid any legal or technical issues.
3. Boot from the Installation Media: Insert the installation media into your computer and restart it. Access the boot menu by pressing the designated key on your keyboard (usually F12 or Del) and select the appropriate boot device (DVD drive or USB drive) to boot from it.
4. Follow Installation Prompts: The Windows installation process will begin. Follow the on-screen prompts to proceed. You may be asked to select language preferences, enter the product key, and choose the installation type (custom or upgrade). Select the custom installation option to perform a clean installation.
5. Format Your System Drive: During the installation, you will come across the disk partitioning step. Select your system drive where Windows is currently installed, and choose the option to format it. This will erase all existing data on the drive, so ensure that you have backed up all your important files.
6. Complete the Installation: After formatting the system drive, follow the remaining steps to complete the installation. This includes selecting the installation location, configuring settings, and creating a user account. Be patient as the installation process may take some time.
7. Reinstall Oracle Client and Applications: After the Windows installation is complete, proceed to reinstall the Oracle client software and any Oracle-related applications that you need. Follow the installation instructions provided by Oracle to properly install the software.
Remember to also reinstall any other necessary software, update device drivers, and restore your data from the backup.
Reinstalling the Windows operating system is a drastic step, and it should only be considered when all other solutions fail to resolve the “Oci.dll is missing or not found” error. It provides a clean slate for your system, ensuring that all system files, including oci.dll, are properly installed and functioning.