
What is shlwapi.dll?
Shlwapi.dll, which stands for Shell Light-weight Utility Library, is a dynamic link library file that is an essential component of the Microsoft Windows operating system. It contains a collection of functions and APIs (Application Programming Interfaces) that provide support for various shell-related tasks, such as file and folder operations, shortcut creation, and user interface functions.
Shlwapi.dll is responsible for implementing crucial features within the Windows shell, including the handling of shell-related interfaces and objects, as well as providing support for Windows Explorer and the Start menu. It plays a fundamental role in the seamless functioning of the operating system by enabling the execution of vital tasks and ensuring the stability and smooth performance of the Windows environment.
This DLL file is located in the C:\Windows\System32 folder. It is loaded into the computer’s memory when the operating system starts up, allowing various programs and processes to access its functions when required. Due to its importance, any errors or issues with the shlwapi.dll file can have a significant impact on the proper functioning of the Windows operating system.
It is worth noting that shlwapi.dll is a system file and should not be tampered with or deleted without proper knowledge or technical expertise. Modifying or removing this file may lead to system instability, application crashes, or even the inability to boot the system properly. Therefore, it is crucial to address any errors related to shlwapi.dll promptly and correctly.
In the next sections, we will discuss the common error messages associated with shlwapi.dll and explore some effective methods to resolve these errors and ensure the smooth functioning of your Windows system.
Common shlwapi.dll Error Messages
When encountering issues with shlwapi.dll, you may come across various error messages indicating specific problems. Understanding these error messages can help you identify the root cause of the issue and find an appropriate solution. Here are some common error messages related to shlwapi.dll that users often encounter:
-
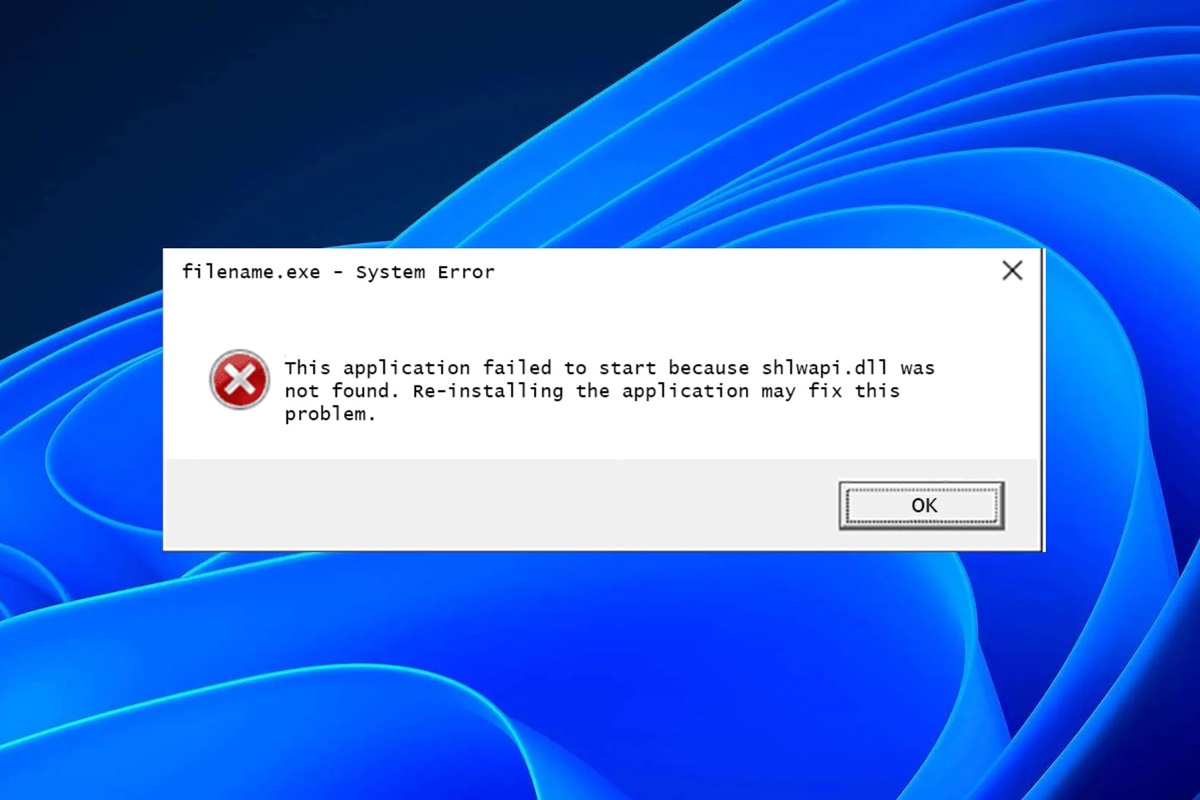
“shlwapi.dll not found.”
This error message suggests that the shlwapi.dll file is either missing or cannot be located by the operating system or the specific program that requires it. The absence of this file can lead to malfunctioning or inability to launch certain applications.
-
“Cannot register shlwapi.dll.”
This error message indicates a problem with registering the shlwapi.dll file in the system registry. Registration is necessary for the operating system to recognize and utilize the file properly. Failure to register the file can cause compatibility issues and application failures.
-
“Invalid shlwapi.dll registry entry.”
This error message suggests that the specific registry entry related to the shlwapi.dll file has become corrupted or contains incorrect information. Such corruption can lead to errors when accessing or utilizing the file, resulting in system instability or crashes.
-
“shlwapi.dll failed to load.”
This error message indicates that the shlwapi.dll file was found, but an error occurred during the loading process. This can happen due to file corruption, conflicts with other system files or applications, or issues with the operating system itself.
Experiencing any of these error messages can be frustrating and disruptive to your computing experience. The good news is that there are several methods available to fix shlwapi.dll errors and get your system back on track. In the next section, we will explore these methods in detail to help you troubleshoot and resolve these issues effectively.
Causes of shlwapi.dll Errors
Understanding the root causes of shlwapi.dll errors is essential in troubleshooting and resolving these issues effectively. Here are some common factors that can lead to shlwapi.dll errors on your Windows system:
-
Missing or Corrupted File: One of the primary causes of shlwapi.dll errors is a missing or corrupted shlwapi.dll file. This can occur due to accidental deletion, improper installation or uninstallation of software, or malware infection.
-
Outdated Software or Drivers: Using outdated software or drivers that rely on shlwapi.dll can also trigger errors. When the software or drivers are not compatible with the version of shlwapi.dll installed on your system, conflicts may arise, leading to error messages.
-
Registry Issues: Problems within the Windows registry can result in shlwapi.dll errors. These issues can occur due to invalid or corrupt registry entries associated with shlwapi.dll, caused by software installation or removal, incomplete updates, or malware infections.
-
Malware Infection: Malicious software or viruses can infect and damage the shlwapi.dll file, leading to errors. These infections can occur through unsafe downloads, email attachments, or visiting compromised websites, compromising the integrity of the file and causing instability in the system.
-
Hardware Problems: In some cases, hardware issues such as failing hard drives or faulty RAM modules can cause shlwapi.dll errors. These problems can result in corrupted or inaccessible files, including shlwapi.dll, leading to application failures or system crashes.
By identifying the specific cause of the shlwapi.dll error, you can implement the appropriate solutions to resolve the issue. In the next section, we will explore various methods that can help you fix shlwapi.dll errors and restore the smooth functioning of your Windows system.
How to Fix shlwapi.dll Not Found or Missing Error
Encountering a “shlwapi.dll not found” or “shlwapi.dll missing” error can be frustrating, as it can prevent you from running certain applications or cause system instability. Fortunately, there are several methods you can try to resolve this issue. Let’s explore them below:
-
Restart Your Computer: Sometimes, a simple restart can fix temporary glitches and resolve the “shlwapi.dll not found” error. Restart your computer and check if the error persists.
-
Check the Recycle Bin: It is possible that the shlwapi.dll file was accidentally deleted and ended up in the Recycle Bin. Open the Recycle Bin and search for the file. If found, restore it to its original location.
-
Restore shlwapi.dll from the Recycle Bin: If you have already emptied the Recycle Bin, you can restore the deleted shlwapi.dll file by using a file recovery tool. These tools can help you recover deleted files, including shlwapi.dll.
-
Run a Virus Scan: Perform a full system scan using reliable antivirus software to detect and remove any malware or viruses that may have infected the shlwapi.dll file. Malware infections can cause the file to be missing or corrupted.
-
Update Windows: Ensure that your Windows operating system is up to date with the latest patches and updates. Microsoft often releases updates that fix known issues, including those related to DLL files like shlwapi.dll.
-
Update Device Drivers: Outdated or incompatible device drivers can cause conflicts with the shlwapi.dll file. Update your drivers to the latest versions from the manufacturer’s official website or use a reliable driver update utility.
-
Repair Invalid Registry Entries: Use a reputable registry cleaner tool to scan and repair any invalid or corrupt registry entries related to shlwapi.dll. Be cautious when modifying the registry, as improper changes can lead to system instability.
-
Use System File Checker (SFC): Run the System File Checker tool to scan for and restore missing or corrupted system files, including shlwapi.dll. Open the Command Prompt as an administrator and run the command “sfc /scannow.”
-
Reinstall the Program: If the shlwapi.dll error occurs when running a specific program, try reinstalling that program. This process will replace any missing or corrupted files associated with the application, including the shlwapi.dll file.
-
Perform a Clean Installation of Windows: If all else fails and the “shlwapi.dll not found” error persists, you may need to consider performing a clean installation of the Windows operating system. This process will reinstall all system files, including shlwapi.dll, ensuring a fresh start.
By following these methods, you can effectively troubleshoot and fix the “shlwapi.dll not found” or “shlwapi.dll missing” error. Choose the method that best suits your situation and take the necessary precautions while making any modifications to your system.
Method 1: Restart Your Computer
One of the simplest and most effective solutions to fix the “shlwapi.dll not found” or “shlwapi.dll missing” error is to restart your computer. Sometimes, the error can be caused by temporary glitches or conflicts that can be resolved by a reboot. Here’s how to do it:
-
Save your work and close all open programs or applications.
-
Click on the “Start” menu in the bottom left corner of your screen.
-
Select the “Restart” option from the power menu.
-
Wait for your computer to shut down and restart.
Once your computer has restarted, check if the “shlwapi.dll not found” or “shlwapi.dll missing” error still persists. In many cases, a simple restart is enough to resolve temporary issues or conflicts that may have caused the error. If the error persists after restarting, you can try other methods to further troubleshoot and fix the issue.
Restarting your computer can help refresh the system, clear temporary files, and reset any conflicting processes. This method is quick and often effective, making it a good initial step to try before diving into more complex troubleshooting procedures. If the error continues to occur, proceed to the next method for further troubleshooting.
Method 2: Check the Recycle Bin
When encountering the “shlwapi.dll not found” or “shlwapi.dll missing” error, it’s worth checking the Recycle Bin on your computer. It’s possible that the shlwapi.dll file was accidentally deleted and sent to the Recycle Bin. Here’s how you can check and restore the file from the Recycle Bin:
-
Double-click on the Recycle Bin icon on your desktop to open it. Alternatively, you can open the File Explorer, navigate to the “Recycle Bin” folder, and open it.
-
In the Recycle Bin window, locate the search bar, which is usually located at the top right corner.
-
Type “shlwapi.dll” in the search bar and press Enter. This will filter the files in the Recycle Bin and display any matches with the file name.
-
If the search results display the shlwapi.dll file, right-click on it and select the “Restore” option. This will restore the file to its original location on your computer.
After restoring the shlwapi.dll file from the Recycle Bin, restart your computer and check if the error still persists. In most cases, the file being present in the Recycle Bin and restoring it can fix the “shlwapi.dll not found” or “shlwapi.dll missing” error. However, if the error continues, there may be other underlying causes that need to be addressed.
Checking the Recycle Bin is a simple yet crucial step to ensure that the missing shlwapi.dll file hasn’t been accidentally deleted. It’s always recommended to double-check the Recycle Bin before proceeding with other troubleshooting methods. Keep in mind that if the shlwapi.dll file isn’t found in the Recycle Bin, it might have been permanently deleted, requiring alternative methods to restore or replace the file.
Method 3: Restore shlwapi.dll from the Recycle Bin
If you have already emptied the Recycle Bin but suspect that the shlwapi.dll file was mistakenly deleted and sent to the Recycle Bin, you can use a file recovery tool to restore it. These tools are designed to recover deleted files, including DLL files like shlwapi.dll. Here’s how you can restore shlwapi.dll from the Recycle Bin using a file recovery tool:
-
Download and install a reputable file recovery tool on your computer. There are several options available, such as Recuva, Disk Drill, or EaseUS Data Recovery Wizard.
-
Launch the file recovery tool and follow the on-screen instructions to scan for deleted files.
-
Select the drive or partition where the shlwapi.dll file was originally located. If you’re unsure, select the primary drive (typically the “C:” drive).
-
Start the scanning process and wait for the tool to analyze the drive and identify any recoverable files, including shlwapi.dll.
-
Once the scanning is complete, browse through the search results to locate the shlwapi.dll file. You can often filter the results by file type or search for the specific file name.
-
Select the shlwapi.dll file and choose the “Restore” or “Recover” option to retrieve the file from its recovered location. Make sure to select a secure location on your computer, such as the original folder or a designated location for DLL files.
After restoring the shlwapi.dll file using the file recovery tool, restart your computer and check if the “shlwapi.dll not found” or “shlwapi.dll missing” error persists. Restoring the file from the Recycle Bin using a file recovery tool can help recover accidentally deleted files and resolve DLL-related errors. However, keep in mind that these tools may not always guarantee a successful recovery, depending on various factors such as file fragmentation or data overwriting.
It’s important to note that prevention is key when it comes to accidentally deleting critical system files like shlwapi.dll. Make sure to exercise caution when deleting files and follow proper procedures to avoid accidental deletions. Regularly backing up important files can also provide an additional layer of protection against permanent file loss.
Method 4: Run a Virus Scan
Running a virus scan is an essential step in addressing the “shlwapi.dll not found” or “shlwapi.dll missing” error. It is possible that the error is caused by malware or viruses that have infected and damaged the shlwapi.dll file. Performing a thorough virus scan can help detect and remove any malicious software, ensuring the integrity of the shlwapi.dll file. Here’s how to run a virus scan on your Windows system:
-
Ensure your antivirus software is up-to-date. If you don’t have a reliable antivirus program installed, download and install one from a reputable source.
-
Open your antivirus program and navigate to the scanning options. Typically, you can find a “Scan” or “Scan Now” button on the main dashboard or in the settings.
-
Choose the scanning option that suits your needs. For a comprehensive scan, select the “Full Scan” or “Deep Scan” option. Alternatively, you can perform a quick scan if you suspect a specific file or folder.
-
Initiate the scan and allow the antivirus program to thoroughly examine your system for malware or viruses. This process may take some time depending on the size of your hard drive and the number of files on your computer.
-
Once the scan is complete, review the scan results to see if any threats were detected. If the antivirus program identifies malware or viruses, follow the prompts to remove them from your system.
-
After removing the threats, restart your computer and check if the “shlwapi.dll not found” or “shlwapi.dll missing” error still persists.
Running a virus scan helps ensure that your system is free from malicious software that could be causing the shlwapi.dll errors. It is crucial to use reputable antivirus software and regularly update it to ensure optimal protection against the latest threats. Remember to schedule periodic scans and enable real-time protection for continuous monitoring and prevention of future infections.
In some cases, even after removing the malware, the shlwapi.dll file might still be damaged or missing. In that case, you may need to try other methods to restore or replace the file to fix the error.
Method 5: Update Windows
Keeping your Windows operating system up to date is essential for optimal performance and stability. It can also help resolve various system-related issues, including the “shlwapi.dll not found” or “shlwapi.dll missing” error. Microsoft regularly releases updates and patches that address known issues, including those related to DLL files such as shlwapi.dll. Updating your Windows system is a straightforward process that can be done through the Windows Update feature. Here’s how to update Windows:
-
Click on the “Start” menu in the bottom left corner of your screen, and select the “Settings” icon (resembling a gearwheel).
-
In the Settings window, select the “Update & Security” option.
-
In the Update & Security menu, click on the “Check for Updates” button. Windows will search for available updates for your system.
-
If there are any updates available, click on the “Download” or “Install” button to begin the update process. Depending on the size and number of updates, this process may take some time.
-
Follow the on-screen prompts to complete the update installation. Your computer may need to restart during this process, so make sure to save your work.
After updating Windows, restart your computer and check if the “shlwapi.dll not found” or “shlwapi.dll missing” error still persists. In many cases, updating Windows can resolve issues related to DLL files and ensure the smooth functioning of your system.
Regularly updating your Windows operating system is crucial for security and performance reasons. It not only fixes known issues but also provides improved compatibility with software and hardware. Enabling automatic updates can ensure that your system stays up to date without manual intervention.
Method 6: Update Device Drivers
Outdated or incompatible device drivers can often cause conflicts with DLL files like shlwapi.dll, resulting in the “shlwapi.dll not found” or “shlwapi.dll missing” error. Keeping your device drivers up to date is crucial for optimal system performance and stability. Here’s how you can update your device drivers:
-
Identify the device drivers that may be causing the issue. Common culprits include graphics cards, network adapters, and sound drivers. You can check for outdated drivers by opening the Device Manager. Press the Windows key + X and select “Device Manager” from the list.
-
In the Device Manager, locate the device category related to the driver you want to update. Right-click on the device and select “Update driver.” You can also choose to “Uninstall device” and then restart your computer, allowing Windows to automatically install the latest driver during the reboot.
-
If you prefer to update the driver manually, visit the manufacturer’s website and look for the latest driver version specific to your device model and operating system. Download the appropriate driver and follow the installation instructions provided by the manufacturer.
-
Repeat the above steps for any other device drivers that may be contributing to the “shlwapi.dll not found” or “shlwapi.dll missing” error.
-
After updating all the relevant device drivers, restart your computer to apply the changes. Check if the error still persists.
Updating device drivers can help resolve compatibility issues and ensure the smooth operation of your system. While Windows typically installs generic drivers, downloading and installing the latest drivers provided by the device manufacturers can provide better compatibility and performance enhancements.
It’s worth noting that manually updating device drivers can be time-consuming and requires technical knowledge. If you’re uncomfortable with the process, you can use driver update software that automates the driver update process. These tools can scan your system, identify outdated drivers, and download and install the latest versions with just a few clicks.
Method 7: Repair Invalid Registry Entries
Invalid or corrupt registry entries associated with shlwapi.dll can lead to the “shlwapi.dll not found” or “shlwapi.dll missing” error. The Windows Registry is a crucial component that stores important configuration settings for the operating system and installed programs. Repairing invalid registry entries can help resolve DLL-related issues. Here’s how you can repair invalid registry entries:
-
Press the Windows key + R to open the Run dialog box. Type “regedit” and press Enter to open the Registry Editor.
-
Before proceeding, it’s highly recommended to back up the registry. Click on the “File” menu in the Registry Editor and select “Export.” Choose a location to save the backup, provide a name, and click “Save.”
-
In the Registry Editor, navigate to the following path:
HKEY_LOCAL_MACHINE\SOFTWARE\Microsoft\Windows\CurrentVersion\SharedDLLs -
In the SharedDLLs folder, look for entries related to shlwapi.dll. Right-click on each entry and select “Delete.” Exercise caution to delete only the entries associated with shlwapi.dll and not any other critical system files.
-
Close the Registry Editor and restart your computer to apply the changes.
Repairing invalid registry entries can help resolve issues caused by corrupt or incorrect information related to shlwapi.dll. However, modifying the registry can be risky if not done correctly. It is important to create a backup and exercise caution while making any changes.
If you’re uncomfortable or unfamiliar with manually editing the registry, it’s recommended to use a trusted registry cleaner tool. These tools can scan for and repair invalid registry entries automatically, ensuring the safety and integrity of your system.
Method 8: Use System File Checker (SFC)
The System File Checker (SFC) is a built-in Windows tool that can scan for and repair corrupted system files, including the shlwapi.dll file. By using the SFC tool, you can potentially fix the “shlwapi.dll not found” or “shlwapi.dll missing” error. Here’s how to use the System File Checker:
-
Press the Windows key and type “Command Prompt.” Right-click on the Command Prompt and select “Run as administrator” to open an elevated Command Prompt window.
-
In the Command Prompt, type the following command and press Enter:
sfc /scannow -
The SFC tool will now scan your system files for any errors or corruption. This process may take some time, so wait for it to complete.
-
If the SFC tool detects any issues with the shlwapi.dll file or any other system files, it will attempt to repair them automatically. Follow the on-screen instructions, if any.
-
Once the scan and repair process is complete, restart your computer and check if the “shlwapi.dll not found” or “shlwapi.dll missing” error still persists.
Using the System File Checker can help restore the integrity of system files, including the shlwapi.dll file. However, keep in mind that the SFC tool may not always be able to repair the corrupted files. In such cases, you may need to consider alternative methods to restore or replace the shlwapi.dll file.
It is important to note that running the SFC tool requires administrative privileges. Opening the Command Prompt as an administrator ensures that the tool has the necessary permissions to scan and repair system files.
Method 9: Reinstall the Program
If you are encountering the “shlwapi.dll not found” or “shlwapi.dll missing” error when running a specific program, reinstalling that program may resolve the issue. It is possible that the program’s installation files or the shlwapi.dll file associated with it have become corrupted or are missing. Reinstalling the program will replace any damaged or missing files, potentially fixing the error. Here’s how to reinstall a program:
-
Open the Control Panel by pressing the Windows key and typing “Control Panel.” Select it from the search results.
-
In the Control Panel, navigate to the “Programs” or “Programs and Features” section.
-
Look for the program causing the “shlwapi.dll not found” or “shlwapi.dll missing” error in the list of installed programs.
-
Right-click on the program and select “Uninstall” or “Remove.” Follow the on-screen prompts to complete the uninstallation process.
-
Once the program is successfully uninstalled, restart your computer.
-
Download the latest version of the program from the official website or a trusted source.
-
Run the installer for the program and follow the on-screen instructions to reinstall it.
-
After the reinstallation is complete, restart your computer and check if the “shlwapi.dll not found” or “shlwapi.dll missing” error still persists.
Reinstalling the program can replace any missing or corrupted files related to shlwapi.dll, ensuring that the program functions properly. Make sure to download the latest version of the program from a trusted source to ensure compatibility with your system.
If the error continues after reinstalling the program, it may be necessary to explore other methods to address the underlying issue, such as restoring the shlwapi.dll file or performing additional troubleshooting steps.
Method 10: Perform a Clean Installation of Windows
If all other methods fail to resolve the “shlwapi.dll not found” or “shlwapi.dll missing” error, performing a clean installation of Windows may be necessary. This method involves reinstalling the entire operating system, which can help fix any underlying issues causing the error. Before proceeding, make sure to back up your important files and create a recovery drive if needed. Here’s how to perform a clean installation of Windows:
-
Backup your files to an external storage device, cloud storage, or another partition.
-
Create a Windows installation media using a USB drive or DVD. You can download the Windows Media Creation Tool from the Microsoft website to create the installation media.
-
Restart your computer and boot from the installation media. This process may require changing the boot order in your computer’s BIOS/UEFI settings.
-
Follow the on-screen instructions provided by the Windows installation wizard. Select your language preferences, enter the product key (if required), and choose “Custom installation” when prompted.
-
In the installation process, select the partition where you want to install Windows. If needed, you can delete existing partitions to create a new one. Proceed with the installation, and Windows will format the selected partition.
-
Follow the prompts to complete the installation. This process may take some time, so be patient.
-
Once the installation is complete, reinstall your programs, restore your files from the backup, and reinstall any necessary device drivers.
Performing a clean installation of Windows can effectively resolve issues related to shlwapi.dll by providing a fresh and stable operating system environment. However, it is a time-consuming process that will remove all your installed programs and personal files. Therefore, it is crucial to back up your important data before proceeding and ensure that you have the necessary installation media and product key.
Make sure to verify the system requirements and compatibility with your computer before performing a clean installation of Windows. It may be helpful to consult the official Microsoft documentation or seek assistance from a technical expert if you are unsure about the process.