
Check the Power Source
When your computer shows no sign of power, the first thing you should check is the power source. Ensure that the power outlet is working by plugging in another electronic device. If there is no power output, you may need to reset the circuit breaker or try a different outlet.
If the power outlet is working fine, then move on to check the power supply. Ensure that the power cable is securely connected to the power supply unit (PSU) and the power outlet. Check for any visible damage or frayed wires on the power cable. If there are any issues, replace the power cable with a new one.
Next, examine the power cord that connects the PSU to your computer. Make sure it is properly connected and not damaged. If you have a spare power cord, try using that to see if it resolves the issue.
Another consideration is the surge protector or power strip that your computer is connected to. Sometimes, these devices can malfunction and prevent power from reaching your computer. To check if this is the case, bypass the surge protector or power strip and connect your computer directly to a power outlet.
If you’ve gone through these steps and your computer still doesn’t show any sign of power, it may be a problem with the power button. In the next section, we will discuss how to troubleshoot the power button and other related components.
Test the Power Cable
One of the common causes for a computer not showing any sign of power is a faulty power cable. To determine whether the power cable is the culprit, follow these steps:
- Inspect the power cable for any visible damage such as cuts, frayed wires, or bent pins. If you notice any issues, it may be necessary to replace the power cable.
- Disconnect the power cable from both the wall outlet and the computer.
- Examine the power cable connectors for any dirt or debris. Clean them using a dry cloth to ensure proper connection.
- Once the cable is clean and free from damage, reconnect it firmly to both the wall outlet and the computer.
- Ensure that the power cable is securely plugged in at both ends.
- Try plugging the power cable into a different power outlet to rule out a faulty outlet as the issue.
- If you have a spare power cable, try using that instead to see if it resolves the problem.
After testing the power cable, attempt to power on your computer. If it shows no sign of power, proceed to the next section to troubleshoot other potential causes.
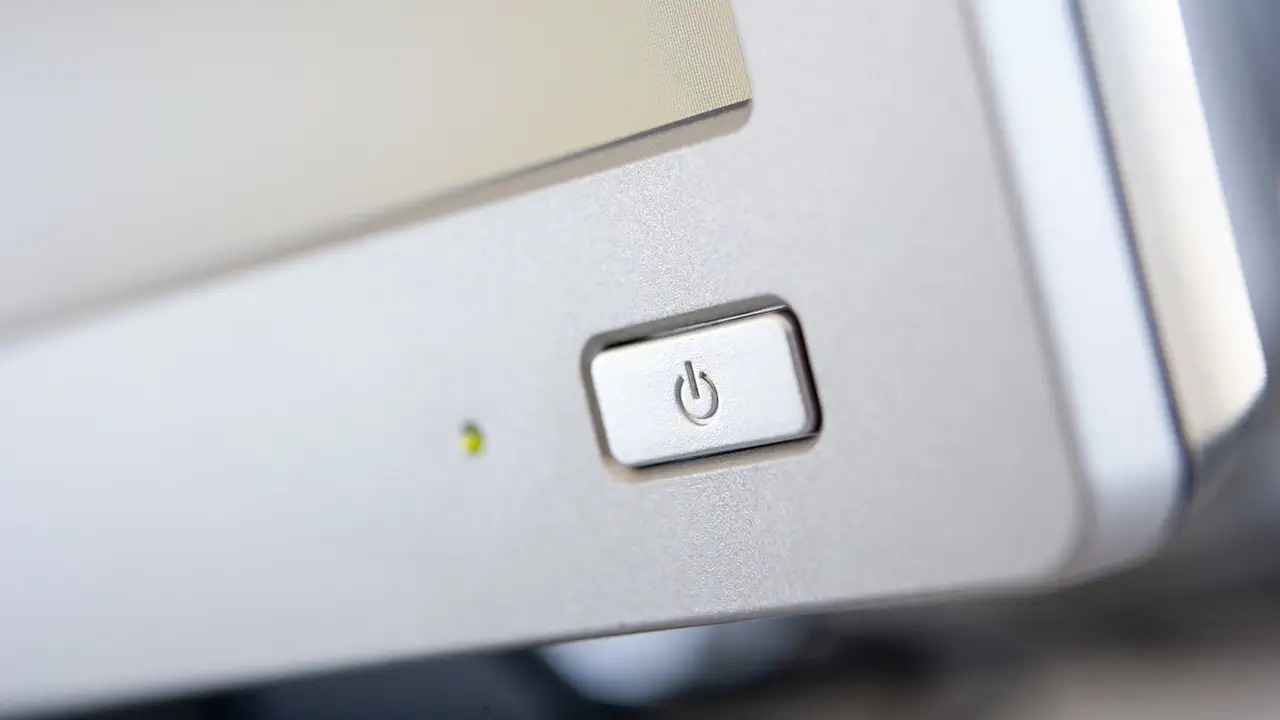
Check the Power Button
If your computer is not showing any sign of power, the issue might lie with the power button itself. Here are some steps to help you troubleshoot the power button:
- Inspect the power button for any physical damage or debris. Make sure it is not stuck or jammed.
- If you have a desktop computer, check the front panel connectors that are connected to the power button. Ensure they are securely plugged into the motherboard.
- If you have a laptop, try removing the battery and disconnecting the power adapter. Hold down the power button for around 15 seconds to discharge any residual power. Reconnect the battery and power adapter, then try to power on the laptop.
- Reset the power button by turning off the computer and unplugging it from the power source. Press and hold the power button for around 30 seconds. Then, plug it back in and try turning it on again.
- Consider using a different power button. If you have a spare power button or if your computer’s case has a reset button, you can temporarily connect it to the motherboard to test if the original power button is faulty.
If the above steps do not resolve the issue with the power button, it is recommended to seek professional assistance or contact the manufacturer for further guidance. The problem may require hardware repair or component replacement.
Inspect and Reset the Power Supply
If your computer is not showing any sign of power, the problem might stem from the power supply. Follow these steps to inspect and reset the power supply:
- Switch off the computer and unplug it from the power source.
- Open the computer case to access the power supply unit (PSU).
- Inspect the PSU for any visible signs of damage, such as bulging capacitors, burnt smell, or loose connections. If you notice any issues, it may be necessary to replace the power supply.
- Disconnect all power cables from the PSU, including those connected to the motherboard and other components.
- Press and hold the power button on the computer for about 15 seconds to discharge any residual power.
- Remove the PSU from the computer case by unscrewing the mounting screws.
- Check the voltage selector switch, if present, on the back of the PSU. Ensure it is set to the correct voltage for your region (e.g., 120V for North America, 240V for Europe).
- Reset the power supply by either using the reset switch (if available) or flipping the power switch on the back of the PSU to the off position, and then back on again after a few seconds.
- Reinstall the power supply unit back into the computer case and secure it with the mounting screws.
- Reconnect all the power cables to the appropriate connectors on the PSU.
- Close the computer case and plug the power cable back into the wall outlet.
After following these steps, try turning on your computer. If the power supply was the issue, your computer should now show signs of power. If not, proceed to the next section to troubleshoot other possible causes.
Remove and Reinsert Components
If your computer is not showing any sign of power, there may be a loose connection or faulty component causing the issue. Follow these steps to remove and reinsert key components:
- Switch off the computer and unplug it from the power source.
- Open the computer case to access the internal components.
- Start by removing and reseating the RAM modules. Carefully press down on the locking tabs on either side of the RAM modules to release them, then pull the modules out and reinsert them firmly.
- Repeat the same process for other removable components such as the graphics card and any expansion cards.
- Check the connections between the power supply cables and the motherboard. Ensure they are securely attached.
- Inspect the SATA or IDE cables that connect the hard drive and optical drive to the motherboard. Remove and reinsert them, ensuring they fit snugly.
- Remove and reinsert the power connectors for the hard drive and any other peripherals.
- Double-check that all components are properly seated, and there are no loose connections.
- Close the computer case and plug the power cable back into the wall outlet.
Once you have reinserted all the components, try turning on your computer. If the issue was due to a loose connection, reseating the components should resolve it. However, if the problem persists, move on to the next troubleshooting step.
Check the Motherboard
If your computer is not showing any sign of power, it’s crucial to check the motherboard. Follow these steps to inspect the motherboard for any potential issues:
- Switch off the computer and unplug it from the power source.
- Open the computer case to access the internal components.
- Inspect the motherboard for any visible signs of damage, such as burn marks, swollen capacitors, or loose connections. If you notice any issues, it may be necessary to seek professional help or replace the motherboard.
- Check the motherboard’s power connections. Make sure that the main ATX power connector is securely attached to the motherboard.
- Look for the CMOS battery on the motherboard. It is a small silver coin-like battery. Ensure that it is properly seated in its socket. If the battery is old or depleted, consider replacing it with a new one.
- Remove any unnecessary components, such as expansion cards or additional RAM modules, to eliminate the possibility of a faulty component interfering with the motherboard’s functionality.
- Inspect the motherboard’s BIOS/CMOS jumper settings. Refer to the motherboard manual for the proper jumper configuration. Ensure that the jumpers are set correctly.
- Check for any loose screws or debris that may be causing a short circuit on the motherboard. Clean the motherboard if necessary.
- Reassemble the computer, making sure all connections are secure.
- Plug the power cable back into the wall outlet and try turning on your computer.
If the computer still does not show any sign of power after checking the motherboard, it might be necessary to seek professional help or consult the manufacturer for further assistance.
Inspect the CPU
If your computer is not showing any sign of power, it’s worth inspecting the CPU (Central Processing Unit) to ensure it’s functioning properly. Follow these steps to inspect the CPU:
- Switch off the computer and unplug it from the power source.
- Open the computer case to access the internal components.
- Locate the CPU, which is usually covered by a heatsink and fan.
- Inspect the CPU for any visible signs of damage, such as bent pins, burn marks, or discoloration. If you notice any issues, it may be necessary to seek professional help or replace the CPU.
- Check the CPU cooler. Ensure that it is securely attached and making proper contact with the CPU. If it’s loose, tighten the screws or clips to secure it.
- Remove the CPU cooler carefully, following the manufacturer’s instructions, if necessary.
- Check the thermal paste between the CPU and the cooler. If it’s dried out or insufficient, clean it off and apply a fresh, thin layer of thermal paste.
- Carefully reattach the CPU cooler, ensuring it is properly aligned and making good contact with the CPU.
- Reassemble the computer, making sure all connections are secure.
- Plug the power cable back into the wall outlet and try turning on your computer.
If the CPU inspection doesn’t resolve the issue and your computer still shows no sign of power, it’s recommended to seek professional help or consult the CPU manufacturer for further assistance.
Test the RAM
When your computer shows no sign of power, it’s worth considering the possibility of faulty RAM (Random Access Memory). Follow these steps to test the RAM:
- Switch off the computer and unplug it from the power source.
- Open the computer case to access the RAM slots.
- If you have multiple RAM modules installed, try removing one module at a time. Start by removing one module and leaving the other(s) in place.
- Once you’ve removed a RAM module, carefully reinsert it into the same slot, ensuring it is seated firmly and properly aligned.
- Repeat the previous step for each RAM module, testing them one at a time.
- After reseating the RAM module, plug the power cable back into the wall outlet and try turning on your computer. If it powers on successfully, the issue may have been with the RAM module you removed.
- If the computer still does not show any sign of power after testing each RAM module individually, try using a different RAM slot. Move the RAM modules to different slots, ensuring they are securely seated in each slot.
- Continue testing different RAM configurations until you’ve tried each module in each slot to eliminate any issues with the RAM itself or the RAM slots on the motherboard.
If the RAM testing does not resolve the issue and your computer still shows no sign of power, it’s recommended to seek professional help or consult the motherboard manufacturer for further assistance.
Inspect the Graphics Card
If your computer is not showing any sign of power, it’s essential to inspect the graphics card. Follow these steps to inspect the graphics card:
- Switch off the computer and unplug it from the power source.
- Open the computer case to access the internal components.
- Locate the graphics card, which is typically inserted into a PCIe slot on the motherboard.
- Inspect the graphics card for any visible signs of damage, such as burn marks, bent pins, or loose connections. If you notice any issues, it may be necessary to seek professional help or replace the graphics card.
- Check the power connectors on the graphics card. Ensure that they are securely attached to the power supply and properly plugged into the graphics card.
- Gently remove the graphics card from the PCIe slot and reinsert it, ensuring it is seated firmly and properly aligned.
- Double-check that all connections to the graphics card are secure, including any additional power cables.
- Reassemble the computer, making sure all connections are secure.
- Plug the power cable back into the wall outlet and try turning on your computer.
If the graphics card inspection and reinsertion process do not resolve the issue and your computer still shows no sign of power, it’s recommended to seek professional help or consult the graphics card manufacturer for further assistance.
Check the Hard Drive
If your computer is not showing any sign of power, it’s important to check the hard drive. Follow these steps to inspect the hard drive:
- Switch off the computer and unplug it from the power source.
- Open the computer case to access the internal components.
- Locate the hard drive, which is typically mounted in a drive bay.
- Inspect the hard drive for any visible signs of damage, such as physical dents, cracks, or loose connections. If you notice any issues, it may be necessary to seek professional help or replace the hard drive.
- Check the data and power cables connected to the hard drive. Ensure they are securely attached to both the hard drive and the motherboard or power supply.
- Ensure that the SATA or IDE cables are properly seated in their respective connectors.
- If you have a spare SATA or IDE cable, consider replacing the existing one to rule out any cable-related issues.
- Remove the hard drive and reinsert it, ensuring it is properly seated in the drive bay and connected to the appropriate cables.
- Reassemble the computer, making sure all connections are secure.
- Plug the power cable back into the wall outlet and try turning on your computer.
If the hard drive inspection and reconnection process do not resolve the issue and your computer still shows no sign of power, it’s recommended to seek professional help or consult the hard drive manufacturer for further assistance.
Examine the BIOS Battery
When your computer shows no sign of power, it’s worth examining the BIOS battery. The BIOS battery, also known as the CMOS battery, stores important configuration information for your computer. Follow these steps to examine the BIOS battery:
- Switch off the computer and unplug it from the power source.
- Open the computer case to access the internal components.
- Locate the BIOS battery on the motherboard. It is typically a small silver coin-like battery.
- Check the battery for any visible signs of damage, such as leakage or corrosion. If you notice any issues, it is essential to replace the BIOS battery.
- Confirm that the BIOS battery is properly seated in its socket. If it appears loose or incorrectly inserted, carefully remove it and reinsert it firmly.
- If you have a spare BIOS battery, consider replacing the existing one to rule out any battery-related issues.
- Close the computer case.
- Plug the power cable back into the wall outlet and try turning on your computer.
- Upon powering on, enter the BIOS settings and ensure that the date, time, and other settings are correct. If they are not, manually adjust them and save the changes.
If the examination and reseating of the BIOS battery do not resolve the issue and your computer still shows no sign of power, it’s recommended to seek professional help or consult the motherboard manufacturer for further assistance.
Test the CMOS Battery
If your computer is not showing any sign of power, it’s important to test the CMOS battery. The CMOS battery, also known as the BIOS battery, provides power to the CMOS chip, which stores important configuration information for your computer. Follow these steps to test the CMOS battery:
- Switch off the computer and unplug it from the power source.
- Open the computer case to access the internal components.
- Locate the CMOS battery on the motherboard. It is typically a small silver coin-like battery.
- Remove the CMOS battery from its socket. Take note of any labels or markings to ensure you reinstall it correctly.
- Check the voltage of the CMOS battery using a multimeter. Set the multimeter to the DC voltage setting and touch the battery contacts with the multimeter probes. If the voltage reads below the specified range (usually 2.5 to 3 volts), the battery may need to be replaced.
- If you do not have a multimeter, consider replacing the CMOS battery with a new one as a troubleshooting step.
- Wait for a few minutes before reinserting the CMOS battery back into its socket.
- Close the computer case.
- Plug the power cable back into the wall outlet and try turning on your computer.
- Upon powering on, enter the BIOS settings and ensure that the date, time, and other settings are correct. If they are not, manually adjust them and save the changes.
If testing or replacing the CMOS battery does not resolve the issue and your computer still shows no sign of power, it’s recommended to seek professional help or consult the motherboard manufacturer for further assistance.
Seek Professional Help if Needed
If your computer is not showing any sign of power and you have exhausted all the troubleshooting steps, it may be time to seek professional help. Professional technicians have the necessary expertise and tools to diagnose and resolve complex hardware issues. Here are some reasons why seeking professional help is advisable:
- Expertise: Professional technicians are trained to diagnose and troubleshoot a wide range of computer hardware issues. They have in-depth knowledge of various components and can pinpoint the root cause of the problem accurately.
- Specialized Tools: Professionals have access to specialized tools and equipment, which may be required to diagnose and repair certain hardware issues. These tools can help identify intricate problems that may be challenging to detect without the right equipment.
- Warranty Considerations: If your computer is still under warranty, attempting repairs yourself may void the warranty. Seeking professional help ensures that the repairs are performed while maintaining the warranty coverage.
- Time and Efficiency: Professional technicians have experience working with computer hardware and can often diagnose and fix issues more efficiently than someone without specialized knowledge. This can save you a significant amount of time and frustration.
- Guaranteed Repairs: Reputable computer repair shops offer warranties or guarantees on their work. If the issue resurfaces after they have fixed it, they will rectify it at no additional cost.
When seeking professional help, consider reputable computer repair shops or authorized service centers. Always inquire about their experience, certifications, and warranties on their work. This will help ensure that you receive quality service and can trust their expertise in resolving your computer’s power-related issues.