
Backup Your Data
Before initiating a factory reset on your Apple desktop computer, it is crucial to backup all your important data to prevent any loss or irretrievable information. Performing a backup will ensure that your files, documents, photos, and other valuable data are safely stored elsewhere, ready to be restored after the reset process.
Apple provides an easy and efficient backup solution with its integrated Time Machine feature. Time Machine allows you to create a complete backup of your entire system, including all your files, applications, and settings.
To back up your data using Time Machine, follow these steps:
- Connect an external hard drive or storage device to your computer.
- Go to the Apple menu and select “System Preferences.”
- Click on “Time Machine” to open the Time Machine preferences.
- Click on “Select Backup Disk” and choose the external drive you connected.
- Click on “Back Up Automatically” to enable automatic backups.
Once the backup is configured, Time Machine will automatically create periodic backups of your system. It is important to let the backup process complete before proceeding with the factory reset.
While Time Machine offers a convenient backup solution, you can also manually copy your important files to an external drive or use cloud storage services like iCloud or Dropbox to store your data securely.
Remember to double-check that all your important files are successfully backed up and accessible before proceeding with the factory reset. Losing data during a factory reset can be irreversible, so taking the time to perform a proper backup is crucial.
Sign Out of iCloud and iTunes
Before factory resetting your Apple desktop computer, it is important to sign out of your iCloud and iTunes accounts to ensure the smooth transition and protect your personal information. Signing out will disconnect your computer from these services and prevent any unintended access to your data.
To sign out of iCloud and iTunes on your Apple desktop computer, follow these steps:
- Open the Apple menu and select “System Preferences.”
- Click on “iCloud” to open the iCloud preferences.
- Click on “Sign Out” and confirm your decision.
- Next, open iTunes and go to the “Account” tab.
- From the dropdown menu, click on “Sign Out” to log out of your iTunes account.
By signing out of iCloud, you will disassociate your computer from your iCloud account, which includes email, contacts, calendar events, and other iCloud services. Make sure to disable the option to keep a copy of iCloud data on your computer.
Logging out of iTunes will prevent any unauthorized purchases or downloads that might occur during the reset process. It is essential to complete the sign-out process before proceeding to the next steps.
Once you have successfully signed out of both iCloud and iTunes, you can proceed with confidence to the next steps of the factory reset process, knowing that your personal information and online accounts are protected.
Deauthorize Your Computer
Prior to initiating a factory reset on your Apple desktop computer, it is crucial to deauthorize your computer from iTunes. Deauthorizing your computer ensures that it is no longer linked to your iTunes account, preventing any unauthorized access to your purchases and personal information.
To deauthorize your computer from iTunes, follow these steps:
- Open iTunes on your computer and sign in to your iTunes account.
- From the “Account” menu, select “Authorizations” and then click on “Deauthorize This Computer.”
- Enter your Apple ID and password when prompted to confirm the deauthorization.
Deauthorizing your computer removes it from the list of authorized devices linked to your iTunes account. It is important to perform this step before proceeding with the factory reset to prevent any issues with accessing or playing your purchased content in the future.
Note that you can only deauthorize up to five computers per year. If you have already reached the maximum limit, you will need to deauthorize one of your existing devices before authorizing the computer you plan to factory reset.
By deauthorizing your computer, you are taking an essential step to protect your digital content and ensure a smooth transition during the factory reset process. Once your computer is deauthorized, you can proceed confidently to the next steps, knowing that your iTunes account is secure.
Disconnect Peripherals
Before performing a factory reset on your Apple desktop computer, it is important to disconnect all peripherals connected to your computer. Peripherals include devices like printers, external hard drives, monitors, keyboards, mice, and any other external devices that are connected to your computer.
Disconnecting peripherals ensures that they do not interfere with the reset process and helps prevent any potential data loss or damage to the devices.
Follow these steps to disconnect peripherals from your Apple desktop computer:
- Power off your computer and unplug it from the electrical outlet.
- If you have any USB devices connected, unplug them from the USB ports.
- If you have a printer, disconnect the USB or network cable connected to it.
- If you are using an external monitor, unplug its cable from your computer.
- Unplug any other peripherals like external hard drives, keyboards, mice, and speakers.
Removing peripherals before proceeding with the factory reset ensures that the reset process is smooth and without any interruptions. It also protects your peripherals from any potential damage that may occur during the reset process.
Remember to keep all the peripherals safely stored in a secure location until the factory reset is complete. Once the reset process is finished, you can reconnect your peripherals and set them up again with your refreshed system.
By disconnecting peripherals before initiating the factory reset, you are taking a vital step to ensure the integrity of the reset process and protect both your computer and the connected devices.
Restart Your Computer
After completing the necessary preparations for a factory reset on your Apple desktop computer, the next step is to restart your computer. Restarting the computer helps ensure a clean and fresh start before entering the recovery mode for the reset process.
To restart your computer, follow these simple steps:
- Save any ongoing work and close all open applications.
- Click on the Apple menu in the top-left corner of the screen.
- Choose the “Restart” option from the drop-down menu.
- Confirm your decision by clicking on the “Restart” button in the dialog box that appears.
Wait for your computer to shut down and then start up again. It may take a few moments for the restart process to complete.
Restarting the computer helps ensure that any temporary files or processes are stopped, allowing for a fresh start as you enter the recovery mode for the factory reset process. It is important to follow this step before proceeding to the next steps of the reset process.
Once your computer has successfully restarted, you are now ready to enter the recovery mode and begin the factory reset process to restore your computer to its original settings.
By restarting your computer, you are initiating the process of preparing your system for the factory reset. This step ensures a clean and stable foundation before proceeding to the more involved steps of erasing your hard drive and reinstalling macOS.
Enter Recovery Mode
Entering the recovery mode is a crucial step in the factory reset process for your Apple desktop computer. Recovery mode provides a dedicated environment that allows you to perform various system maintenance tasks, including erasing your hard drive and reinstalling macOS.
To enter recovery mode on your Apple desktop computer, follow these steps:
- Shut down your computer completely.
- Press the power button to turn on your computer.
- As soon as you hear the startup sound, press and hold down the Command (⌘) and R keys simultaneously.
- Continue holding the keys until the Apple logo or a spinning globe appears on the screen.
Once you have successfully entered recovery mode, you will be presented with a few options to choose from, including restoring from a Time Machine backup, reinstalling macOS, and more.
Recovery mode offers a range of troubleshooting and maintenance options to help you resolve any software issues, but for the purpose of a factory reset, we will focus on erasing your hard drive and reinstalling macOS.
By entering recovery mode, you are gaining access to the necessary tools and options to perform a factory reset on your Apple desktop computer. It is important to follow the provided steps carefully to ensure a successful reset process and restore your computer to its original state.
Note that entering recovery mode may take a few moments, depending on the computer model and system specifications. Be patient and wait for the recovery mode screen to appear before proceeding to the next steps.
Erase Your Hard Drive
Once you have entered the recovery mode on your Apple desktop computer, the next step in the factory reset process is to erase your hard drive. This step ensures that all your data, files, and applications are removed from the computer, returning it to its original state.
To erase your hard drive, follow these steps:
- From the recovery mode screen, select “Disk Utility” and click on “Continue.”
- In the Disk Utility window, select your main hard drive from the list of available drives.
- Click on the “Erase” tab at the top of the window.
- Provide a name for your hard drive and choose the appropriate format (usually “APFS” or “Mac OS Extended (Journaled)”).
- Click on the “Erase” button and confirm your decision.
Wait for the disk erasing process to complete. This may take some time depending on the size and speed of your hard drive.
Once the erasing process is finished, your hard drive will be completely wiped, and all data will be irretrievable. It is crucial to double-check that you have backed up any important files before proceeding with this step.
By erasing your hard drive, you are ensuring that all your personal information and files are permanently removed from your computer. This step is necessary to achieve a complete factory reset and prepare your computer for the reinstallation of macOS.
Take extra precautions to ensure that you are erasing the correct hard drive and not any external or secondary drives connected to your computer, as this can lead to unintended data loss.
Once the hard drive erasure is successfully completed, you can move on to the next steps of reinstalling macOS and setting up your computer again.
Reinstall macOS
After erasing your hard drive, the next step in the factory reset process for your Apple desktop computer is to reinstall macOS. Reinstalling macOS will restore the operating system to its original state, providing a clean and fresh start for your computer.
To reinstall macOS, follow these steps:
- From the recovery mode screen, select “Reinstall macOS” and click on “Continue.”
- Follow the on-screen instructions to choose your language preferences and agree to the license agreement.
- When prompted, select the destination drive where you want to install macOS.
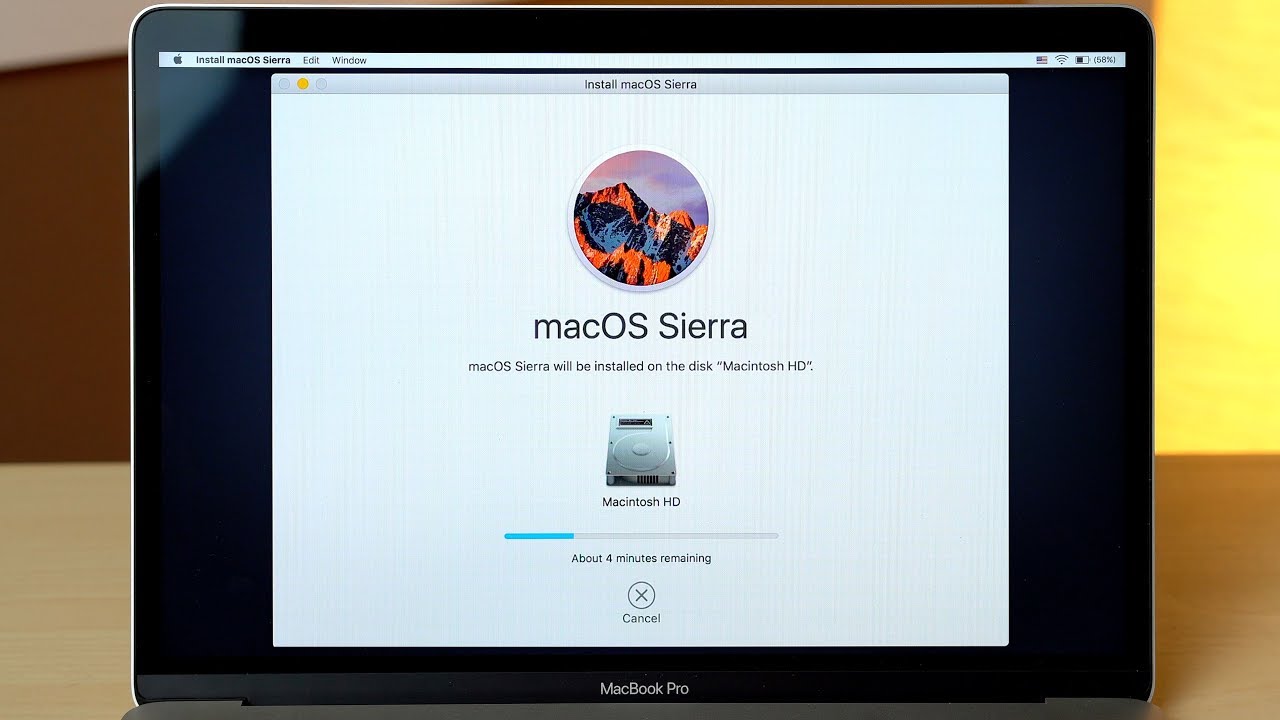
- Click on the “Install” button and wait for the installation process to complete.
The reinstallation process may take some time, depending on the speed of your computer and internet connection. It is important to have a stable internet connection during the installation process.
Once macOS is successfully reinstalled, your computer will be in its factory default state, with all the built-in applications and settings restored.
After the reinstallation, you will be prompted to set up your computer again, including creating a user account, connecting to Wi-Fi, and configuring other preferences.
Make sure to follow the on-screen instructions carefully and set up your computer according to your preferences. You can restore your files and data from your previously created backup or set up your computer as a fresh start, depending on your needs.
By reinstalling macOS, you are returning your computer to its original state and ensuring that the operating system is clean and functioning properly. This final step completes the factory reset process and prepares your Apple desktop computer for a fresh start.
Set Up Your Computer Again
Once you have completed the reinstallation of macOS on your Apple desktop computer, the final step in the factory reset process is to set up your computer again. This involves configuring various settings, establishing a user account, and personalizing your computer according to your preferences.
To set up your computer after a factory reset, follow these steps:
- Follow the on-screen instructions to choose your country or region and select your keyboard layout.
- If you have a stable internet connection, you can choose to connect to Wi-Fi during the setup process. Alternatively, you can skip this step and connect to Wi-Fi later.
- Create a new user account by providing your name and a password. Optionally, you can set up a password hint for added security.
- Agree to the terms and conditions and choose whether you want to enable or disable location services.
- Set up various preferences and options, such as Siri, Appearance, Dark Mode, and more, according to your preferences.
- If you have a Time Machine backup, you can choose to restore your files and settings from the backup.
It is important to take your time during the setup process and carefully choose the settings that suit your needs. This is an opportunity to customize your computer and ensure an optimal user experience.
If you do not have a Time Machine backup, you can start fresh and manually transfer your files and data from your previously created backup or external storage devices.
By setting up your computer again, you are customizing your Apple desktop computer to suit your preferences and needs. Take the time to explore the settings, install necessary applications, and ensure that your computer is ready for use.
Once you have completed the setup process, you can start using your computer again with the confidence that it is refreshed, secure, and ready to serve your computing needs.