
Why Disable McAfee?
McAfee is a popular antivirus software designed to protect your computer from various threats such as malware, viruses, and spyware. However, there are times when you may need to disable or uninstall McAfee temporarily or permanently. Here are a few reasons why you might consider disabling McAfee:
- Performance issues: While McAfee provides excellent protection, it can sometimes slow down your computer’s performance. This is especially true if you have an older system or limited resources. Disabling McAfee may help improve your computer’s speed and responsiveness.
- Conflicts with other programs: In some cases, McAfee may conflict with other software on your computer. This can cause unexpected errors or crashes. If you’re experiencing compatibility issues with certain applications, disabling McAfee temporarily may help resolve the problem.
- Testing alternative security solutions: If you’re considering switching to a different antivirus program, you may want to disable McAfee temporarily to evaluate the performance and effectiveness of the new software. This allows you to make an informed decision based on your specific needs.
- System maintenance or troubleshooting: Sometimes, when performing system maintenance tasks or troubleshooting technical issues, it may be necessary to disable McAfee temporarily. This allows you to identify and isolate any potential conflicts or problems that may arise during these processes.
- Personal choice: Ultimately, disabling or uninstalling McAfee might simply be a personal preference. Some users prefer to rely on alternative security solutions, while others may find that they don’t require antivirus software at all. If you decide that McAfee is not necessary for your specific needs, disabling or uninstalling it can help free up system resources.
Now that we’ve explored the reasons why you may want to disable McAfee, we will discuss the methods to do so in the following sections. Whether you’re looking to temporarily disable McAfee, uninstall it completely, or cancel the auto-renewal subscription, we’ve got you covered.
Method 1: Disabling McAfee Temporarily
If you’re looking to temporarily disable McAfee without uninstalling it, you can follow these steps:
- Step 1: Open the McAfee Security Center: Locate the McAfee icon in the system tray or the notification area of your computer’s taskbar. Right-click on the icon and select “Open McAfee Security Center” from the menu that appears.
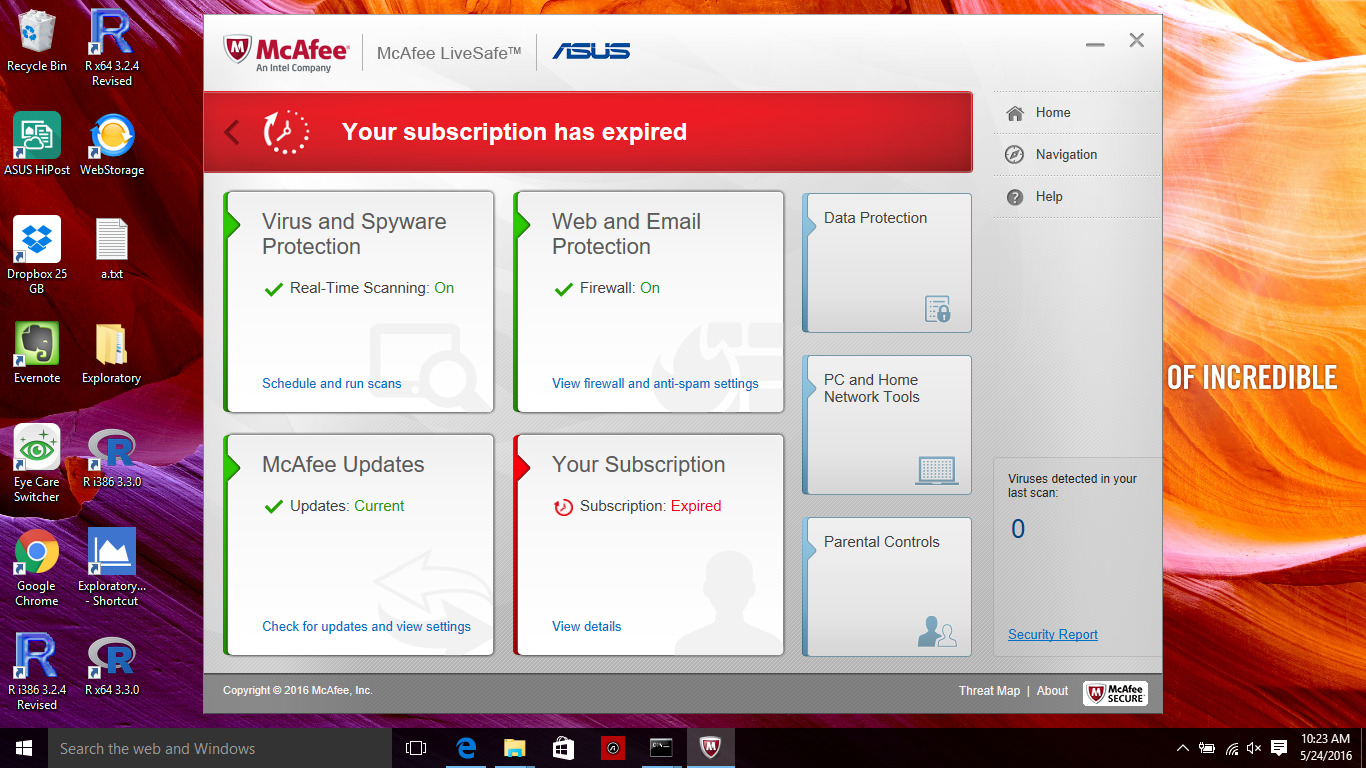
- Step 2: Access the Navigation Center: Once the McAfee Security Center opens, you will see a navigation panel on the left side of the window. Click on the “Navigation” tab to expand it and access the different sections of McAfee.
- Step 3: Disable Real-Time Scanning: In the navigation panel, click on the “Real-Time Scanning” section. You will see the option to turn off real-time scanning. Simply toggle the switch to the “Off” position, which will temporarily disable McAfee’s real-time protection.
- Step 4: Confirm the Disable Action: A pop-up window will appear, asking you to confirm the action. Read the warning message carefully and make sure you understand the potential risks of disabling real-time scanning. Click “Turn Off” to proceed.
- Step 5: Temporarily Disable Firewall (optional): If you also want to disable McAfee’s firewall temporarily, you can do so by accessing the “Firewall” section in the navigation panel and turning it off. However, it’s important to note that disabling your firewall can leave your computer vulnerable to network attacks. Only disable the firewall if you’re in a safe and trusted network environment.
By following these steps, you can temporarily disable McAfee’s real-time scanning and, if necessary, disable the firewall. It’s important to remember that disabling McAfee’s protection should only be done temporarily and in controlled situations. Always ensure that you reactivate McAfee’s real-time scanning and firewall once you have completed the desired task or your computer is no longer at risk.
Method 2: Uninstalling McAfee Completely
If you no longer require McAfee on your computer and want to remove it entirely, you can follow these steps:
- Step 1: Close all McAfee programs: Before uninstalling McAfee, make sure to close all McAfee programs running on your computer. This includes the McAfee Security Center, McAfee VirusScan, and any other McAfee-related processes. You can close these programs by right-clicking on the McAfee icon in the system tray and selecting “Exit” or “Close.”
- Step 2: Open Control Panel: Click on the “Start” menu and open the Control Panel on your computer. You can typically find the Control Panel in the “Windows System” or “Windows Administrative Tools” folder, depending on your operating system version.
- Step 3: Uninstall McAfee: In the Control Panel, navigate to the “Programs” or “Programs and Features” section. Look for an entry that mentions McAfee or McAfee Security, and select it. Click on the “Uninstall” or “Remove” button to start the uninstallation process.
- Step 4: Remove the McAfee folder: After the uninstallation process is complete, it’s a good practice to manually remove any remaining McAfee files and folders. Open the “File Explorer” or “Windows Explorer” and navigate to the following location:
C:\Program Files\orC:\Program Files (x86)\(for 64-bit operating systems).
Look for a folder named “McAfee” or any other McAfee-related folders. Right-click on the folder and select “Delete” to remove it from your computer.
By following these steps, you can uninstall McAfee completely from your computer. It’s important to note that removing McAfee will leave your computer without antivirus protection. Therefore, it’s advisable to have an alternative antivirus program installed before uninstalling McAfee to ensure continuous protection against online threats.
Step 1: Close All McAfee Programs
Before uninstalling McAfee or making any changes to its settings, it is crucial to ensure that all McAfee programs are closed on your computer. This step is necessary to prevent any interruptions or conflicts during the uninstallation process. Here’s how you can close all McAfee programs:
- Step 1.1: Locate the McAfee icon: Look for the McAfee icon in the system tray, which is usually located at the bottom-right corner of your desktop screen. The icon is typically represented by a small “M” or the McAfee logo.
- Step 1.2: Right-click on the McAfee icon: Once you’ve located the McAfee icon, right-click on it to open a context menu.
- Step 1.3: Exit or Close McAfee programs: From the context menu, select the option that allows you to exit or close all McAfee programs. This option may be labeled as “Exit,” “Close,” or a similar term.
- Step 1.4: Confirm the action: Depending on your McAfee version, a confirmation dialog box may appear, asking you to confirm that you want to close all McAfee programs. If prompted, click “Yes” or “OK” to proceed and close the programs.
It is important to ensure that all McAfee programs are closed, including the McAfee Security Center, McAfee VirusScan, and any other McAfee-related processes. Closing these programs will allow you to proceed with the next steps, such as uninstalling McAfee or making any necessary changes to the settings.
By following this step, you will ensure that there are no active McAfee processes running in the background, which could potentially interfere with the uninstallation process or cause conflicts with other programs on your computer. Closing all McAfee programs is a crucial first step to ensure smooth and uninterrupted execution of subsequent actions.
Step 2: Open Control Panel
In order to uninstall McAfee from your computer, you need to access the Control Panel. The Control Panel is a centralized hub that allows you to manage various settings and programs on your Windows computer. Follow these steps to open the Control Panel:
- Step 2.1: Click on the Start menu: Located at the bottom-left corner of your desktop screen, the Start menu is represented by the Windows logo. Click on the Start menu to open it.
- Step 2.2: Open the Control Panel: Within the Start menu, you will find a search bar. Type “Control Panel” into the search bar and press Enter or click on the appropriate search result.
- Step 2.3: Navigate to the Programs section: Once the Control Panel opens, you will see different categories or sections. Look for a section titled “Programs” or “Programs and Features.” Click on this section to continue.
- Step 2.4: Access the Uninstall a Program option: In the Programs section, you will find a link or an option labeled “Uninstall a Program” or “Programs and Features.” Click on this link to open the list of installed programs on your computer.
By following these steps, you will be able to open the Control Panel on your Windows computer and navigate to the Programs section, specifically the Uninstall a Program option. This will allow you to view the list of installed programs and proceed with uninstalling McAfee from your computer.
It’s important to note that the steps to access the Control Panel may vary slightly depending on your version of Windows. However, the general process remains the same. Once you have successfully opened the Control Panel, you can move on to the next step in the uninstallation process.
Step 3: Uninstall McAfee
Once you have accessed the list of installed programs in the Control Panel, you can proceed with uninstalling McAfee from your computer. Follow these steps to uninstall McAfee:
- Step 3.1: Locate McAfee in the list of installed programs: In the Programs and Features or Uninstall a Program section, you will find a list of all the programs installed on your computer. Scroll through the list to find an entry that mentions McAfee, McAfee Security, or any other McAfee-related software.
- Step 3.2: Select McAfee for uninstallation: Click on the McAfee entry to select it. You may need to right-click on the entry and select an option like “Uninstall” or “Remove.”
- Step 3.3: Initiate the uninstallation process: Once you have selected McAfee for uninstallation, click on the “Uninstall” or “Remove” button to initiate the uninstallation process.
- Step 3.4: Follow the on-screen prompts: A McAfee uninstaller window will appear, guiding you through the uninstallation process. Follow the on-screen prompts and carefully read any messages or options that appear. You may be asked to confirm the uninstallation or choose specific components of McAfee to remove.
- Step 3.5: Wait for the uninstallation to complete: The uninstallation process may take a few moments to complete, depending on the size and complexity of McAfee and your computer’s performance. Be patient and let the uninstallation process finish.
- Step 3.6: Restart your computer (if prompted): After the uninstallation is complete, you may see a prompt asking you to restart your computer. It is recommended to restart your computer to ensure that any remaining McAfee files or processes are completely removed.
By following these steps, you will be able to initiate the uninstallation of McAfee from your computer. Make sure to follow the on-screen prompts and read any messages carefully to ensure a successful uninstallation process. Once the process is complete, McAfee will be removed from your computer, freeing up the system resources it was occupying.
Step 4: Remove the McAfee Folder
After uninstalling McAfee from your computer, it is recommended to manually remove any remaining McAfee files and folders to ensure a complete removal. Follow these steps to remove the McAfee folder:
- Step 4.1: Open File Explorer or Windows Explorer: You can open File Explorer or Windows Explorer by pressing the Windows key + E on your keyboard or by double-clicking the folder icon on your taskbar or desktop.
- Step 4.2: Navigate to the Program Files folder: In File Explorer or Windows Explorer, navigate to the following location based on your operating system version:
For 32-bit Windows:C:\Program Files\
For 64-bit Windows:C:\Program Files (x86)\ - Step 4.3: Locate the McAfee folder: Look for a folder named “McAfee” or any other McAfee-related folders in the Program Files directory. Right-click on the McAfee folder and select “Delete” from the context menu to remove it.
- Step 4.4: Empty the Recycle Bin (optional): After deleting the McAfee folder, the files will be moved to the Recycle Bin. To free up disk space, you can right-click on the Recycle Bin icon on your desktop and select “Empty Recycle Bin” to permanently delete these files.
- Step 4.5: Repeat the process for other McAfee-related folders (if any): While the main McAfee folder is typically located in the Program Files directory, there may be additional McAfee-related folders in other locations. If you are aware of any additional folders, navigate to those locations and delete them following the same process.
By following these steps, you will manually remove the McAfee folder and any remaining McAfee-related files from your computer. This ensures that no traces of the software remain and frees up disk space previously occupied by McAfee.
It is important to note that you should only delete the McAfee folder and other McAfee-related folders if you have already uninstalled McAfee from your computer. Deleting these folders without uninstalling McAfee first may cause issues with your computer’s performance or other programs. Always ensure you have uninstalled McAfee before proceeding with the removal of the McAfee folder.
Method 3: Disabling Auto-Renewal
If you have a subscription for McAfee and want to disable the auto-renewal feature to prevent automatic charges, follow these steps:
- Step 1: Open your McAfee account: Launch your web browser and go to the McAfee website. Sign in to your McAfee account using your registered email address and password.
- Step 2: Go to the Account page: Once you are logged in, locate and click on the “My Account” or “Account” tab. This will take you to the account management page.
- Step 3: Navigate to the Auto-Renewal settings: Look for the “Auto-Renewal Settings” or a similar option in your account settings. It may be listed under the “My Profile,” “Billing,” or “Subscription” sections. Click on this option to proceed.
- Step 4: Disable the auto-renewal feature: On the Auto-Renewal settings page, you will see a toggle switch or checkbox labeled “Auto-Renewal” or “Automatic Renewal.” Make sure this option is turned off or unchecked to disable the auto-renewal feature.
- Step 5: Save the changes: After disabling the auto-renewal feature, scroll down to the bottom of the page and look for a “Save” or “Apply” button. Click on this button to save your changes and update the auto-renewal settings for your McAfee subscription.
By following these steps, you can disable the auto-renewal feature for your McAfee subscription. This ensures that your subscription will not be automatically renewed, and you will not be billed for future periods. However, it’s important to note that your McAfee subscription will continue to remain active until its expiration date.
Disabling the auto-renewal feature gives you more control over your subscription and allows you to evaluate your options before deciding whether to renew or switch to a different antivirus solution in the future.
Step 1: Open McAfee Account
In order to disable the auto-renewal feature for your McAfee subscription, you will need to access your McAfee account. Follow these steps to open your McAfee account:
- Step 1.1: Launch your web browser: Open your preferred web browser on your computer.
- Step 1.2: Go to the McAfee website: In the address bar of your web browser, type in the URL for the official McAfee website. It is usually
www.mcafee.com. - Step 1.3: Sign in to your McAfee account: Locate the “Sign In” or “My Account” option on the McAfee website. Click on this option to access the sign-in page.
- Step 1.4: Enter your login credentials: On the sign-in page, enter your registered email address and password that you used to create your McAfee account. If you don’t have an account, you may need to create one by clicking on the “Register” or “Create an Account” option.
- Step 1.5: Access the Account page: Once you have successfully logged in, you will be redirected to your McAfee account dashboard or a similar page. Look for a tab or link labeled “My Account” or “Account” and click on it.
By following these steps, you will be able to access your McAfee account. It is important to note that you must have a valid McAfee account to make any changes to your subscription settings, such as disabling the auto-renewal feature.
If you are unable to access your account or encounter any issues during the sign-in process, you can reach out to McAfee customer support for assistance. They will be able to guide you through the account access process or help resolve any account-related concerns you may have.
Step 2: Cancel Auto-Renewal Subscription
Once you have accessed your McAfee account, you can proceed to cancel the auto-renewal subscription. Follow these steps to cancel the auto-renewal feature for your McAfee subscription:
- Step 2.1: Locate the Subscription or Billing section: Look for a tab or link labeled “Subscription,” “Renewal,” or “Billing” within your McAfee account dashboard. Click on this section to access your subscription details.
- Step 2.2: Review your subscription information: In the Subscription or Billing section, you will find details about your current McAfee subscription, including the expiration date, renewal period, and billing information. Take a moment to review these details to ensure you are cancelling the correct subscription.
- Step 2.3: Cancel the auto-renewal: Look for an option or link that allows you to cancel the auto-renewal feature for your subscription. This option may be labeled as “Cancel Auto-Renewal,” “Disable Auto-Renew,” or a similar term. Click on this option to proceed with cancelling the auto-renewal.
- Step 2.4: Confirm the cancellation: After selecting the option to cancel auto-renewal, a confirmation dialog box or page will appear. It may include information about the consequences of cancelling the auto-renewal, such as losing access to certain features or discounts. Read the information carefully, and if you still wish to proceed, click on the “Confirm” or “Cancel Auto-Renewal” button.
- Step 2.5: Check for confirmation: Once the cancellation is processed, you should receive a confirmation notification or email indicating that the auto-renewal feature has been successfully cancelled. It is recommended to save or keep a record of this confirmation for your reference.
By following these steps, you will be able to cancel the auto-renewal feature for your McAfee subscription. This ensures that your subscription will not be automatically renewed, and you will not be billed for future periods. It’s important to note that cancelling the auto-renewal does not immediately terminate your current subscription, but it prevents it from being renewed automatically at the end of the subscription period.
If you have any concerns or questions about the cancellation process, it is recommended to reach out to McAfee customer support for further assistance. They will be able to provide additional guidance and address any issues you may encounter during the cancellation process.