
What is Mail Merge?
Mail merge is a powerful feature that allows you to create personalized documents, such as letters, envelopes, or labels, by merging information from a data source with a template. It eliminates the need to manually input repetitive information, making it a time-saving tool for businesses, organizations, and individuals.
With mail merge, you can draft one template with placeholders, known as merge fields, and populate them with data from a spreadsheet or database. This data can include names, addresses, contact information, and any other relevant details that you want to customize for each recipient.
Imagine you need to send personalized invitation letters to a hundred people. Rather than manually typing each recipient’s name, address, and other particulars, you can use mail merge to automatically fill in the information from your data source. This not only saves time but also guarantees accuracy and consistency in your correspondence.
Mail merge is incredibly versatile and can be used for a variety of purposes. It is commonly employed in customer relationship management (CRM) to send personalized marketing materials, invoices, order confirmations, and more. Additionally, it is frequently utilized in event management, fundraising campaigns, and mass communication efforts.
By harnessing the power of mail merge, you can streamline your communication processes, improve efficiency, and deliver targeted messages that resonate with your recipients. Whether you are a small business owner, a nonprofit organization, or an individual looking to simplify your document creation, mail merge is an invaluable tool that can greatly enhance your productivity.
Setting up Your Document
Before you begin creating a mail merge, you need to prepare your document in the application of your choice, such as Microsoft Word or Google Docs. Follow these steps to set up your document for a successful mail merge:
- Open a New Document: Start by opening a blank document in your preferred word processing software. This will serve as the template for your merged document.
- Define the Document Type: Determine the type of document you want to create, such as a letter, envelope, or label. This will help you choose the appropriate template and layout.
- Format the Document: Apply any formatting preferences, such as font style, size, and color, to the document. Consider the overall design and branding of your organization for a professional and cohesive look.
- Insert Static Content: Add any static content that will remain the same for all recipients. This may include a company logo, header, footer, or introductory paragraph.
- Leave Space for Merge Fields: Identify the areas in your document that need to be customized for each recipient. These are the spaces where you will insert merge fields. Leave enough space to accommodate the longest expected data.
By setting up your document correctly, you lay the foundation for a successful mail merge process. Following these steps ensures that your template is ready to receive the variable information from your data source. Once your document is properly configured, you can move on to creating a data source, which we will explore in the next section.
Creating a Data Source
In order to merge personalized information into your document, you need to create a data source that contains the relevant data for each recipient. This data source can be a spreadsheet, a database, or even a contact list from your email application. Follow these steps to create a data source:
- Gather Your Data: Collect all the necessary information for your mail merge, such as names, addresses, and any other data points you want to include. Ensure that the data is accurate and up-to-date.
- Create a Spreadsheet: If you don’t already have a data source, open a blank spreadsheet in a program like Microsoft Excel, Google Sheets, or Numbers. Label each column with a descriptive header that corresponds to the type of information it contains.
- Enter Data: Enter the recipient-specific data into the appropriate columns in your spreadsheet. Each row represents an individual recipient, and each column contains a specific data item, such as “First Name,” “Last Name,” or “Email Address.”
- Save Your Data Source: Once you have finished entering the data, save the spreadsheet in a location that is easily accessible. This will be the file you reference during the mail merge process.
It’s important to ensure the accuracy and consistency of your data source. Double-check for any errors or typos, and make sure that the data is properly formatted according to your needs. By organizing your data into a structured source, you’re ready to move on to designing your mail merge document.
Designing Your Template
Once you have set up your document and created a data source, it’s time to design the template for your mail merge. The template serves as the foundation for your merged document and determines how the final output will look for each recipient. Follow these steps to design your template:
- Consider the Purpose: Think about the purpose of your mail merge and the message you want to convey. This will help you determine the overall layout, tone, and style of your template.
- Choose a Template: Depending on the software you’re using, you can either select a pre-designed template or create your own. Templates provide a starting point with pre-defined styles and placeholders.
- Formatting and Styling: Format your template to align with your branding guidelines and the desired aesthetic of the document. Customize fonts, colors, and spacing to create a visually appealing design.
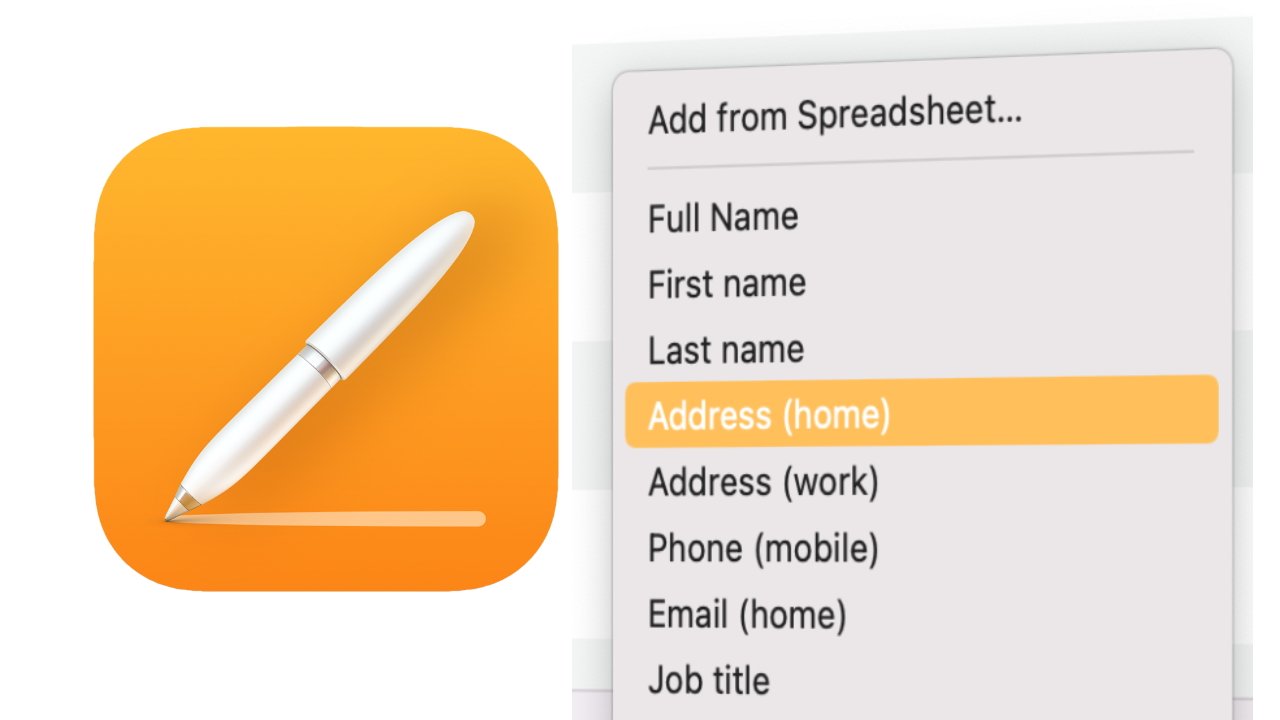
- Add Merge Fields: Identify the areas in the template where you want to insert dynamic content from your data source. These areas are typically marked with merge fields, which act as placeholders for the personalized information.
- Preview and Test: Before proceeding, preview your template to ensure that the merge fields are placed correctly and that the design elements look as intended. Verify that there are no missing or overlapping fields.
As you design your template, keep in mind that simplicity and readability are important factors. Avoid cluttered layouts and excessive use of colors or fonts that may distract from the main message. A clean and professional design will leave a positive impression on your recipients.
Take the time to review and refine your template until you are satisfied with the look and feel. With a well-designed template in place, you’re ready to move on to the next step of the mail merge process, which involves inserting merge fields into your document.
Inserting Merge Fields
Now that you have your template designed, it’s time to insert merge fields into your document. Merge fields act as placeholders that will be replaced with the corresponding data from your data source when you perform the mail merge. Follow these steps to insert merge fields:
- Place the Cursor: Position your cursor in the location where you want to insert a merge field. This could be in the body of the document, the salutation line, or any other area where personalized information is needed.
- Insert a Merge Field: In your word processing software, locate the option to insert merge fields. This is typically found in the “Mailings” or “Insert” menu. Click on the appropriate command to open the merge field dialog box.
- Select the Field: Choose the field you want to insert from your data source. This could be a recipient’s full name, address, company name, or any other data point you collected. Select the field and click “Insert” or a similar button to insert it into your document.
- Continue Inserting Fields: Repeat the process for each merge field you want to include in your document. Be sure to place them in the correct locations and in the desired order.
- Format Merge Fields: Optionally, you can format the merge fields to match the rest of your text. This includes adjusting the font, size, style, or adding bold and italic formatting.
By inserting merge fields into your template, you’re instructing your word processing software to replace these fields with the corresponding data when you perform the mail merge. It’s important to double-check the placement and accuracy of your merge fields to ensure that the merged document appears as expected for each recipient.
Now that you have your merge fields in place, the next step is to preview and edit your merged documents before finalizing and distributing them.
Previewing and Editing
Once you have inserted merge fields into your template, it is crucial to preview and edit your merged documents before generating the final versions. This step allows you to ensure that the personalized information is merged correctly and that the document appears as intended for each recipient. Follow these steps to preview and edit your merged documents:
- Preview Merged Documents: Access the preview or preview merge feature in your mail merge software. This will show you a sample of how the merged document will look for each recipient. Review multiple records to verify that the data is inserted correctly in all cases.
- Check for Errors: Carefully examine the merged documents for any errors or inconsistencies. Pay attention to misspelled names, incorrect data dependencies, or formatting issues. Make corrections as needed in your data source or template.
- Edit Content: If you notice any content that needs adjustment, such as wording or phrasing, make the necessary edits in your template. Keep in mind that these changes will reflect in all merged documents.
- Repeat the Preview/Edit Cycle: Continue previewing and editing until you are confident that the merged documents are accurate, error-free, and visually appealing.
Previewing and editing your merged documents is essential to maintain a professional and error-free communication with your recipients. It allows you to catch any mistakes and make necessary adjustments before distributing the final versions. Take the time to review each merged document and ensure that it accurately reflects the personalized information you want to convey.
Once you are satisfied with the preview and editing process, you are ready to move on to merging your documents, which is the final step in the mail merge process.
Merging Your Document
After you have designed your template, inserted merge fields, and previewed and edited your merged documents, it’s time to merge the data and generate the final versions. Follow these steps to merge your document:
- Initiate the Merge: Locate the option to merge or start the merge process in your word processing software. This is usually found in the “Mailings” or “Merge” menu. Click on the appropriate command to begin.
- Select the Data Source: Specify the data source that contains the recipient information. Choose the correct file or link to the database/spreadsheet you created earlier.
- Map the Fields: If prompted, map the merge fields in your template with the corresponding columns in your data source. This ensures that the correct data is pulled and inserted into each field.
- Preview the Merge: Preview the merged documents once again to see how the final version will look. Ensure that all merge fields are populated with the correct data and that the formatting is consistent.
- Generate Merged Documents: Once you are satisfied with the preview, proceed to generate the merged documents. This action will create individual copies of your template with personalized information for each recipient.
- Save or Print the Merged Documents: Choose whether you want to save the merged documents as separate files or print them directly from the software. Save the files in a location that is easily accessible and organized.
By following these steps, you can confidently merge your document and ensure that each recipient receives a personalized and accurate version. Take your time to review the merged documents once again for any final checks before distributing them to your intended audience.
Congratulations! You have successfully completed the mail merge process and created customized documents efficiently, saving time and effort. With your merged documents ready, you can now proceed to the next step, which involves customizing the merged documents further, if desired.
Customizing Your Merged Documents
Once you have merged your documents, you have the flexibility to further customize them to enhance their visual appeal and deliver a personalized touch to your recipients. Here are some options for customizing your merged documents:
- Add Additional Elements: Consider including additional elements such as images, logos, or relevant graphics to reinforce your brand identity or message. These visual elements can help grab the attention of your recipients.
- Modify Font Styles and Formatting: Adjust the font styles, sizes, and formatting to make the merged documents more visually appealing and aligned with your brand guidelines. Take care to choose fonts that are easy to read.
- Include Conditional Content: Depending on your data source, you may want to customize the content of your merged documents based on certain criteria. For instance, you can include conditional statements to include specific content for particular recipients.
- Personalize Greetings or Closings: Tailor the greetings or closings of your merged documents to make them more personal. You can use merge fields to insert the recipients’ names or other relevant information in these areas.
- Segment Your Audience: If you have several groups of recipients and want to customize the content further, you can segment your data source and create separate merged documents for each segment. This allows you to target specific messages to specific audiences.
- Proofread and Review: Before finalizing your customized merged documents, review them carefully, checking for any spelling or grammatical errors. Ensure that all merge fields are correctly populated and that the layout and formatting appear as intended.
- Distribute Your Merged Documents: Choose the most appropriate method to distribute your customized merged documents to your recipients. This could be through email, printing and mailing, or sharing them electronically via a file-sharing platform.
By taking the time to customize your merged documents, you can create a more engaging and personalized experience for your recipients. It allows you to make a lasting impression, establish a deeper connection, and increase the effectiveness of your communication.
Remember to always maintain a balance between customization and efficiency. While personalization is important, ensure that the process remains manageable and scalable, especially when dealing with large sets of data and multiple recipients.
With your customized merged documents ready, you have successfully utilized the power of mail merge to create personalized and impactful communication materials for your audience.
Troubleshooting Common Issues
While performing a mail merge, you may encounter occasional challenges or errors that require troubleshooting. Here are some common issues that may arise during the mail merge process and tips on how to resolve them:
- Data Formatting Errors: One common issue is data formatting errors that prevent the merge from functioning correctly. Ensure that your data source is properly formatted, with consistent data types, and that there are no extra spaces or characters that may cause conflicts.
- Merge Field Alignment: Sometimes merge fields may not align properly with the desired content in your template. Check that you have correctly inserted the merge fields in the appropriate locations and that the field codes are not accidentally modified or deleted.
- Missing or Incomplete Data: If some merge fields appear empty or incomplete in the merged documents, review your data source to ensure that all the necessary information is present. Double-check for any missing data entries or inconsistencies in the data source file.
- Merge Errors or Incorrect Data: If the merged documents contain errors or incorrect data, review the mapping of the merge fields to the appropriate columns in your data source. Ensure that the fields are correctly linked, and make any necessary adjustments to the mapping.
- Formatting and Layout Issues: In some cases, the formatting and layout of the merged documents may not appear as expected. Check for any formatting inconsistencies in your template, such as incorrect font sizes or styles. Adjust the formatting as needed to ensure a consistent look across all merged documents.
- Large Data Sets and Performance: Working with large data sets may impact the performance of the mail merge. If you experience slow processing speed, consider breaking down the data into smaller segments or optimizing the performance of your software by closing unnecessary applications or processes running in the background.
- Email Delivery and Filtering: When sending merged documents via email, be aware that spam filters or email providers may flag them as potential junk mail. To increase the chances of successful delivery, ensure that your email content is compliant with spam guidelines, include a proper subject line, and monitor the deliverability of your emails.
When troubleshooting these issues, it is essential to have a systematic approach. Start by reviewing your data source, template, and mapping settings. Double-check for any errors or inconsistencies that may disrupt the mail merge process. If needed, consult the documentation or seek support from the software provider or community forums for additional assistance.
By being aware of these common issues and taking proactive measures to address them, you can ensure a smooth and successful mail merge and deliver accurate and personalized documents to your recipients.