
Importing a Google Calendar
Importing a Google Calendar allows you to bring events from another calendar into your Google account. This is useful when you want to consolidate multiple calendars or when you want to include events from a shared calendar in your own calendar. Here are a few methods you can use to import a Google Calendar.
- Option 1: Importing events from another calendar: If you have events in another calendar program or platform, such as Outlook or Apple Calendar, you can export the events as a file and then import that file into your Google Calendar. The specific steps may vary depending on the program you are using, but generally, you’ll need to export the events as an .ics or .csv file, then go to your Google Calendar settings and choose the “Import” option to upload the file. Google Calendar will automatically add the events to your calendar.
- Option 2: Sharing a Google Calendar: If the calendar you want to import is a Google Calendar and is shared with you, you can add it to your own Google Calendar without importing it. Simply go to the “Other calendars” section in your Google Calendar settings and click on “Add a friend’s calendar.” Enter the email address associated with the shared calendar, and it will be added to your calendar view. You can choose to show or hide this calendar as needed.
- Option 3: Using third-party tools or apps: There are several tools and apps available that can help you copy or import a Google Calendar. These tools often provide additional features and customization options. To use this method, you’ll need to research and choose a reliable tool or app that suits your needs.
No matter which option you choose, it’s important to review the imported calendar or events to ensure everything is accurate and complete. Double-check the dates, times, locations, and any other details to avoid any confusion or conflicts. Adjust any settings or permissions as necessary to align with your preferences.
By importing a Google Calendar, you can merge multiple calendars into one and have all your events conveniently accessible from a single account. This saves you time and effort in managing and tracking various schedules. Choose the method that works best for you, and enjoy the benefits of an organized and synchronized calendar.
Copying a Google Calendar
If you want to create a duplicate or make a copy of an existing Google Calendar, there are a few methods you can use. Copying a Google Calendar can be helpful when you want to preserve the original calendar while making modifications or customizations to the copied version. Here are some options to copy a Google Calendar:
- Option 1: Importing events from another calendar: This method is similar to the first option in the previous section, but instead of importing events from an external calendar, you will export and import events within a Google Calendar. First, export the events from the original calendar as an .ics or .csv file. Then, create a new Google Calendar and import the exported file into the new calendar. This will copy all the events from the original calendar to the new one.
- Option 2: Sharing a Google Calendar: If the calendar you want to copy is shared with you, you can add it to your own Google Calendar without importing it. This will create a separate copy of the shared calendar under your account. Go to the “Other calendars” section in your Google Calendar settings and click on “Add a friend’s calendar.” Enter the email address associated with the shared calendar, and it will be added as a separate calendar in your account.
- Option 3: Using third-party tools or apps: Just like importing, there are third-party tools and apps available that can help you copy a Google Calendar. These tools often offer additional features and customization options. Research and choose a reliable tool or app that allows you to copy a Google Calendar. Follow the provided instructions to make a duplicate of the calendar you wish to copy.
After copying the Google Calendar, it’s important to review the copied calendar to ensure that all events and settings have been accurately duplicated. Check the dates, times, participants, and any specific details to ensure everything is correct. This step will help you avoid any confusion or discrepancies between the original calendar and the copied version.
By copying a Google Calendar, you can preserve the integrity of the original while making modifications and customizations to the copied version. This allows you to have multiple calendars with different settings or share specific copies with different individuals or groups. Choose the method that suits your needs and keep your schedules organized in multiple copies of your Google Calendar.
Option 1: Importing events from another calendar
One of the ways to copy or import events from another calendar into your Google Calendar is by using the “Import” feature. This method is useful if you have events in another calendar program or platform, such as Outlook or Apple Calendar, that you want to bring into your Google account.
To begin, you’ll need to export the events from the original calendar as a file, usually in the .ics or .csv format. The steps for exporting events may vary depending on the program you are using. Generally, you can look for an “Export” or “Save As” option in the calendar program and choose the desired file format.
Once you have exported the events, follow these steps to import them into your Google Calendar:
- Open your Google Calendar on a web browser and log into your Google account.
- In the left sidebar, find the “Other calendars” section and click on the “+” button next to it. Choose the “Import” option from the menu that appears.
- A file upload dialog box will open. Click on the “Select file from your computer” button and navigate to the exported calendar file. Select the file and click “Open” to begin the import process.
- In the next window, you can customize the settings for the imported events. For example, you can choose which calendar to import the events into, specify a time zone, or choose to import recurring events. Once you have made your selections, click on the “Import” button.
- Google Calendar will process the imported file and add the events to your calendar. Depending on the size of the file and the number of events, this may take a few seconds to several minutes.
- Once the import is complete, you will see a confirmation message. Click “Close” to finish the process.
After importing the events, it is essential to review them in your Google Calendar to ensure that everything is accurately imported. Double-check the dates, times, locations, and any other event details to avoid any discrepancies. You can make adjustments or modifications to the imported events as needed to align them with your preferences.
By using the “Import” feature, you can easily bring events from another calendar program or platform into your Google Calendar. This streamlines the process of consolidating multiple calendars and ensures that all your events are accessible from a single account.
Option 2: Sharing a Google Calendar
Sharing a Google Calendar allows you to add a calendar that has already been created by someone else and have it displayed alongside your own calendars. This option is useful when you want to copy a Google Calendar that is shared with you without importing it.
To share and add a Google Calendar to your own account, follow these steps:
- Open your Google Calendar on a web browser and log into your Google account.
- In the left sidebar, find the “Other calendars” section and click on the “+” button next to it. Choose the “Add a friend’s calendar” option from the menu that appears.
- A dialog box will open, prompting you to enter the email address associated with the shared calendar you want to add. Type in the email address and click “Add” to proceed.
- The shared calendar will now be added as a separate calendar in your account. You will be able to view and manage its events alongside your own calendars.
- To show or hide the shared calendar, simply check or uncheck the box next to its name in the “Other calendars” section of your Google Calendar.
When you share a Google Calendar, any updates or changes made by the owner of the calendar will be automatically reflected in the shared version. This allows you to stay up-to-date with any modifications, additions, or deletions made to the calendar.
By adding a shared Google Calendar, you can effectively copy it without the need for importing or duplicating events. This option is particularly useful when you want to include events from a shared calendar in your own calendar, without altering the original calendar in any way.
Remember to respect the permissions and privacy settings associated with the shared calendar. The owner of the calendar may have specified certain access restrictions or limitations. Be mindful of these settings when adding and using the shared calendar to ensure you comply with the owner’s intentions.
Step 1: Exporting the calendar you want to copy
Before you can copy a Google Calendar, you will need to export the calendar you wish to duplicate. This step allows you to create a file containing all the events and details from the original calendar. Here’s how you can export a Google Calendar:
- Open your Google Calendar on a web browser and log into your Google account.
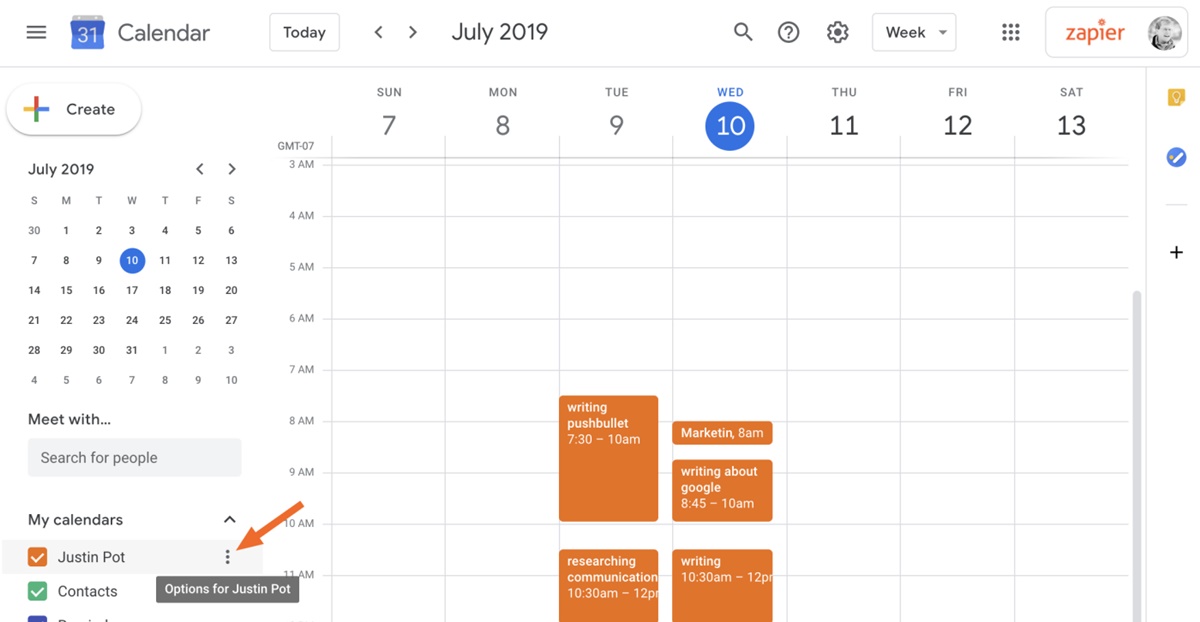
- In the left sidebar, find the “My calendars” section and locate the calendar you want to copy.
- Hover over the calendar name and click on the three-dot icon that appears.
- A dropdown menu will appear. Select the “Settings and sharing” option.
- In the settings panel that opens, scroll down until you see the “Export calendar” section.
- Click on the “Export” button to proceed with exporting the calendar.
- A file will be generated containing your calendar data. You may be prompted to choose a location on your computer to save the file.
- Depending on the size of your calendar and the number of events, it may take a few moments to generate the export file.
- After the export is complete, the calendar file will be saved on your computer in a format like .ics or .csv.
Once you have exported the calendar, you can proceed to the next step of copying the Google Calendar. The exported file contains all the event data, including dates, times, descriptions, and any other relevant information.
It’s important to note that the export file does not include any recurring events, reminders, or notifications. If you have any recurring events in your calendar, you will need to manually recreate them in the copied calendar.
By exporting the calendar you wish to duplicate, you will have a file containing all the necessary information to create a replica of the original calendar. This exported file is a crucial component in the process of copying a Google Calendar.
Step 2: Importing the exported calendar file
Once you have exported the calendar you want to copy, the next step is to import the exported calendar file into your Google Calendar. This process allows you to recreate the events and details from the original calendar in a new or existing Google Calendar. Here’s how you can import the exported calendar file:
- Open your Google Calendar on a web browser and log into your Google account.
- In the left sidebar, find the “Other calendars” section and click on the “+” button next to it. Choose the “Import” option from the menu that appears.
- A file upload dialog box will open. Click on the “Select file from your computer” button and navigate to the exported calendar file that you saved in the previous step.
- Select the exported calendar file and click “Open” to begin the import process.
- In the next window, you may have the option to choose the calendar where you want to import the events. If you want to create a new calendar, select the “Create new calendar” option and enter a name for the new calendar. If you want to import the events into an existing calendar, choose that calendar from the dropdown menu.
- Review the import options, such as whether you want to import reminders or ignore duplicate events, and make any necessary selections.
- Once you are satisfied with the import settings, click on the “Import” button to begin the import process.
- Google Calendar will process the imported file and add the events to the selected calendar. Depending on the size of the file and the number of events, this may take a few seconds to several minutes.
- After the import is complete, you will see a confirmation message. Click “Close” to finish the process.
Once the calendar file has been successfully imported, all the events and details from the exported calendar will be recreated in your Google Calendar. Double-check the imported events to ensure that everything is accurate and complete. Pay attention to dates, times, locations, and any specific details to avoid discrepancies or errors.
By importing the exported calendar file, you can easily recreate the events in a new or existing Google Calendar. This allows you to have a duplicate copy of the original calendar, making it easier to manage and customize your schedules.
Step 3: Verifying the imported calendar
After importing the exported calendar file into your Google Calendar, it is crucial to verify the imported calendar to ensure that all the events and details have been accurately transferred. This step helps avoid any discrepancies or missing information. Follow these steps to verify the imported calendar:
- Open your Google Calendar on a web browser and log into your Google account.
- In the left sidebar or the “My calendars” section, locate the calendar where you imported the events. Click on its name to display the calendar’s events.
- Go through the imported events one by one and verify that the dates, times, locations, and any other details are correct. Pay close attention to any recurring events or events with specific exceptions.
- If you notice any discrepancies or missing information, double-check the original calendar file that you exported. Ensure that all the necessary details were included in the exported file.
- If the imported calendar contains recurring events, review them to ensure that the recurrence pattern is accurate and identical to the original calendar. Make any necessary adjustments or corrections to ensure the recurring events are correctly set up.
- If the imported calendar had any event reminders or notifications, verify that they have been imported correctly and are set up as desired.
Verifying the imported calendar is an essential step to ensure that the events and details from the original calendar have been successfully replicated in the imported version. It is crucial to double-check all the essential elements, such as dates, times, locations, and recurring events.
If you discover any discrepancies or errors during the verification process, you may need to go back and troubleshoot the import process. Make sure that you followed the correct steps and that the original calendar file contains all the necessary information.
By verifying the imported calendar, you can ensure the accuracy and completeness of the duplicate calendar. This helps to maintain an organized and reliable schedule that reflects the events and details from the original calendar.
Step 4: Adjusting settings and permissions
Once you have imported and verified the copied calendar, it’s important to adjust the settings and permissions to align them with your preferences. This step allows you to customize the copied calendar and manage its visibility and access. Follow these steps to adjust the settings and permissions for your imported calendar:
- Open your Google Calendar on a web browser and log into your Google account.
- In the left sidebar or the “My calendars” section, locate the copied calendar that you want to adjust. Hover over its name and click on the three-dot icon that appears.
- From the dropdown menu, select the “Settings and sharing” option.
- In the settings panel that opens, you will find various options to customize the copied calendar.
- Calendar Name: If you want to change the name of the copied calendar, you can do so in the “Calendar name” field.
- Calendar Color: You can customize the color of the copied calendar to make it easily distinguishable from other calendars. Select the desired color from the available options.
- Access Permissions: Choose whether you want to keep the copied calendar private, make it public, or share it with specific individuals or groups. Adjust the access permissions according to your preferences.
- Event Notifications: Set up event notifications and reminders for the copied calendar, ensuring that you receive timely reminders for important events.
- Other Settings: Depending on your needs, you may find additional settings such as time zone, language, working hours, and more. Adjust these settings as required.
- Once you have made the necessary adjustments and updates, click on the applicable buttons to save the changes.
By adjusting the settings and permissions, you can tailor the copied calendar to your preferences. This includes customizing the name and color, managing access permissions, and setting up event notifications to suit your needs.
It’s important to review the permissions for the copied calendar and ensure that it is shared or kept private according to your intentions. If you have shared the original calendar with others, you may need to manually adjust the permissions for the copied calendar to match the original settings.
Take the time to explore the different settings and options available to customize the copied calendar. This will help you organize and manage your schedules effectively while maintaining control over the visibility and access to the calendar.
Option 3: Using third-party tools or apps
Another option to copy or import a Google Calendar is by utilizing third-party tools or apps that are specifically designed for this purpose. These tools often provide additional features and customization options, making the process more efficient and tailored to your needs. Here’s how you can use third-party tools or apps to copy a Google Calendar:
- Step 1: Researching available tools or apps: Start by researching and exploring the various tools or apps that are available for copying or importing Google Calendars. Look for popular and reputable options that have positive reviews and ratings. Consider the features, ease of use, and compatibility with your device or operating system.
- Step 2: Installing and setting up the chosen tool or app: Once you have identified a suitable tool or app, follow the instructions provided by the developer to download and install it on your device. Complete the setup process, which may involve linking the app to your Google account or granting necessary permissions.
- Step 3: Copying or importing the Google Calendar: Use the features and functions provided by the tool or app to copy or import the Google Calendar. The specific steps may vary depending on the chosen tool, but typically involve selecting the source calendar, specifying the target calendar, and initiating the copying or importing process. Follow the prompts and instructions provided by the tool or app to complete the process.
- Step 4: Checking the copied/imported calendar for accuracy and completeness: After the copying or importing process is complete, ensure you review the copied or imported calendar to verify that all the events, details, and settings have been accurately transferred. Double-check dates, times, locations, recurring events, and any specific customization options you had in the original calendar.
Using third-party tools or apps can provide a streamlined and efficient way to copy or import Google Calendars. These tools often offer advanced features and automation options, saving you time and effort in the process.
It is important to research and choose a reputable tool or app, as well as follow the provided instructions carefully. Ensure that the tool or app you select is compatible with your device and meets your specific requirements for copying or importing a Google Calendar.
By utilizing third-party tools or apps, you can simplify the process of copying or importing Google Calendars, taking advantage of additional features to enhance the customization and management of your calendars.
Step 1: Researching available tools or apps
When it comes to copying or importing a Google Calendar, one option to consider is using third-party tools or apps. These external solutions offer specialized functionality and convenience, making the process more efficient and customized to your needs. Here’s how you can begin researching and identifying the available tools or apps:
- Start by conducting thorough research on the internet to discover the various tools or apps specifically designed for copying or importing Google Calendars. Look for popular choices that have positive reviews and ratings from users. Pay close attention to the features offered and whether they align with your requirements.
- Visit reputable app marketplaces such as Google Play Store or Apple App Store, and search for calendar-related apps that provide the copying or importing functionality. Read through the app descriptions, reviews, and ratings to gauge their suitability.
- Explore online forums, communities, and social media platforms where discussions related to Google Calendar management take place. Engage with users who have experience with copying or importing calendars and inquire about the tools or apps they have used and recommend.
- Consider seeking recommendations from colleagues, friends, or family members who have previously engaged in similar calendar management tasks. Their firsthand experiences and feedback about specific tools or apps can be valuable in guiding your decision.
- Pay attention to the developer or company reputation. Look for established providers known for creating reliable and secure tools or apps. Visit their websites, read about their expertise, and ensure their products are well-maintained and regularly updated.
- Take note of any additional features and functionalities offered by the tools or apps. Assess whether these align with your specific needs. For instance, you may want features such as automatic syncing, advanced event management, or integration with other platforms.
- Consider the compatibility of the tools or apps with your device and operating system. Verify whether they are available for your smartphone, tablet, or computer. Check the system requirements to ensure smooth performance.
- Compare the pricing models, as some tools or apps may require a one-time payment, while others may have subscription plans. Evaluate the costs in line with your budget and the value the tool or app provides.
By conducting thorough research and exploring the available tools or apps, you can gather valuable insights that will facilitate your decision-making process. Assessing features, user feedback, and compatibility will help you identify the most suitable tool or app for copying or importing Google Calendars.
Step 2: Installing and setting up the chosen tool or app
After researching and selecting a suitable tool or app for copying or importing a Google Calendar, the next step is to install and set up the chosen solution. This involves downloading the tool or app onto your device and configuring it to work with your Google account. Follow these steps to install and set up the tool or app:
- Visit the official website or app marketplace for the chosen tool or app. Look for the appropriate download or installation option based on your device’s operating system (e.g., Android, iOS, Windows, macOS).
- Click on the provided download link or button to initiate the download process. If required, follow the prompts and grant any necessary permissions for the download to proceed.
- Once the download is complete, locate the installation file on your device. The file is typically stored in your Downloads folder or in the location specified during the download process.
- Double-click or tap on the installation file to begin the installation process. Follow the on-screen prompts and instructions provided by the installer to install the tool or app onto your device.
- After the installation is complete, launch the tool or app. You may be prompted to sign in or create an account if it’s your first time using the tool or app. Follow the instructions to set up an account and link it to your Google account.
- Once you have signed in or completed the account setup process, navigate to the settings or preferences section in the tool or app. Look for options related to connecting or integrating with Google Calendar.
- Follow the provided instructions to link the tool or app to your Google account. This typically involves granting necessary permissions for the tool or app to access your Google Calendar data.
- Once the integration is complete, you may be able to customize various settings and preferences for the tool or app. Explore the available options and configure them as desired to enhance your experience with the tool or app.
- Ensure that you save any changes or settings you have modified within the tool or app.
By following the installation and setup steps provided by the chosen tool or app, you can establish the necessary connection between the tool or app and your Google Calendar account. This will enable the subsequent steps of copying or importing the desired calendar events.
Remember to keep the tool or app updated with the latest versions to ensure compatibility and access to any new features or enhancements.
Step 3: Copying or importing the Google Calendar
Once you have installed and set up the chosen tool or app for copying or importing a Google Calendar, you can proceed with the actual process of copying or importing the calendar. Follow these steps to copy or import the Google Calendar using the tool or app:
- Launch the installed tool or app on your device.
- Sign in to the tool or app using your account credentials, if prompted.
- Within the tool or app, locate the option to copy or import a Google Calendar. This option may vary depending on the specific tool or app you have chosen.
- Follow the provided instructions or prompts to select the source calendar that you want to copy or import.
- Choose the destination or target calendar where you want to copy or import the events. This may be an existing calendar on your Google account or a new calendar that you create within the tool or app.
- Specify any additional settings or preferences for the copying or importing process, such as selecting specific date ranges, excluding certain event types, or customizing event details.
- Initiate the copying or importing process by clicking on the appropriate button or option within the tool or app.
- Allow the tool or app to transfer the events from the source calendar to the destination calendar. The time this process takes may vary depending on the number of events and the complexity of the data being copied or imported.
- Once the copying or importing process is complete, review the copied or imported events in the destination calendar to ensure accuracy and completeness. Double-check the dates, times, descriptions, and any other event details.
It is important to note that the actual steps for copying or importing a Google Calendar may vary depending on the tool or app you choose. Therefore, it is essential to closely follow the instructions provided by the tool or app developer.
By utilizing the chosen tool or app, you can streamline the process of copying or importing a Google Calendar, saving time and effort while ensuring the accurate transfer of event data.
Step 4: Checking the copied/imported calendar for accuracy and completeness
After copying or importing a Google Calendar using the chosen tool or app, it’s critical to thoroughly check the copied or imported calendar for accuracy and completeness. This step ensures that all events, details, and settings have been accurately transferred. Here’s how you can check the copied or imported calendar:
- Open your Google Calendar on a web browser or through your calendar app.
- Locate the calendar that you copied or imported using the tool or app. It should now be visible alongside your other calendars.
- Review each event in the copied or imported calendar one by one. Double-check the dates, times, locations, descriptions, and any other relevant details. Pay special attention to any recurring events or events with specific exceptions.
- Verify that the copied or imported calendar reflects any settings or preferences that you had applied in the original calendar. This includes customizations like event colors, reminders, notifications, and any specific calendar sharing or access permissions.
- If you notice any discrepancies or missing information, refer back to the original calendar to ensure that all necessary details were included in the copying or importing process.
- Make any necessary adjustments or modifications to the events or settings in the copied or imported calendar. This could involve correcting errors, updating event details, or applying specific preferences.
- Consider sharing the copied or imported calendar with relevant individuals or groups, especially if it was originally a shared calendar or if you want certain people to access the events in the copied calendar.
- Take note of any further actions that need to be taken following the copying or importing process, such as syncing the copied or imported calendar with other devices or applications.
Thoroughly checking the copied or imported calendar is crucial to ensure the accuracy and completeness of the transferred event data. By carefully reviewing each event and verifying the settings, you can address any discrepancies or errors, thereby ensuring the reliability of the newly created calendar.
Remember that the checking process may involve making further adjustments or modifications to the copied or imported calendar. Take the time to customize the calendar to your preferences and requirements, ensuring that it aligns with your desired organization and management of events.