
What You’ll Need
To connect your Nest Thermostat to a new account, you’ll need the following:
- A compatible Nest Thermostat
- A smartphone or tablet with the Nest app installed
- A stable Wi-Fi connection
- The username and password of your home Wi-Fi network
The Nest Thermostat is compatible with most heating and cooling systems, including gas, electric, and oil-based systems. However, it’s always a good idea to check the Nest website or consult the thermostat’s installation guide to ensure compatibility with your specific system.
Having a smartphone or tablet with the Nest app installed is crucial for the setup process. The Nest app allows you to control and monitor your thermostat remotely, adjust temperature settings, and receive important alerts and notifications.
Make sure you have a stable Wi-Fi connection in your home. The Nest Thermostat relies on Wi-Fi to connect to the Nest app and communicate with your other smart devices. If your Wi-Fi signal is weak or unreliable, it may cause connectivity issues and hinder the performance of your thermostat.
You will also need the username and password of your home Wi-Fi network. During the setup process, you’ll be prompted to enter this information to allow the thermostat to connect to your network and gain internet access.
Once you have gathered all these essentials, you’ll be ready to power up your Nest Thermostat and begin the setup process.
Step 1: Power Up the Thermostat
The first step in connecting your Nest Thermostat to a new account is to power it up. Follow these steps:
- Locate the power cable: Depending on your system, you may need to locate the power cable connected to your old thermostat. This cable is usually labeled as “Rh” or “Rc” and supplies power to the thermostat.
- Turn off the power: Before disconnecting the old thermostat, ensure that the power to your HVAC system is turned off. This can typically be done by switching off the circuit breaker that controls the system.
- Disconnect the old thermostat: Once the power is off, carefully remove the old thermostat from the wall. Take note of how the wires are connected so you can easily reconnect them later.
- Connect the Nest Thermostat: Take the Nest Thermostat and connect the wires from your HVAC system to the corresponding terminals on the thermostat. If you’re unsure about which wire goes where, refer to the Nest app or consult the installation manual.
- Mount the thermostat: After connecting the wires, securely mount the Nest Thermostat onto the wall using the included screws and mounting plate.
- Turn on the power: With the thermostat mounted, turn the power back on by flipping the circuit breaker. The thermostat should power up and display a welcome message or the Nest logo.
Once the thermostat is powered up, you’re ready to move on to the next step of the setup process.
Step 2: Download the Nest App
Now that you’ve powered up your Nest Thermostat, the next step is to download the Nest app. Follow these instructions:
- Open your device’s app store: Whether you have an iPhone or an Android device, open the respective app store (App Store for iOS or Google Play Store for Android) on your smartphone or tablet.
- Search for the Nest app: In the app store, search for “Nest” using the search bar at the top of the screen.
- Select and download the Nest app: From the search results, tap on the official Nest app developed by Nest Labs, Inc., and proceed to download and install it on your device.
- Launch the Nest app: Once the installation is complete, locate the Nest app icon on your device’s home screen or app drawer and tap on it to launch the app.
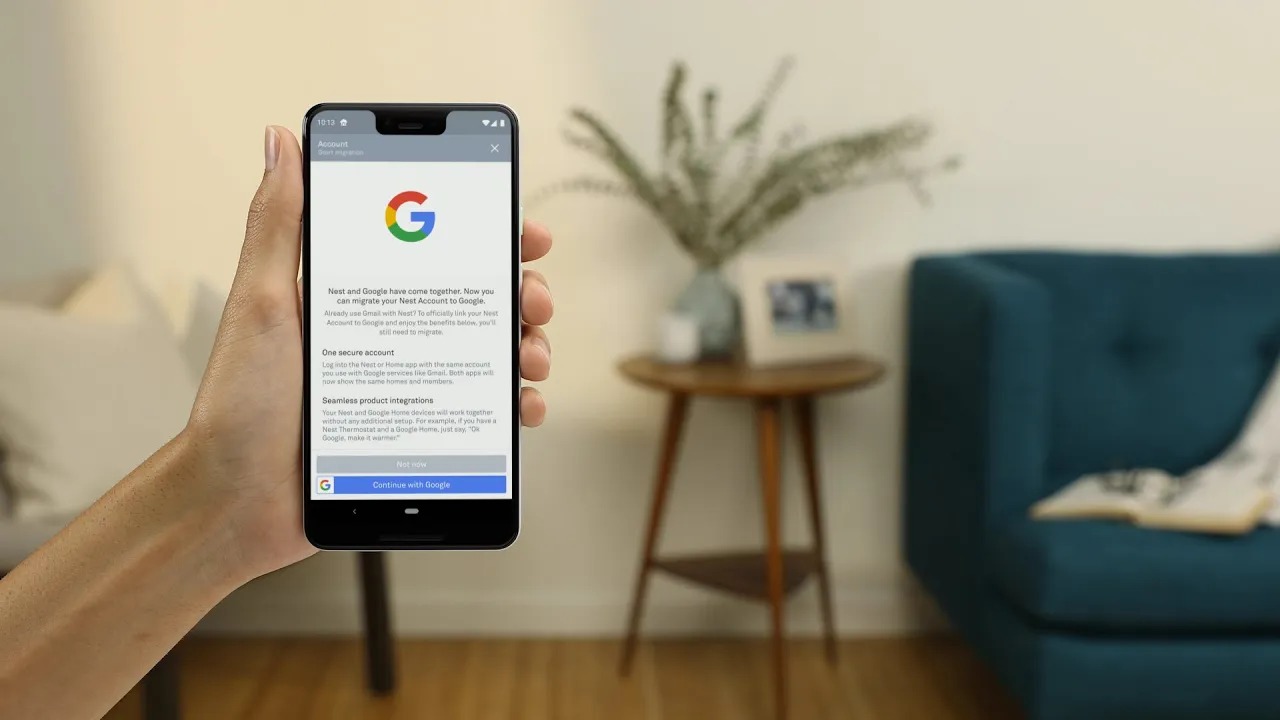
- Sign in or create a new account: If you already have a Nest account, sign in using your existing credentials. Otherwise, tap on “Create Account” to set up a new Nest account.
- Follow the on-screen prompts: The Nest app will guide you through the process of connecting your thermostat to your account. Make sure to follow the instructions carefully and provide any necessary information, such as your location and email address.
Once you have successfully downloaded and launched the Nest app and signed in to your account, you’re one step closer to connecting your Nest Thermostat to your new account.
Step 3: Create a New Nest Account
In order to connect your Nest Thermostat to a new account, you’ll need to create a Nest account. Follow these steps to create a new account:
- Launch the Nest app: Open the Nest app on your smartphone or tablet. If you haven’t already downloaded the app, refer to the previous step for instructions.
- Tap on “Create Account”: On the Nest app’s login screen, tap on the “Create Account” button.
- Provide your email and password: Enter your email address and create a secure password for your Nest account. Make sure to choose a password that is strong and not easily guessable.
- Verify your email: After entering your email and password, Nest will send a verification email to the provided address. Go to your email inbox, open the email from Nest, and click on the verification link to confirm your email address.
- Agree to the terms of service: Read and agree to Nest’s terms of service and privacy policy by checking the boxes provided.
- Enter your location: Nest may ask for your location information to provide you with accurate weather data and energy-saving recommendations. Enter your location details as prompted.
- Set up two-factor authentication (optional): For added security, Nest offers the option to enable two-factor authentication. If you wish to enable this feature, follow the on-screen instructions to set it up.
- Complete the account creation: Once you’ve provided all the necessary information, tap on “Create Account” or “Finish” to complete the account creation process.
After successfully creating your Nest account, you’ll be able to proceed to the next step of connecting your Nest Thermostat to your new account.
Step 4: Connect the Thermostat to Wi-Fi
Now that you have created a new Nest account, it’s time to connect your thermostat to Wi-Fi. Follow these steps to ensure a successful connection:
- Open the Nest app: Launch the Nest app on your smartphone or tablet if it’s not already open.
- Tap on the “+” sign: Look for the “+” sign or the “Add product” button within the app and tap on it to start the thermostat setup process.
- Select your product: From the list of Nest products, choose the Nest Thermostat.
- Scan the QR code: Your Nest Thermostat will have a unique QR code located on the back. Open your device’s camera and scan the QR code to automatically detect your thermostat.
- Select your Wi-Fi network: On the app screen, choose your home Wi-Fi network from the list of available networks.
- Enter the Wi-Fi password: If your Wi-Fi network is password-protected, enter the password when prompted. Double-check that you enter it correctly to avoid any connectivity issues.
- Wait for the connection: The Nest Thermostat will attempt to connect to your Wi-Fi network. This process may take a few moments, so be patient and ensure that your device remains within range of your Wi-Fi router.
- Verify the connection: Once the thermostat successfully connects to Wi-Fi, the Nest app will display a confirmation message. You’ll now be able to control your thermostat remotely and access its features through the app.
With your Nest Thermostat connected to Wi-Fi, you can now move on to the next step of the setup process and start customizing your thermostat’s settings.
Step 5: Set Up the Thermostat
Now that your Nest Thermostat is connected to Wi-Fi, it’s time to set it up and configure its settings. Follow these steps to ensure a smooth setup process:
- Name your thermostat: Within the Nest app, you’ll be prompted to give your thermostat a name. Choose a descriptive name that will help you identify it easily, such as “Living Room” or “Bedroom”.
- Select your HVAC system: The app will ask you to specify the type of heating and cooling system you have in your home. Select the appropriate option from the list provided, such as “Gas”, “Electric”, or “Oil”. If you’re unsure about your system type, consult the thermostat’s installation guide or a professional.
- Set up temperature preferences: Next, you’ll be asked to set your preferred temperature range for both heating and cooling. Adjust the temperature sliders according to your comfort preferences.
- Enable Eco Mode (optional): Eco Mode helps you save energy by automatically adjusting your thermostat’s settings when you’re away from home. If you wish to enable this feature, follow the on-screen instructions to set it up.
- Set up scheduling (optional): The Nest Thermostat allows you to create a customized schedule for heating and cooling your home. If you’d like to take advantage of this feature, follow the prompts to set up your desired schedule.
- Review and confirm settings: Once you’ve adjusted all the necessary settings, take a moment to review them on the app screen. Make sure everything is accurate and to your liking before proceeding.
- Save the settings: Tap on the “Save” or “Finish” button to save your thermostat’s settings and complete the setup process.
Once you’ve completed the setup process, your Nest Thermostat is ready to go and will start intelligently controlling the temperature in your home based on the preferences you’ve set. You can always revisit the Nest app to make further adjustments or fine-tune your thermostat’s settings.
Step 6: Customize Your Nest Settings
With your Nest Thermostat set up, it’s time to explore the various customization options available to you. Follow these steps to personalize your Nest settings:
- Access the Nest app: Open the Nest app on your smartphone or tablet.
- Select your thermostat: If you have multiple Nest devices, choose the thermostat you want to customize from the list of connected devices.
- Adjust temperature settings: Use the temperature slider within the app to manually adjust the desired temperature. Simply slide your finger across the screen to increase or decrease the temperature to your preference.
- Explore energy-saving features: Nest Thermostats come equipped with energy-saving features, such as Eco Mode and Home/Away Assist. Take the time to explore and enable these features, as they can help optimize energy usage and save on your utility bills.
- Set up temperature sensors (optional): If you have additional Nest Temperature Sensors installed in different rooms, you can customize how your thermostat responds to the readings from these sensors. Adjust the preferences within the app to ensure that your thermostat takes into account temperature variations throughout your home.
- Enable and adjust scheduling: Fine-tune your thermostat’s schedule to align with your daily routines. Within the Nest app, you can create a customized schedule that automatically adjusts the temperature based on specific times of the day.
- Explore additional settings: Dive into the Nest app to discover additional settings and features. These may include options for fan control, humidity adjustment, and system mode preferences.
- Monitor energy usage: Keep track of your energy usage and savings within the Nest app. Access the Energy History section to view detailed reports and insights into how your thermostat is optimizing energy consumption.
- Receive alerts and notifications: Set up alerts and notifications within the app to stay informed about important events, such as temperature swings, maintenance reminders, and filter replacement alerts.
By customizing your Nest settings, you can ensure that your thermostat operates according to your specific needs and preferences. Take advantage of the various features and options available to make the most out of your Nest Thermostat.
Step 7: Complete the Installation
After customizing your Nest Thermostat settings to your liking, it’s time to complete the installation process. Follow these final steps to ensure a successful and efficient installation:
- Double-check connections: Take a moment to verify that all the wires are securely connected to the appropriate terminals on your Nest Thermostat. This will ensure proper functionality and prevent any connectivity issues.
- Secure the thermostat: Ensure that the Nest Thermostat is securely fastened to the wall using the provided screws and mounting plate. This will prevent any accidental dislodging or movement.
- Confirm Wi-Fi connectivity: Make sure that your Nest Thermostat is still connected to your home Wi-Fi network. Open the Nest app and check the status of your thermostat to ensure a stable connection.
- Perform a test run: Adjust the temperature settings on your Nest Thermostat and verify that it responds accordingly. Listen for the HVAC system to activate and observe if the desired temperature changes are reflected.
- Monitor performance: Keep an eye on your Nest Thermostat’s performance over the next few days. Monitor how it maintains the set temperature, adjusts based on your schedule, and activates any energy-saving features you’ve enabled.
- Seek professional assistance if needed: If you encounter any issues or concerns during the installation or setup process, don’t hesitate to seek professional assistance. Contact Nest support or consult an HVAC technician for expert guidance.
- Enjoy the benefits: Sit back, relax, and enjoy the convenience and energy-saving benefits that your Nest Thermostat brings. Experience the comfort of a perfectly controlled indoor environment and the peace of mind that comes with efficient energy usage.
By completing the installation process and ensuring the proper functioning of your Nest Thermostat, you can confidently take advantage of its innovative features and enjoy a comfortable and energy-efficient home.
Troubleshooting Tips
While connecting and setting up your Nest Thermostat is generally a seamless process, you may encounter some common issues along the way. Here are some troubleshooting tips to help you overcome any challenges:
- Ensure proper power supply: Double-check that your HVAC system has power and that the power cables are securely connected to the thermostat. If there’s no power, check the circuit breaker and reset it if necessary.
- Check Wi-Fi connectivity: If your thermostat isn’t connecting to Wi-Fi, verify that you’re within range of your Wi-Fi router and that the network credentials are entered correctly. You may need to move the router closer or contact your internet service provider for assistance.
- Restart the thermostat: If your Nest Thermostat is unresponsive, try restarting it by removing it from the wall and disconnecting the power temporarily. After a few seconds, reconnect the thermostat and power it up again.
- Update the Nest app: Ensure that you have the latest version of the Nest app installed on your device. Outdated app versions may have compatibility issues with newer firmware updates for the thermostat.
- Reset the thermostat: If all else fails, you can perform a factory reset on your Nest Thermostat. Refer to the installation guide or Nest website for instructions on how to reset your specific model.
- Contact Nest support: If you’re still unable to resolve the issue, don’t hesitate to contact Nest support for further assistance. They have a team of experts ready to help troubleshoot and resolve any technical difficulties you may encounter.
Remember, it’s always a good idea to thoroughly review the installation guide and consult the Nest website for additional troubleshooting tips specific to your thermostat model. Paying attention to these steps and seeking assistance when needed will help ensure a smooth and successful setup of your Nest Thermostat.