
What is a Nest Thermostat?
A Nest Thermostat is a smart thermostat that allows you to control the temperature of your home with ease and convenience. It’s packed with intelligent features and advanced technology that make it more than just a basic thermostat. With its sleek design and user-friendly interface, the Nest Thermostat is a favorite among homeowners looking to enhance their comfort levels while saving energy.
One of the standout features of the Nest Thermostat is its ability to learn your preferred temperature settings over time. Using advanced algorithms, it analyzes your usage patterns and adjusts the temperature accordingly. This means that as you go about your daily activities, the Nest Thermostat intuitively adapts to your needs, ensuring maximum comfort while reducing energy waste.
Another key feature of the Nest Thermostat is its compatibility with smart home systems. It seamlessly integrates with popular platforms like Google Home and Amazon Alexa, allowing you to control the temperature using voice commands or through mobile apps. This level of integration empowers you to manage your home’s climate settings from anywhere, giving you unparalleled convenience and flexibility.
In addition to its learning capabilities and smart home integration, the Nest Thermostat also provides detailed energy usage reports. These reports give you valuable insights into how much energy you’re consuming and when, allowing you to make informed decisions about your energy usage habits. By identifying energy-saving opportunities, you can reduce your carbon footprint and potentially save on your utility bills.
Installing and setting up a Nest Thermostat is a straightforward process that can be done by most homeowners. With a few simple steps, you can easily replace your existing thermostat with a Nest Thermostat and start enjoying its benefits. Whether you’re a tech-savvy individual or someone new to smart home devices, the Nest Thermostat offers a user-friendly experience that is accessible to all.
Getting Started
Before you begin the installation process, it’s important to gather all the necessary tools and materials. Here’s a list of what you’ll need:
- Flathead and Phillips screwdrivers
- Drill and drill bit (if required for installation)
- Wire stripper
- Level
- Nest Thermostat
- Mounting plate
- Screws and wall anchors
Once you have the tools ready, follow these steps to get started:
- Turn off power: Start by turning off the power to your heating and cooling system. This can be done by switching off the respective circuit breaker in your electrical panel.
- Remove the old thermostat: Carefully remove the cover of your existing thermostat to expose the wiring. Take note of the wires and their corresponding terminals.
- Mount the Nest base: Using the provided screws and wall anchors, mount the Nest base to the wall. Make sure it is level and securely attached.
- Connect the wires: Label each wire with the corresponding terminal letter on the Nest base. Then, using a screwdriver, connect each wire to its respective terminal on the Nest base.
- Attach the Nest display: Gently snap the Nest display onto the base until it is firmly in place. Ensure that the display is aligned correctly.
- Turn on power: Go back to your electrical panel and switch the circuit breaker back on to restore power to your heating and cooling system.
- Follow the on-screen prompts: The Nest display will guide you through the setup process. Follow the on-screen prompts to connect your Nest Thermostat to your Wi-Fi network and customize your preferences.
Once your Nest Thermostat is successfully set up, you can start enjoying the convenience and energy-saving benefits it offers. Remember to refer to the user manual for additional information or troubleshooting guidance if needed.
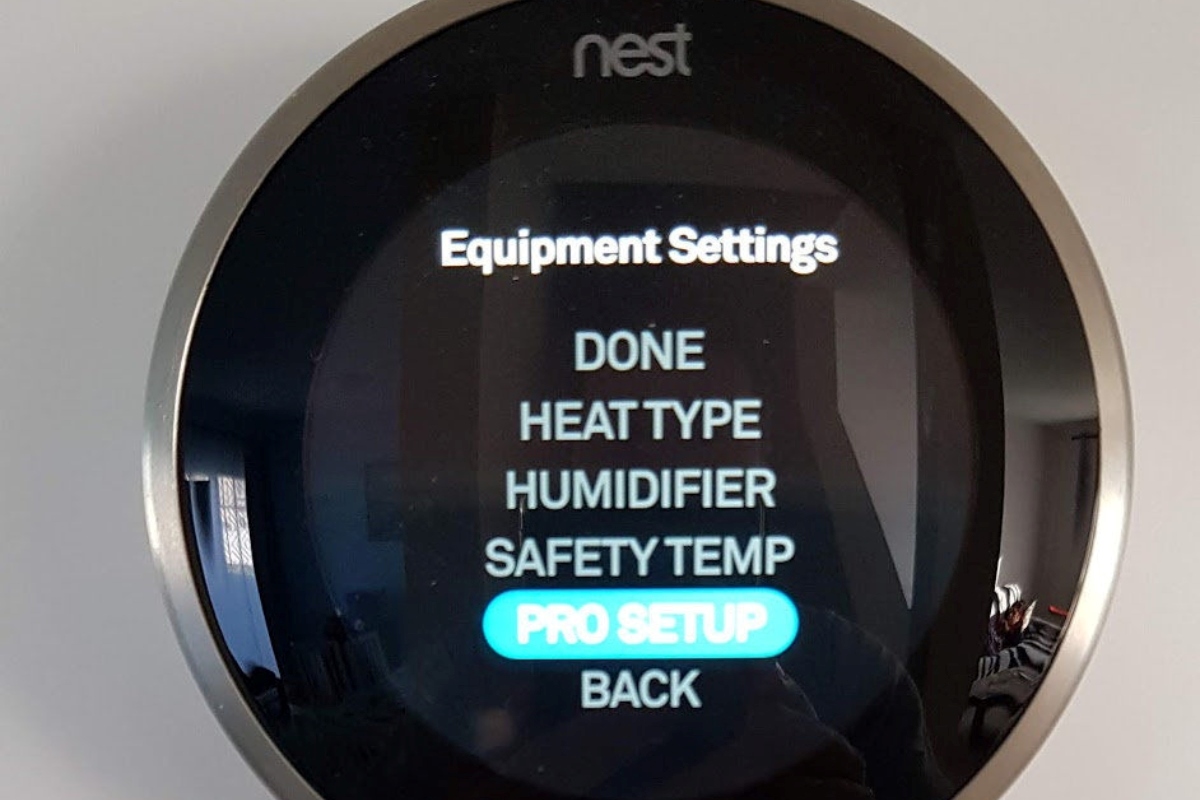
Installing the Nest Thermostat
Installing a Nest Thermostat in your home is a simple process that can be completed in just a few steps. Here’s a step-by-step guide to help you install your Nest Thermostat:
- Turn off the power: To ensure your safety, start by turning off the power to your heating and cooling system. Locate the circuit breaker associated with your HVAC system and switch it off.
- Remove the old thermostat: Carefully remove the cover of your existing thermostat to expose the wiring. Take note of the wires and their corresponding terminals.
- Mount the Nest base: Using the provided screws and wall anchors, mount the Nest base to the wall. Make sure it is level and securely attached.
- Connect the wires: Label each wire with the corresponding terminal letter on the Nest base. Then, using a screwdriver, connect each wire to its respective terminal on the Nest base.
- Attach the Nest display: Gently snap the Nest display onto the base until it is firmly in place. Ensure that the display is aligned correctly.
- Turn on power: Go back to your electrical panel and switch the circuit breaker back on to restore power to your heating and cooling system.
- Follow the on-screen prompts: The Nest display will guide you through the setup process. Follow the on-screen prompts to connect your Nest Thermostat to your Wi-Fi network and customize your preferences.
During the installation process, it’s important to refer to the included user manual for any specific instructions or wiring details that may apply to your HVAC system. Additionally, if you encounter any challenges or have questions, Nest provides a dedicated support team that can assist you through phone or online chat.
Remember that if you’re uncomfortable with any step of the installation process, it’s recommended to seek the help of a qualified professional to ensure the proper installation of your Nest Thermostat.
Connecting to Wi-Fi
Connecting your Nest Thermostat to your Wi-Fi network is essential to unlock its full functionality and access remote control capabilities. Follow these steps to connect your Nest Thermostat to Wi-Fi:
- Power on your Nest Thermostat: Ensure that your Nest Thermostat is properly installed and powered on.
- On the Nest Thermostat, select the language and country: Use the display and buttons on your Nest Thermostat to select your preferred language and country.
- Scan the QR code: Using your smartphone or tablet, open the Nest app and follow the prompts to scan the QR code displayed on your Nest Thermostat. This will help the app identify and connect to your specific thermostat device.
- Connect to your Wi-Fi network: The Nest app will guide you through the process of connecting your Nest Thermostat to your Wi-Fi network. Make sure to select the correct network and enter the password accurately.
- Confirm the connection: Once the connection process is complete, your Nest Thermostat will display a confirmation message on its screen, indicating that it is successfully connected to your Wi-Fi network.
It’s important to ensure that your Nest Thermostat is within range of your Wi-Fi router for a stable connection. If you’re experiencing connectivity issues, try moving your thermostat closer to the router, or consider adding a Wi-Fi extender to improve the signal strength in your home.
Once connected to your Wi-Fi network, you can access your Nest Thermostat remotely using the Nest mobile app or web portal. This allows you to control and monitor your thermostat settings from anywhere, whether you’re at home or away.
Keep in mind that the initial connection process may vary slightly depending on the version of the Nest Thermostat you’re using. Always refer to the manufacturer’s instructions, user manual, or online resources for specific guidance tailored to your device.
Setting Up the Nest App
The Nest app is the key to unlocking the full potential of your Nest Thermostat. It allows you to control and monitor your thermostat settings from the convenience of your smartphone or tablet. Here’s how to set up the Nest app:
- Download the Nest app: Visit the App Store or Google Play Store on your mobile device and search for the Nest app. Download and install it on your device.
- Create a Nest account: Open the Nest app and select “Sign up.” Follow the prompts to create a Nest account. If you already have a Nest account, you can simply log in using your existing credentials.
- Add your Nest Thermostat: In the app, select the option to add a device. Follow the prompts to scan the QR code on your Nest Thermostat or enter the device’s serial number. This will link your thermostat to your Nest account.
- Connect to your Wi-Fi network: After adding your Nest Thermostat, the app will guide you through connecting it to your Wi-Fi network. Make sure to select the correct network and enter the Wi-Fi password accurately.
- Set up thermostat preferences: Once your Nest Thermostat is connected, you can customize various settings and preferences through the app. This includes creating heating and cooling schedules, adjusting temperature thresholds, and more.
- Explore additional features: The Nest app offers a range of additional features to enhance your comfort and energy efficiency. These include geofencing, which adjusts your thermostat based on your location, and energy usage reports that provide insights into your consumption patterns.
With the Nest app, you have full control over your thermostat settings no matter where you are. Whether you’re at home or away, you can adjust the temperature, monitor your energy usage, and even receive notifications and alerts regarding your HVAC system.
Remember to keep your Nest app updated to access the latest features and security enhancements. If you encounter any issues during the setup process or while using the app, refer to the Nest support resources or contact their customer support for assistance.
Creating a Nest Account
To fully utilize the features of your Nest Thermostat and access the control options through the Nest app, you’ll need to create a Nest account. Here’s how you can set up your Nest account:
- Download the Nest app: Visit the App Store or Google Play Store on your mobile device and search for the Nest app. Download and install it on your device.
- Launch the Nest app: Open the Nest app on your device and tap on the “Sign up” or “Create account” button to begin the account creation process.
- Enter your email address: Provide a valid email address that you want to associate with your Nest account. Make sure to enter it accurately as this will be used for communication and account verification purposes.
- Create a password: Choose a strong and secure password for your Nest account. It should be unique and include a combination of letters, numbers, and special characters to enhance security.
- Verify your email address: After submitting your email and password, Nest will send a verification email to the address you provided. Check your inbox and follow the instructions in the email to verify your account.
Once you have completed these steps, your Nest account will be set up and ready to use. This account will allow you to log into the Nest app and access all the features and settings for your Nest Thermostat.
In addition to controlling your Nest Thermostat, your Nest account also provides access to other Nest products and services, such as Nest cameras and Nest Protect smoke and carbon monoxide detectors. You can integrate these devices into your smart home ecosystem and manage them all from a single platform.
It’s important to keep your Nest account credentials secure and not share them with unauthorized individuals. Regularly update your password and enable two-factor authentication for an extra layer of security.
If you encounter any issues or need further assistance during the account creation process, refer to the Nest support resources or contact their customer support for guidance.
Customizing Your Nest Thermostat
One of the advantages of owning a Nest Thermostat is the ability to customize its settings and features to fit your preferences and lifestyle. Here are some ways you can customize your Nest Thermostat:
- Temperature preferences: Adjust the temperature settings to your liking. You can set different temperatures for specific times of the day to ensure optimal comfort and energy efficiency.
- Scheduling: Take advantage of the scheduling feature to create a heating and cooling schedule that aligns with your routine. Program different temperature settings for weekdays and weekends, or customize it based on your individual needs.
- Learning feature: Over time, your Nest Thermostat learns your preferences and habits. It adapts to your schedule and adjusts the temperature accordingly, ensuring optimal comfort while maximizing energy savings.
- Remote control: Utilize the Nest app to control your thermostat from anywhere. Whether you’re at work, on vacation, or simply in another room, you can easily adjust the temperature settings using your smartphone or tablet.
- Auto-Away: The Nest Thermostat can detect when you’re not at home and automatically switch to an energy-saving mode. This helps reduce energy consumption when no one is present, allowing you to save on your utility bills.
- Energy usage reports: Access detailed reports on your energy consumption patterns and analyze where you can make improvements. This information can help you identify energy-saving opportunities and make informed decisions to reduce your environmental impact.
- Integrations: Take advantage of integrations with other smart home devices and platforms. Link your Nest Thermostat with voice assistants like Google Assistant or Amazon Alexa for convenient hands-free control.
Remember, customization options may vary depending on the specific model of your Nest Thermostat and the features it supports. It’s always a good idea to refer to the user manual or online resources provided by Nest for detailed instructions on customizing your particular thermostat.
By personalizing your Nest Thermostat settings, you can create the optimal environment in your home while also reducing energy waste and lowering your utility bills. Experiment with different settings and features to find the perfect balance of comfort and efficiency for your household.
Taking Advantage of Nest Features
The Nest Thermostat offers a range of features that can enhance your comfort, convenience, and energy efficiency. Here are some of the key features of the Nest Thermostat and how you can make the most of them:
- Learning capabilities: The Nest Thermostat utilizes advanced algorithms to learn your preferred temperature settings and usage patterns. As you make manual adjustments, it adapts and creates a personalized schedule that aligns with your lifestyle.
- Remote control: With the Nest app, you can control your thermostat remotely from anywhere. Whether you’re relaxing on the couch or away from home, you have the flexibility to adjust the temperature settings with just a few taps on your smartphone or tablet.
- Energy-saving mode: The Nest Thermostat’s energy-saving mode, known as Eco Mode, helps reduce energy consumption when you’re away from home. It automatically adjusts the temperature to a more energy-efficient level, saving you money on your energy bills without sacrificing comfort.
- Geofencing: Geofencing technology allows your Nest Thermostat to track your smartphone’s location. It can automatically adjust the temperature as you come and go, ensuring a comfortable environment when you’re home and conserving energy when you’re away.
- Integration with other devices: The Nest Thermostat seamlessly integrates with other smart home devices, such as smart speakers and home automation systems. This allows for enhanced automation and voice control capabilities, making it even more convenient to manage your home’s temperature.
- Energy usage reports: The Nest app provides detailed energy usage reports that give you insights into how much energy your HVAC system is consuming. By analyzing these reports, you can identify opportunities to reduce energy waste and make adjustments for greater efficiency.
- Nest Protect integration: If you have a Nest Protect smoke and carbon monoxide detector, it can communicate with your Nest Thermostat. In the event of a potential emergency, the thermostat can automatically shut off the HVAC system to prevent the spread of smoke or harmful gases.
By taking advantage of these features, you can optimize your home’s comfort, save energy, and reduce your environmental impact. Experiment with different settings and preferences to find the perfect balance that suits your needs and preferences.
Always consult the user manual or visit the Nest support website for more information on how to maximize the features of your specific Nest Thermostat model.
Troubleshooting Common Issues
While the Nest Thermostat is designed to be user-friendly and reliable, you may encounter occasional issues that can be easily resolved. Here are some common problems you might encounter with your Nest Thermostat and possible troubleshooting steps:
- Wi-Fi connection issues: If your Nest Thermostat is having trouble connecting to your Wi-Fi network, check that your network is functioning correctly and that the thermostat is within range. Ensure that the Wi-Fi password is entered correctly and that there are no obstructions interfering with the signal.
- Temperature discrepancies: If you notice a significant difference between the set temperature and the actual temperature in your home, check for any drafts or factors that may affect temperature readings. Also, confirm that the thermostat is properly calibrated and securely mounted.
- Unresponsive display: If the Nest Thermostat display is not responding to touch commands, try rebooting the thermostat by removing it from the base and putting it back on. If the issue persists, ensure that the thermostat is receiving power and check for any loose wiring connections.
- Heating or cooling system not turning on: If your HVAC system is not functioning when the thermostat calls for heating or cooling, verify that the thermostat is set to the correct mode (Heat, Cool, or Auto). Check your circuit breaker panel to ensure that power is reaching your system and that no circuits are tripped.
- Unreliable schedule: If your Nest Thermostat is not following the schedule or is not adjusting to your preferences, verify that the schedule is programmed correctly and that the learning feature is enabled. Additionally, check for any software updates for your thermostat and ensure that the app is up to date.
If you’re experiencing persistent issues or have additional troubleshooting questions, it’s recommended to consult the official Nest support documentation or contact their customer support team for assistance. They have a wealth of resources and knowledgeable technicians who can guide you through any challenges you may encounter.
Remember, proper installation, firmware updates, and regular maintenance are crucial to ensuring optimal performance of your Nest Thermostat. Regularly clean the thermostat and its sensors, and check for any updates or firmware upgrades to keep it functioning optimally.
Frequently Asked Questions
Here are some frequently asked questions about Nest Thermostats:
- Can I install a Nest Thermostat myself?
- Are Nest Thermostats compatible with all heating and cooling systems?
- Can I use voice commands to control my Nest Thermostat?
- Does the Nest Thermostat require an internet connection to function?
- Can I use the Nest Thermostat with multiple zones in my home?
- Are Nest Thermostats compatible with smart home automation systems?
- How often should I replace the batteries in my Nest Thermostat?
Yes, most homeowners can install a Nest Thermostat themselves. The installation process is straightforward, and detailed instructions can be found in the product manual or online resources provided by Nest. However, if you’re uncomfortable with the process, it’s recommended to seek the assistance of a professional HVAC technician.
Nest Thermostats are compatible with many common heating and cooling systems, including gas, electric, heat pump, and radiant systems. However, it’s important to check Nest’s compatibility guide or consult a professional to ensure compatibility with your specific system.
Yes, Nest Thermostats can be integrated with popular voice assistants like Google Assistant and Amazon Alexa. This allows you to control your thermostat settings using voice commands.
While an internet connection is not required for basic functionality, it is necessary to access advanced features, remote control capabilities, and receive software updates for your Nest Thermostat. A Wi-Fi connection is also required for initial setup.
Yes, if you have a multi-zone HVAC system, you can install a separate Nest Thermostat for each zone. This allows for individual temperature control and enhanced energy efficiency.
Yes, Nest Thermostats are designed to integrate seamlessly with popular smart home automation systems. This allows you to create comprehensive home automation scenarios where your thermostat can interact with other smart devices in your home.
The Nest Thermostat is typically powered by the HVAC system and does not require battery replacement under normal conditions. In case of a power outage or if your HVAC system does not provide power to the thermostat, the Nest Thermostat uses an internal battery that is rechargeable and should last for several hours.
For more specific questions or concerns, refer to the official Nest support website, user manual, or contact their customer support for detailed assistance regarding your particular situation.