
Reasons to Turn AC On Nest Thermostat
The Nest Thermostat has revolutionized the way we control our home’s heating and cooling systems. With its smart features and intuitive design, it offers several compelling reasons to turn on your AC using the Nest Thermostat. Let’s explore some of these reasons:
- Energy Efficiency: By using the Nest Thermostat to control your AC, you can achieve significant energy savings. The thermostat learns your preferences and creates a personalized schedule, automatically adjusting the temperature when you’re away to conserve energy. This can lead to reduced energy bills and a smaller carbon footprint.
- Convenience: Turning on your AC with the Nest Thermostat offers unparalleled convenience. Instead of manually adjusting the temperature or relying on a traditional programmable thermostat, you can control the AC from anywhere using your smartphone or tablet. Whether you’re at home or on the go, it’s as simple as tapping a few buttons.
- Comfort: The Nest Thermostat allows you to fine-tune your home’s temperature, ensuring optimal comfort day and night. You can set different temperatures for different times of the day, ensuring a cozy environment when you wake up and a cooler atmosphere when you sleep. With the ability to adjust the temperature remotely, you’ll always come back to a comfortable home.
- Schedule Flexibility: The Nest Thermostat gives you the flexibility to create custom schedules for your AC. Whether you prefer a consistent temperature throughout the day or if you want to adjust it based on your daily routine, the thermostat allows you to easily set up a schedule that fits your lifestyle. This ensures your AC maintains the perfect temperature according to your preferences.
- Integration with Smart Home Systems: If you have a smart home system in place, the Nest Thermostat seamlessly integrates with popular platforms such as Google Home, Amazon Alexa, and Apple HomeKit. This allows you to control your AC using voice commands or automate it alongside other smart devices in your home. The integration opens up a world of possibilities for syncing your AC with other home automation features.
The Nest Thermostat offers numerous benefits when it comes to turning on your AC. With its energy efficiency, convenience, comfort, schedule flexibility, and integration capabilities, it is undoubtedly a game-changer in home climate control. Whether you’re looking to reduce your energy consumption, increase your comfort, or simply enjoy the convenience of remote AC control, the Nest Thermostat is the perfect solution.
Checking Compatibility with AC System
Before you can turn on your AC using the Nest Thermostat, it’s essential to ensure compatibility with your AC system. This step will help you avoid any compatibility issues and ensure a seamless integration. Here’s how you can check compatibility:
- Check HVAC System Compatibility: Start by verifying if your heating, ventilation, and air conditioning (HVAC) system is compatible with the Nest Thermostat. The Nest website provides a compatibility checker tool where you can enter details about your AC system and check if it is compatible with the thermostat.
- Check Wiring Compatibility: Take a look at your current thermostat’s wiring. The Nest Thermostat requires a specific set of wires to function correctly. You can consult the Nest Thermostat’s installation guide or the compatibility checker tool to determine if your existing wiring is compatible. If your current wiring doesn’t meet the requirements, you may need to consult a professional electrician to make the necessary adjustments.
- Confirm Power Requirements: The Nest Thermostat requires a power source to operate. Ensure that your AC system has a dedicated C-wire (common wire) or an alternative power source, such as a power extender kit, if your system is not equipped with a C-wire. This is crucial for proper functionality and to avoid any issues with power supply to the thermostat.
- Research Additional Accessories: Depending on your AC system and its compatibility with the Nest Thermostat, you may need additional accessories for a smooth integration. For example, if your AC system uses a heat pump or has multiple stages of cooling, you may require a Nest Temperature Sensor to ensure accurate temperature control in every part of your home.
- Consult Professional Assistance: If you’re unsure about the compatibility of your AC system with the Nest Thermostat or need assistance with the installation process, it’s recommended to consult a professional HVAC technician. They can assess your system, provide guidance, and ensure a proper installation that maximizes the functionality of the Nest Thermostat.
Checking compatibility is a crucial step before turning on your AC with the Nest Thermostat. By verifying your HVAC system compatibility, checking the wiring, confirming power requirements, researching additional accessories, and seeking professional assistance, you can ensure a successful integration and enjoy the full benefits of controlling your AC with the Nest Thermostat.
Setting Up Nest Thermostat for AC Control
Once you have confirmed compatibility with your AC system, it’s time to set up your Nest Thermostat for AC control. The following steps will guide you through the process:
- Turn Off Power: Start by turning off the power to your AC system at the circuit breaker. This ensures your safety during the installation process.
- Remove Existing Thermostat: Carefully remove your existing thermostat from the wall. Take note of the labels on the wires and the corresponding terminals they are connected to.
- Mount the Nest Thermostat: Attach the Nest Thermostat base to the wall using the provided screws and anchors. Ensure it is mounted level and secure.
- Connect Wires: Connect the labeled wires from your AC system to the corresponding terminals on the Nest Thermostat base. Follow the wiring diagram provided in the Nest Thermostat’s installation guide for proper connections.
- Connect to Wi-Fi: Power on your AC system and navigate through the setup on the Nest Thermostat’s display. Connect the thermostat to your Wi-Fi network by entering the network name and password when prompted.
- Follow On-screen Instructions: The Nest Thermostat will guide you through the initial setup process with on-screen instructions. Follow the prompts to input your location, time, and other required information.
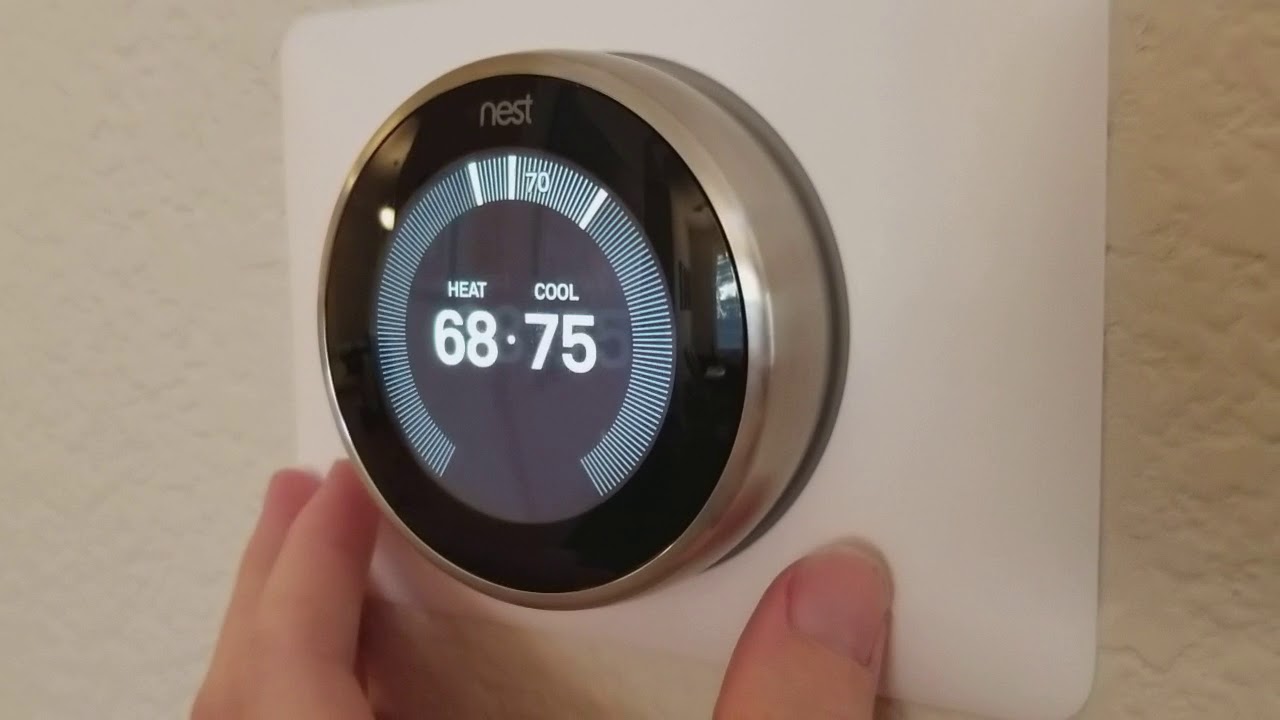
- Set Up Temperature Preferences: Use the Nest Thermostat’s interface to set your desired temperature preferences. You can choose between heating and cooling modes and adjust the temperature for different times of the day.
- Install Nest App: Download and install the Nest app on your smartphone or tablet. Sign in using your Nest account credentials and follow the on-screen instructions to connect the app to your Nest Thermostat.
- Test AC Control: Once your Nest Thermostat is set up, test the AC control by adjusting the temperature settings from the app or directly on the thermostat’s display. Ensure that your AC system responds accordingly to the commands.
By following these steps, you can successfully set up your Nest Thermostat for AC control. Always refer to the installation guide provided by Nest for detailed instructions specific to your thermostat model and AC system. With proper installation and configuration, you can conveniently control your AC from anywhere and enjoy the comfort and energy savings offered by the Nest Thermostat.
Adjusting Temperature Settings for AC
Once you have set up your Nest Thermostat for AC control, you have the flexibility to adjust temperature settings according to your preferences. Here are a few key points to keep in mind while adjusting the temperature settings:
- Schedule Optimization: The Nest Thermostat offers a feature called “Auto-Schedule” which learns your temperature preferences and creates a personalized schedule. It analyzes your temperature adjustments over time and automatically adjusts the temperature when you’re away or asleep to conserve energy. Make sure to give the thermostat some time to learn your preferences and optimize the schedule.
- Temperature Adjustment: The Nest Thermostat allows you to adjust the temperature easily. You can manually modify the temperature by turning the temperature dial on the thermostat or by adjusting it in the Nest app. Increase the temperature for cooling or decrease it for a warmer environment. The thermostat remembers your preferences and applies them consistently.
- Temperature Setbacks: Consider using temperature setbacks to save energy. Setbacks involve temporarily adjusting the temperature higher or lower when you’re not at home or during specific times of the day when you don’t require maximum comfort. With the Nest Thermostat, you can easily customize setback settings and create energy-efficient schedules to optimize your AC usage.
- Remote Control: One of the advantages of the Nest Thermostat is the ability to control your AC remotely using the Nest app. Whether you’re on vacation, at work, or simply in another room, you can adjust the temperature settings from your smartphone or tablet. This feature provides convenience and allows you to ensure a comfortable and welcoming environment whenever you arrive home.
- Temperature Sensor Integration: If you have multiple Nest Temperature Sensors installed in different areas of your home, make use of their capabilities. The sensors help the Nest Thermostat understand the temperature variations in different rooms, allowing for more balanced and accurate temperature control. You can set preferences for each sensor and ensure that the AC adjusts based on the specific conditions in each area.
- Adaptive Features: The Nest Thermostat comes with adaptive features that can adjust temperature settings based on external factors. For example, the thermostat monitors the outside weather conditions and can make adjustments to provide a comfortable indoor climate. It also accounts for the time it takes to heat or cool your home, ensuring optimal temperature levels and minimizing energy waste.
By adjusting temperature settings on your Nest Thermostat, you can create a comfortable environment that suits your needs while optimizing energy usage. Take advantage of features like schedule optimization, temperature adjustments, temperature setbacks, remote control, temperature sensor integration, and adaptive features to tailor your AC settings to perfection.
Using the Nest App to Turn AC On
The Nest App provides a convenient and user-friendly way to turn on your AC using your smartphone or tablet. Whether you’re at home or away, here’s how you can use the Nest App to control your AC:
- Download and Install the Nest App: Start by downloading and installing the Nest App from the App Store or Google Play Store. Sign in using your Nest account credentials or create a new account if you don’t have one already.
- Connect the App to Your Nest Thermostat: Follow the on-screen instructions in the app to connect it to your Nest Thermostat. This typically involves scanning a QR code on the thermostat or entering a unique identifier located on the device. Once connected, you can start controlling your AC remotely.
- Access Temperature Controls: Once the app is connected to your Nest Thermostat, you will have access to temperature controls. You can adjust the desired temperature by simply sliding your finger across the screen or by tapping the plus and minus buttons. The app provides real-time feedback, allowing you to see the changes in temperature as you make adjustments.
- Set Schedules and Temperature Preferences: The Nest App allows you to set up schedules and temperature preferences for different times of the day. You can create custom schedules that match your daily routine or choose from pre-set options offered by the app. This feature enables you to have the perfect temperature at any given time without manual adjustments.
- Enable Home/Away Assist: Home/Away Assist is a feature in the Nest App that uses your phone’s location to determine whether you’re home or away. It automatically adjusts the temperature based on your presence to save energy when you’re not at home and ensure a comfortable environment when you return. You can customize the settings for Home/Away Assist according to your preferences.
- Receive Temperature Notifications: The Nest App can send you temperature notifications, keeping you informed about any significant temperature changes in your home. These notifications can be helpful in alerting you to potential issues with your AC system or providing updates on temperature fluctuations.
- Integrate with Other Smart Home Devices: The Nest App offers integration with other smart home devices, allowing you to control your AC alongside other automated features. You can connect your Nest Thermostat to platforms like Google Home, Amazon Alexa, or Apple HomeKit for voice control and enhanced automation.
- Enable Energy-Saving Features: The Nest App provides access to various energy-saving features offered by the Nest Thermostat. These features include Eco Mode, which adjusts the temperature settings when your home is unoccupied, and Seasonal Savings, which provides personalized recommendations to save energy and reduce costs.
By using the Nest App, you can easily and intuitively control your AC from anywhere. Take advantage of temperature controls, schedule customization, Home/Away Assist, notifications, device integration, and energy-saving features to maximize the functionality and convenience of your Nest Thermostat.
Troubleshooting Common AC Issues with Nest Thermostat
Even with the advanced features of the Nest Thermostat, occasionally you may encounter issues related to your AC system. Here are some common problems and troubleshooting steps:
- No Power or Not Turning On: If your AC system is not receiving power or the Nest Thermostat is not turning on, check the breaker panel to ensure the circuit is not tripped. If the breaker is fine, inspect the wires connected to the thermostat and make sure they are securely fastened. If the issue persists, consult a professional technician to assess the wiring and power supply.
- Inaccurate Temperature Readings: If your Nest Thermostat is displaying inaccurate temperature readings, it may be due to incorrect sensor placement or calibration. Ensure that the thermostat is not exposed to direct sunlight, drafts, or other sources of heat or cold. Use the Nest app to calibrate the temperature sensor and verify that the thermostat is correctly detecting the ambient temperature.
- AC Not Cooling or Heating: If your AC system is running, but there is no cooling or heating, check the AC mode settings on the Nest Thermostat. Make sure it is set to the appropriate mode (cooling or heating) and that the desired temperature is set correctly. Additionally, check the air filters in your AC system and clean or replace them if they are dirty, as clogged filters can impede airflow and affect cooling or heating performance.
- Connectivity Issues: If you are experiencing connectivity issues between the Nest Thermostat and the Nest app, check the Wi-Fi connection on both the thermostat and your mobile device. Ensure that they are connected to the same network and that the signal strength is sufficient. If the issue continues, try restarting your router or contacting your internet service provider for assistance.
- Compatibility Problems: If you are encountering compatibility problems between your AC system and the Nest Thermostat, double-check the wiring connections to ensure they are correctly installed. Consult the Nest website or seek professional advice to confirm compatibility and resolve any wiring or configuration issues.
- Intermittent Power Loss: If your Nest Thermostat is intermittently losing power or resetting, it may be caused by a loose or unstable electrical connection. Check the wiring connections at both ends and ensure they are secure. If the problem persists, consult an electrician to inspect and repair any underlying electrical issues.
- Battery Replacement: If your Nest Thermostat displays a low-battery warning, replace the batteries promptly. Follow the instructions in the Nest Thermostat’s user manual to locate and replace the batteries. Ensure that you use the recommended battery type to maintain optimal performance.
- Strange Noises or Odors: If your AC system produces unusual noises or odors, it may indicate mechanical or electrical issues. Turn off the system immediately and contact an HVAC technician to diagnose and address the problem. Do not attempt any repairs yourself, as it may pose a risk to your safety and further damage the equipment.
While the Nest Thermostat is designed for seamless operation, troubleshooting common AC issues is sometimes necessary. By following these troubleshooting steps and seeking professional help when needed, you can ensure proper functionality, maximize the benefits of your Nest Thermostat, and maintain a comfortable environment in your home.
Tips for Efficiently Using AC with Nest Thermostat
Efficiently using your AC in conjunction with the Nest Thermostat can help you save energy and optimize comfort. Here are some tips to ensure efficient operation:
- Utilize Temperature Setbacks: Take advantage of temperature setbacks during times when you don’t need maximum cooling. Set the temperature slightly higher when you’re away or asleep to conserve energy. The Nest Thermostat’s schedule optimization feature can automatically adjust the temperature for optimal energy savings.
- Use Fan Only Mode: On milder days, consider using the fan-only mode to circulate air without running the air conditioning compressor. This can help maintain a comfortable atmosphere while using less energy, especially when outdoor temperatures are more favorable.
- Adjust Temperature Settings Incrementally: Instead of making drastic temperature changes, adjust the temperature settings in smaller increments. This allows the AC system to work more efficiently and prevents unnecessary strain on the equipment.
- Keep Doors and Windows Closed: Ensure that doors and windows are closed properly when running the AC. This prevents cool air from escaping and warm air from entering the space, helping the AC system maintain the desired temperature more efficiently.
- Utilize Room Sensors: If you have multiple Nest Temperature Sensors, place them strategically in different areas of your home. This enables the Nest Thermostat to optimize cooling based on the specific conditions in each area, ensuring a balanced and efficient distribution of cool air.
- Monitor Energy Usage: Make use of the energy usage data provided by the Nest app to monitor and analyze your AC’s energy consumption. This information can help you identify patterns and adjust the temperature settings or schedule to maximize energy efficiency.
- Take Advantage of Seasonal Savings: Enable the Seasonal Savings feature offered by the Nest Thermostat. This feature provides personalized recommendations to conserve energy and reduce costs based on usage patterns and environmental conditions.
- Regularly Clean and Maintain AC System: Keep your AC system in good working condition by regularly cleaning or replacing air filters and scheduling professional maintenance. A clean and well-maintained system operates more efficiently, ensuring proper airflow and temperature control.
- Maximize Natural Ventilation: Take advantage of natural ventilation when outdoor conditions permit. Open windows and use ceiling fans or standalone fans to increase airflow and reduce reliance on the AC system.
- Evaluate Home Insulation: Assess your home’s insulation to ensure that it is properly sealing and insulating the space. Good insulation can help maintain a consistent temperature and reduce the workload on the AC system.
By incorporating these tips into your AC usage with the Nest Thermostat, you can optimize energy efficiency, reduce costs, and create a comfortable environment in your home. Experiment with different settings, monitor energy usage, and take advantage of the innovative features offered by the Nest Thermostat to achieve the perfect balance of comfort and efficiency.
Taking Advantage of Nest Thermostat’s Energy-Saving Features
The Nest Thermostat offers a range of energy-saving features that can help you reduce energy consumption and lower your utility bills. By leveraging these features effectively, you can make the most of your Nest Thermostat’s capabilities. Here are some key energy-saving features to take advantage of:
- Schedule Optimization: The Nest Thermostat’s schedule optimization feature learns your temperature preferences and creates a personalized schedule. It automatically adjusts the temperature when you’re away to conserve energy and ensures your home is comfortable when you return. Allow the thermostat some time to understand your patterns and make adjustments accordingly.
- Home/Away Assist: Enable Home/Away Assist, a feature that uses your phone’s location to detect whether you’re home or away. The Nest Thermostat can then adjust the temperature accordingly to save energy when you’re not at home. You can customize the settings to determine how aggressively the thermostat should change temperature settings based on your presence.
- Eco Mode: The Nest Thermostat’s Eco Mode allows you to set a maximum and minimum temperature range for your home. When the home is unoccupied, the thermostat will automatically adjust the temperature within this range to save energy. This feature ensures that your home doesn’t get too hot or too cool when no one is around.
- Seasonal Savings: Take advantage of the Seasonal Savings feature, which offers personalized recommendations to optimize energy usage based on environmental conditions and usage patterns. The Nest Thermostat analyzes your behavior and provides proactive suggestions to save energy without compromising comfort.
- Energy History: Use the Energy History feature in the Nest app to monitor and analyze your energy usage patterns. This allows you to identify opportunities for improvement and make adjustments to your temperature settings or schedule. The insights provided can help you make informed decisions to further optimize energy efficiency.
- Away Temperature Pre-conditioning: Enable the Away Temperature Pre-conditioning feature, which takes advantage of your phone’s location to start cooling or heating your home before you arrive. By pre-conditioning the temperature, you can ensure a comfortable environment as soon as you step through the door while minimizing energy waste.
- Temperature Notifications: Configure temperature notifications on the Nest app to stay informed about significant temperature changes in your home. These notifications can help you detect potential issues with your AC system or alert you to temperature fluctuations that require adjustments in your thermostat settings.
- Integrate with Energy Partners: The Nest Thermostat can integrate with select utility companies and energy partners to offer additional energy-saving benefits. This integration allows your thermostat to communicate with your utility provider and take advantage of dynamic pricing or energy-saving events to optimize your energy usage and potentially save you money.
- Smart Home Integration: Leverage the smart home integration capabilities of the Nest Thermostat to create a synchronized ecosystem. Connect your Nest Thermostat with other smart devices like smart lights, sensors, or switches to automate temperature adjustments and maximize energy efficiency throughout your home.
By utilizing the energy-saving features provided by the Nest Thermostat, you can significantly reduce your energy consumption and contribute to a more sustainable living environment. Experiment with these features, monitor your energy usage, and make adjustments based on the insights provided by the Nest app to continually improve your energy efficiency and enjoy the benefits of a comfortable, energy-efficient home.