
Why you might need to change WiFi on your Nest Thermostat
If you own a Nest Thermostat, you understand the convenience it brings to your home by providing efficient and customizable climate control. However, there may come a time when you need to change the WiFi network that your Nest Thermostat is connected to. Here are a few reasons why you might need to make this change:
1. Upgrading your internet service: If you decide to upgrade your internet service or switch to a different internet service provider, you will need to update the WiFi network on your Nest Thermostat to ensure that it remains connected to the internet and operates smoothly.
2. Moving to a new home: When you move to a new house, you will likely have a different WiFi network and password. Changing the WiFi on your Nest Thermostat is necessary to connect it to the new network and continue controlling your thermostat remotely.
3. Improving WiFi coverage: Perhaps you’ve noticed that some areas of your home have weak WiFi signals, resulting in intermittent connectivity for your Nest Thermostat. In this case, you might decide to install a new WiFi router or access point closer to the thermostat location. Changing the WiFi network on your Nest Thermostat will allow it to connect to the stronger signal and ensure a more reliable connection.
4. Troubleshooting connectivity issues: If you’re experiencing problems with your Nest Thermostat connecting to the current WiFi network, changing the network settings can be a helpful troubleshooting step. It can resolve common connectivity issues by establishing a fresh connection to the WiFi network.
5. Network security concerns: If you suspect that your current WiFi network has been compromised or you simply want to enhance the security of your smart home devices, changing the WiFi network on your Nest Thermostat can be a proactive measure. It ensures that your thermostat is connected to a secure and protected network.
Remember, ensuring a stable and reliable WiFi connection is crucial for your Nest Thermostat to function correctly and maintain its smart features. By understanding why you might need to change the WiFi network and password, you can stay prepared in case the need arises.
Step 1: Find the WiFi option
When you’re ready to change the WiFi network on your Nest Thermostat, the first step is to locate the WiFi option in your thermostat’s settings. Here’s how to do it:
1. Open the Nest app: Launch the Nest app on your smartphone or tablet. Ensure that you’re logged into your account that is associated with the Nest Thermostat you want to update.
2. Select your thermostat: If you have more than one Nest Thermostat connected to your account, choose the one you wish to reconfigure. This will take you to the device’s main screen.
3. Access the settings: Look for the settings icon, usually in the top right or bottom right corner of the screen, and tap on it. This will open the settings menu.
4. Find the WiFi option: Scroll through the settings menu until you locate the option labeled “WiFi” or “Network.” Tap on it to access the WiFi settings for your Nest Thermostat.
It’s important to note that the steps above are specific to the Nest app, which is the primary method of controlling your Nest Thermostat. If you prefer to use the thermostat’s physical interface to navigate through the settings, consult the manufacturer’s documentation for instructions on accessing the WiFi option directly on the device.
Once you have successfully located the WiFi option, you’re ready to proceed to the next step of selecting your new WiFi network.
Step 2: Select your new WiFi network
After finding the WiFi option in the settings menu of your Nest Thermostat, the next step is to select your new WiFi network. Follow these steps:
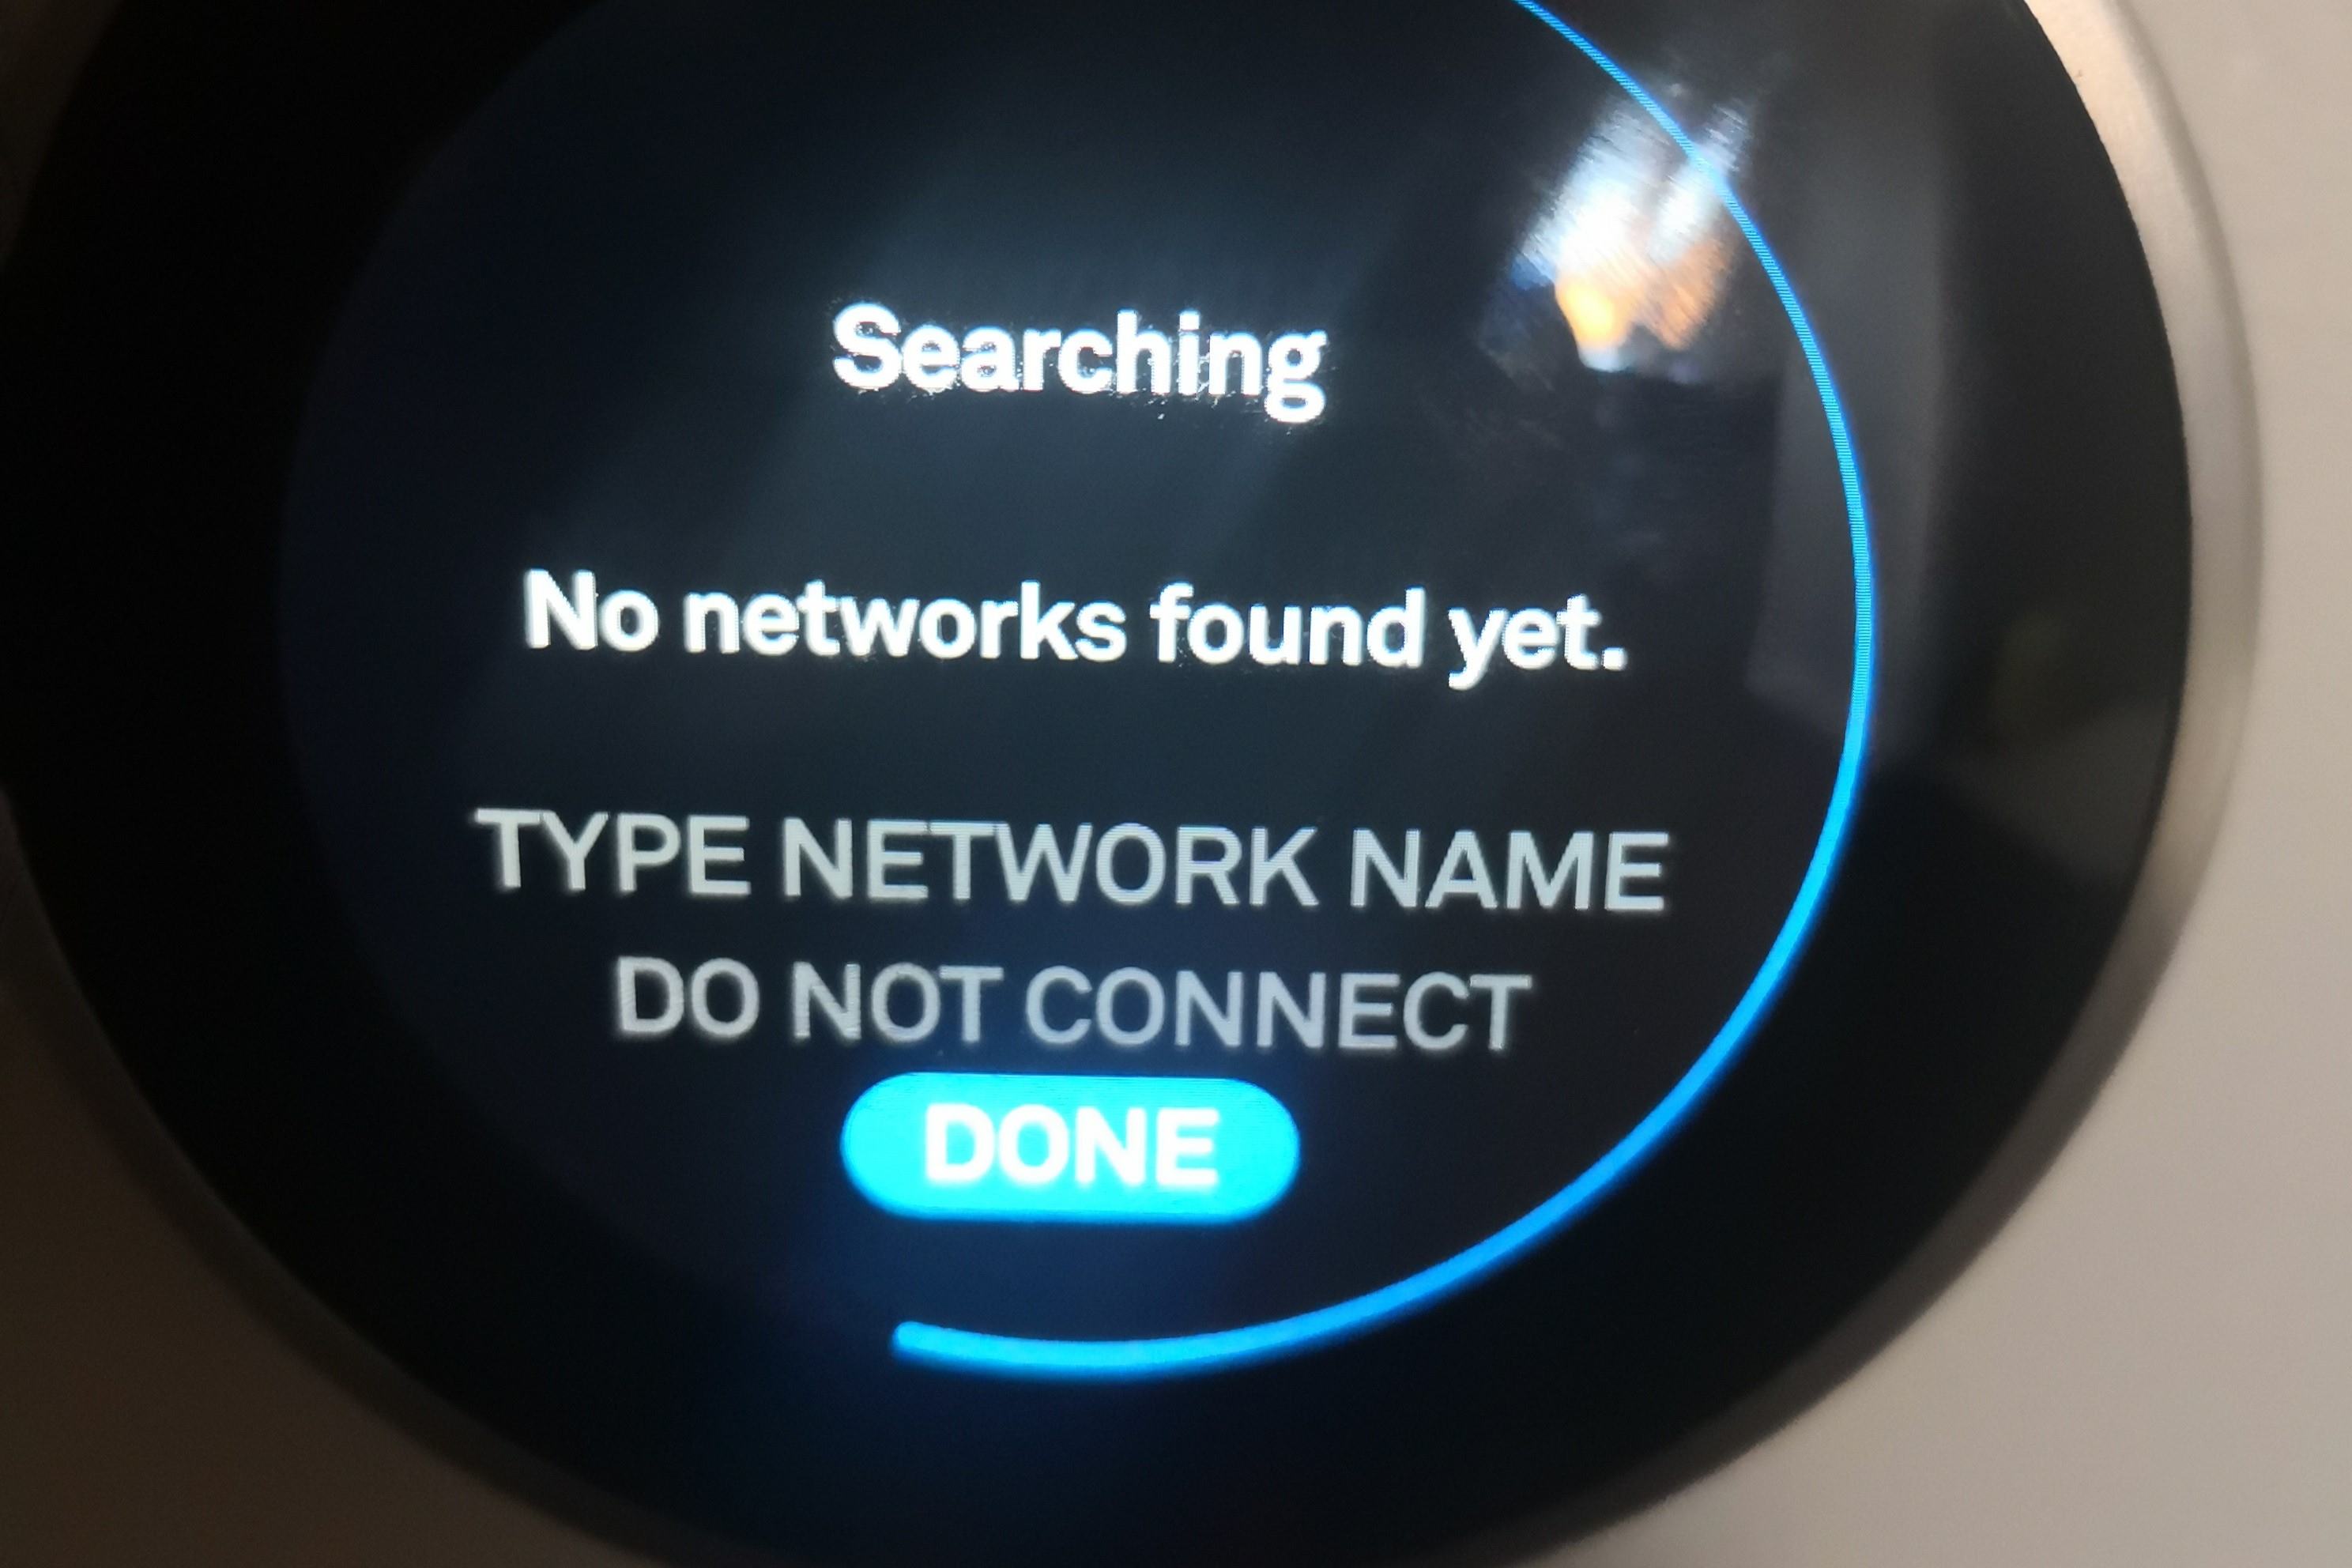
1. Scan for available networks: Once you’re in the WiFi settings, your Nest Thermostat will automatically scan for nearby WiFi networks. Wait for the list of available networks to populate on the screen.
2. Select your new WiFi network: Look for your new WiFi network in the list and tap on it to select it. Make sure you choose the correct network name (SSID) from the list.
3. Enter the WiFi password: After selecting your new WiFi network, you will be prompted to enter the password. Tap on the password field and use the on-screen keyboard to type in your WiFi password. Ensure that you enter it correctly to avoid any connection issues.
4. Confirm your selection: Once you have entered the WiFi password, carefully review the information to ensure everything is correct. If everything looks good, proceed to confirm your selection. This step may vary depending on the interface of your Nest Thermostat, but it typically involves tapping a “Save” or “Connect” button.
It’s important to note that the process of selecting your new WiFi network may vary slightly depending on the version of the Nest Thermostat you own and the app or interface you’re using. If you encounter any difficulties or have questions during this step, consult the Nest app’s help section or refer to the manufacturer’s documentation for detailed instructions.
Once you have successfully selected your new WiFi network and entered the password, your Nest Thermostat will attempt to establish a connection to the network. If the connection is successful, you’re ready to move on to the next step of connecting your Nest Thermostat to the new WiFi network.
Step 3: Enter the WiFi password
Entering the WiFi password is a crucial step in changing the WiFi network on your Nest Thermostat. Follow these steps to ensure a successful configuration:
1. On your Nest Thermostat’s screen: If your Nest Thermostat has a touchscreen display, you will need to navigate to the WiFi password field. Depending on the device model, this may involve tapping on the screen or using the dial to scroll through the settings.
2. Using the on-screen keyboard: Once you have accessed the WiFi password field, an on-screen keyboard will appear. Use the touchscreen or dial to enter the password carefully. Pay attention to uppercase and lowercase letters, as WiFi passwords are case-sensitive.
3. Confirm your password: After entering the WiFi password, double-check for any typos or errors. It’s essential to enter the password accurately to avoid connection issues. Once you’re confident that the password is correct, move on to the next step.
4. Save or confirm: Your Nest Thermostat will prompt you to save or confirm the entered WiFi password. This step may involve pressing a “Save” or “Connect” button on the device’s interface. Follow the on-screen instructions to proceed.
Please note that the process of entering the WiFi password may vary depending on the specific model of your Nest Thermostat. Refer to the manufacturer’s documentation or the Nest app’s help section if you encounter any difficulties or require further assistance.
Once you have successfully entered the WiFi password and confirmed the information, your Nest Thermostat will attempt to connect to the new WiFi network. If the connection is established, you’re ready for the final step of connecting your Nest Thermostat to the new WiFi network.
Step 4: Connect your Nest Thermostat to the new WiFi network
After entering the WiFi password, the final step is to connect your Nest Thermostat to the new WiFi network. Follow these steps to ensure a successful connection:
1. Wait for the connection: Once you have saved or confirmed the WiFi password, your Nest Thermostat will attempt to establish a connection to the new network. This process may take a few moments, so be patient and wait for the device to connect.
2. Verify the connection: Your Nest Thermostat will display a message or indicator on the screen to indicate a successful connection to the new WiFi network. This may vary depending on the model of your thermostat, so refer to the manufacturer’s documentation for specific instructions.
3. Test the connection: To ensure that your Nest Thermostat is properly connected to the new WiFi network, perform a quick test. Open the Nest app on your smartphone or tablet and check if you can control and monitor your thermostat remotely. If you can adjust the temperature and access all the features, it means that the connection has been successfully established.
4. Continue enjoying your smart thermostat: With your Nest Thermostat now connected to the new WiFi network, you can continue enjoying the convenience and energy efficiency it provides. Take advantage of the various features and scheduling options available to optimize your home’s climate control.
If you encounter any issues during the process of connecting your Nest Thermostat to the new WiFi network, you can consult the Nest app’s help section or contact customer support for assistance. They will be able to provide further guidance and troubleshooting steps specific to your situation.
Remember to keep your WiFi network secure by using a strong, unique password and regularly updating your network settings. This helps protect your Nest Thermostat and other connected devices from unauthorized access and ensures the privacy and security of your smart home ecosystem.
Troubleshooting common issues when changing WiFi on your Nest Thermostat
While changing the WiFi network on your Nest Thermostat is generally a straightforward process, you may encounter some common issues. Here are a few troubleshooting tips to help you resolve them:
1. Weak WiFi signal: If your Nest Thermostat is unable to connect to the new WiFi network, check the signal strength in the location where the thermostat is installed. If the signal is weak, consider installing a WiFi extender or moving your router closer to improve the signal strength.
2. Incorrect WiFi password: Double-check that you entered the correct WiFi password when connecting your Nest Thermostat to the new network. Verify that there are no typos, and ensure that you are using the correct case for uppercase and lowercase letters.
3. Network compatibility: Some older or specialized WiFi networks may not be compatible with your Nest Thermostat. Ensure that you are using a standard WiFi network using the 2.4GHz frequency and WPA or WPA2 security protocol for optimal compatibility.
4. Router settings: Certain router settings, such as MAC address filtering or access control, may prevent your Nest Thermostat from connecting to the WiFi network. Check your router’s settings and make sure they allow the thermostat to communicate with the network.
5. Restart your Nest Thermostat and router: If you’re still experiencing connectivity issues, try restarting both your Nest Thermostat and your router. Power off your thermostat and unplug your router for a few minutes before powering them back on and attempting to reconnect.
6. Reset your Nest Thermostat: If all else fails, you can perform a factory reset on your Nest Thermostat. This will remove all settings and configurations, including the WiFi network information. Refer to the manufacturer’s documentation for instructions on how to perform a factory reset.
If you have followed these troubleshooting tips and are still unable to resolve the issue, it may be helpful to consult the Nest support website or contact customer support for further assistance. They can provide additional troubleshooting steps and guide you through resolving any specific issues with your Nest Thermostat and WiFi network connectivity.
By troubleshooting these common issues, you can ensure a seamless transition when changing the WiFi network on your Nest Thermostat and continue enjoying the benefits of a connected and smart home.