
Gather the necessary materials
Before you begin cleaning your laptop screen, it’s essential to gather the necessary materials to ensure a safe and effective cleaning process. Having the right tools at hand will help you achieve the best results without causing any damage to your screen.
Here are the materials you will need:
- A microfiber cloth
- Distilled water or screen cleaning solution
- A small spray bottle
- Cotton swabs (optional)
A microfiber cloth is an important component for cleaning your laptop screen. It is gentle enough to avoid scratching the surface, and its fine fibers effectively pick up dust and smudges. Avoid using paper towels, tissue, or regular cloth, as they can leave lint or scratch the screen.
Distilled water is a safe and cost-effective choice for cleaning your laptop screen. If you prefer to use a screen cleaning solution, make sure it is specifically designed for electronic devices and does not contain harsh chemicals that could damage the screen.
A small spray bottle will help you apply the cleaning solution evenly on the microfiber cloth without over-saturating it. This ensures that you won’t accidentally drip excess liquid onto your laptop screen.
Cotton swabs can be helpful for cleaning hard-to-reach areas such as the corners or the edges of the screen. However, they should be used sparingly and with caution, as they have the potential to leave fibers behind if not used properly.
By gathering these materials before you start, you’ll be well-prepared to clean your laptop screen effectively and safely.
Power off and unplug your laptop
Before you begin cleaning your laptop screen, it is crucial to power off your laptop and unplug it from the power source. This step is essential to ensure your safety and prevent any potential damage to your device.
Here’s why it is important to power off and unplug your laptop:
1. Safety first: Powering off your laptop and disconnecting it from the power source eliminates the risk of electric shock while cleaning the screen. It is always better to be safe than sorry, so make sure you follow this step diligently.
2. Protecting your laptop: Cleaning a laptop screen that is powered on and connected to a power source can pose a risk to the internal components. Accidental liquid spills or moisture seeping into the device can cause short circuits and irreversible damage. By disconnecting the power, you minimize the chances of any mishaps occurring.
3. Reducing screen glare: When the laptop is powered off, it is easier to see and locate smudges, fingerprints, or dirt on the screen. This makes the cleaning process more effective and ensures that you don’t miss any spots.
It is important to note that you should never attempt to clean a laptop screen while it is powered on. Even if the screen is in sleep mode, there is still a chance of accidental input or damage if you are not careful. Taking the extra time to power off and unplug your laptop provides you with a safe and risk-free environment for cleaning.
Remember, the goal is to maintain the longevity and functionality of your laptop, and following this step will help you achieve that.
Use a microfiber cloth to remove surface dust and debris
Before applying any cleaning solution to your laptop screen, it is important to remove surface dust and debris using a microfiber cloth. Dust and particles can accumulate on the screen, making it difficult to achieve a smudge-free and pristine result.
Follow these steps to effectively remove surface dust and debris:
1. Ensure your laptop is powered off and unplugged: As mentioned earlier, it is crucial to take this safety measure before cleaning your laptop screen.
2. Fold the microfiber cloth: Start by folding the microfiber cloth into a small, manageable size. This will facilitate more precise cleaning and allow you to easily maneuver around the screen.
3. Gently wipe the screen in a downward motion: With the microfiber cloth, lightly press down on the screen and move in a downward motion from the top to the bottom. Apply minimal pressure to avoid damaging the screen. This movement helps dislodge and pick up any loose dust or debris that may be adhering to the surface.
4. Pay attention to corners and edges: Dust and debris often accumulate in the corners and around the edges of the screen. Take extra care when cleaning these areas, using the corner of the microfiber cloth or a cotton swab to ensure all particles are removed.
5. Check for any remaining dust or debris: After wiping the entire screen, inspect it carefully to see if there are any remaining specks of dust or debris. If necessary, repeat the cleaning process until the screen appears clean and free of surface particles.
Using a microfiber cloth to remove surface dust and debris is an important first step in the laptop screen cleaning process. By starting with a clean surface, you will achieve better results when applying a cleaning solution later on.
Remember to be gentle and avoid using excessive force that could cause scratches or damage to the screen. Taking the time to properly clean the surface will enhance your viewing experience and keep your laptop looking its best.
Prepare a cleaning solution
Once you have removed the surface dust and debris from your laptop screen, it’s time to prepare a cleaning solution that will effectively remove smudges, fingerprints, and stubborn stains without causing any damage.
Follow these steps to prepare a safe and effective cleaning solution:
1. Distilled water: One of the simplest and most commonly used cleaning solutions for a laptop screen is distilled water. Distilled water is free from impurities that can potentially harm the screen. Fill a small spray bottle with distilled water.
2. Screen cleaning solution: If you prefer a specially formulated cleaning solution, you can purchase a screen cleaning solution that is specifically designed for electronic device screens. These solutions are gentle, non-abrasive, and safe to use on various laptop screen types. Follow the instructions on the bottle for proper usage.
3. Do not use harsh chemicals: It’s important to avoid using harsh chemicals such as ammonia, alcohol, or window cleaners. These substances can damage the protective coatings on your screen and cause discoloration or cloudiness. Stick to gentle solutions that are specifically designed for electronic screens.
To prepare the cleaning solution:
1. If using distilled water: Spray a small amount of distilled water onto a clean microfiber cloth. Be cautious not to oversaturate the cloth, as excessive moisture can damage the screen.
2. If using a screen cleaning solution: Follow the instructions on the bottle to determine the proper amount needed. Spray the solution onto a clean microfiber cloth according to the recommended usage.
Remember, a little goes a long way. You only need enough moisture on the cloth to effectively clean the screen without saturating it. Excess liquid can seep into the edges of the screen or keyboard, potentially causing damage.
By preparing a suitable cleaning solution, you are setting yourself up for a successful and safe cleaning process. Whether using distilled water or a screen cleaning solution, you can confidently move forward with cleaning your laptop screen.
Dampen the microfiber cloth with the cleaning solution
Now that you have prepared a suitable cleaning solution, it’s time to dampen the microfiber cloth. This step is crucial as it ensures that the cleaning solution is evenly distributed and ready to remove smudges and dirt from your laptop screen.
Follow these steps to dampen the microfiber cloth with the cleaning solution:
1. Take the clean microfiber cloth: Ensure that the microfiber cloth you are using is clean and free from any previous residue or debris. This will prevent any particles from transferring to the screen during the cleaning process.
2. Using a spray bottle: If you are using a spray bottle, hold it about 6-8 inches away from the microfiber cloth. Spray a few pumps of the cleaning solution directly onto the cloth. Aim for an even distribution of the solution across the surface of the cloth.
3. If not using a spray bottle: If you are not using a spray bottle, you can apply the cleaning solution to the microfiber cloth by pouring a small amount directly onto the cloth. The key is to ensure that the cloth is slightly damp, not dripping wet.
4. Check the dampness: After applying the cleaning solution, check the dampness of the microfiber cloth. It should feel slightly moist but not overly saturated. If it’s too wet, gently squeeze out any excess liquid.
5. Avoid applying the solution directly to the screen: It’s important to note that you should avoid applying the cleaning solution directly to the laptop screen. Applying liquid directly to the screen can increase the risk of liquid seeping into the device and causing damage.
By properly dampening the microfiber cloth with the cleaning solution, you ensure that the cloth is ready to effectively remove smudges and dirt from your laptop screen. Remember to handle the cloth with care so as not to accidentally drop any excess liquid onto the screen or surrounding areas.
With your microfiber cloth properly prepped, you’re now ready to move on to the next step: gently wiping the laptop screen to remove the dirt and smudges.
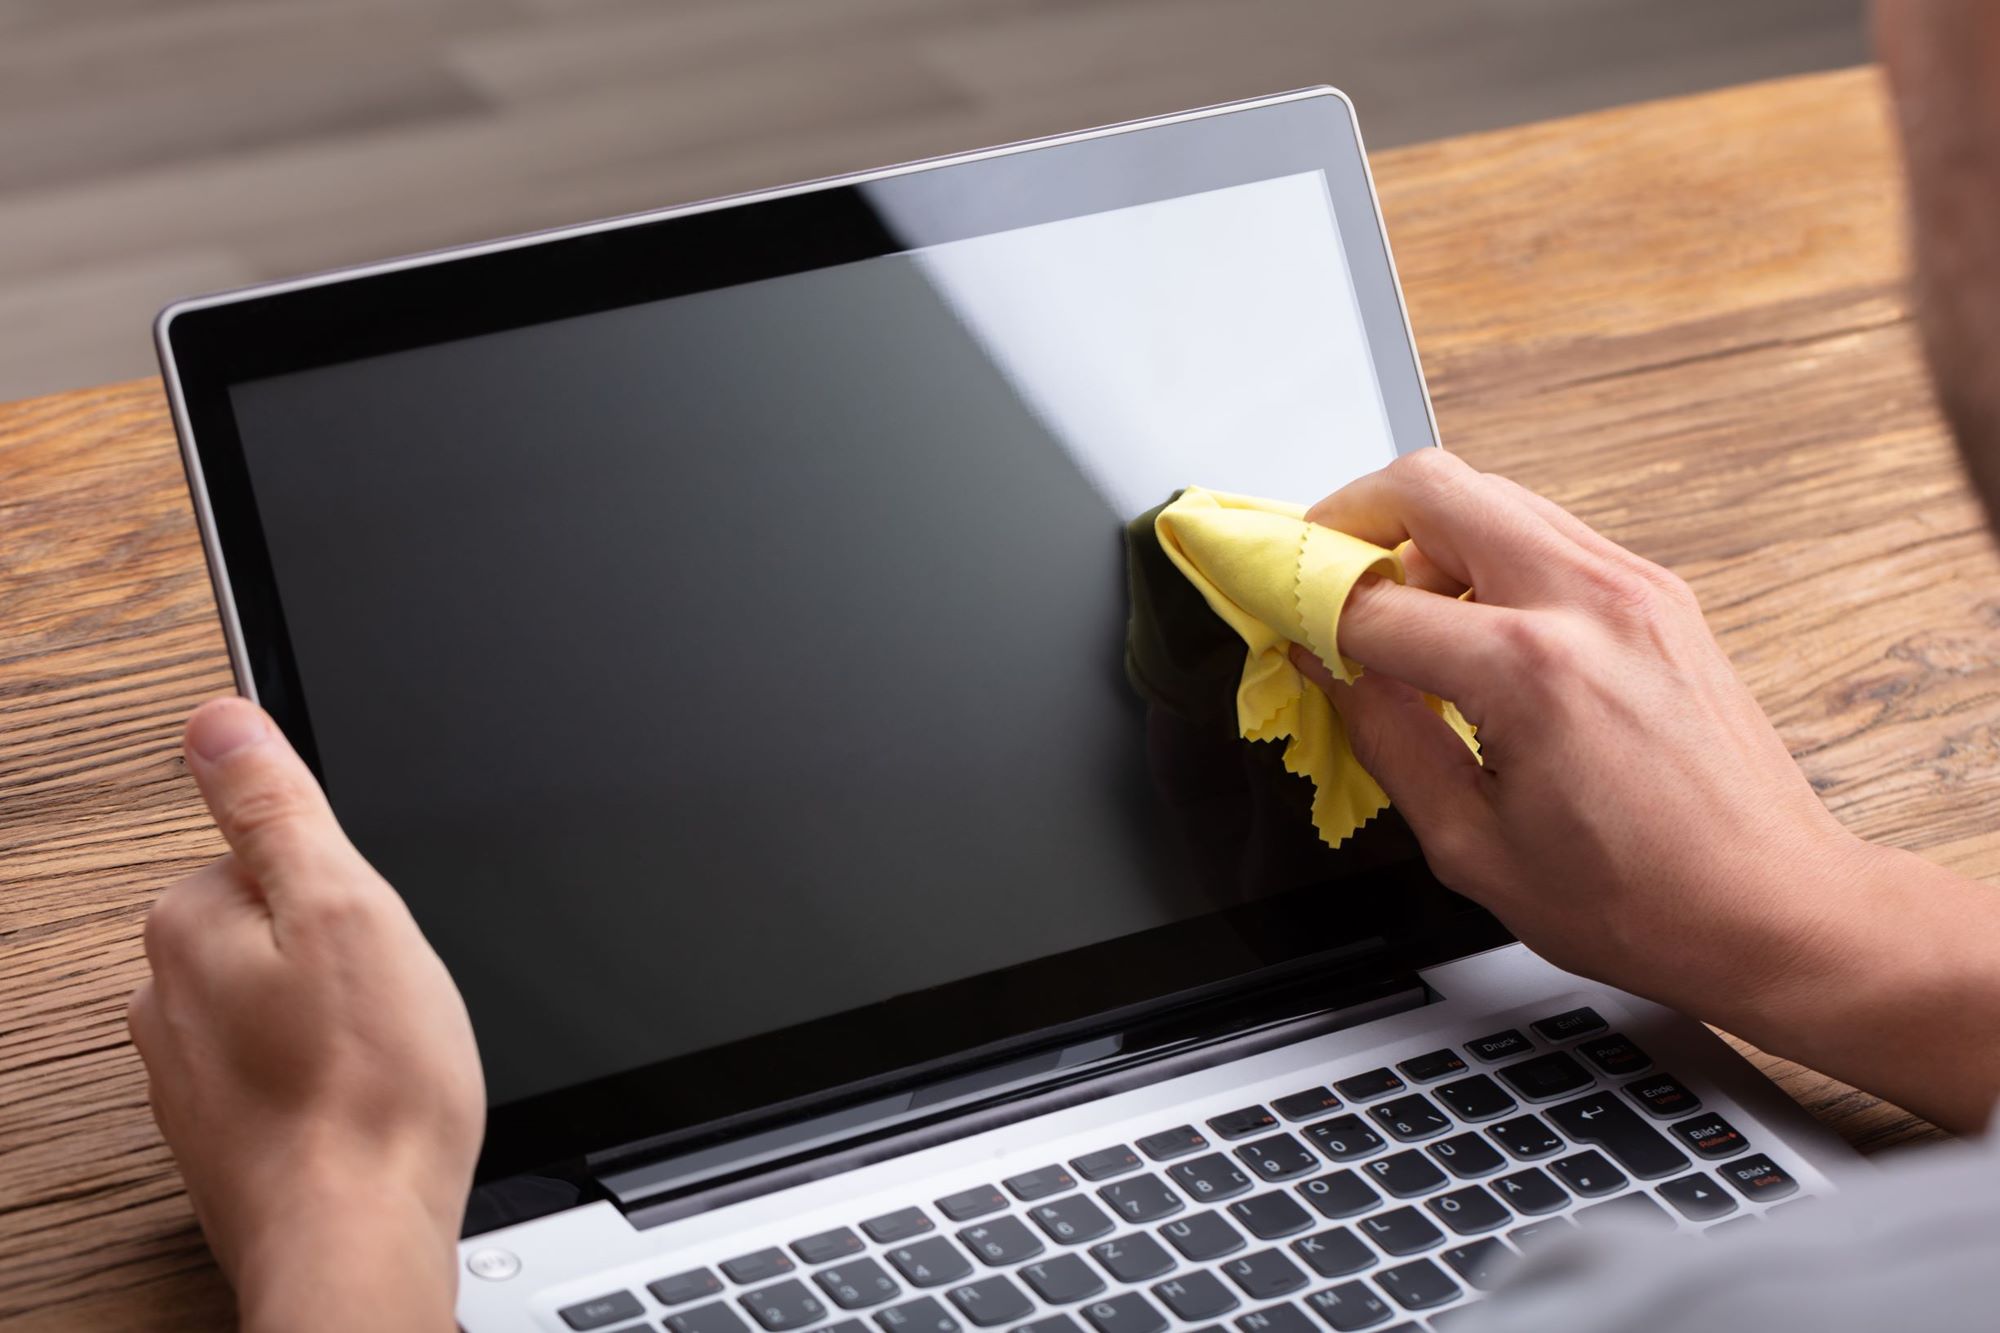
Gently wipe the laptop screen in a circular motion
With the microfiber cloth properly dampened with the cleaning solution, it’s time to gently wipe the laptop screen to remove dirt, smudges, and fingerprints. Follow these steps to ensure a thorough and effective cleaning:
1. Start from the top: Begin wiping the screen from the top and work your way down. This ensures that any dirt or debris that falls during the cleaning process will not be spread back onto already cleaned areas.
2. Use a circular motion: Apply gentle pressure to the microfiber cloth and use circular motions to clean the screen. The circular motion helps to lift and remove stubborn smudges and dirt without damaging the screen. Avoid using excessive force or scrubbing, as this can lead to scratches or damage.
3. Cover the entire screen: Make sure to cover the entire surface area of the screen, including the corners and edges. Pay close attention to areas where fingerprints or smudges are more visible. Take your time and be thorough in your cleaning process to achieve the best results.
4. Repeat if necessary: If there are lingering smudges or stubborn stains, don’t be afraid to repeat the process. Dampen the cloth again, if needed, and gently wipe the affected areas until they are clean. Patience and persistence are key to achieving a spotless screen.
5. Avoid excessive pressure: While it’s important to apply gentle pressure, be cautious not to press too hard on the screen. Excessive pressure can damage the delicate components of the screen or cause the pixels to become distorted. Let the cleaning solution and the microfiber cloth do the work for you.
Remember that the goal is to gently and safely remove dirt and smudges without causing any harm to the laptop screen. With a careful and systematic approach, you’ll be able to restore your screen back to its pristine condition.
Once you’ve finished wiping the laptop screen, it’s time to address any stubborn stains or fingerprints that may require additional attention.
Pay attention to stubborn stains or fingerprints
While gently wiping the laptop screen in a circular motion will remove the majority of dirt and smudges, there may be instances where stubborn stains or fingerprints require extra attention. It’s important to address these areas to ensure a thorough and satisfying cleaning process.
Here are some steps to effectively deal with stubborn stains or fingerprints:
1. Identify the problem areas: Take a close look at your laptop screen and identify any stubborn stains or visible fingerprints. These areas will require a bit more effort and targeted cleaning.
2. Dampen a cotton swab (if necessary): If the stains or fingerprints are particularly stubborn or hard to remove, you can dampen a cotton swab with a small amount of cleaning solution. Be cautious not to oversaturate the swab, as excessive liquid can seep into the screen and cause damage.
3. Gently work on the affected areas: Using the dampened cotton swab or the microfiber cloth, apply gentle pressure and carefully work on the stubborn stains or fingerprints in a circular motion. Be patient and persistent, but avoid using excessive force as it may result in scratches or damage to the screen.
4. Avoid using abrasive materials: When dealing with stubborn stains, it may be tempting to use rough or abrasive materials to scrub them away. However, this can do more harm than good. Stick to the gentle approach using a microfiber cloth or cotton swab to prevent any damage to the screen’s surface.
5. Check your progress: After working on the stubborn stains or fingerprints, assess your progress. If the marks are still visible, repeat the process using a fresh section of the microfiber cloth or a new cotton swab. Sometimes, persistent stains require multiple attempts to completely remove them.
By paying attention to stubborn stains or fingerprints, you ensure that your laptop screen is free from any blemishes that may hinder your viewing experience. With a bit of extra effort, you can achieve a clean and clear screen that looks as good as new.
Once you are satisfied with your cleaning efforts, it’s time to move on to the next step: drying the laptop screen to remove any remaining moisture.
Dry the screen with a clean, dry microfiber cloth
After cleaning your laptop screen and removing any stubborn stains or fingerprints, it’s essential to dry the screen properly to avoid leaving behind streaks or moisture that can damage the screen. Drying the screen ensures a crystal-clear finish and enhances the overall appearance of your laptop.
Follow these steps to effectively dry your laptop screen:
1. Take a clean, dry microfiber cloth: Ensure that the microfiber cloth you use for drying is separate from the one you used for cleaning. This prevents any residual moisture or cleaning solution from transferring to the screen during the drying process.
2. Gently pat the screen: Start by gently patting the screen with the dry microfiber cloth. Avoid rubbing the screen vigorously, as it can cause friction and potentially damage the surface. Patting the screen will help absorb any remaining moisture without streaking.
3. Pay attention to corners and edges: Make sure to thoroughly dry the corners and edges of the screen. These areas can often retain moisture, so give them some extra attention to ensure they are completely dry.
4. Check for streaks or smudges: After drying the screen, give it a closer look to make sure there are no streaks or smudges left behind. If you notice any, gently buff the affected area using the dry microfiber cloth in circular motions until the screen is clear and streak-free.
5. Ensure the cloth is clean and dry: Throughout the drying process, periodically check the microfiber cloth to ensure it remains clean and dry. If it becomes damp or dirty, switch to a fresh cloth to avoid reintroducing moisture or debris to the screen.
Drying the screen is an important final step in the cleaning process to achieve a spotless and pristine appearance. By following these steps and being thorough in your drying efforts, you can ensure a clear and vibrant display on your laptop.
Once the screen is dry, it’s important to maintain regular cleaning routines to prevent the buildup of dirt and dust, which can affect the screen’s clarity and performance.
Repeat the process if necessary
If, after completing the cleaning and drying steps, you notice that your laptop screen is still not as clean as you’d like it to be, don’t worry. Sometimes, stubborn dirt, smudges, or fingerprints require multiple cleaning attempts to fully remove.
Follow these steps to effectively repeat the cleaning process if necessary:
1. Assess the cleanliness of the screen: Take a moment to evaluate the current state of your laptop screen. Look for any remaining dirt, smudges, or fingerprints that you may have missed during the initial cleaning. Identify the specific areas that require additional attention.
2. Dampen the microfiber cloth with the cleaning solution: If needed, dampen the microfiber cloth again with the appropriate cleaning solution. Ensure that the cloth is slightly moist, not dripping wet.
3. Repeat the gentle wiping motion: Once the cloth is properly dampened, gently wipe the problem areas of the screen, using a circular motion. Apply minimal pressure and be careful not to scrub or press too hard to avoid damaging the screen.
4. Pay extra attention to stubborn stains or fingerprints: For particularly stubborn stains or fingerprints, spend a bit more time and effort to address them. Dampen a cotton swab with a small amount of cleaning solution and carefully work on the affected areas, using gentle circular motions.
5. Dry the screen again: After repeating the cleaning process, dry the laptop screen once more with a clean, dry microfiber cloth. Ensure that the cloth is free from any moisture or debris that could potentially leave streaks.
Remember to be patient and persistent during the cleaning process. It may take multiple attempts to completely remove stubborn dirt or smudges from your laptop screen. Taking the time to repeat the process will ultimately result in a cleaner and more visually appealing display.
If, after repeating the cleaning process, you are still unsatisfied with the cleanliness of your laptop screen, you may want to seek professional assistance or consult the manufacturer for further guidance.
Now that you’ve repeated the process, you can move on to the next step: avoiding the use of harsh chemicals or abrasive materials in the cleaning process.
Avoid using harsh chemicals or abrasive materials
When cleaning your laptop screen, it’s important to use gentle methods and avoid harsh chemicals or abrasive materials that can cause damage. Maintaining a safe and effective cleaning routine will help preserve the integrity and longevity of your screen.
Here are some key points to remember:
1. Say no to harsh chemicals: Harsh chemicals like ammonia, bleach, or alcohol can strip away the protective coatings on your laptop screen, leading to discoloration, cloudiness, or even irreversible damage. Avoid using these substances at all costs.
2. Opt for gentle cleaning solutions: Instead of harsh chemicals, use gentle cleaning solutions specifically designed for electronic screens. Look for products that are labeled safe for use on laptops, LCD or LED screens, and other electronic devices. These solutions are formulated to effectively clean without causing harm.
3. Avoid abrasive materials: Rough materials like paper towels, tissue, or abrasive cloths can scratch the delicate surface of your laptop screen. Opt for a soft, lint-free microfiber cloth instead. These cloths are designed to be gentle and effective at removing dirt and smudges without causing any damage.
4. Be mindful of cleaning techniques: When cleaning your laptop screen, always use gentle motions. Avoid applying excessive pressure or scrubbing vigorously, as this can lead to scratches or other forms of damage.
5. Follow manufacturer’s guidelines: Manufacturers often provide specific instructions on how best to clean their laptop screens. Take the time to read and follow these guidelines to ensure you are using the appropriate cleaning methods and materials for your specific device.
By avoiding harsh chemicals and abrasive materials, you can maintain the integrity of your laptop screen and keep it looking its best for years to come. Gentle cleaning methods and suitable products are key to preserving the clarity and longevity of your screen.
Now that you are aware of what to avoid in the cleaning process, it’s important to also pay attention to the cleanliness of the surrounding areas of the laptop screen.
Clean the surrounding areas of the laptop screen
While cleaning the laptop screen is important, it’s equally essential to pay attention to the cleanliness of the surrounding areas. Dust, dirt, and debris can accumulate on the keyboard, touchpad, and bezels, hindering the overall appearance and performance of your laptop. By cleaning these areas, you ensure a more hygienic and aesthetically pleasing device.
Here are some steps to clean the surrounding areas of the laptop screen:
1. Power off and unplug your laptop: Before cleaning the surrounding areas, make sure to power off your laptop and disconnect it from the power source. This ensures your safety and prevents any accidental keystrokes or damage to the device.
2. Use a can of compressed air: Start by using a can of compressed air to blow away any loose dust or debris from the keyboard and crevices around the laptop screen. Hold the can upright and use short bursts of air to dislodge the particles. Be careful not to tilt the can upside down, as it can release liquids that may damage the laptop.
3. Wipe the keyboard and touchpad: Take a clean microfiber cloth and gently wipe the keyboard and touchpad to remove any remaining dust and smudges. Pay attention to the spaces between the keys and use a cotton swab dampened with a small amount of cleaning solution for hard-to-reach areas. Ensure that the cloth is dry and free from any moisture to avoid damaging the components.
4. Clean the bezels and edges: Use the microfiber cloth to clean the bezels and edges around the laptop screen. Wipe them gently, removing any dust or fingerprints that may have accumulated. Take care not to press too hard to avoid damaging the screen or other sensitive parts of the laptop.
5. Allow it to air dry: Let the laptop air dry for a few minutes to ensure that any moisture from the cleaning process has evaporated. This will prevent any potential damage caused by residual moisture making contact with the internal components.
By regularly cleaning the surrounding areas of your laptop screen, you ensure a hygienic and visually appealing device. Removing dust and debris from the keyboard and bezels not only enhances the overall appearance but also contributes to the efficient functioning of your laptop.
Now that you’ve cleaned the surrounding areas, establishing a regular cleaning routine will help prevent the buildup of dirt and dust in the future.
Maintain a regular cleaning routine to prevent buildup of dirt and dust
Keeping your laptop screen clean and free from dirt and dust not only improves its appearance but also contributes to its overall performance and longevity. To ensure a clear and pristine screen, it’s essential to maintain a regular cleaning routine that prevents the buildup of dirt and dust.
Here are some tips to help you establish a regular cleaning routine:
1. Set a cleaning schedule: Determine how often you will clean your laptop screen based on your usage and environment. For most users, a weekly or bi-weekly cleaning routine is sufficient to prevent significant buildup. However, if you frequently use your laptop in dusty or dirty conditions, you may need to clean it more often.
2. Use a microfiber cloth for quick daily cleanings: Keep a microfiber cloth handy to quickly wipe the screen on a daily basis. This helps remove surface dust and fingerprints before they have a chance to accumulate. A quick wipe-down at the end of each day can go a long way in maintaining a clean screen.
3. Avoid eating or drinking near your laptop: Food and liquid spills can not only damage your laptop but also leave behind sticky residue and attract dust. It’s best to avoid eating or drinking near your laptop to minimize the risk of spills and keep your screen cleaner for longer.
4. Protect your laptop when not in use: Use a laptop sleeve or cover to protect your laptop when it is not in use. This helps shield the screen from dust and other environmental factors that can contribute to buildup. Keeping your laptop covered when not in use can significantly reduce the need for frequent cleanings.
5. Be mindful of where you place your laptop: Avoid placing your laptop on dusty surfaces or near open windows where it can be exposed to dirt and debris. Choosing clean and dust-free areas to work with your laptop can help reduce the amount of dust and dirt that accumulates on the screen.
By incorporating these practices into your regular routine, you can prevent the buildup of dirt and dust on your laptop screen. Not only will this keep your screen looking clean and clear, but it will also contribute to its long-term functionality and performance.
Now that you have a regular cleaning routine, you can enjoy a beautiful and well-maintained laptop screen for years to come.