
Why Change Your Payment Method on Netflix
Netflix is an incredibly popular streaming service that provides users with access to a vast library of movies, TV shows, documentaries, and more. With millions of subscribers worldwide, Netflix has made it convenient for users to enjoy their favorite content on various devices. One important aspect of using Netflix is ensuring that your payment method is up to date. Here are a few reasons why you might need to change your payment method on Netflix:
- Expired or Declined Card: If the credit or debit card linked to your Netflix account has expired or is no longer valid, you will need to update your payment method to continue enjoying uninterrupted access to your favorite shows.
- Changing Banks: If you have recently switched banks or closed your existing account, you will need to update your payment method on Netflix with the new account details to ensure seamless billing and avoid any disruptions to your Netflix subscription.
- Switching Payment Methods: Perhaps you have been using a credit card to make payments on Netflix and now prefer to switch to a different payment method, such as PayPal or a different credit card. Changing your payment method allows you to have more flexibility in managing your subscriptions.
- Security Reasons: It’s always a good practice to regularly update your payment information for security purposes. By changing your payment method on Netflix periodically, you reduce the risk of fraudulent activity or unauthorized access to your account.
- Discounts and Offers: Occasionally, Netflix may partner with payment processors or banks to offer exclusive discounts or promotions. By changing your payment method to an eligible one, you can take advantage of these offers and potentially save money on your Netflix subscription.
Overall, keeping your payment information accurate and up to date on Netflix ensures a seamless streaming experience without any interruptions. Whether it’s due to card expiration, bank account changes, security reasons, or the desire to take advantage of discounts, changing your payment method on Netflix is a simple and necessary process.
Step 1: Logging into your Netflix Account
Before you can change your payment method on Netflix, you need to log into your account. Follow the steps below to access your account:
- Open your preferred web browser and go to the Netflix website (www.netflix.com).
- Click on the “Sign In” button located at the top right corner of the page.
- Enter your email address or phone number associated with your Netflix account in the provided field.
- Next, enter your password. Make sure that you type it correctly to avoid any login issues.
- Click on the “Sign In” button to proceed.
Once you have successfully logged into your Netflix account, you can proceed to the next step of changing your payment method. It’s essential to have access to your account in order to make any necessary updates or modifications.
Step 2: Go to Account Settings
Once you have logged into your Netflix account, the next step is to navigate to the Account Settings page. Here’s how you can do it:
- On the Netflix homepage, locate your profile icon at the top right corner of the screen. It’s usually represented by your profile picture or initials.
- Click on the profile icon to open a drop-down menu.
- In the drop-down menu, select “Account” to access your account settings.
This will take you to the Account Settings page, where you can manage various aspects of your Netflix account, including your payment method.
It’s worth noting that only the primary account holder can access the Account Settings page. If you are using a shared Netflix account, make sure you have the necessary permissions or consult with the primary account holder to make any payment method changes.
Step 3: Update Payment Method
After navigating to the Account Settings page on Netflix, you are ready to update your payment method. Follow the steps below to make the necessary changes:
- Scroll down the Account Settings page until you find the section labeled “Membership & Billing.”
- Under that section, locate and click on the “Update payment info” or “Change payment method” link.
- You may be prompted to re-enter your Netflix account password for security verification.
- Once you have entered your password, you will be directed to a new page where you can update your payment information.
On this page, you will typically see the current payment method associated with your Netflix account, which may be a credit card, debit card, PayPal, or other eligible payment options based on your region.
To update the payment method, you usually have the option to:
- Provide new credit card or debit card details, including the card number, expiration date, and security code.
- Choose PayPal as the new payment method and link your Netflix account to your PayPal account.
- Follow the on-screen instructions to set up any other available payment options based on your location.
Make sure to carefully enter your payment details to avoid any errors or discrepancies. Once you have updated your payment method, proceed to the next step to confirm and activate the new payment method on Netflix.
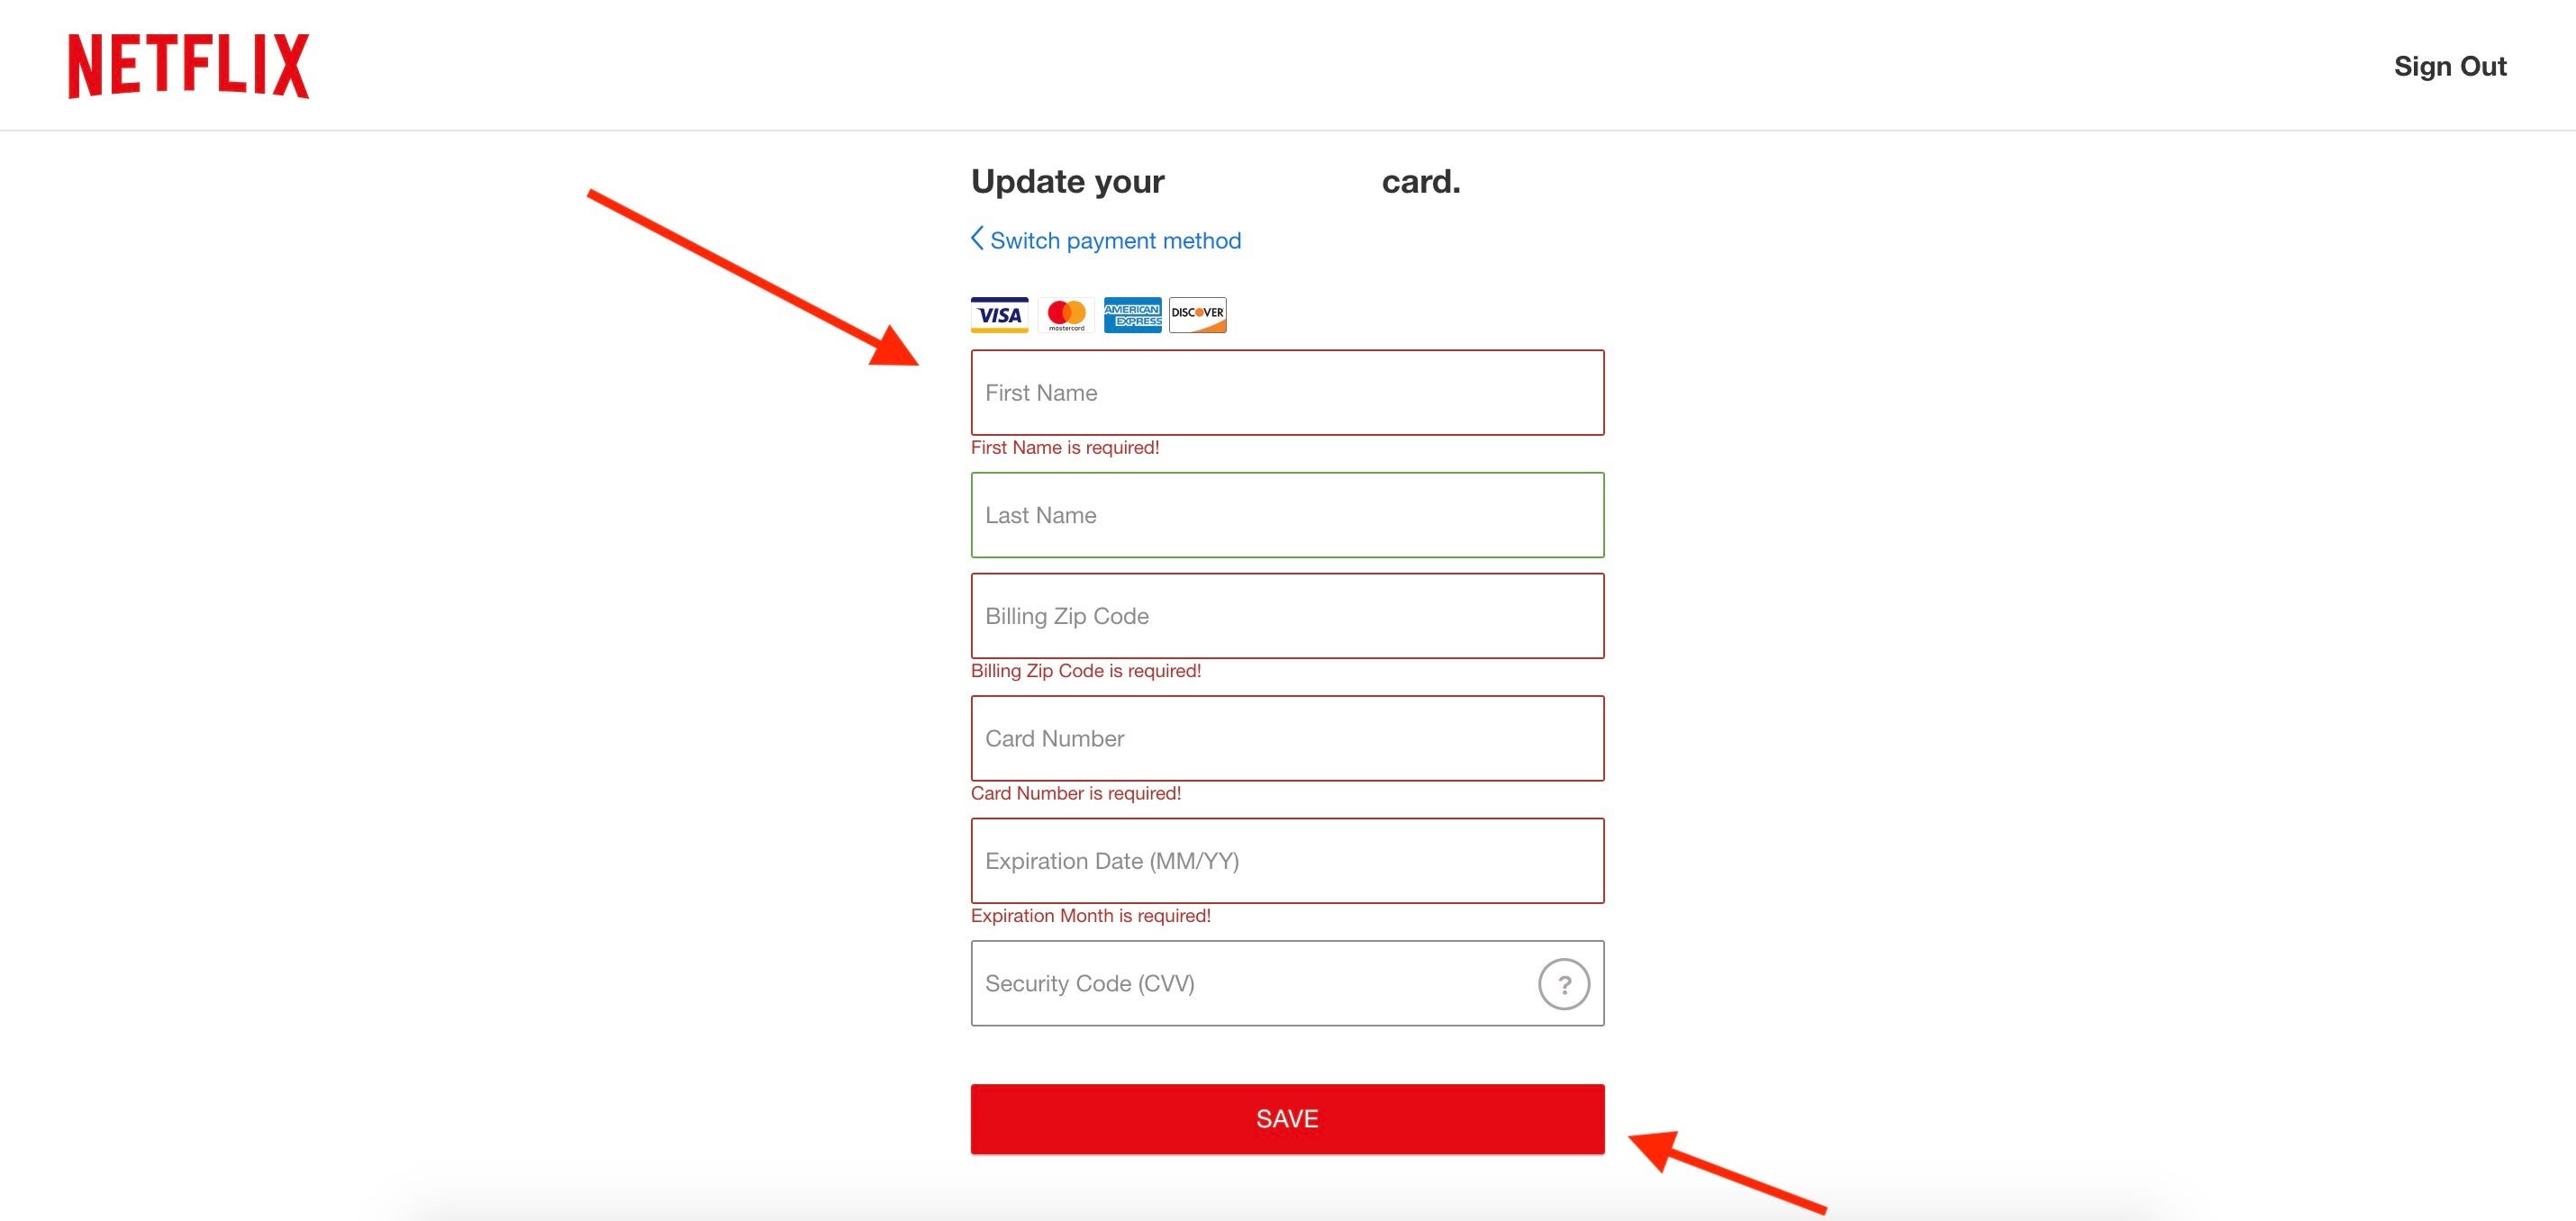
Step 4: Enter Payment Details
After clicking on the “Update payment info” or “Change payment method” link on the Account Settings page, you will be redirected to a page where you can enter your new payment details. Here’s what you need to do:
- Choose the type of payment method you wish to use from the available options, such as credit card, debit card, or PayPal.
- If you select a credit or debit card, enter the relevant information, including the card number, expiration date, and security code. Make sure to double-check the accuracy of the entered details.
- Alternatively, if you choose to use PayPal, you may be redirected to the PayPal website to log in to your account and authorize the payment.
- Follow the prompts and instructions provided on the screen to complete the payment method update process. This may include verifying your payment details and agreeing to any terms and conditions.
- Once you have entered all the required information and completed the necessary steps, click on the “Save” or “Update” button to save your new payment details on Netflix.
It’s important to note that the steps and options may vary slightly depending on your region and the available payment methods supported by Netflix.
After successfully entering your payment details, proceed to the next step to confirm and activate the new payment method on your Netflix account.
Step 5: Confirmation and Activating New Payment Method
After entering your payment details on Netflix, it’s crucial to confirm and activate your new payment method to ensure uninterrupted service. Follow these steps to complete the process:
- Review the payment information you entered to ensure accuracy. Double-check the card details or PayPal account linked to your Netflix subscription.
- If everything looks correct, click on the “Confirm” or “Activate” button to finalize the update.
- Netflix may prompt you to re-enter your account password for security purposes before activating the new payment method.
- Once you have confirmed the update, Netflix will process the new payment method and activate it on your account. This may take a few moments.
- Once the activation is complete, you will receive a notification or confirmation message indicating that your new payment method has been successfully updated and activated.
It’s essential to keep in mind that the billing cycle for your Netflix subscription may depend on the specific terms and conditions of your plan. Therefore, the update to your payment method may take effect immediately or at the start of the next billing period.
It’s recommended to check your account settings or billing information to ensure the successful activation of the new payment method. You can also reach out to Netflix customer support if you encounter any issues or require further assistance.
With your new payment method activated, you can enjoy uninterrupted streaming and access to the vast selection of content available on Netflix.
Step 6: Removing Old Payment Method
After successfully updating and activating your new payment method on Netflix, it’s important to remove the old payment method to avoid any confusion or potential billing issues. Follow these steps to remove the old payment method from your account:
- Go back to the Account Settings page on Netflix. You can do this by clicking on the profile icon at the top right corner of the screen and selecting “Account” from the drop-down menu.
- Scroll down to the “Membership & Billing” section, similar to the steps taken earlier in the process.
- Look for the old payment method listed under the “Payment Method” or “Billing Information” section.
- Click on the “Remove” or “Delete” link next to the old payment method.
- Netflix may ask for confirmation before permanently removing the payment option.
- Review the details once again to ensure that you are removing the correct payment method.
- If you are sure, click on the “Confirm” or “Remove” button to proceed with the removal.
Removing the old payment method will prevent future charges from being attempted on that particular payment option. By keeping only the updated and active payment method on your account, you can maintain accurate billing and avoid any potential issues with your Netflix subscription.
After removing the old payment method, you can continue to enjoy uninterrupted streaming on Netflix with the confidence that your billing information is up to date and accurate.
Step 7: Checking Payment History
Once you have updated your payment method and removed the old one on Netflix, it’s a good idea to check your payment history to ensure that everything is in order. Here’s how you can check your payment history:
- Go to the Account Settings page on Netflix by clicking on the profile icon at the top right corner of the screen and selecting “Account” from the drop-down menu.
- Scroll down to the “Membership & Billing” section.
- Look for the “Payment History” or “Billing History” option.
- Click on the link to access your payment history.
- Review the details of your past payments, including the dates and amounts charged to your account.
- Make sure that the payment history matches your expectations and that there are no unauthorized charges.
- If you notice any discrepancies or have any concerns, it’s advisable to contact Netflix customer support for assistance.
Checking your payment history provides you with a clear overview of your past transactions with Netflix. It helps you verify that your new payment method is being correctly charged and that there are no unexpected or unauthorized payments associated with your account.
By regularly reviewing your payment history, you can ensure the accuracy of your billing and maintain control over your Netflix subscription.
Remember, if you have any questions or concerns about your payment history or account, don’t hesitate to reach out to Netflix customer support for further assistance.