
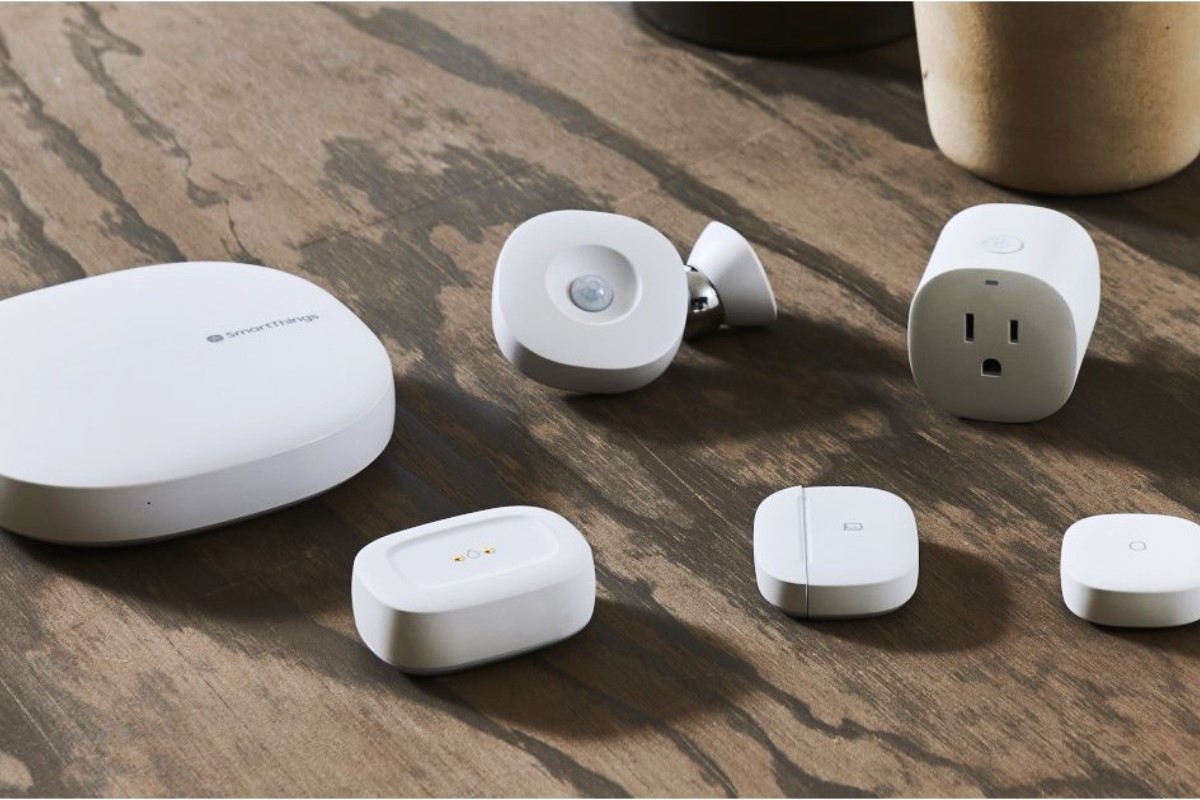
What you will need
Before you begin adding a Philips Hue sensor to SmartThings, it’s important to make sure you have the following items:
- A Philips Hue bridge: This is the central hub that connects your Philips Hue devices to the SmartThings ecosystem.
- A SmartThings hub: This is the central hub that connects and controls all of your SmartThings-compatible devices.
- A Philips Hue sensor: This is the motion sensor that you want to add to your SmartThings setup.
- A smartphone or tablet: This will be used to set up and control your SmartThings devices.
Ensure that your Philips Hue bridge and your SmartThings hub are both properly set up and connected to your home network. It’s also a good idea to download and install the SmartThings mobile app on your smartphone or tablet before starting the setup process.
Having the right equipment and a clear understanding of what components are needed will ensure a smooth and successful integration of the Philips Hue sensor with your SmartThings setup.
Installing the Philips Hue Bridge and SmartThings Hub
Before you can add a Philips Hue sensor to your SmartThings setup, you need to ensure that the Philips Hue Bridge and SmartThings Hub are properly installed and connected. Here’s how:
- Start by connecting the Philips Hue Bridge to your home router using an ethernet cable. Make sure the bridge is powered on and connected to a power source.
- Next, download the Philips Hue mobile app on your smartphone or tablet. Follow the app’s instructions to set up the bridge and connect it to your home network. Make sure to create a Philips Hue account if prompted.
- Once the bridge is successfully connected, proceed to set up the SmartThings Hub. Connect the hub to your router using an ethernet cable, and ensure it’s powered on.
- Download the SmartThings mobile app and sign in or create a new account if necessary. Follow the app’s instructions to set up the hub and connect it to your home network.
- Once the SmartThings Hub is connected, it’s time to link it with your Philips Hue Bridge. Open the SmartThings app and navigate to the “Add a Device” section.
- Select “Lights and Switches” from the list of available devices and choose “Philips Hue.” The app will guide you through the process of connecting the bridge to SmartThings.
- Follow the prompts in the app to authorize the connection between the SmartThings Hub and your Philips Hue Bridge. This will allow SmartThings to control your Philips Hue devices.
Once the Philips Hue Bridge and SmartThings Hub are successfully installed and connected, you’re ready to proceed with adding the Philips Hue sensor to your SmartThings setup. Keep in mind that the specific steps for connecting the bridge and hub may vary slightly depending on the versions of the devices and the app you are using.
Connecting the Philips Hue Sensor
Now that you have successfully installed the Philips Hue Bridge and SmartThings Hub, it’s time to connect the Philips Hue sensor to your SmartThings setup. Follow these steps:
- Ensure that the Philips Hue sensor is within range of the Philips Hue Bridge and that its batteries are properly inserted. The sensor should be placed in a location where it can detect motion effectively.
- Open the Philips Hue mobile app on your smartphone or tablet and navigate to the “Settings” or “Devices” section.
- Choose “Add New Device” or a similar option to initiate the pairing process.
- The app will begin searching for the Philips Hue sensor. Press and hold the button on the sensor until the LED light flashes to make it discoverable.
- Once the app detects the sensor, it will prompt you to add it to your existing Philips Hue setup. Follow the on-screen instructions to complete the pairing process.
- After the sensor is successfully added to your Philips Hue setup, open the SmartThings mobile app.
- Navigate to the “Add a Device” section and select “Lights and Switches.”
- Locate and choose the Philips Hue sensor from the list of available devices.
- Follow the instructions in the app to authorize SmartThings to connect with the sensor and add it to your SmartThings setup.
Once the connection process is complete, you should see the Philips Hue sensor listed in your SmartThings devices. It is now ready to be used in your SmartThings automations and routines.
Remember, the specific steps for connecting the Philips Hue sensor may vary slightly depending on your version of the Philips Hue app and the SmartThings app. Refer to the app’s instructions and prompts for accurate guidance throughout the process.
Adding the Philips Hue Sensor to SmartThings
With the Philips Hue sensor connected to your SmartThings setup, it’s time to add the sensor to your SmartThings devices. Follow these steps to integrate the Philips Hue sensor with SmartThings:
- Open the SmartThings mobile app on your smartphone or tablet and navigate to the dashboard.
- Select “Add Device” or a similar option to start the device pairing process.
- Choose “Philips Hue” from the list of available device types.
- The app will now scan for the Philips Hue sensor. Once it appears, select it to proceed.
- The app will prompt you to press the button on the Philips Hue sensor to initiate pairing.
- Press and hold the button on the sensor until the LED light starts flashing. This will make the sensor discoverable by SmartThings.
- Wait for the app to complete the pairing process. It may take a few minutes to establish a connection between the sensor and SmartThings.
- Once the pairing is successful, you will receive a confirmation message in the app.
- Go back to the SmartThings dashboard and you should now see the Philips Hue sensor listed among your devices.
Now that the Philips Hue sensor is added to SmartThings, you can start using it in your automations, routines, and other SmartThings features.
Note that the steps mentioned above are based on the general process of adding a device to SmartThings. The exact steps and options may differ slightly depending on the version of the app you are using. Refer to the app’s instructions and prompts for accurate guidance throughout the process.
Adjusting the Sensor Settings in SmartThings
After adding the Philips Hue sensor to SmartThings, you have the ability to customize and adjust various settings to suit your needs. Here’s how you can adjust the sensor settings in the SmartThings app:
- Open the SmartThings mobile app on your smartphone or tablet and navigate to the dashboard.
- Select the Philips Hue sensor from your list of devices.
- Tap on the sensor to access its settings and configuration options.
- Depending on the sensor model, you will have different settings available to you. Common settings may include sensitivity level, motion detection range, and timeout duration.
- Adjust the sensitivity level to determine how sensitive the sensor is to motion. A higher sensitivity level means the sensor will detect motion even from a slight movement, while a lower sensitivity level will require more significant movement to trigger the sensor.
- Set the motion detection range to specify the distance at which the sensor can detect motion. This can be useful if you only want the sensor to trigger when someone is in close proximity.
- Configure the timeout duration, which determines how long the sensor will remain active after detecting motion. You can choose to have the sensor deactivate quickly or stay active for a longer period.
- Save your settings and exit the sensor settings page.
By adjusting the sensor settings in SmartThings, you can fine-tune its behavior according to your preferences and the specific needs of your home automation setup.
Remember that the available settings may vary depending on your specific model of the Philips Hue sensor and the version of the SmartThings app. Refer to the app’s instructions and prompts for accurate guidance on adjusting the sensor settings.
Using the Philips Hue Sensor with SmartThings Automations
One of the key benefits of integrating the Philips Hue sensor with SmartThings is the ability to create powerful automations that enhance the functionality of your smart home setup. Here’s how you can utilize the Philips Hue sensor in your SmartThings automations:
- Open the SmartThings mobile app on your smartphone or tablet and navigate to the dashboard.
- Select “Automation” or a similar option to access the automation creation feature.
- Tap on “Add Automation” or a similar button to start creating a new automation.
- Choose a trigger for your automation. Select the Philips Hue sensor as the trigger device.
- Select the desired motion event, such as motion detected or motion cleared, as the trigger condition for your automation.
- Next, specify the actions or tasks you want the automation to perform when the trigger condition is met. For example, you can set the automation to turn on specific lights or activate a scene when motion is detected.
- Customize additional settings for your automation, such as time delays, repeats, or specific days of the week when the automation should or should not run.
- Review all the settings and confirm the creation of the automation.
Once the automation is created, the Philips Hue sensor will trigger the specified actions based on the defined conditions. For example, when motion is detected, the lights controlled by the Philips Hue system can automatically turn on, creating a seamless and convenient lighting experience.
Experiment with different combinations of trigger conditions and actions to tailor your automations to your specific requirements and preferences. This will enable you to create a truly customized and efficient smart home experience.
Note that the automation creation process may vary slightly depending on the version of the SmartThings app you are using. Consult the app’s instructions and prompts for accurate guidance when setting up automations with the Philips Hue sensor.
Troubleshooting Common Issues
While setting up and using the Philips Hue sensor with SmartThings, you may encounter some common issues. Here are a few troubleshooting steps to help you address these problems:
- No motion detected: If you’re not receiving any motion detection alerts or the sensor doesn’t seem to be working, ensure that the sensor’s batteries are properly inserted and have sufficient charge. Also, check the placement of the sensor to ensure it is within the specified motion detection range.
- Interference: If the sensor’s motion detection is inconsistent or unreliable, there may be interference from other wireless devices in your home. Try adjusting the placement of the sensor or relocating other devices that could be causing interference.
- Connection issues: If the Philips Hue sensor is not connecting to SmartThings or is frequently disconnecting, ensure that both the sensor and the SmartThings hub are within range of a stable Wi-Fi network. Consider moving the SmartThings hub to a different location or using a Wi-Fi extender to improve the connection.
- Incorrect settings: If the sensor’s settings are not working as expected, double-check the sensitivity level, motion detection range, and timeout duration in the SmartThings app. Adjust these settings based on your preferences and the specific requirements of your smart home setup.
- Outdated firmware: If you’re experiencing persistent issues with the Philips Hue sensor, check for firmware updates for both the sensor and the SmartThings hub. Keeping the devices updated with the latest firmware can often resolve compatibility issues and improve overall performance.
- App troubleshooting: If you encounter any issues specifically related to the SmartThings app, try closing the app, clearing its cache, and restarting your smartphone or tablet. You can also consider uninstalling and reinstalling the app to ensure a fresh installation.
If you continue to experience problems with the Philips Hue sensor and SmartThings integration, consult the user manuals and online support resources provided by both Philips Hue and SmartThings. Additionally, reach out to their customer support teams for further assistance and troubleshooting.
Troubleshooting can be a trial-and-error process, but with patience and persistence, you can resolve most issues and enjoy a smooth and reliable experience with the Philips Hue sensor integrated into your SmartThings setup.