
Setting Up Your Amazon Account
Getting started with adding devices to your Amazon account is a breeze. Before you begin, make sure you have an active Amazon account. If you don’t have one, simply sign up for an account on Amazon’s website. Once you’re all set with an account, follow these steps:
- Download the Alexa app: To start the device setup process, you’ll need to download the Alexa app on your smartphone or tablet. The app is available for both iOS and Android devices and can be found in the respective app stores.
- Sign in to your Amazon account: Open the Alexa app and sign in using your Amazon account credentials. Make sure you use the same account that you plan to use for your devices.
- Set up a device: Tap the “Devices” icon at the bottom right corner of the app and select “Add Device.” You’ll be prompted to choose the type of device you want to add. Amazon offers a wide range of options, including smart home devices, entertainment devices, security cameras, wearable devices, kitchen appliances, home office devices, and outdoor devices.
- Follow the on-screen instructions: Once you’ve selected the type of device you want to add, the app will guide you through a series of on-screen instructions. These instructions may vary depending on the specific device you’re adding, so it’s important to carefully follow each step.
- Connect to Wi-Fi: During the setup process, you’ll need to connect your device to your Wi-Fi network. Make sure you have the correct network name and password handy for a smooth setup experience.
- Test your device: After completing the setup process, it’s a good idea to test your device to ensure it’s working properly. Follow any additional instructions provided by the app or the device manufacturer to complete the setup.
That’s it! You’ve successfully set up your Amazon account and added your first device. Repeat these steps for any additional devices you want to add. With your devices connected to your Amazon account, you’ll have full control and access to their features through the Alexa app.
Exploring the Alexa App
Now that you have set up your Amazon account and added your devices, it’s time to explore the Alexa app. The Alexa app serves as the central hub for managing and controlling your connected devices. Here’s a guide on how to navigate and make the most of the Alexa app:
- Home screen: Upon opening the Alexa app, you’ll be greeted with the home screen which displays relevant information, such as your device’s status, weather updates, and suggestions based on your usage. Take a moment to familiarize yourself with the layout and options available on this screen.
- Device control: Tap the “Devices” icon at the bottom right corner of the app to access a list of all your connected devices. From here, you can control individual devices, adjust settings, and create routines to automate tasks. Explore the various options and features available for each device to customize your smart home experience.
- Skills and routines: The Alexa app offers a wide range of skills and routines that can enhance the capabilities of your devices. Skills are like apps that you can enable to access additional features and services. Routines, on the other hand, allow you to automate multiple actions with a single command. Browse through the skills and routines available in the app to discover new functionalities for your devices.
- Settings and preferences: To personalize your Alexa experience, navigate to the settings menu in the app. Here, you can customize various options, such as your preferred language, privacy settings, and notifications. Take a few moments to configure the settings according to your preferences.
- Discover more: The Alexa app offers a wealth of additional features and services beyond device control. Explore the menus and tabs in the app to find information on music streaming, news updates, reminders, and more. You might be surprised by the range of possibilities the app offers.
By familiarizing yourself with the Alexa app, you can fully harness the power and convenience of your connected devices. Take some time to navigate through the app, experiment with different features, and make adjustments to suit your needs. Before you know it, you’ll be effortlessly managing your smart home, enjoying entertainment, and benefiting from the countless possibilities Alexa and the app have to offer.
Adding Smart Home Devices
Adding smart home devices to your Amazon account is a great way to make your home more convenient and efficient. Whether it’s smart lights, thermostats, or smart plugs, you can easily integrate them with the Alexa app for seamless control. Here’s how to add smart home devices to your Amazon account:
- Check device compatibility: Before purchasing any smart home device, ensure that it is compatible with Alexa and can be integrated into your Amazon account. Look for the “Works with Alexa” label or compatibility information on the product packaging or the manufacturer’s website.
- Prepare the device: Follow the manufacturer’s instructions to set up the smart home device. This may involve connecting it to power, setting up a dedicated app, or connecting it to your Wi-Fi network. Make sure the device is ready for pairing and is within range of your Wi-Fi network.
- Add the device in the Alexa app: Open the Alexa app and navigate to the “Devices” section. Tap on “Add Device” and select the type of smart home device you are adding. The app will guide you through the pairing process, which typically involves putting the device into discovery mode and connecting it to your Amazon account.
- Discover the device: Once the device is successfully added, Alexa will detect and recognize it. You may need to wait a few moments for the device to appear in the app. If it does not show up immediately, try restarting the app or the device and ensure they are on the same Wi-Fi network.
- Name your device: In the Alexa app, you can assign a unique name to each smart home device for easy identification. Choose a name that is easy to remember and relevant to the device’s location or function. For example, you could name a smart plug in the living room “Living Room Lamp”.
- Set up routines and automation: Take advantage of the automation features in the Alexa app to create routines and schedules for your smart home devices. For example, you can create a routine that turns off all the lights and locks the doors when you say “Goodnight”. Explore the options available in the Alexa app to personalize your smart home experience.
By adding smart home devices to your Amazon account and integrating them with the Alexa app, you can enjoy the convenience of controlling your home with just your voice. Experiment with different devices, explore the automation features, and make your home smarter and more efficient than ever before.
Adding Entertainment Devices
If you’re looking to elevate your entertainment experience, adding entertainment devices to your Amazon account is the way to go. From smart TVs and streaming devices to soundbars and speakers, integrating these devices with the Alexa app opens up a world of possibilities. Here’s how you can add entertainment devices to your Amazon account:
- Select the right device: Before adding an entertainment device, ensure that it is compatible with Alexa and can be controlled through the Alexa app. Popular options include smart TVs, streaming devices like Fire TV Stick or Roku, and audio devices such as soundbars or wireless speakers.
- Set up the device: Follow the manufacturer’s instructions to set up the entertainment device. This may involve connecting it to power, connecting it to your Wi-Fi network, or configuring other settings. Refer to the device’s manual or the manufacturer’s website for detailed setup instructions.
- Add the device in the Alexa app: Open the Alexa app and navigate to the “Devices” section. Tap on “Add Device” and choose the appropriate category for your entertainment device. The app will guide you through the process of connecting and pairing the device with your Amazon account.
- Discover and name the device: Once the device is successfully added, Alexa will discover and recognize it. Give the device a name that is easy to remember, such as “Living Room TV” or “Kitchen Speaker”. This will allow you to control it with voice commands more effortlessly.
- Control your entertainment devices: With your entertainment devices added to the Alexa app, you can now control them using your voice. Use simple voice commands like “Alexa, turn on the TV” or “Alexa, play my favorite playlist on the speakers” to enjoy hands-free control over your entertainment setup.
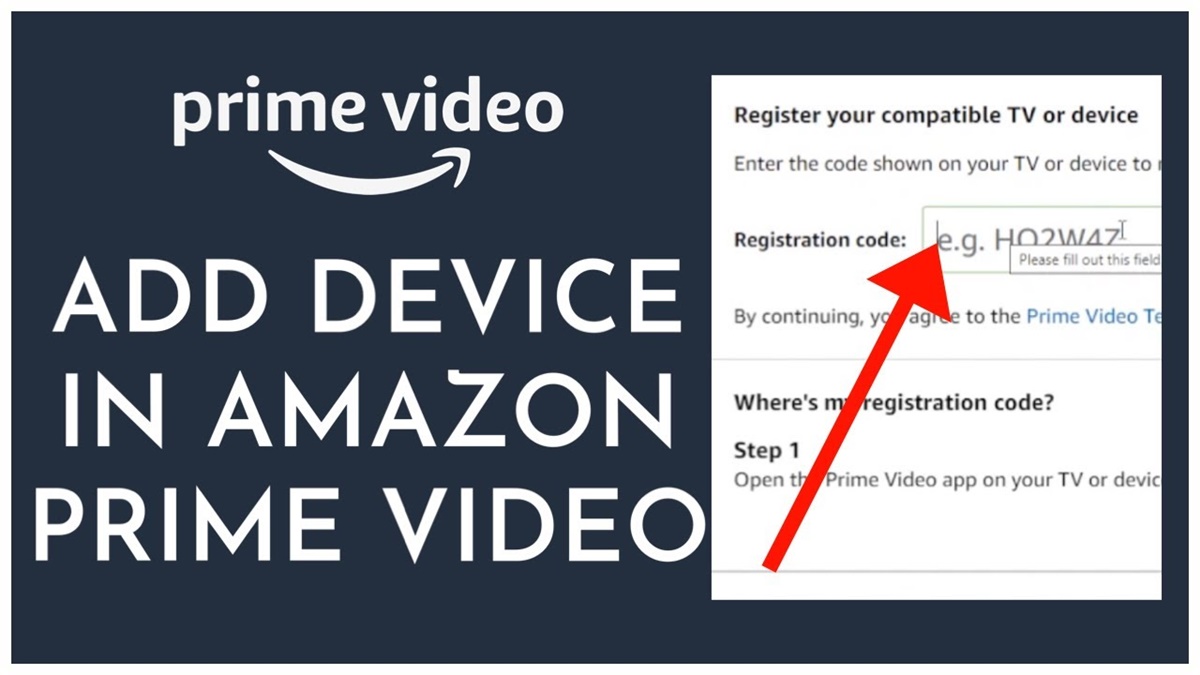
- Explore integration with streaming services: Many entertainment devices have built-in support for popular streaming services like Netflix, Prime Video, and Spotify. Link your accounts in the Alexa app to easily access and control your favorite content. Enjoy seamless streaming and immerse yourself in your favorite movies, TV shows, and music.
Adding entertainment devices to your Amazon account and connecting them with the Alexa app not only brings convenience but also enhances your entertainment experience. Enjoy the power of voice control, personalized recommendations, and seamless integration with popular streaming services. Sit back, relax, and let Alexa take your entertainment to the next level.
Adding Security Cameras
Adding security cameras to your Amazon account can provide peace of mind and help you keep a watchful eye on your home or office. With the integration of security cameras with the Alexa app, you can easily monitor and control your cameras from one central location. Here’s how to add security cameras to your Amazon account:
- Choose a compatible security camera: Before purchasing a security camera, ensure that it is compatible with Alexa and can be connected to your Amazon account. Look for cameras that have the “Works with Alexa” label or check the compatibility information provided by the manufacturer.
- Set up the security camera: Follow the manufacturer’s instructions to set up the security camera. This may involve mounting the camera, connecting it to power, and configuring any necessary settings. Refer to the camera’s manual or the manufacturer’s website for detailed setup instructions.
- Add the camera in the Alexa app: Open the Alexa app and navigate to the “Devices” section. Tap on “Add Device” and select the category for your security camera. The app will guide you through the process of connecting the camera to your Amazon account. This may involve scanning a QR code or entering the camera’s credentials.
- Discover and name the camera: Once the camera is successfully added, Alexa will discover and recognize it. Assign a memorable name to the camera, such as “Front Door Camera” or “Backyard Camera”. This will make it easier to identify and control the camera through voice commands.
- Monitor and control through the Alexa app: With your security cameras added to the Alexa app, you can now monitor and control them conveniently. Use the app to view live video feeds, receive motion detection alerts, and adjust camera settings. Additionally, you can use voice commands with Alexa devices to control your cameras hands-free.
- Enhance security with routines and automation: Take advantage of the automation features in the Alexa app to create routines and schedules for your security cameras. For example, you can create a routine that triggers the cameras to start recording when you say “Alexa, I’m leaving”. Customize the settings to meet your specific security needs.
By adding security cameras to your Amazon account and integrating them with the Alexa app, you gain greater control and visibility over the security of your premises. Use the app to monitor your cameras, receive alerts, and even deter potential intruders with the power of your voice. Keep an extra eye on your surroundings and enjoy a heightened sense of security.
Adding Wearable Devices
Wearable devices offer a new level of convenience and functionality, and integrating them with your Amazon account can unlock even more possibilities. Whether it’s a smartwatch, fitness tracker, or smart glasses, adding wearable devices to your Amazon account allows you to seamlessly manage and control them. Here’s how you can add wearable devices to your Amazon account:
- Check compatibility: Before purchasing a wearable device, ensure that it is compatible with the Alexa app and can be integrated with your Amazon account. Look for devices that specify compatibility with Amazon Alexa or check the manufacturer’s website for compatibility information.
- Set up the wearable device: Follow the manufacturer’s instructions to set up the wearable device. This typically involves charging the device, installing any required apps or software on your smartphone, and connecting the device to your phone via Bluetooth. Refer to the device’s manual or the manufacturer’s website for detailed setup instructions.
- Add the device in the Alexa app: Open the Alexa app and navigate to the “Devices” section. Tap on “Add Device” and choose the appropriate category for your wearable device. The app will guide you through the process of connecting the device to your Amazon account. This may involve signing in to your account, authorizing permissions, or linking accounts with third-party apps.
- Discover and name the device: Once the device is successfully added, Alexa will discover and recognize it. Give the device a unique and recognizable name, such as “Smartwatch” or “Fitness Tracker”. This will make it easier to identify and control the device through voice commands.
- Control your wearable device with Alexa: With your wearable device added to the Alexa app, you can use voice commands to control certain features and functions. For example, you can ask Alexa to track your fitness stats, set reminders, or play music on your smartwatch. Explore the available options and functionalities specific to your wearable device.
- Sync with other apps and devices: Wearable devices often have their own dedicated apps or can be synced with other popular apps and devices. Explore the settings within the wearable device’s app or the Alexa app to connect with other services, such as fitness apps or smart home devices. This integration allows you to enjoy a seamless experience across multiple platforms.
By adding wearable devices to your Amazon account and integrating them with the Alexa app, you can enjoy the convenience and control at your fingertips. From tracking fitness goals to receiving notifications, your wearable device becomes even more versatile and powerful with the integration. Embrace the world of wearables and elevate your daily routines and activities.
Adding Kitchen Appliances
Adding kitchen appliances to your Amazon account can make your cooking and meal preparation more convenient and efficient. With the integration of kitchen appliances into the Alexa app, you can have greater control and access to a range of features. Here’s how you can add kitchen appliances to your Amazon account:
- Choose compatible appliances: Before purchasing a kitchen appliance, ensure that it is compatible with Alexa and can be connected to your Amazon account. Look for appliances that have the “Works with Alexa” label or check the compatibility information provided by the manufacturer.
- Set up the appliance: Follow the manufacturer’s instructions to set up the kitchen appliance. This may involve connecting it to power, configuring settings, or downloading a dedicated app. Consult the appliance’s manual or the manufacturer’s website for detailed setup instructions.
- Add the appliance in the Alexa app: Open the Alexa app and go to the “Devices” section. Tap on “Add Device” and select the category for your kitchen appliance. The app will guide you through the process of connecting the appliance to your Amazon account. This may involve scanning a QR code, entering login credentials, or selecting the device from a list.
- Discover and name the appliance: Once the appliance is successfully added, Alexa will detect and recognize it. Give the appliance a descriptive name that corresponds to its function or location in the kitchen, such as “Coffee Maker” or “Air Fryer”. This will make it easier to identify and control the appliance through voice commands.
- Control your appliance with Alexa: With your kitchen appliances added to the Alexa app, you can use voice commands to control and operate them. For example, you can ask Alexa to preheat the oven, brew a cup of coffee, or set a cooking timer. Explore the various voice commands specific to your kitchen appliance for a hands-free and convenient cooking experience.
- Use routines and automation: Maximize the convenience of your kitchen appliances by creating routines and automating tasks. For instance, you can create a routine that turns on the coffee maker and starts brewing when you say “Good morning”. Take advantage of the automation features in the Alexa app to simplify your daily kitchen routines.
By adding kitchen appliances to your Amazon account and integrating them with the Alexa app, you can streamline your kitchen tasks and have greater control over your cooking and meal preparation. Embrace the power of voice control and automation to make your kitchen more efficient and enjoyable. Experience the convenience of a smart kitchen and unleash your culinary creativity.
Adding Home Office Devices
Setting up your home office with the right devices can significantly enhance your productivity and efficiency. By adding home office devices to your Amazon account and integrating them with the Alexa app, you can have seamless control over your workspace. Here’s how you can add home office devices to your Amazon account:
- Select compatible devices: Before purchasing home office devices, ensure that they are compatible with Alexa and can be integrated with your Amazon account. Look for devices that have the “Works with Alexa” label or check the compatibility information provided by the manufacturer.
- Set up the devices: Follow the manufacturer’s instructions to set up your home office devices. This may involve connecting them to power, configuring settings, or downloading dedicated apps. Refer to the devices’ manuals or the manufacturer’s websites for detailed setup instructions.
- Add the devices in the Alexa app: Open the Alexa app and go to the “Devices” section. Tap on “Add Device” and select the appropriate category for your home office devices. The app will guide you through the process of connecting the devices to your Amazon account. This may involve scanning a QR code, entering login credentials, or selecting the devices from a list.
- Discover and name the devices: Once the devices are successfully added, Alexa will detect and recognize them. Assign descriptive names to each device that reflect their function or placement in your home office. For example, you could name a printer as “Home Office Printer” or a desk lamp as “Office Desk Lamp”. This will allow you to control and manage the devices with ease using voice commands.
- Control your devices with Alexa: With your home office devices added to the Alexa app, you can control and operate them using voice commands. For instance, you can ask Alexa to print a document, turn on the desk lamp, or adjust the temperature of a smart thermostat. Take advantage of voice control to streamline your workflow and enhance your productivity.
- Improve automation and routines: Explore the automation features in the Alexa app to create routines and automate tasks in your home office. For example, you can create a routine that turns on the lights, starts the coffee machine, and opens specific apps on your computer when you say “Start my workday”. Customize the routines to suit your preferences and make your home office setup work efficiently for you.
By adding home office devices to your Amazon account and integrating them with the Alexa app, you can transform your workspace into a productive and smart environment. Enjoy the convenience of voice control and automation, and create a streamlined workflow that maximizes your efficiency. Upgrade your home office experience and take your work productivity to new heights.
Adding Outdoor Devices
Adding outdoor devices to your Amazon account can enhance your outdoor living space and make your outdoor activities more enjoyable. By integrating outdoor devices with the Alexa app, you can have greater control and convenience at your fingertips. Here’s how you can add outdoor devices to your Amazon account:
- Choose compatible outdoor devices: Before purchasing outdoor devices, ensure that they are compatible with Alexa and can be connected to your Amazon account. Look for devices that have the “Works with Alexa” label or check the compatibility information provided by the manufacturer.
- Set up the outdoor devices: Follow the manufacturer’s instructions to set up your outdoor devices. This may involve mounting them, connecting them to power, or configuring settings. Refer to the devices’ manuals or the manufacturer’s websites for detailed setup instructions.
- Add the devices in the Alexa app: Open the Alexa app and go to the “Devices” section. Tap on “Add Device” and select the appropriate category for your outdoor devices. The app will guide you through the process of connecting the devices to your Amazon account. This may involve scanning a QR code, entering login credentials, or selecting the devices from a list.
- Discover and name the devices: Once the devices are successfully added, Alexa will detect and recognize them. Give each device a descriptive name that corresponds to its function or location, such as “Outdoor Lights” or “Pool Pump”. This will make it easier to control and manage the devices using voice commands.
- Control your outdoor devices with Alexa: With your outdoor devices added to the Alexa app, you can use voice commands to control them. For example, you can ask Alexa to turn on the outdoor lights, adjust the temperature of a smart thermostat for your patio, or activate the sprinkler system. Enjoy the convenience of controlling your outdoor space with just your voice.
- Create automation and schedules: Take advantage of the automation features in the Alexa app to create routines and schedules for your outdoor devices. For instance, you can create a routine that turns on the lights, starts the fountain, and plays music when you say “Outdoor relax”. Set up schedules to automatically turn on/off devices at specific times, such as turning on the landscape lights every evening. Customize the automation settings to suit your preferences and lifestyle.
By adding outdoor devices to your Amazon account and integrating them with the Alexa app, you can transform your outdoor space into a smart and convenient area. Enjoy the ease of controlling your outdoor devices with voice commands and automate your outdoor routines. Embrace the possibilities and make the most of your time spent outdoors.
Troubleshooting Common Issues
While adding devices to your Amazon account and integrating them with the Alexa app is generally a smooth process, you may encounter some common issues along the way. Here are a few troubleshooting tips to help you resolve these common issues:
- Ensure a stable internet connection: A stable and reliable internet connection is essential for the proper functioning of your devices. Make sure your Wi-Fi network is working correctly and that your devices are connected to it.
- Check device compatibility: Before adding a device, double-check its compatibility with Alexa and your Amazon account. Not all devices are compatible with Alexa, so make sure to verify the compatibility information provided by the manufacturer.
- Update device firmware and app software: Ensure that your devices and the Alexa app are running the latest firmware and software versions. Check for updates regularly and install them to solve any potential compatibility issues.
- Restart devices and the Alexa app: Sometimes, a simple restart can fix various issues. Try restarting your devices, including your smartphone or tablet running the Alexa app, as well as the devices you are adding.
- Check device placement and range: Some devices, such as smart home devices or security cameras, may require a certain range from your Wi-Fi router. Ensure that the devices are within range and not obstructed by walls or other objects that could hamper the signal.
- Double-check login credentials and permissions: When adding devices, ensure that you are using the correct login credentials and providing the necessary permissions for the Alexa app to access the devices.
- Reset devices or factory reset: If you are still experiencing issues, try resetting the devices to their factory settings. This will remove any previous configurations and start the setup process again from scratch.
- Consult device manufacturer support: If the issue persists, don’t hesitate to reach out to the device manufacturer’s customer support. They can provide you with specific troubleshooting steps and guidance based on the device you are trying to add.
Remember, troubleshooting common issues during the device setup process is a normal part of the integration experience. By following these troubleshooting tips and seeking assistance when needed, you can overcome challenges and ensure a seamless and enjoyable experience with your devices and the Alexa app.