
What is Amazon Echo?
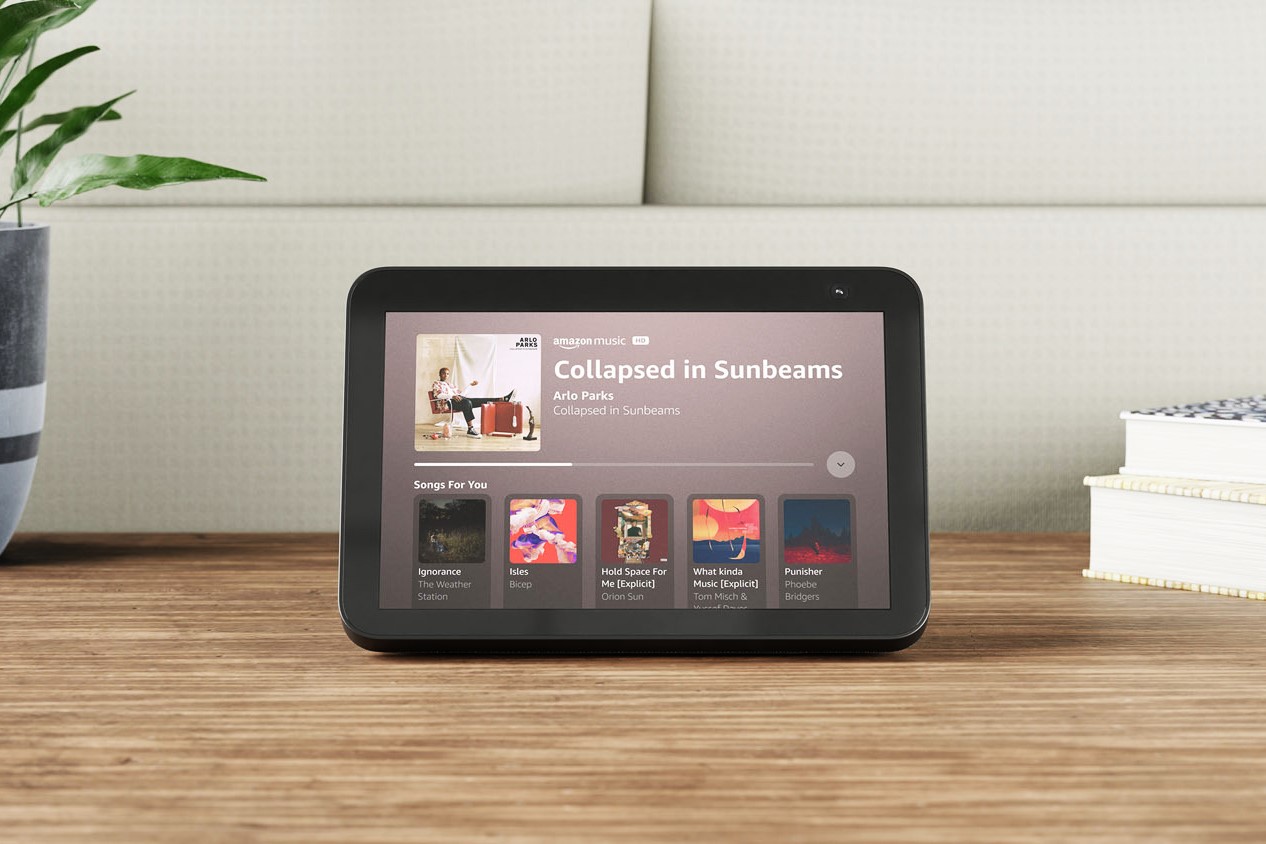
Amazon Echo is a smart speaker and voice-command device developed by Amazon. It is powered by Amazon’s virtual assistant, Alexa, which can perform a variety of tasks, such as playing music, setting reminders, answering questions, controlling smart home devices, and much more. Echo is designed to be hands-free and can be activated simply by saying the wake word, “Alexa.”
The device combines a speaker system with an array of microphones that allow it to hear and respond to voice commands from across the room. This means you can ask Alexa to play your favorite music, get the latest news updates, or even order a pizza without having to lift a finger.
Amazon Echo is available in various models, including the Echo Dot, Echo Plus, and Echo Show, each with its own features and capabilities. The sleek and compact design of the Echo devices allows them to seamlessly blend into any room or decor.
One of the standout features of Amazon Echo is its ability to connect with other smart devices in your home, allowing you to control your lights, thermostats, cameras, and more using just your voice. This makes Echo a central hub for home automation and simplifies the control of your smart home ecosystem.
With regular updates and an ever-expanding range of skills and abilities, Amazon Echo continues to evolve and improve, offering users a convenient and intuitive means of interacting with their devices and accessing information.
Getting Started with Amazon Echo
Setting up your Amazon Echo is a straightforward process that only takes a few minutes. Here’s a step-by-step guide to help you get started:
- Unbox your Amazon Echo and plug it into a power outlet. Ensure that the device is connected to a stable Wi-Fi network.
- Download the Alexa app on your smartphone or tablet from the app store. The app is available for both iOS and Android devices.
- Open the Alexa app and sign in with your Amazon account. If you don’t have an Amazon account, you’ll need to create one.
- Once signed in, tap on the “Devices” icon located at the bottom right corner of the app’s home screen.
- Select “Add Device” and then choose the type of Echo device you have, such as Echo, Echo Dot, or Echo Show.
- Follow the on-screen instructions to complete the setup process. This includes connecting your Echo device to your Wi-Fi network and giving it a unique name.
- Once your Echo device is successfully set up, you can start talking to Alexa by simply saying the wake word, “Alexa.”
That’s it! You are now ready to start using your Amazon Echo and enjoying the hands-free convenience it offers.
Remember, you can customize Alexa to suit your preferences and needs. You can connect your Echo device to various music streaming services, smart home devices, and even enable additional skills that enhance its functionality.
By exploring the Alexa app, you’ll discover a range of features, such as setting up routines, managing your privacy settings, and personalizing your Echo device’s sound and display options.
Getting started with Amazon Echo is as easy as following these simple steps. Before you know it, you’ll be using Alexa to play your favorite music, answer your questions, and help you manage your daily tasks effortlessly.
Creating a Music List
One of the great features of Amazon Echo is the ability to create and manage a personalized music list. Whether you want to have a playlist of your favorite songs or create a collection of songs for a specific occasion, here’s how you can do it:
- Step 1: Open the Alexa app on your smartphone or tablet. Make sure you are logged in with your Amazon account.
- Step 2: Tap on the menu icon (represented by three horizontal lines) located in the top left corner of the app’s home screen.
- Step 3: From the menu, select “Music, Video, & Books.”
- Step 4: Tap on “Amazon Music.”
- Step 5: In the Amazon Music section, you can choose between “My Music Library” or “Playlists & Stations.” Select the option that suits your needs.
- Step 6: Browse through the available songs or playlists. You can use the search function to find specific songs or artists.
- Step 7: Once you have chosen the songs or created a new playlist, tap on “Add to my music.” This will add the selected songs or playlist to your personal music list.
- Step 8: Return to the home screen of the Alexa app and say, “Alexa, play music.” Alexa will start playing the songs from your personalized music list.
That’s it! You have successfully created a music list on your Amazon Echo. You can now enjoy your favorite songs and playlists with just a voice command.
Do keep in mind that you can always edit or remove songs from your music list as your preferences change. Simply follow the steps above and make the desired changes in the Music section of the Alexa app.
Having a personalized music list allows you to have easy access to your favorite tunes and ensures that you always have the perfect soundtrack for any occasion.
Step 1: Open the Alexa App
In order to create and manage your music list on Amazon Echo, the first step is to open the Alexa app on your smartphone or tablet. This app is available for both iOS and Android devices and can be downloaded from the respective app stores.
Once you have downloaded and installed the Alexa app, follow these steps to open it:
- Locate the Alexa app icon on your device’s home screen or app drawer.
- Tap on the app icon to launch it.
- If you haven’t logged in before, you will be prompted to sign in with your Amazon account. Enter your login credentials and tap “Sign In.”
- If you are already logged in, the app will open to its home screen.
Upon opening the Alexa app, you will have access to a range of features and settings to customize your Amazon Echo experience. The app serves as the control center for your Echo device, allowing you to manage music, set up routines, control smart home devices, and much more.
Browsing through the Alexa app, you will find various sections, including Music, Routines, Skills, Devices, and Settings. Each section provides different functionalities and options to personalize your Echo device.
Additionally, the Alexa app serves as a hub for discovering and enabling new skills. These skills are like apps that add extra capabilities to your Echo device, allowing you to do things like play games, order pizza, check the weather, and more.
By opening the Alexa app, you are taking the first step towards unlocking the full potential of your Amazon Echo and enjoying a seamless and interactive smart home experience.
Step 2: Tap on the Menu Icon
After opening the Alexa app on your smartphone or tablet, the next step to create and manage your music list on Amazon Echo is to tap on the menu icon. The menu icon is typically represented by three horizontal lines and is located in the top left corner of the app’s home screen.
Follow these instructions to find and tap on the menu icon:
- Open the Alexa app on your device by locating its icon and tapping on it.
- Once the app is open, you will be on the home screen. Look for the menu icon, which is usually situated in the top left corner of the screen.
- Tap on the menu icon and a dropdown menu or navigation pane will appear, providing you with various options and sections to explore.
Tapping on the menu icon is essential for navigating through the Alexa app and accessing different features and settings. It serves as a gateway to manage your Echo device, configure preferences, and explore additional functionalities.
By tapping on the menu icon, you can access sections such as Music, Videos, Books, Routines, Skills, and more. Each section contains specific options and settings that allow you to customize your Amazon Echo and enhance your overall user experience.
Exploring the menu options and sections within the Alexa app will enable you to personalize your Echo device, set up routines, connect smart home devices, and create and manage your music list with ease.
Remember to tap on the menu icon when using the Alexa app to efficiently navigate and access the features and settings you desire.
Step 3: Select “Music, Video, & Books”
Once you have tapped on the menu icon in the Alexa app, the next step in creating and managing your music list on Amazon Echo is to select the “Music, Video, & Books” option. This selection will take you to a section within the app where you can access various media-related features and settings.
Here’s how to proceed with this step:
- Open the Alexa app on your smartphone or tablet by tapping on its icon.
- Upon opening the app, you will see the menu icon located in the top left corner of the screen. Tap on the menu icon.
- A dropdown menu or navigation pane will appear. Look for the option that says “Music, Video, & Books” and tap on it.
By selecting “Music, Video, & Books,” you will be directed to a dedicated section within the Alexa app that encompasses various entertainment-related features and settings.
Within this section, you can access a range of options, such as managing your music library, setting up music services, controlling video playback, and exploring audiobooks and podcasts.
Additionally, this section allows you to personalize your Echo device’s media preferences, such as adjusting audio settings, creating playlists, and enabling or disabling specific media services.
Selecting “Music, Video, & Books” is an important step in utilizing the full capabilities of your Amazon Echo device. It grants you access to a wealth of entertainment options, enabling you to enjoy music, videos, and books in a hands-free and convenient manner.
Remember to navigate to the “Music, Video, & Books” section within the Alexa app to explore and customize the media-related features of your Amazon Echo.
Step 4: Tap on “Amazon Music”
After selecting the “Music, Video, & Books” option in the Alexa app, the next step to create and manage your music list on Amazon Echo is to tap on “Amazon Music”. This will allow you to access and interact with the music streaming service provided by Amazon.
Follow these instructions to complete this step:
- Open the Alexa app on your smartphone or tablet.
- Tap on the menu icon located in the top left corner of the app’s home screen.
- A dropdown menu or navigation pane will appear. Look for the option that says “Music, Video, & Books” and tap on it.
- Within the “Music, Video, & Books” section, locate and tap on “Amazon Music”.
Tapping on “Amazon Music” will grant you access to the music streaming service offered by Amazon. It provides you with an extensive library of songs, albums, playlists, and stations to choose from.
With “Amazon Music”, you can enjoy a wide range of music genres, discover new artists, and listen to your favorite tracks with just a few taps or through voice commands using your Amazon Echo device.
By tapping on “Amazon Music”, you can also access additional features such as personalized recommendations, curated playlists, and the ability to create and manage your own music lists and playlists.
It is worth noting that to fully utilize the “Amazon Music” service, you may need to have an active subscription. Amazon offers different tiers of subscriptions, including Amazon Music Free, Prime Music, and Amazon Music Unlimited, each with its own features and benefits.
So, tap on “Amazon Music” in the Alexa app to explore the vast music library and enjoy a seamless music streaming experience on your Amazon Echo device.
Step 5: Tap on “My Music Library” or “Playlists & Stations”
Once you have tapped on “Amazon Music” in the Alexa app, the next step to create and manage your music list on Amazon Echo is to choose between “My Music Library” or “Playlists & Stations”. This selection will determine the area of the music service that you want to explore and customize.
Follow these instructions to complete this step:
- Open the Alexa app on your smartphone or tablet.
- Tap on the menu icon located in the top left corner of the app’s home screen.
- A dropdown menu or navigation pane will appear. Look for the option that says “Music, Video, & Books” and tap on it.
- Within the “Music, Video, & Books” section, tap on “Amazon Music”.
- Now, you will be presented with the options “My Music Library” and “Playlists & Stations”. Choose the one that suits your needs and preferences.
By tapping on “My Music Library”, you will be able to browse through the collection of songs and albums that you have already added to your personal library. This is a great option if you want to create a music list based on your own collection and preferences.
If you select “Playlists & Stations”, you will have access to pre-curated playlists and stations created by Amazon and other users. This option is ideal if you want to discover new music or if you prefer the convenience of ready-made playlists for different moods and occasions.
Both options offer flexibility and customization possibilities for creating and managing your music list. You can add songs, albums, or playlists to your collection, create your own playlists, and edit or remove items as desired.
By selecting “My Music Library” or “Playlists & Stations”, you can tailor your music experience on the Amazon Echo to your personal taste and enjoy a virtually unlimited selection of songs and playlists.
So, tap on either “My Music Library” or “Playlists & Stations” in the Alexa app to further refine and customize your music list on Amazon Echo.
Step 6: Browse and Select Songs or Create a New Playlist
After choosing between “My Music Library” or “Playlists & Stations” in the Alexa app, the next step to create and manage your music list on Amazon Echo is to browse and select songs or create a new playlist. This allows you to curate your music list according to your preferences and desired listening experience.
Follow these instructions to complete this step:
- Open the Alexa app on your smartphone or tablet.
- Tap on the menu icon located in the top left corner of the app’s home screen.
- A dropdown menu or navigation pane will appear. Look for the option that says “Music, Video, & Books” and tap on it.
- Within the “Music, Video, & Books” section, tap on “Amazon Music”.
- Choose either “My Music Library” or “Playlists & Stations”, depending on your preference.
- Now, you can explore the available songs, albums, or playlists. Use the search function or browse through different categories to find the music you want to add to your music list.
- If you have chosen “My Music Library”, you can select individual songs or entire albums and add them to your music list.
- If you have chosen “Playlists & Stations”, you can browse through curated playlists and stations. Select the ones you like and add them to your music list.
- Alternatively, you can create a new playlist by tapping on the option provided. Give your playlist a name and start adding songs to it.
Browsing and selecting songs or creating a new playlist allows you to personalize your music list on Amazon Echo. You can curate a collection of your favorite songs, create themed playlists, or discover new music from pre-made playlists and stations.
Take your time to explore the vast music library available and make selections that resonate with your musical taste and preferences. Don’t hesitate to experiment and create multiple playlists for different moods, occasions, or genres.
By browsing and selecting songs or creating a new playlist, you can tailor your music list to your liking and ensure that your Amazon Echo plays the songs that you enjoy the most.
So, make the most of this step by exploring the available options and creating a music list that truly reflects your musical preferences and enhances your listening experience on Amazon Echo.
Step 7: Tap on “Add to my music”
After browsing and selecting songs or creating a new playlist, the next step in creating and managing your music list on Amazon Echo is to tap on “Add to my music”. This action will add the chosen songs or playlist to your personal music library, allowing you to access them easily whenever you want.
Here’s how to complete this step:
- Open the Alexa app on your smartphone or tablet.
- Tap on the menu icon located in the top left corner of the app’s home screen.
- A dropdown menu or navigation pane will appear. Look for the option that says “Music, Video, & Books” and tap on it.
- Within the “Music, Video, & Books” section, tap on “Amazon Music”.
- Choose either “My Music Library” or “Playlists & Stations”, depending on your preference.
- Explore the available songs, albums, or playlists and select the ones you want to add to your music list.
- Once you have made your selections, tap on “Add to my music” to add them to your personal music library.
By tapping on “Add to my music”, you are ensuring that the chosen songs or playlist are easily accessible on your Amazon Echo device. They will be part of your personal collection, allowing you to play them through voice commands or the Alexa app.
Adding songs or playlists to your music list allows you to have quick and convenient access to your favorite music whenever you want to create a specific ambiance, listen to your preferred artists, or enjoy a curated playlist.
Additionally, having a personalized music library enables you to have a seamless music experience across all your Alexa-enabled devices. Whether you’re at home or on the go, your music list will be at your fingertips.
So, tap on “Add to my music” to ensure that your chosen songs or playlist are part of your personal music library and effortlessly accessible on your Amazon Echo.
Step 8: Return to the Home Screen and Say “Alexa, play music”
After adding songs or playlists to your personal music library, the final step in creating and managing your music list on Amazon Echo is to return to the home screen of the Alexa app and command Alexa to play the music. This will allow you to enjoy the music from your customized list effortlessly using voice commands.
Follow these instructions to complete this step:
- Open the Alexa app on your smartphone or tablet.
- Tap on the menu icon located in the top left corner of the app’s home screen.
- A dropdown menu or navigation pane will appear. Look for the option that says “Music, Video, & Books” and tap on it.
- Within the “Music, Video, & Books” section, tap on “Amazon Music”.
- Choose either “My Music Library” or “Playlists & Stations”, depending on your preference.
- Browse and select the songs or playlist you want to listen to.
- Tap on “Add to my music” to add your selections to your personal music library.
- Return to the home screen of the Alexa app by tapping on the home icon or using the navigation options.
- Once on the home screen, wake up your Amazon Echo by saying the wake word, “Alexa”.
- Give a voice command by saying “Alexa, play music”. Alexa will start playing the music from your personalized music list.
By returning to the home screen of the Alexa app and instructing Alexa to play music, you are initiating the playback of the songs or playlists you have added to your personal music library on Amazon Echo.
The voice command “Alexa, play music” will prompt Alexa to start playing the music from your customized list, providing you with a seamless and enjoyable music listening experience.
Remember, you can also use specific voice commands to further customize the playback, such as requesting a specific artist, genre, album, or playlist. Alexa’s advanced voice recognition technology ensures that your commands are executed accurately, bringing your music preferences to life.
So, return to the home screen of the Alexa app, wake up your Amazon Echo, and say “Alexa, play music” to enjoy the songs from your personalized music list with ease.
Editing or Removing Songs from the Music List
Once you have created your music list on Amazon Echo, you may want to make changes to it over time. Whether you want to edit the song order, remove certain songs, or update the playlist, you can easily modify your music list using the Alexa app. Here’s how:
- Step 1: Open the Alexa app on your smartphone or tablet.
- Step 2: Tap on the menu icon located in the top left corner of the app’s home screen.
- Step 3: From the menu, select “Music, Video, & Books”.
- Step 4: Tap on “Amazon Music”.
- Step 5: Choose either “My Music Library” or “Playlists & Stations”, depending on the area you want to edit.
- Step 6: Select the song or playlist that you want to edit or remove.
- Step 7: Make the desired changes. For editing, you can reorganize the song order, rename the playlist, or add/remove songs. To remove a song or playlist, tap on the “Delete” option.
- Step 8: Once you have made the changes, return to the home screen of the Alexa app.
- Step 9: To make sure your changes are reflected on your Amazon Echo, say “Alexa, play music” to initiate the updated music list.
By following these steps, you can easily edit or remove songs from your music list on Amazon Echo. Whether you want to fine-tune your playlist or just remove songs that no longer suit your preferences, the Alexa app provides a user-friendly interface for managing your music collection.
Remember, making changes to your music list in the Alexa app will ensure that the updated version is automatically synchronized with your Amazon Echo device. This means that when you give the command “Alexa, play music”, the revised version of your music list will be played.
So, don’t hesitate to edit or remove songs from your music list as your preferences change. With the flexibility afforded by the Alexa app, you can easily customize your music collection on Amazon Echo to create the perfect listening experience.
Step 1: Open the Alexa App
To begin setting up your music list on Amazon Echo, the first step is to open the Alexa app on your smartphone or tablet. This app serves as a control hub for your Echo device and allows you to customize various settings and features.
Follow these instructions to open the Alexa app:
- Locate the Alexa app icon on your device’s home screen or app drawer.
- Tap on the app icon to launch the Alexa app.
- If you haven’t logged in, you will be prompted to sign in with your Amazon account. Enter your credentials and tap “Sign In”.
- If you are already logged in, the app will open to its home screen.
Opening the Alexa app is crucial for managing and organizing your music list. It allows you to access the necessary features and settings to create, edit, and remove songs from your music collection.
Besides managing your music list, the Alexa app offers additional functionalities. You can use it to set up routines, control smart home devices, customize your Echo settings, enable new skills, and much more.
By opening the Alexa app, you unlock the full potential of your Amazon Echo device, transforming it into a personalized entertainment and smart home assistant.
So, make sure to open the Alexa app on your smartphone or tablet to proceed with setting up your music list on Amazon Echo.
Step 2: Tap on the Menu Icon
After opening the Alexa app on your smartphone or tablet, the next step in setting up your music list on Amazon Echo is to tap on the menu icon. This icon is represented by three horizontal lines and is usually located in the top left or top right corner of the app’s interface.
Here are the instructions to complete this step:
- Open the Alexa app on your smartphone or tablet.
- Look for the menu icon, typically located in the top left or top right corner of the app’s interface.
- Tap on the menu icon to access the app’s main menu or navigation options.
By tapping on the menu icon, you open up a world of possibilities within the Alexa app. It allows you to navigate through different sections and access various features tailored to customizing your music list and overall Echo experience.
Inside the menu, you’ll find options such as Music, Video, & Books, Routines, Skills, Devices, Settings, and more depending on the version of the app. Tapping on the menu icon is a pivotal step as it serves as a gateway to these sections.
From the menu, you can access the Music section, where you can explore your music library, create playlists, and manage your music preferences. You can also navigate to other sections to configure smart home devices, set up routines, or enable additional skills to enhance Alexa’s capabilities.
By tapping on the menu icon in the Alexa app, you gain access to a world of customization options, ensuring that your music list on Amazon Echo reflects your unique taste and preferences.
So, be sure to tap on the menu icon to continue the setup process and discover the full range of features the Alexa app has to offer.
Step 3: Select “Music, Video, & Books”
After tapping on the menu icon in the Alexa app, the next step in setting up your music list on Amazon Echo is to select the “Music, Video, & Books” option. This option allows you to access and customize various media-related features for your Echo device.
Follow these instructions to complete this step:
- Open the Alexa app on your smartphone or tablet.
- Tap on the menu icon, typically located in the top left or top right corner of the app’s interface.
- A menu will appear with different options. Look for the “Music, Video, & Books” option and tap on it.
By selecting “Music, Video, & Books,” you enter into a dedicated section of the Alexa app that centralizes all media-related functionalities. This section enables you to manage your music library, control video playback, explore eBooks and audiobooks, and more.
Within the “Music, Video, & Books” section, you’ll find options to configure and customize your music settings, such as connecting music services, setting default music providers, and managing music-related preferences.
Additionally, this section provides access to various media content, including music, movies, TV shows, eBooks, and audiobooks. You can browse through available content, make selections, and add them to your music list or watchlist.
Selecting “Music, Video, & Books” is an essential step as it ensures you can tailor your music list and media experience on Amazon Echo to your liking. It empowers you to seamlessly integrate your preferred media services and enjoy a personalized entertainment experience.
So, make sure to select “Music, Video, & Books” in the Alexa app to access and customize the media-related features for your Amazon Echo device.
Step 4: Tap on “Amazon Music”
After selecting the “Music, Video, & Books” option in the Alexa app, the next step to set up your music list on Amazon Echo is to tap on “Amazon Music”. This selection allows you to access and configure the music streaming service provided by Amazon.
Follow these instructions to complete this step:
- Open the Alexa app on your smartphone or tablet.
- Tap on the menu icon, typically located in the top left or top right corner of the app’s interface.
- A menu will appear with different options. Select the “Music, Video, & Books” option.
- Within the “Music, Video, & Books” section, tap on “Amazon Music”.
Tapping on “Amazon Music” allows you to access the extensive music streaming service offered by Amazon. This service provides you with a vast library of songs, albums, playlists, and radio stations to choose from.
With “Amazon Music”, you can enjoy a variety of genres, discover new artists, and listen to your favorite tracks by utilizing voice commands or through the Alexa app. You can also take advantage of personalized recommendations and curated playlists to enhance your listening experience.
It’s important to note that to fully utilize the “Amazon Music” service, you may need to have an active subscription. Amazon offers different subscription tiers, including Amazon Music Free, Prime Music, and Amazon Music Unlimited, each with its own set of features and benefits.
By tapping on “Amazon Music” in the Alexa app, you gain access to a world of music at your fingertips. This allows you to truly personalize your music list and enjoy a seamless and immersive musical experience on your Amazon Echo device.
So, tap on “Amazon Music” in the Alexa app to explore the expansive library and take advantage of the full potential of music streaming on your Amazon Echo.
Step 5: Tap on “My Music Library” or “Playlists & Stations”
After tapping on “Amazon Music” in the Alexa app, the next step in setting up your music list on Amazon Echo is to choose between “My Music Library” or “Playlists & Stations”. This selection allows you to determine which area of the music service you want to explore and customize.
Follow these instructions to complete this step:
- Open the Alexa app on your smartphone or tablet.
- Tap on the menu icon, typically located in the top left or top right corner of the app’s interface.
- A menu will appear with different options. Select the “Music, Video, & Books” option.
- Within the “Music, Video, & Books” section, tap on “Amazon Music”.
- Now, you will be presented with the options “My Music Library” and “Playlists & Stations”. Choose the one that aligns with your preferences.
By tapping on “My Music Library”, you gain access to the songs and albums that you have added to your personal music collection. This option is ideal for creating a music list based on your own library and preferences.
If you select “Playlists & Stations”, you can explore pre-curated playlists and stations created by Amazon and other users. This option allows you to discover new songs or enjoy ready-made playlists that suit your mood or genre preferences.
Both options offer flexibility and customization possibilities in creating and managing your music list. You can add songs to your collection, create your own playlists, and explore curated playlists or stations tailored to your tastes.
By tapping on either “My Music Library” or “Playlists & Stations”, you can further refine and tailor your music list on Amazon Echo to create the perfect soundtrack for any occasion or mood.
So, choose between “My Music Library” or “Playlists & Stations” in the Alexa app to dive into the world of music customization and enjoy a personalized music list on your Amazon Echo device.
Step 6: Select the Song or Playlist You Want to Edit
After deciding whether to edit a song or playlist, the next step in managing your music list on Amazon Echo is to select the specific song or playlist you want to edit. This process allows you to make changes to the content or settings of your chosen item to better suit your preferences.
Follow these instructions to complete this step:
- Open the Alexa app on your smartphone or tablet.
- Tap on the menu icon, typically located in the top left or top right corner of the app’s interface.
- A menu will appear with different options. Select the “Music, Video, & Books” option.
- Within the “Music, Video, & Books” section, tap on “Amazon Music”.
- Choose either “My Music Library” or “Playlists & Stations”, depending on the area you want to edit.
- Browse through the options until you find the particular song or playlist you wish to edit.
- Tap on the song or playlist you want to edit to select it.
Selecting the specific song or playlist you want to edit enables you to modify various aspects based on your preferences. Depending on the chosen item, you can make changes such as reordering songs within a playlist, modifying the title or description, adding or removing songs, or adjusting playback settings.
If you selected a song from your music library, you can make changes specific to that song. If you opted to edit a playlist, you can customize the playlist itself, including its contents and settings.
By selecting the song or playlist you want to edit, you have the freedom to personalize your music list and tailor it to your specific desires. Whether you want to refine the order, add new songs, or adjust settings, this step gives you complete control over your music collection on Amazon Echo.
So, select the song or playlist you want to edit within the Alexa app to initiate the customization process and make your music list truly your own.
Step 7: Make the Desired Changes or Tap on “Delete”
After selecting the song or playlist you want to edit in the Alexa app, the next step in managing your music list on Amazon Echo is to make the desired changes or tap on “Delete”. This step allows you to modify the content or settings of the selected item based on your preferences.
Follow these instructions to complete this step:
- Open the Alexa app on your smartphone or tablet.
- Tap on the menu icon, typically located in the top left or top right corner of the app’s interface.
- A menu will appear with different options. Select the “Music, Video, & Books” option.
- Within the “Music, Video, & Books” section, tap on “Amazon Music”.
- Choose either “My Music Library” or “Playlists & Stations”, depending on the area you want to edit.
- Browse through the options until you find the specific song or playlist you wish to edit.
- Tap on the song or playlist you want to edit to select it.
- Make the desired changes to the selected item, such as rearranging songs, modifying the title or description, or adjusting playback settings.
- If you wish to remove the selected item from your music list, tap on “Delete”.
By making the desired changes, you can tailor the song or playlist to your exact preferences. You have the flexibility to reorder songs, add or remove tracks, refine the details, or tweak playback settings to create the perfect atmosphere or customize the listening experience.
If, instead, you choose to tap on “Delete”, the selected item will be removed from your music list. This option is useful if you want to remove songs or playlists that no longer align with your preferences or create space for new additions.
Remember, the changes you make within the Alexa app will be automatically synced with your Amazon Echo device. This ensures that when you give the voice command “Alexa, play music”, the updated version of your music list will be applied.
So, take the opportunity in this step to make the desired changes or remove items from your music list to curate a collection that perfectly matches your musical tastes and preferences.
Step 8: Return to the Home Screen and Say “Alexa, play music”
After making the desired changes to your music list on Amazon Echo, the final step is to return to the home screen of the Alexa app and give the voice command “Alexa, play music”. This step ensures that your updated music list is ready to be played and enjoyed.
Follow these instructions to complete this step:
- Open the Alexa app on your smartphone or tablet.
- Tap on the menu icon, typically located in the top left or top right corner of the app’s interface.
- A menu will appear with different options. Select the “Music, Video, & Books” option.
- Within the “Music, Video, & Books” section, tap on “Amazon Music”.
- Choose either “My Music Library” or “Playlists & Stations”, depending on the area you made changes to.
- Make the desired changes to your music list, such as editing songs or playlists.
- Once you are satisfied with the changes, return to the home screen of the Alexa app.
- Wake up your Amazon Echo by saying the wake word, “Alexa”.
- Give the voice command “Alexa, play music”. Alexa will initiate the playback of your updated music list.
By returning to the home screen of the Alexa app and using the voice command “Alexa, play music”, you ensure that the changes you made to your music list are applied and ready for enjoyment on your Amazon Echo device.
Once you give the command, Alexa will start playing the songs and playlists from your personalized music collection based on the updates you made. Whether you added new songs, edited the order, or tweaked settings, Alexa will play the music exactly as you intended.
So, return to the home screen of the Alexa app, wake up your Amazon Echo, and say “Alexa, play music” to enjoy the updated version of your music list and immerse yourself in a personalized sound experience.