
Step 1: Open Outlook and create a new message
When it comes to adding a background image to a message in Outlook, the first step is to open the Outlook application and create a new message. This can be done by following a few simple steps.
First, launch Outlook on your computer. You can either find it in your application menu or type “Outlook” in the search bar and select the appropriate result. Once Outlook is open, click on the “New Email” button or press “Ctrl + N” on your keyboard to create a new message.
A blank message window will appear, ready for you to compose your email. In the “To” field, enter the recipient’s email address and fill out the subject line as desired. This will ensure that your message is properly addressed and easily identifiable in the recipient’s inbox.
Now, you have successfully opened Outlook and created a new message. In the following steps, we will guide you on how to add a background image to make your message stand out. Keep reading to learn more!
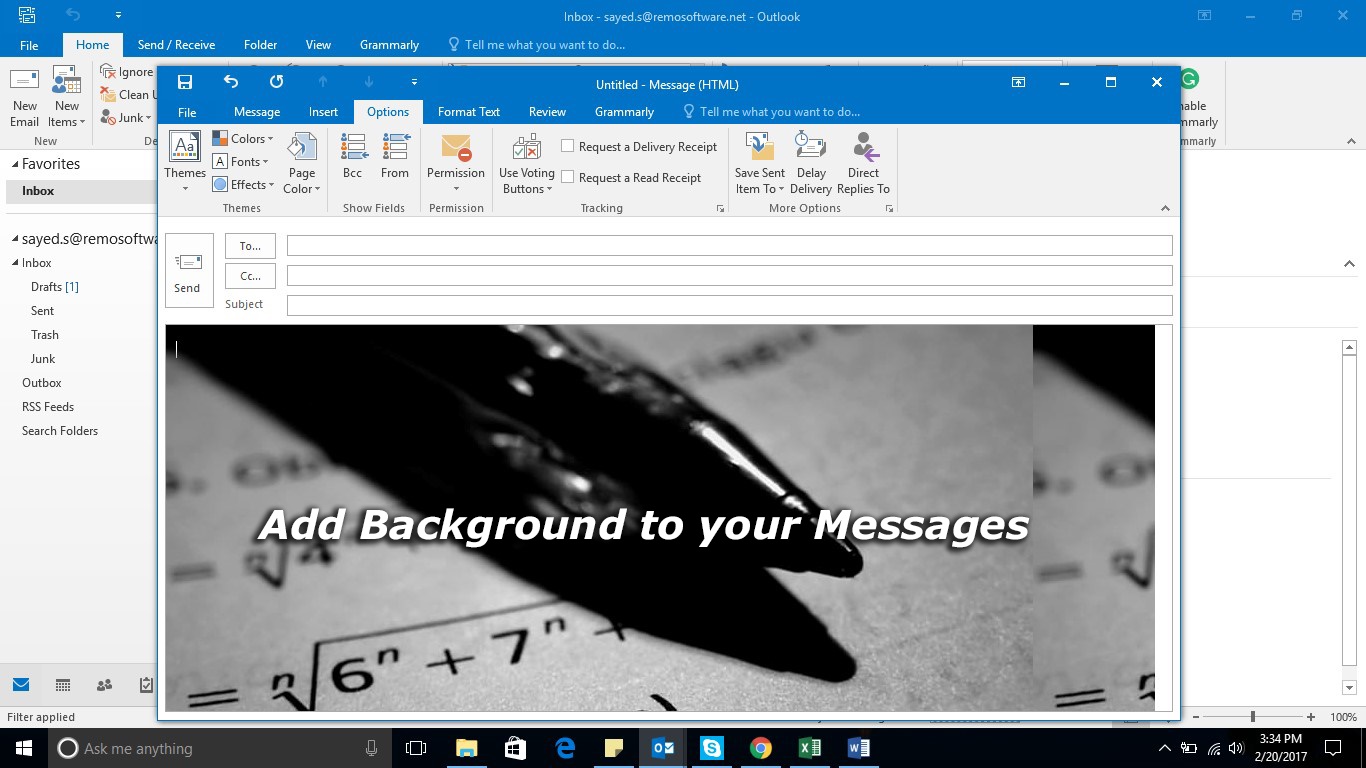
Step 2: Click on the “Options” tab in the message toolbar
Once you have opened Outlook and created a new message, the next step is to click on the “Options” tab in the message toolbar. This tab contains various formatting and customization options that will allow you to add a background image to your message.
To access the “Options” tab, locate the toolbar at the top of the message window. It is usually situated below the ribbon and contains several tabs, such as “File,” “Home,” “Insert,” and more. Find and click on the “Options” tab, which is typically the second or third tab from the left.
Upon clicking the “Options” tab, a range of additional options will appear. These options include message-specific settings, such as importance, encoding, and delivery options. The “Options” tab is designed to provide you with more control and flexibility in customizing your email.
By accessing the “Options” tab, you are now one step closer to adding a background image to your message. In the next step, we will guide you on how to proceed further and select the appropriate option to add your desired background image. Keep reading to learn more!
Step 3: Click on “Page Color” in the “Themes” group
After accessing the “Options” tab, the next step is to click on “Page Color” in the “Themes” group. This option allows you to set the background color or image for your email message, giving it a unique and visually appealing look.
To locate “Page Color,” make sure you are still on the “Options” tab in the message toolbar. Look for the “Themes” group, which is typically located in the middle or towards the right side of the toolbar. Within this group, you will find the “Page Color” option.
“Page Color” is represented by an icon that resembles a paint bucket. Click on this icon, and a drop-down menu will appear, displaying various color and image options for your message background.
By selecting “Page Color,” you can choose to apply a solid color background or proceed to add a background image. In the next step, we will guide you on how to proceed if you wish to add a background image to your email message. Continue reading to learn more!
Step 4: Select “Fill Effects” from the drop-down menu
Once you have clicked on “Page Color” in the “Themes” group, a drop-down menu will appear with various options. To continue adding a background image to your message, it’s time to select “Fill Effects” from this menu.
Locate and click on “Fill Effects” in the drop-down menu that appears after clicking on “Page Color.” This option will open a dialog box with even more customization options for your message background.
The “Fill Effects” dialog box allows you to apply different effects and styles to your background image. You can choose from gradients, patterns, textures, and more. However, for the purpose of adding a background image, we will focus on the “Picture” tab in the “Fill Effects” dialog box.
By selecting “Fill Effects,” you are now ready to proceed with adding your desired background image to the email message. In the next step, we will guide you on how to navigate to the “Picture” tab and choose an image. Keep reading to find out more!
Step 5: Choose the “Picture” tab in the “Fill Effects” dialog box
After selecting “Fill Effects” in the previous step, you will be presented with the “Fill Effects” dialog box. To proceed with adding a background image to your email message, your next step is to choose the “Picture” tab within this dialog box.
Within the “Fill Effects” dialog box, you will see several tabs at the top, including “Gradient,” “Texture,” “Pattern,” and more. Your goal is to select the “Picture” tab, which will allow you to add the background image of your choice.
Click on the “Picture” tab to access the options specifically related to adding a background image. This tab will provide you with various settings and features to manipulate the appearance and positioning of the image.
On the “Picture” tab, you can choose to select an image from your computer’s local storage, an online location, or even use a clip art image provided by Outlook. These options give you the flexibility to personalize your email message with your own image or choose from a range of pre-existing options.
By selecting the “Picture” tab, you are now ready to move forward and add the desired background image to your email message. In the next step, we will guide you on how to browse and select the image you want to use. Keep reading to find out more!
Step 6: Click on the “Select Picture” button
Once you have chosen the “Picture” tab in the “Fill Effects” dialog box, your next step is to click on the “Select Picture” button. This button will allow you to browse and choose the specific image you want to set as the background for your email message.
Locate the “Select Picture” button within the “Picture” tab of the “Fill Effects” dialog box. It is usually accompanied by an icon that resembles a folder or magnifying glass. Clicking on this button will open a file browsing window, allowing you to select the image file you have in mind.
Once the file browsing window appears, you can navigate to the location where your desired image is stored. This can be a folder on your local computer or an online location, depending on where you have stored the image.
Once you have located the image file, click on it to select it, and then click on the “Insert” or “Open” button, depending on the specific interface of the file browsing window. This will confirm your selection and close the file browsing window.
With the image selected, you have now successfully chosen the background image that you want to use for your email message. In the next step, we will guide you on how to adjust the appearance and settings of the image using the options provided. Keep reading to learn more!
Step 7: Browse and select the image you want to use as the background
Now that you have clicked on the “Select Picture” button, it’s time to browse and select the image that you want to use as the background for your email message. This step allows you to add a personal touch and make your message visually appealing.
When you click on the “Select Picture” button, a file browsing window will appear. This window allows you to navigate through your computer’s folders and locate the image file you wish to use. Alternatively, you may have the option to choose from a library of clip art provided by Outlook.
In the file browsing window, navigate to the folder or location where your desired image is stored. This could be your computer’s local storage, an external device, or even an online location if you have the image hosted on a website.
Once you have found the image you want to use as the background, simply click on it to select it. You may be able to preview the image in the photo viewer within the file browsing window to confirm that it is the correct one.
After selecting the image, click on the “Insert” or “Open” button, depending on the file browsing window interface, to confirm your selection. The file browsing window will then close, and your chosen image will be set as the background for your email message.
Congratulations! You have successfully browsed and selected the image that you want to use as the background for your email message. In the next step, we will guide you on how to adjust the appearance and settings of the image using the options provided. Keep reading to find out more!
Step 8: Adjust the appearance and settings of the image using the options provided
Now that you have selected the image for your background, it’s time to customize its appearance and settings using the options provided. This step will allow you to fine-tune the background image to suit your preferences and enhance the overall look of your email message.
Depending on the version of Outlook you are using, you might have different options to adjust the appearance and settings of the background image. Some common options include:
– Stretch: This option stretches the image to fit the entire background of the email message. It can possibly distort the image if its aspect ratio is not compatible with the message dimensions.
– Tile: This option tiles or repeats the image across the background of the email message. It creates a pattern by replicating the image multiple times.
– Center: This option centers the image in the background of the email message, without stretching or tiling it.
– Scale: This option scales the image proportionally to fit within the dimensions of the email message, without distorting the aspect ratio.
To adjust the appearance and settings of the image, locate the relevant options within the background image settings. Depending on the version of Outlook, these options might be found directly in the “Fill Effects” dialog box or in a separate dialog box specific to the background image.
Experiment with different options and preview how the image looks using the provided preview window or by sending a test email to yourself or a colleague. This will help you determine which settings work best for your particular image and message layout.
Once satisfied with the adjustments, click on the “OK” or “Apply” button to finalize the changes and apply the customized background image to your email message.
By adjusting the appearance and settings of the background image, you have added a personal touch and made your email message visually appealing. In the next step, we will guide you on how to compose your message and send it with the background image intact. Keep reading to learn more!
Step 9: Click “OK” to apply the background image to the message
After adjusting the appearance and settings of the background image to your liking, the next step is to click the “OK” button to apply the changes and set the background image for your email message. This step ensures that your recipient will see the customized background when they open the email.
Once you have made the desired adjustments to the background image settings, locate the “OK” button within the settings dialog box. It is usually located towards the bottom right or left corner of the dialog box.
Clicking the “OK” button confirms your selections and closes the background image settings dialog box. The changes you made to the background image settings will now be applied to the email message you are composing.
It’s important to note that the background image will only be visible to recipients who have their email clients configured to display HTML emails. Some email clients, notably older versions or those set to receive plain text emails only, may not display the background image as intended.
To ensure the highest compatibility with various email clients, it’s recommended to keep your email message layout and content clear and legible even without relying heavily on the background image. This way, even if the background image isn’t visible, your message can still be easily understood.
With the background image applied to your email message, you are now ready to move on to the final step of composing your message and sending it with the customized background intact. Read on to the next step to learn more!
Step 10: Compose your message and send it with the background image
Now that you have successfully applied the background image to your email message, it’s time to compose your message and send it out with the customized background intact. This step allows you to add your desired content to the email and share it with your intended recipients.
Start by focusing on the body of the email message. You can begin writing your message in the text editor provided within the Outlook interface. Here, you can add your text, format it, and include any necessary images or attachments.
Keep in mind that the background image should complement the content of your message without overpowering it. Ensure that your text and other elements are easily readable against the backdrop of the background image.
Once you have crafted your email message and ensured that everything looks visually appealing, you are ready to send it. Click on the “Send” button, usually located at the top left of the Outlook interface, to send your message.
When the recipient opens your email, Outlook will display the message with the background image intact, provided their email client supports HTML emails. The customized background can add that extra touch of professionalism or creativity to your email, making it stand out in your recipient’s inbox.
Remember to consider the preferences and settings of your recipients when using background images in your email messages. Some recipients may have disabled background images in their email client settings.
Additionally, it’s vital to test your email on different email clients, devices, and screen sizes to ensure that the background image appears as intended and doesn’t disrupt the overall user experience.
By composing your message and sending it with the background image, you have successfully created a visually appealing email that captures the attention of your recipients. Congratulations on completing all the steps!