
Checking Compatibility
Before changing a SIM card, it’s crucial to ensure that the new SIM card is compatible with your device. This step is often overlooked, but it’s essential to prevent any potential issues with network connectivity or device functionality. Here are the key aspects to consider when checking compatibility:
- Network Compatibility: Verify that the new SIM card is supported by your mobile carrier’s network. Different carriers utilize specific network technologies, such as GSM or CDMA. Ensure that your device and the new SIM card are compatible with the same network type to guarantee seamless communication.
- Device Lock Status: If your device was obtained through a carrier contract, it may be locked to that specific carrier. In such cases, the new SIM card must be from the same carrier or an unlocked device is required to use a SIM card from a different carrier. Check with your carrier or refer to the device’s documentation to determine its lock status.
- SIM Card Size: SIM cards come in various sizes, including standard, micro, and nano. Ensure that the new SIM card matches the appropriate size for your device. Adapters are available to resize SIM cards if necessary, but it’s best to use the correct size to avoid any complications.
By confirming these compatibility factors, you can proceed with confidence, knowing that the new SIM card is suitable for your device and carrier network. This proactive approach minimizes the risk of encountering connectivity issues or incompatibility errors after the SIM card replacement process.
Powering Off the Device
Before embarking on the process of changing a SIM card, it’s essential to power off the device. This simple yet crucial step ensures the safety of the device and minimizes the risk of damaging the SIM card or the device’s SIM card slot. Here’s a stepwise guide to powering off the device:
- Save and Close Applications: Begin by saving any unsaved data and closing all running applications on the device. This prevents data loss and ensures a smooth shutdown process.
- Press and Hold the Power Button: Locate the power button on your device, typically situated along the device’s edges or on the front panel. Press and hold the power button until the shutdown options appear on the screen.
- Select “Power Off” or “Shut Down”: Once the shutdown options are displayed, select the “Power Off” or “Shut Down” option. Confirm the action if prompted to initiate the device’s shutdown process.
- Wait for the Device to Power Off: Allow the device to complete the shutdown process. This may involve a brief wait as the device powers down and the screen turns off. Ensure that the device is completely powered off before proceeding to the next step.
By following these steps to power off the device, you mitigate the risk of causing any damage to the SIM card or the device itself. Additionally, powering off the device sets the stage for safely accessing the SIM card slot and proceeding with the subsequent steps of the SIM card replacement process.
Locating the SIM Card Slot
Once the device is powered off, the next step in changing a SIM card is to locate the SIM card slot. The location of the SIM card slot varies depending on the device model, but it is typically found in one of the following locations:
- External SIM Tray: Many modern smartphones feature an external SIM tray, usually located on the sides of the device. This tray may require a SIM ejector tool or a small pin to access and remove the SIM card.
- Under the Battery Cover: In some older or budget-friendly devices, the SIM card slot may be positioned beneath the device’s back cover and battery. To access the SIM card slot in such devices, the battery cover must be removed.
- Internal Tray: Certain devices, particularly iPhones, have an internal SIM tray accessed by inserting a pin or SIM ejector tool into a small hole located near the SIM card slot. This method releases the tray, allowing for SIM card removal and insertion.
It’s important to consult the device’s user manual or the manufacturer’s website for specific instructions on locating the SIM card slot for your particular device model. Additionally, online tutorials and visual guides can be valuable resources for identifying the SIM card slot’s precise location.
By successfully locating the SIM card slot, you’re one step closer to seamlessly replacing the SIM card in your device. This preparatory phase sets the stage for the subsequent steps involved in removing the old SIM card and inserting the new one.
Removing the Old SIM Card
After locating the SIM card slot, the next step in the process of changing a SIM card is to carefully remove the old SIM card from the device. This step requires precision and attention to avoid damaging the SIM card or the device. Here’s a detailed guide on removing the old SIM card:
- Use the Ejector Tool: If your device features an external SIM tray, use the provided SIM ejector tool or a small pin to gently press the eject button located near the SIM tray. This action releases the tray, allowing for easy access to the old SIM card.
- Handle the SIM Card Carefully: Once the SIM tray is accessible, handle the old SIM card with care. Hold the SIM card by its edges to prevent any damage to the metal contacts or the chip on the card’s surface.
- Remove the SIM Card: Gently push the old SIM card out of the tray by applying light pressure to the exposed edge. Take care not to bend or scratch the SIM card during this process.
- Inspect the SIM Card Slot: After removing the old SIM card, inspect the SIM card slot for any dust, debris, or foreign objects that may have accumulated. Use a soft brush or compressed air to clean the slot if necessary, ensuring a clean environment for the new SIM card.
By following these steps to remove the old SIM card, you ensure a smooth transition to the insertion of the new SIM card. Handling the old SIM card delicately and inspecting the SIM card slot are essential practices that contribute to a successful SIM card replacement process.
Inserting the New SIM Card
With the old SIM card successfully removed, the next pivotal step in changing a SIM card is to carefully insert the new SIM card into the device. This process demands precision and attention to detail to ensure the proper installation of the new SIM card. Here’s a comprehensive guide on inserting the new SIM card:
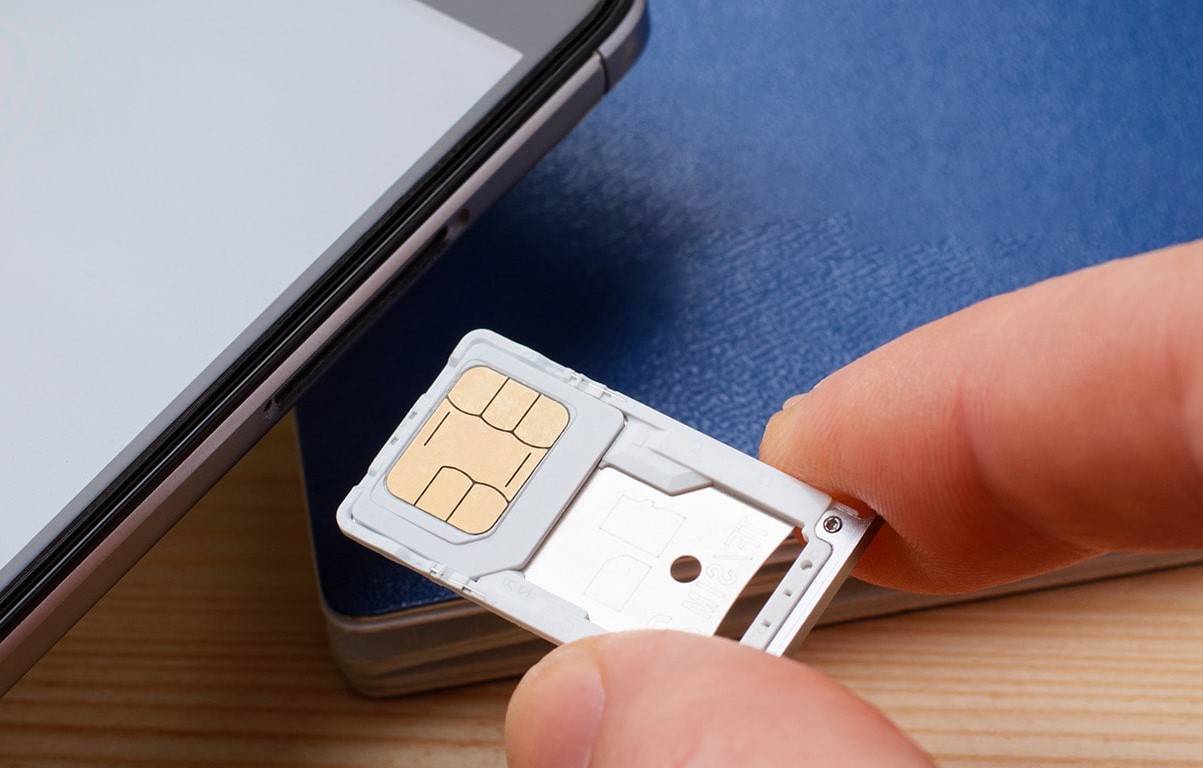
- Verify the Orientation: Before inserting the new SIM card, confirm its orientation by aligning the notched corner of the SIM card with the corresponding notch in the SIM tray. Ensuring the correct alignment prevents the risk of inserting the SIM card in the wrong position.
- Place the SIM Card in the Tray: Carefully position the new SIM card in the designated area of the SIM tray, ensuring that it lies flat and aligns with the edges of the tray. Avoid applying excessive force during this step to prevent any damage to the SIM card or the tray.
- Slide the Tray into the Device: If your device features an external SIM tray, gently slide the tray back into the device until it fits securely in place. For devices with an internal SIM tray, carefully push the tray back into its slot until it clicks into position.
- Power On the Device: Once the new SIM card is securely inserted, power on the device to initiate the SIM card recognition process. Allow the device to establish a connection with the new SIM card and verify that network connectivity is established.
By meticulously following these steps to insert the new SIM card, you ensure a seamless transition to utilizing the new SIM card in your device. The proper orientation and gentle handling of the new SIM card are crucial in preventing installation errors and guaranteeing optimal functionality.
Powering On the Device
After successfully inserting the new SIM card, the next vital step in the SIM card replacement process is to power on the device. This action allows the device to recognize the new SIM card and establish network connectivity. Here’s a stepwise guide to powering on the device:
- Press and Hold the Power Button: Locate the power button on your device and press it for a few seconds until the device powers on. Depending on the device model, the power button is typically situated on the sides or the front panel of the device.
- Wait for the Device to Boot Up: Allow the device to complete the boot-up process, which may involve displaying the device manufacturer’s logo followed by the home screen or lock screen. This signifies that the device has powered on successfully.
- Enter the Device Passcode (if applicable): If your device is secured with a passcode, fingerprint, or facial recognition, proceed to enter the required authentication to access the device’s interface.
- Verify Network Connectivity: Once the device is powered on, check for network connectivity indicators, such as signal bars or Wi-Fi connectivity. Ensure that the device recognizes the new SIM card and establishes a connection with the carrier’s network.
By following these steps to power on the device, you complete the essential process of integrating the new SIM card into your device. Verifying network connectivity after powering on the device ensures that the new SIM card is functioning correctly and that you can seamlessly utilize your device’s communication features.
Activating the New SIM Card
Upon powering on the device with the new SIM card inserted, the final step in the SIM card replacement process is to activate the new SIM card. Activation ensures that the SIM card is fully functional and recognized by the mobile carrier’s network, enabling you to make calls, send messages, and access mobile data. Here’s a comprehensive guide to activating the new SIM card:
- Check for Activation Instructions: Some new SIM cards require activation before they can be used. Check the documentation provided with the new SIM card or visit the carrier’s website for specific activation instructions.
- Initiate the Activation Process: If activation is necessary, follow the carrier’s instructions to activate the new SIM card. This may involve visiting the carrier’s activation webpage, calling a designated activation hotline, or using a mobile app provided by the carrier.
- Provide Required Information: During the activation process, you may be prompted to provide specific details, such as the SIM card’s serial number, your device’s IMEI number, and personal identification information. Ensure that you have this information readily available for a smooth activation experience.
- Confirm Activation Completion: Once the activation process is initiated, follow the on-screen prompts or instructions provided by the carrier to confirm that the new SIM card has been successfully activated. This confirmation may be displayed on your device’s screen or communicated through a confirmation message from the carrier.
- Test the SIM Card Functions: After activation, test the functionality of the new SIM card by making a test call, sending a message, and accessing mobile data. Verify that all communication features are operational, indicating that the new SIM card is fully activated and ready for use.
By diligently following these steps to activate the new SIM card, you ensure a seamless transition to utilizing the new SIM card’s capabilities. Successful activation is pivotal in enabling uninterrupted communication and connectivity, allowing you to fully leverage the features of your device with the new SIM card.