
Understanding Auto-Lock on iPhone 13
Auto-Lock is a feature on the iPhone 13 that automatically locks the screen after a period of inactivity. This feature is designed to conserve battery life and enhance security by preventing unauthorized access to the device. When the Auto-Lock feature is enabled, the iPhone 13 will lock the screen and require the user to enter their passcode or use Face ID or Touch ID to unlock it.
By default, the Auto-Lock duration is set to 30 seconds on the iPhone 13. This means that if the device is left idle for 30 seconds, the screen will automatically lock. However, users have the flexibility to adjust the Auto-Lock duration according to their preferences.
Understanding the Auto-Lock feature is essential for iPhone 13 users, as it directly impacts the device's power consumption and security. By setting an appropriate Auto-Lock duration, users can strike a balance between conserving battery life and ensuring convenient access to their device.
In the next sections, we will explore how to access and modify the Auto-Lock settings on the iPhone 13, empowering users to customize this feature to suit their individual needs and usage patterns.
Accessing Auto-Lock Settings
Accessing the Auto-Lock settings on the iPhone 13 is a straightforward process that allows users to customize the duration before the device automatically locks its screen. By accessing these settings, users can tailor the Auto-Lock feature to align with their specific usage patterns and preferences.
To access the Auto-Lock settings on the iPhone 13, users can follow these simple steps:
-
Open Settings: Begin by tapping the "Settings" app on the iPhone 13's home screen. The Settings app is represented by a gear icon and serves as the central hub for customizing various aspects of the device.
-
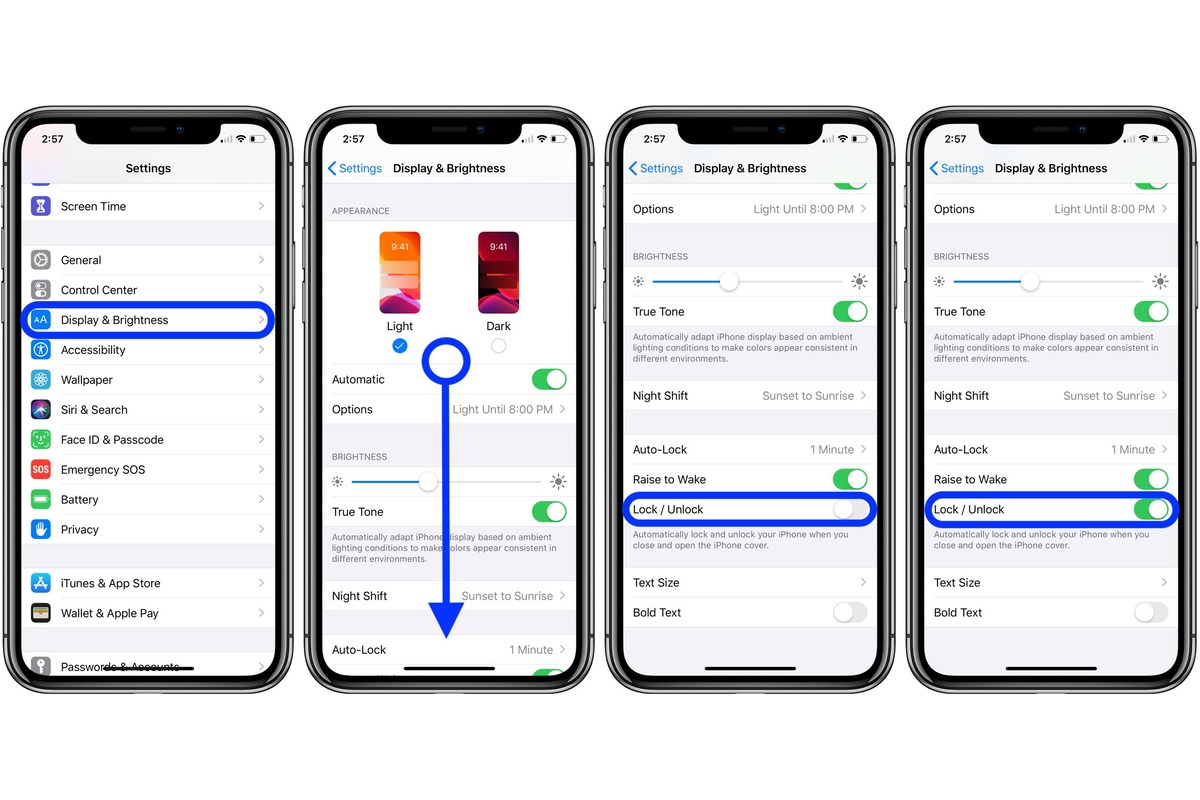
Navigate to Display & Brightness: Within the Settings menu, scroll down and select "Display & Brightness." This section houses a range of display-related settings, including the Auto-Lock feature.
-
Access Auto-Lock Settings: Within the Display & Brightness menu, locate the "Auto-Lock" option. Tapping on this option will present users with a list of predefined time intervals, ranging from 30 seconds to 5 minutes, as well as the "Never" option for disabling Auto-Lock altogether.
-
Select Desired Duration: Users can now select their preferred Auto-Lock duration from the list of available options. This selection will determine the amount of time the iPhone 13 remains active before automatically locking its screen when left idle.
By following these steps, users can effortlessly access the Auto-Lock settings on their iPhone 13 and make adjustments to suit their individual needs. Whether it's extending the duration to accommodate longer periods of inactivity or opting for a shorter duration to conserve battery life, the ability to access and modify the Auto-Lock settings empowers users to personalize their device's behavior according to their preferences.
Accessing the Auto-Lock settings is a fundamental aspect of managing the iPhone 13's power consumption and security features. With the flexibility to tailor the Auto-Lock duration, users can strike a balance between preserving battery life and ensuring convenient access to their device, enhancing the overall user experience.
Changing Auto-Lock Duration
Changing the Auto-Lock duration on the iPhone 13 is a simple yet impactful way to customize the device's behavior according to individual preferences and usage patterns. By adjusting the Auto-Lock duration, users can effectively manage power consumption and enhance the security of their device. Whether it's extending the duration to accommodate longer periods of inactivity or opting for a shorter duration to conserve battery life, the ability to modify the Auto-Lock settings empowers users to tailor their iPhone 13 experience.
To change the Auto-Lock duration on the iPhone 13, users can follow these straightforward steps:
-
Open Settings: Begin by tapping the "Settings" app on the iPhone 13's home screen. The Settings app, represented by a gear icon, serves as the central hub for customizing various aspects of the device.
-
Navigate to Display & Brightness: Within the Settings menu, scroll down and select "Display & Brightness." This section houses a range of display-related settings, including the Auto-Lock feature.
-
Access Auto-Lock Settings: Within the Display & Brightness menu, locate the "Auto-Lock" option. Tapping on this option will present users with a list of predefined time intervals, ranging from 30 seconds to 5 minutes, as well as the "Never" option for disabling Auto-Lock altogether.
-
Select Desired Duration: Users can now select their preferred Auto-Lock duration from the list of available options. This selection will determine the amount of time the iPhone 13 remains active before automatically locking its screen when left idle.
By following these steps, users can effortlessly change the Auto-Lock duration on their iPhone 13, allowing them to align the device's behavior with their specific needs and preferences. Whether it's extending the duration to accommodate longer periods of inactivity or opting for a shorter duration to conserve battery life, the ability to modify the Auto-Lock settings empowers users to personalize their device's behavior according to their preferences.
Customizing the Auto-Lock duration is a fundamental aspect of managing the iPhone 13's power consumption and security features. By tailoring the Auto-Lock duration to suit individual preferences, users can strike a balance between preserving battery life and ensuring convenient access to their device, ultimately enhancing the overall user experience.
Disabling Auto-Lock
Disabling the Auto-Lock feature on the iPhone 13 is a deliberate choice that can have both practical and convenience-related implications. While Auto-Lock serves as a valuable security and power-saving measure, there are scenarios where users may find it necessary to temporarily disable this feature. Whether it's for uninterrupted display of content during a presentation, prolonged reading or reference activities, or specific accessibility requirements, the ability to disable Auto-Lock provides users with the flexibility to tailor their iPhone 13 experience to suit their immediate needs.
To disable the Auto-Lock feature on the iPhone 13, users can follow a few simple steps:
-
Open Settings: Begin by tapping the "Settings" app on the iPhone 13's home screen. The Settings app, represented by a gear icon, serves as the central hub for customizing various aspects of the device.
-
Navigate to Display & Brightness: Within the Settings menu, scroll down and select "Display & Brightness." This section houses a range of display-related settings, including the Auto-Lock feature.
-
Access Auto-Lock Settings: Within the Display & Brightness menu, locate the "Auto-Lock" option. Tapping on this option will present users with a list of predefined time intervals, ranging from 30 seconds to 5 minutes, as well as the "Never" option for disabling Auto-Lock altogether.
-
Select "Never": To disable the Auto-Lock feature, simply tap on the "Never" option. This selection ensures that the iPhone 13's screen will remain active indefinitely, without automatically locking, regardless of inactivity.
By following these steps, users can effectively disable the Auto-Lock feature on their iPhone 13, providing them with the flexibility to maintain an uninterrupted display as per their specific requirements.
It's important to note that while disabling Auto-Lock can be beneficial in certain situations, it's advisable to re-enable this feature after the specific need has been addressed. Enabling Auto-Lock helps conserve battery life and ensures the security of the device when it's not in use. Therefore, users should consider the implications of keeping Auto-Lock disabled for extended periods and re-enable it when the need for uninterrupted screen activity ceases.
In essence, the ability to disable Auto-Lock on the iPhone 13 offers users the flexibility to tailor the device's behavior to accommodate specific activities or accessibility needs, ultimately enhancing the overall user experience.