
Reasons to Tilt Windows for Cleaning
Tilting windows for cleaning offers several benefits that make it an essential step in maintaining the cleanliness and functionality of your windows. Here are some compelling reasons to tilt your windows for cleaning:
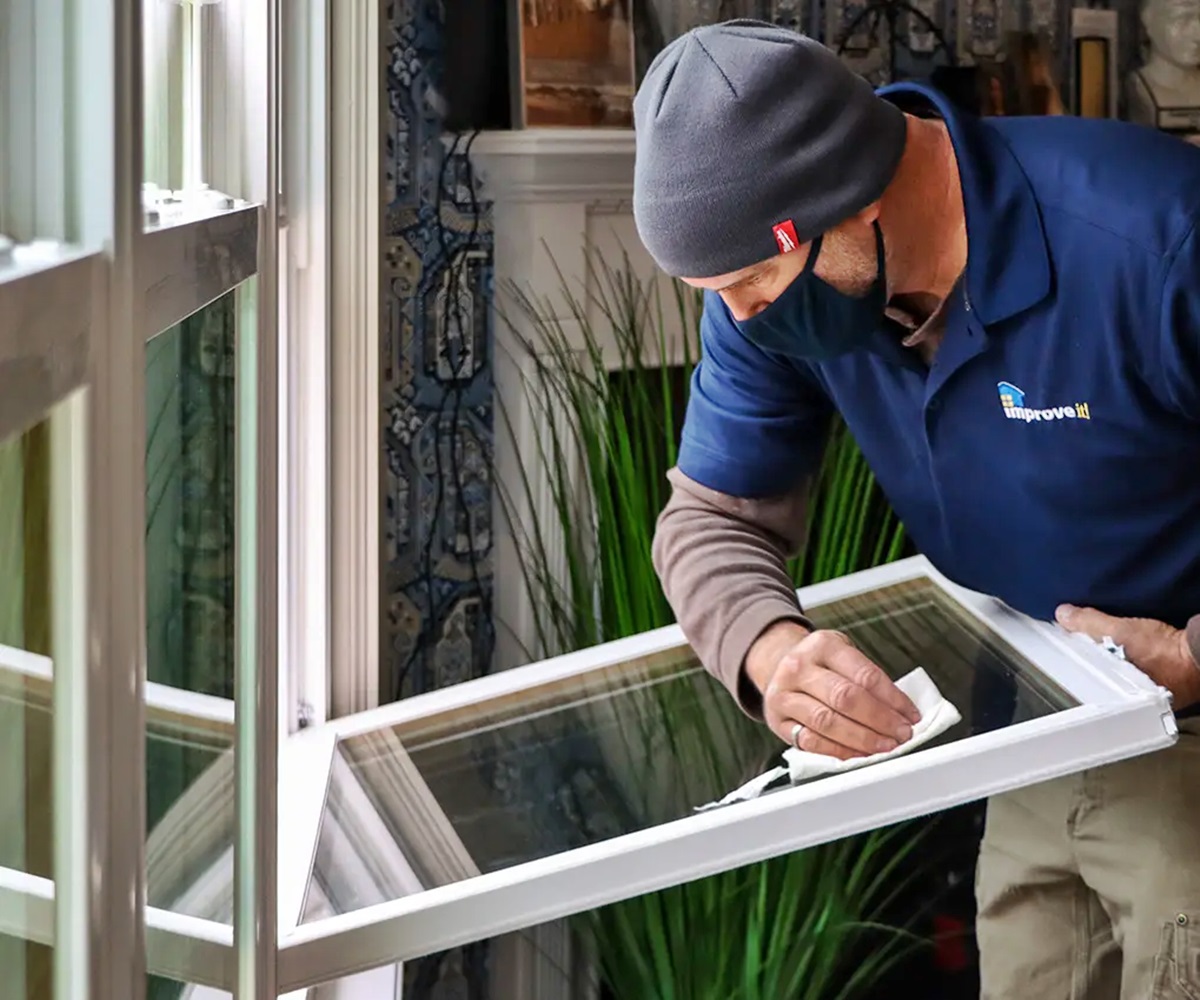
1. Access to the Exterior: Tilted windows provide you with easy access to the exterior side of the glass, allowing you to clean off dirt, grime, and other debris that may have accumulated over time. This ensures that your windows remain crystal clear, allowing ample natural light to enter your space.
2. Enhanced Air Quality: Regularly cleaning your windows helps improve the air quality inside your home. A build-up of dirt and dust on windows can contribute to indoor pollutants, which can negatively impact your health. By tilting your windows and thoroughly cleaning them, you can reduce the presence of allergens and enjoy cleaner air indoors.
3. Prevents Damage: Over time, dirt and debris build-up can cause damage to the window frames and seals. Tilted windows allow you to remove this build-up, helping to prevent potential damage and extending the lifespan of your windows.
4. Vast Improvement in Aesthetics: Clean, clear windows enhance the overall aesthetic appeal of your home. By tilting your windows and giving them a thorough cleaning, you can enjoy the beauty of unobstructed views, making your space more inviting and visually appealing.
5. Maintain Efficiency: Tilted windows enable you to clean both the interior and exterior surfaces, contributing to the overall efficiency of your windows. Clean windows allow for better heat insulation during the winter and reduce energy loss, ultimately leading to cost savings on heating and cooling bills.
6. Spot Potential Issues: Tilted windows provide an opportunity to inspect the condition of the window frames, seals, and hardware. It allows you to identify any signs of wear, damage, or potential issues, such as leaks or cracks, which can be addressed early on, saving you from costly repairs in the future.
Overall, tilting windows for cleaning is an essential maintenance task that offers numerous benefits. Not only does it improve the cleanliness and aesthetics of your windows, but it also helps maintain their functionality and prolong their lifespan. By incorporating regular window cleaning into your routine and properly tilting your windows, you can enjoy a brighter, healthier, and more efficient living environment.
Safety Precautions to Take Before Tilt
When it comes to tilting windows for cleaning, it is crucial to prioritize safety to prevent accidents and injuries. Here are some essential safety precautions to keep in mind before tilting your windows:
1. Wear Protective Gear: Before attempting to tilt your windows, make sure to wear appropriate protective gear such as gloves and safety glasses. This will help protect your hands from sharp edges and your eyes from any debris that may dislodge during the cleaning process.
2. Secure Ladders or Scaffolding: If you need to reach windows at a higher level, ensure that the ladder or scaffolding is properly secured and stable. Place it on a flat, sturdy surface, and have someone assist you to hold it in place for added stability.
3. Clear the Window Area: Before tilting the windows, remove any obstacles or objects near the windowsill or underneath the window. This will help prevent any accidents or damage that may occur if items fall or get in the way during the tilting process.
4. Check for Structural Integrity: It is essential to inspect the window frames and sashes for any signs of damage or decay. If you notice any structural issues, such as rot or cracks, have them repaired by a professional before attempting to tilt the windows.
5. Follow Manufacturer’s Instructions: Different types of windows have unique tilting mechanisms. It is important to familiarize yourself with the specific instructions provided by the window manufacturer. This will ensure that you engage the correct mechanisms and avoid any unnecessary damage or malfunctions.
6. Never Force the Window: If you encounter resistance or difficulty while trying to tilt the window, do not force it open. This could result in broken or damaged components. Instead, seek guidance from a professional to address any mechanical issues or obstructions.
7. Beware of Weather Conditions: Avoid tilting your windows during heavy rain, intense wind, or extreme weather conditions. These conditions can make the cleaning process more hazardous and increase the risk of accidents or injury.
By adhering to these safety precautions, you can ensure a safe and secure environment while tilting your windows for cleaning. Remember, your safety should always be the top priority, and if you are unsure about any aspect of the process, it is best to consult with a professional for assistance.
Steps to Tilt Horizontal Sliding Windows
Tilting horizontal sliding windows allows for easy access to both sides of the glass and makes cleaning a breeze. Here are the steps to safely tilt your horizontal sliding windows:
1. Unlock the Window: Ensure that the window is fully closed and locked before attempting to tilt it. This will prevent any accidental sliding or movement while you’re working on it.
2. Locate the Tilt Latches: Look for the tilt latches on the top or bottom of the window frame. These are small, movable tabs that secure the window in place and allow it to tilt.
3. Unlock the Tilt Latches: Slide or push the tilt latches towards the center of the window to disengage them. This will release the window mechanism and allow it to tilt.
4. Tilt the Window: Gently push the window from the bottom while simultaneously pulling it towards you. This will tilt the window inwards, allowing you access to the exterior glass for cleaning.
5. Secure the Window in Tilted Position: To hold the window in the tilted position, some windows have specific mechanisms or locks that need to be engaged. Consult the window’s manufacturer instructions or look for any additional latches or locks to securely hold the window in place.
6. Clean the Window: Once the window is tilted, use a glass cleaner or a mixture of mild soap and water to clean the glass surfaces. Wipe down the glass using a soft cloth or sponge, making sure to remove any dirt, dust, or smudges.
7. Clean the Window Tracks: While the window is tilted, take the opportunity to clean the window tracks as well. Use a vacuum or a brush to remove any debris or dirt that may have accumulated in the tracks.
8. Re-engage the Tilt Latches: To bring the window back to its normal position, gently push the window upwards until you hear the tilt latches click back into place. This indicates that the window is securely locked.
9. Test the Window: After tilting and cleaning the window, test its functionality by sliding it back and forth along the track. Ensure that it moves smoothly and locks into place properly.
By following these steps, you can easily and safely tilt your horizontal sliding windows for cleaning. Remember to always refer to the manufacturer’s instructions for your specific window type for any additional guidance or precautions.
Steps to Tilt Double-Hung Windows
Tilting double-hung windows is a straightforward process that allows for easy cleaning of both the interior and exterior surfaces. Here are the steps to follow when tilting your double-hung windows:
1. Unlock the Window: Ensure that the window is fully closed and locked before attempting to tilt it. This will prevent any accidental movement or unwanted sliding.
2. Locate the Tilt Latches: Look for the tilt latches on the side of the window frame. These latches are typically located near the top or bottom sash.
3. Unlock the Tilt Latches: Slide or push the tilt latches towards the center of the window to disengage them. This will release the sashes and allow them to tilt.
4. Tilt the Lower Sash: To access the lower sash, gently push it upwards until it is at a slight angle. The tilt latches will hold the sash in this position, allowing you to clean the exterior glass.
5. Clean the Exterior Glass: While the lower sash is tilted, use a glass cleaner or a mixture of mild soap and water to clean the exterior glass surface. Use a soft cloth or sponge to wipe away any dirt, grime, or smudges.
6. Tilt the Upper Sash: Once you have finished cleaning the lower sash, lower it back down into its original position. Then, repeat the tilting process for the upper sash by pushing it downwards at a slight angle.
7. Clean the Interior Glass: While the upper sash is tilted, clean the interior glass using the same glass cleaner or soap and water mixture. Wipe away any dust, fingerprints, or dirt using a soft cloth or sponge.
8. Clean the Window Tracks: While the sashes are tilted, use a vacuum or a brush to remove any debris or dirt that may have accumulated in the window tracks. This will ensure smooth operation when closing and opening the window.
9. Re-engage the Tilt Latches: Once you have finished cleaning and are satisfied with the window’s cleanliness, gently push both sashes back into their original, vertical position. Slide the tilt latches back into place to secure the sashes.
10. Test the Window: After tilting and cleaning the double-hung window, test its functionality by raising and lowering both sashes. Ensure that they glide smoothly along the tracks and lock into place securely.
By following these steps, you can effectively tilt your double-hung windows and effortlessly clean both the interior and exterior surfaces. Remember to exercise caution and refer to the manufacturer’s guidelines for your specific window type, if available.
Steps to Tilt Casement Windows
Tilting casement windows can provide easy access for cleaning the interior and exterior surfaces. Here are the steps to safely tilt your casement windows:
1. Close the Window: Ensure that the casement window is closed and latched securely before attempting to tilt it. This will prevent any accidental movements or damage.
2. Locate the Casement Arm: Look for the long metal arm attached to the bottom of the window frame. This arm connects the window sash to the frame and allows it to open and tilt.
3. Unlock the Casement Arm: Locate the locking mechanism on the casement arm, typically near the hinge point. Release the locking mechanism by turning it counterclockwise or following the manufacturer’s instructions.
4. Disengage the Casement Arm: Once the locking mechanism is released, hold the casement arm firmly while pushing it towards the center of the window frame. This will disengage the arm from the hinge point.
5. Tilt the Window: With the casement arm disengaged, gently push the window from the bottom. This will allow the window to tilt inward, granting you access to both the interior and exterior surfaces.
6. Secure the Window in Tilted Position: Some casement windows have specific mechanisms or latches that hold the window in the tilted position. Engage these mechanisms or latches to secure the window while you clean it.
7. Clean the Window: Use a glass cleaner or a mixture of mild soap and water to clean both the interior and exterior glass surfaces. Wipe away any dirt, dust, or smudges using a soft cloth or sponge.
8. Clean the Window Frame: While the window is tilted, seize the opportunity to clean the window frame as well. Use a vacuum or a brush to remove any dirt or debris that may have accumulated.
9. Re-engage the Casement Arm: After cleaning, hold the window securely and return it to its original position. Align the casement arm with the hinge point and push it back into place until it locks securely.
10. Test the Window: Once the casement arm is re-engaged, test the functionality of the window by opening and closing it. Ensure that it operates smoothly and locks securely.
By following these steps, you can safely and effectively tilt your casement windows for cleaning. Remember to refer to the manufacturer’s instructions for any specific guidelines or considerations for your particular casement window model.
Steps to Tilt Awning Windows
Tilting awning windows allows for easy cleaning and ventilation while maintaining the functionality and aesthetics of your windows. Here are the steps to safely tilt your awning windows:
1. Close the Window: Ensure that the awning window is fully closed and securely latched before attempting to tilt it. This will prevent any accidental movements or potential damage.
2. Locate the Awning Window Operator: Look for the crank handle or lever located on the window frame. This mechanism controls the opening and tilting of the awning window.
3. Unlock the Window Operator: Depending on the design of your awning window, you may need to turn the crank handle counterclockwise or release the lever to unlock the window operator. Follow the manufacturer’s instructions for your specific window model.
4. Open the Window Partially: Begin by opening the window partially, around 3-4 inches. This will allow you to access the tilt mechanism while maintaining control of the window’s movement.
5. Locate the Tilt Latch: Look for the tilt latch on the side or bottom of the window sash. This latch holds the window in a tilted position for easy cleaning.
6. Disengage the Tilt Latch: Release the tilt latch by pressing it inward or pulling it down, depending on the latch’s design. This will allow the window sash to tilt away from the frame.
7. Tilt the Window Sash: With the tilt latch disengaged, gently push the window sash from the bottom while holding onto the sides. This will tilt the window sash inward, providing access to both the interior and exterior glass surfaces.
8. Secure the Window in Tilted Position: Some awning windows have built-in mechanisms that hold the window sash in the tilted position. Others may require you to hold the window sash in place manually. Ensure that the window is secure before proceeding to clean.
9. Clean the Window: Use a glass cleaner or a mixture of mild soap and water to clean the interior and exterior glass surfaces. Wipe away any dirt, dust, or smudges using a soft cloth or sponge.
10. Re-engage the Tilt Latch: Once you have finished cleaning the window, align the window sash with the frame and press it gently to engage the tilt latch. Ensure that the latch securely holds the window in its closed position.
11. Test the Window: After re-engaging the tilt latch, test the functionality of the awning window by operating the crank handle or lever. Open and close the window to ensure that it moves smoothly and latches securely.
By following these steps, you can safely and effectively tilt your awning windows for cleaning. Remember to consult the manufacturer’s instructions for any specific guidelines or considerations for your particular awning window model.
Steps to Tilt Jalousie Windows
Tilting jalousie windows allows for easy cleaning and maintenance, ensuring clear views and optimal functionality. Here are the steps to safely tilt your jalousie windows:
1. Close the Window: Ensure that all the glass panels of the jalousie window are fully closed and locked before attempting to tilt them. This will prevent any accidental movements or damage.
2. Locate the Operator Handle: Look for the crank handle or lever located on the window frame. This handle controls the opening and tilting of the jalousie window.
3. Unlock the Window Operator: Depending on the design of your jalousie window, you may need to turn the crank handle counterclockwise or release the lever to unlock the window operator. Refer to the manufacturer’s instructions for your specific window model.
4. Open the Window Partially: Begin by partially opening the jalousie window to a 45-degree angle. This allows you to access the tilt mechanism while maintaining control over the window’s movement.
5. Locate the Tilt Latches: Look for the tilt latches or clips attached to each individual glass panel. These latches secure the panels in place and allow for tilting.
6. Disengage the Tilt Latches: Release the tilt latches by pushing them inward or pulling them up, depending on their design. This will disengage the latches and allow the individual glass panels to tilt.
7. Tilt the Glass Panels: With the tilt latches disengaged, gently push each glass panel from the bottom while holding onto the sides. This will tilt the panels outward, providing access to both the interior and exterior surfaces.
8. Secure the Glass Panels in Tilted Position: Jalousie windows often have built-in mechanisms that hold the glass panels in the tilted position. Ensure that the panels are securely held in place before proceeding to clean.
9. Clean the Glass Panels: Use a glass cleaner or a mixture of mild soap and water to clean both sides of the glass panels. Wipe away any dirt, dust, or smudges using a soft cloth or sponge, ensuring thorough cleaning on both the interior and exterior surfaces.
10. Re-engage the Tilt Latches: Once you have finished cleaning, align the glass panels with the frame and push them gently to engage the tilt latches. Ensure that the latches securely hold the glass panels in their closed position.
11. Test the Window: After re-engaging the tilt latches, test the functionality of the jalousie window by operating the crank handle or lever. Open and close the window to ensure that all the glass panels move smoothly and latch securely.
By following these steps, you can safely tilt your jalousie windows for cleaning and maintenance. Remember to consult the manufacturer’s instructions or seek professional assistance if you have any specific questions or concerns about your jalousie window model.
Steps to Tilt Hopper Windows
Tilting hopper windows is a simple process that allows for easy cleaning and maintenance. Here are the steps to safely tilt your hopper windows:
1. Close the Window: Ensure that the hopper window is fully closed and securely latched before attempting to tilt it. This will prevent any accidental movements or potential damage.
2. Locate the Latches or Locks: Look for the latches or locks on the window frame. These mechanisms secure the window in place and enable it to tilt.
3. Unlock the Latches or Locks: Depending on your hopper window’s design, you may need to slide or push the latches to the release position or turn the locks counterclockwise to unlock them. Refer to the manufacturer’s instructions for your specific window model.
4. Tilt the Window Inward: With the latches or locks released, gently push the window towards the interior of the room. This will cause the window to tilt inward, exposing both the interior and exterior surfaces for cleaning.
5. Secure the Window in Tilted Position: Some hopper windows have built-in mechanisms that hold the window in the tilted position. Others may require you to hold the window in place manually. Ensure that the window is secure before proceeding to clean.
6. Clean the Interior and Exterior Surfaces: While the hopper window is tilted, use a glass cleaner or a mixture of mild soap and water to clean both the interior and exterior surfaces of the glass. Wipe away any dirt, dust, or smudges using a soft cloth or sponge.
7. Check the Sill and Tracks: Take this opportunity to clean the window sill and tracks. Remove any debris or dirt using a vacuum cleaner or a brush. This will help maintain smooth operation when opening and closing the window.
8. Return the Window to the Closed Position: Once you have finished cleaning, gently push the hopper window back into its original closed position. Ensure that it is properly aligned with the window frame.
9. Lock the Window: Engage the latches or locks to secure the hopper window in its closed position. Verify that the window is securely locked to ensure proper sealing and security.
10. Test the Window: After tilting and cleaning the hopper window, test its functionality by opening and closing it. Ensure that the window operates smoothly and securely latches.
By following these steps, you can safely and effectively tilt your hopper windows for cleaning and maintenance. Remember to consult the manufacturer’s instructions or seek professional assistance for any specific guidance or concerns regarding your hopper window model.
Steps to Tilt Tilt and Turn Windows
Tilting tilt and turn windows is a convenient feature that allows for easy cleaning and ventilation. Here are the steps to safely tilt your tilt and turn windows:
1. Close the Window: Ensure that the tilt and turn window is fully closed and latched securely before attempting to tilt it. This will prevent any accidental movements or potential damage.
2. Identify the Tilt Function: Look for the handle or lever on the window frame with icons or markings indicating the tilt function. This handle typically has a 90-degree rotation for the tilt operation.
3. Engage the Tilt Position: Rotate the handle or lever 90 degrees to engage the tilt function. This will allow you to tilt the window sash for cleaning purposes.
4. Tilt the Window Sash: With the tilt function engaged, gently push the window sash from the bottom while holding onto the sides. This will cause the sash to tilt inward, providing access to the interior and exterior surfaces for cleaning.
5. Secure the Window in Tilted Position: Some tilt and turn windows have built-in mechanisms that hold the window sash in the tilted position. Others may require you to hold the sash in place manually. Ensure that the window is secure before proceeding to clean.
6. Clean the Interior and Exterior Surfaces: While the window sash is tilted, use a glass cleaner or a mild soap and water solution to clean both the interior and exterior surfaces of the glass. Wipe away any dirt, dust, or smudges using a soft cloth or sponge.
7. Check the Sill and Frame: Take this opportunity to clean the window sill and frame. Remove any debris or dirt using a vacuum cleaner or a brush. This will help maintain a clean and smooth functioning window system.
8. Return the Window to the Closed Position: Once you have finished cleaning, gently push the window sash back into its original closed position. Ensure that it is properly aligned with the window frame.
9. Disengage the Tilt Function: Rotate the handle or lever back to its original position, typically perpendicular to the window frame, to disengage the tilt function.
10. Lock the Window: Engage the window’s locking mechanism to securely lock the tilt and turn window in its closed position. Verify that the window is properly locked for optimal security and sealing.
11. Test the Window: After tilting and cleaning the window, test its functionality by operating the handle or lever. Open and close the window to ensure that it operates smoothly, both in the tilted and closed positions.
By following these steps, you can safely and effectively tilt your tilt and turn windows for cleaning and maintenance. Remember to consult the manufacturer’s instructions or seek professional assistance for any specific guidelines or concerns regarding your particular tilt and turn window model.
Steps to Tilt Pivot Windows
Tilting pivot windows is a simple process that allows for easy cleaning and maintenance. Here are the steps to safely tilt your pivot windows:
1. Close the Window: Ensure that the pivot window is fully closed and securely latched before attempting to tilt it. This will prevent any accidental movements or potential damage.
2. Locate the Pivot Points: Look for the pivot points on the sides or top of the window frame. These points act as hinges and allow the window sash to pivot.
3. Identify the Tilt Mechanism: Depending on the design of your pivot window, there may be a specific mechanism that needs to be engaged to allow the window to tilt. This may be a latch or a button located near the pivot points.
4. Engage the Tilt Mechanism: Follow the manufacturer’s instructions to engage the tilt mechanism. This will release the window sash and allow it to pivot.
5. Tilt the Window Sash: With the tilt mechanism engaged, gently push the window sash from the bottom or the side while holding onto the sides for support. This will cause the sash to tilt inward, providing access to both the interior and exterior surfaces for cleaning.
6. Secure the Window in Tilted Position: Some pivot windows have built-in mechanisms that hold the window sash in the tilted position. Others may require you to hold the sash in place manually. Ensure that the window is secure before proceeding to clean.
7. Clean the Interior and Exterior Surfaces: While the window sash is tilted, use a glass cleaner or a mild soap and water solution to clean both the interior and exterior surfaces of the glass. Wipe away any dirt, dust, or smudges using a soft cloth or sponge.
8. Check the Window Frame: Take this opportunity to clean the window frame as well. Remove any debris or dirt using a vacuum cleaner or a brush. This will help maintain a clean and smooth functioning window system.
9. Return the Window to the Closed Position: Once you have finished cleaning, gently push the window sash back into its original closed position. Ensure that it is properly aligned with the window frame.
10. Disengage the Tilt Mechanism: Follow the manufacturer’s instructions to disengage the tilt mechanism, securing the window sash in its closed position.
11. Test the Window: After tilting and cleaning the window, test its functionality by gently pushing on the window sash to ensure that it locks securely into place. Open and close the window to verify that it operates smoothly.
By following these steps, you can safely and effectively tilt your pivot windows for cleaning and maintenance. Remember to consult the manufacturer’s instructions or seek professional assistance for any specific guidelines or concerns regarding your particular pivot window model.
Common Mistakes to Avoid When Tilting Windows
Tilting windows for cleaning is a simple task that can be done by most homeowners. However, there are some common mistakes that should be avoided to ensure a safe and successful window tilting experience. Here are some of the most common mistakes to watch out for:
1. Skipping Safety Precautions: One of the biggest mistakes is neglecting safety precautions. Always wear protective gear such as gloves and safety glasses, secure ladders or scaffolding properly, and be mindful of weather conditions before attempting to tilt your windows.
2. Forcing the Window: Trying to force a window to tilt when it is jammed or stuck is a mistake that can lead to damage or injury. If you encounter resistance, stop and investigate the issue. It’s best to seek professional assistance in such cases.
3. Neglecting Regular Maintenance: Failing to maintain your windows regularly can result in a buildup of dirt, dust, and debris, making it more difficult to tilt and clean them. Regular cleaning and maintenance can prevent this issue and make tilting easier.
4. Using Harsh Cleaners: Using harsh or abrasive cleaners on your windows can cause damage to the glass, frames, and seals. It’s best to use a mild soap and water solution or a recommended glass cleaner to ensure effective and safe cleaning.
5. Overlooking Window Tracks: Window tracks often accumulate dirt and debris, affecting the smooth operation of the windows. Neglecting to clean the tracks regularly can result in difficulty when trying to tilt the windows. Make sure to include track cleaning in your window maintenance routine.
6. Incorrect Tilting Method: Each type of window has a specific tilting mechanism, and using the wrong method can lead to damage or improper cleaning. Refer to the manufacturer’s instructions or seek professional guidance to ensure you are using the correct method for tilting your specific window type.
7. Rushing Through the Process: Taking your time and being thorough while tilting your windows is important. Rushing through the process can lead to overlooking areas that need cleaning, potentially leaving behind dirt or streaks.
8. Ignoring Window Frame and Hardware: It’s not just the glass that needs cleaning; the frames and hardware of your windows also require attention. Neglecting these areas can result in an incomplete cleaning and may impact the overall functionality of the windows.
9. Overlooking Safety Locks or Latches: After tilting your windows, make sure to engage any safety locks or latches that hold them in the tilted position. Failure to do so can lead to accidents or damage if the windows unexpectedly close.
10. Not Testing the Window: After cleaning and tilting your windows, it is essential to test their functionality. Open and close the windows to ensure they operate smoothly and securely lock into place.
By avoiding these common mistakes, you can ensure a successful and safe window tilting experience. Following proper procedures, using the correct cleaning methods, and prioritizing safety will help you maintain clean and functional windows for years to come.