
Preparing the Area
Before you start lowering your curtain blinds, it’s important to prepare the area to ensure a smooth and hassle-free process. Taking a few minutes to prepare will help prevent any unnecessary accidents or damage to your blinds. Here are some steps you can follow:
- Clear the surrounding area: Remove any obstacles or furniture that may be in the way of the blinds. This will give you enough space to work comfortably and avoid any accidental bumps or knocks.
- Inspect the blinds: Take a close look at the condition of your curtain blinds. Check for any signs of damage, such as broken slats or loose strings. Addressing these issues beforehand will ensure that your blinds function properly when you lower them.
- Close any windows or doors: It’s important to close any windows or doors in the room where the blinds are located. This will help prevent drafts or strong gusts of wind from blowing the blinds around, potentially causing them to get tangled or damaged.
- Secure cords or chains: If your blinds have cords or chains, make sure they are properly secured and out of reach of children or pets. You can use cord cleats or safety devices to keep them neatly organized and prevent any accidents.
- Clean the blinds: Dust or debris can hinder the smooth operation of the blinds. Use a feather duster or a soft cloth to gently remove any dirt or dust that may have accumulated on the blinds. Cleaning them regularly will also help prolong their lifespan.
By taking the time to prepare the area before lowering your curtain blinds, you’ll ensure a safe and efficient process. This will not only protect your blinds from potential damage but also make it easier for you to operate them smoothly. Now that you’ve prepared the area, you’re ready to start lowering your curtain blinds.
Gathering the Necessary Tools
Before you can start lowering your curtain blinds, it’s important to gather the necessary tools. Having these tools on hand will ensure that you have everything you need to easily lower and adjust your blinds. Here are the essential tools you’ll need:
- Step ladder or stool: Depending on the height of your blinds, you may need a step ladder or stool to comfortably reach and operate them. Make sure the ladder or stool is stable and secure before using it.
- Cord or chain guides: If your blinds have cords or chains, consider using cord or chain guides to keep them tangle-free and reduce the risk of entanglement. These guides can be attached to the wall or window frame.
- Blind pull or wand: Some types of blinds, such as Venetian blinds or vertical blinds, may require a blind pull or wand to lower and adjust them. Make sure you have a sturdy and easy-to-use pull or wand that is compatible with your blinds.
- Cord tassel: A cord tassel can be used to secure the cords of your blinds and prevent them from dangling loosely. It adds a neat and organized look to your blinds and can also help prevent accidents.
- Electric drill: If you have motorized blinds, you may need an electric drill to install or adjust the blinds’ mechanisms. Follow the manufacturer’s instructions and take safety precautions when using the drill.
- Soft cloth or duster: Having a soft cloth or duster on hand is essential for cleaning your blinds and removing any dust or debris that may accumulate over time. Regular cleaning will help maintain the appearance and functionality of your blinds.
Gathering these necessary tools before lowering your curtain blinds will make the process much easier and more efficient. It’s important to ensure that you have the right tools for your specific type of blinds to avoid any potential issues or difficulties. Now that you’re equipped with the necessary tools, you’re ready to move on to understanding the different types of curtain blinds.
Understanding the Different Types of Curtain Blinds
Before you lower your curtain blinds, it’s important to understand the different types available. Each type of blind has its own unique features and mechanisms for lowering and adjusting. Here is an overview of the most common types of curtain blinds:
- Roller blinds: Roller blinds consist of a fabric panel that can be rolled up or down using a control chain or spring-loaded mechanism. Lowering roller blinds involves using the control chain to smoothly lower the fabric panel to the desired height.
- Roman blinds: Roman blinds are made of fabric panels that fold neatly when raised and unfold when lowered. To lower Roman blinds, you can use a cord or chain system to gradually lower the fabric panels to the desired position.
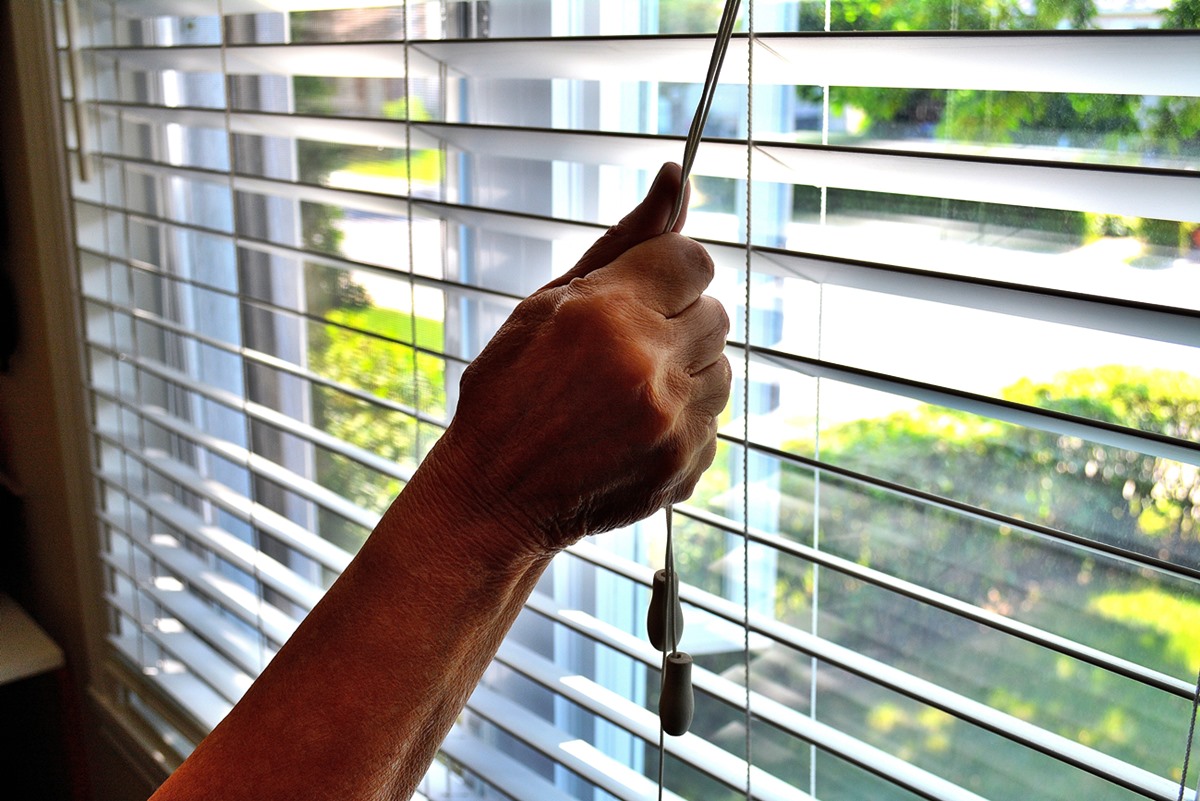
- Venetian blinds: Venetian blinds are typically made of horizontal slats that can be tilted and raised or lowered. To lower Venetian blinds, you would use a control cord to lower the blinds and a tilt rod to adjust the angle of the slats.
- Vertical blinds: Vertical blinds consist of vertical hanging slats that can be rotated and drawn across using a control chain or wand. Lowering vertical blinds involves drawing the slats across the window opening using the control chain or wand.
- Honeycomb shades: Honeycomb shades, also known as cellular blinds, are made of honeycomb-shaped cells that trap air and provide insulation. To lower honeycomb shades, you can use a cord or chain system to lower the blinds and adjust the level of light and privacy.
- Pleated shades: Pleated shades are made of a single piece of fabric that is pleated when raised and extends when lowered. To lower pleated shades, you can use a cord or chain system to smoothly lower the fabric to the desired height.
- Sheer shades: Sheer shades combine the features of curtains and blinds, with horizontal fabric vanes sandwiched between two sheer fabric panels. To lower sheer shades, you can use a control cord or wand to adjust the vanes and achieve the desired level of light and privacy.
- Bamboo blinds: Bamboo blinds are made of natural bamboo or woven wood material, creating a warm and organic look. Lowering bamboo blinds involves using a cord or chain system to gradually lower the blinds and adjust the level of light and privacy.
Understanding the different types of curtain blinds will help you determine the appropriate method for lowering and adjusting your specific blinds. Each type may have its own unique mechanisms and controls, so it’s important to familiarize yourself with the instructions provided by the manufacturer. Now that you have a better understanding of the different types of curtain blinds, you can move on to learning how to lower each type effectively.
Lowering Roller Blinds
Roller blinds are a popular type of curtain blind known for their simplicity and ease of use. Lowering roller blinds is a straightforward process that can be done using the control chain or spring-loaded mechanism. Here are the steps to lower roller blinds:
- Locate the control chain: The control chain is usually located on the side of the roller blind. It may have a plastic or metal handle for easy grip and operation.
- Hold the control chain: Firmly hold the control chain with one hand. Make sure you have a secure grip on it to prevent any accidental slips or drops.
- Gradually lower the blinds: With a gentle and controlled motion, start pulling the control chain downward. As you pull, you will notice the fabric panel of the roller blinds lowering towards the desired height.
- Stop at the desired position: Lower the roller blinds to the desired height. The blinds can be adjusted to different levels to control light and privacy in the room.
- Secure the control chain: If the control chain has a tensioner, you can secure it in place to keep the blinds at the desired height. This will prevent them from rolling up unexpectedly.
It’s important to note that some roller blinds may have a spring-loaded mechanism instead of a control chain. To lower spring-loaded roller blinds, simply release the spring mechanism and let the blinds unroll and lower to the desired position. You can adjust the tension of the spring mechanism if needed.
When lowering roller blinds, be mindful of the speed and force applied to the control chain or spring mechanism. Lower the blinds smoothly and avoid any sudden jerks or pulls that may damage the blinds or cause them to become misaligned.
Overall, lowering roller blinds is a straightforward process that can be done with ease. With these simple steps, you can effectively lower your roller blinds and achieve the desired level of light and privacy in your space.
Lowering Roman Blinds
Roman blinds are a stylish and versatile option for curtain blinds, known for their elegant folds and smooth operation. Lowering Roman blinds involves using a cord or chain system to gradually lower the fabric panels to the desired position. Here’s a step-by-step guide on how to lower Roman blinds:
- Locate the control cord or chain: The control cord or chain is usually positioned on one side of the Roman blinds. It may have a plastic or metal handle for easy grip and operation.
- Hold the control cord or chain: Firmly hold the control cord or chain with one hand. Ensure that you have a secure grip to prevent any accidental slips or tangles.
- Gradually lower the blinds: With a gentle and controlled motion, start pulling the control cord or chain downward. As you pull, you will notice the fabric panels unfolding and lowering towards the desired height.
- Stop at the desired position: Lower the Roman blinds to the desired height. The blinds can be adjusted to different levels to control light and privacy in the room.
- Secure the control cord or chain: If your Roman blinds have a cord or chain cleat, use it to secure the control cord or chain. This will prevent the blinds from accidentally rolling up and keep them at the desired height.
It’s important to note that some Roman blinds may have a continuous loop cord system instead of a chain. To lower these blinds, simply pull down on the continuous loop cord with a steady and controlled motion.
When lowering Roman blinds, be mindful of the speed and force applied to the control cord or chain. Lower the blinds smoothly and avoid any sudden jerks or pulls that may damage the blinds or cause the folds to become misaligned.
Caring for Roman blinds is essential to maintain their appearance and functionality. Regularly dust or vacuum the fabric panels to remove any dirt or debris. If the blinds become stained, follow the cleaning instructions provided by the manufacturer or consult a professional.
Lowering Roman blinds is a fairly simple process that can be done with ease once you become familiar with the control cord or chain system. By following these steps, you can effortlessly lower the Roman blinds in your space and create a beautiful and functional window treatment.
Lowering Venetian Blinds
Venetian blinds are a classic choice for curtain blinds, known for their adjustable slats and versatile light control. Lowering Venetian blinds involves using a control cord to lower the blinds and a tilt rod to adjust the angle of the slats. Here’s a step-by-step guide on how to lower Venetian blinds:
- Locate the control cord: The control cord is typically located on one side of the Venetian blinds. It may have a plastic handle or a loop at the end for easy gripping.
- Hold the control cord: Firmly hold the control cord with one hand, making sure you have a secure grip and enough slack to lower the blinds.
- Lower the blinds: With a controlled pulling motion, start lowering the blinds by gently pulling down on the control cord. As you pull, you will notice the slats of the blinds beginning to lower towards the desired height.
- Stop at the desired position: Lower the Venetian blinds to the desired height. You can adjust them to different levels to control the amount of light and privacy in the room.
- Adjust the slat angle: To adjust the angle of the slats, locate the tilt rod. The tilt rod is typically positioned in the center of the blinds. Rotate the tilt rod clockwise or counterclockwise to tilt the slats to the desired angle.
- Secure the control cord: If your Venetian blinds have a cord cleat, you can use it to secure the control cord in place. This will prevent the blinds from accidentally rising up and keep them at the desired height.
When lowering Venetian blinds, it’s important to lower them slowly and with control to avoid any abrupt movements that may damage the blinds or cause the slats to become misaligned. Applying too much force to the control cord can also lead to slat misalignment, so it’s important to use a gentle pulling motion.
To keep your Venetian blinds in good condition, regularly dust or wipe the slats with a soft cloth or duster. If the blinds become stained, you can clean them using mild soap and water, following the manufacturer’s instructions. Avoid using harsh chemicals or abrasive materials that may damage the blinds.
Lowering Venetian blinds allows you to easily adjust the amount of light and privacy in your space. By following these simple steps, you can effortlessly lower your Venetian blinds and achieve the desired ambiance in your room.
Lowering Vertical Blinds
Vertical blinds are a popular choice for curtain blinds, especially for large windows or sliding glass doors. They are known for their vertical hanging slats that can be rotated and drawn across using a control chain or wand. Lowering vertical blinds involves drawing the slats across the window opening with ease. Here’s a step-by-step guide on how to lower vertical blinds:
- Locate the control chain or wand: The control chain or wand is typically located on one side of the vertical blinds. It may have a plastic handle for easy gripping or a wand that can be turned.
- Hold the control chain or wand: Firmly hold the control chain or wand with one hand, making sure you have a secure grip to operate the blinds smoothly.
- Draw the slats across: With a controlled motion, start pulling or turning the control chain or wand to draw the slats across the window opening. As you do so, you will notice the slats moving in unison and lowering towards the desired height.
- Stop at the desired position: Draw the vertical blinds across the window opening to the desired height. You can adjust them to different levels to control light and privacy in the room.
- Secure the control chain or wand: If your vertical blinds have a chain tensioner or wand holder, use it to secure the control chain or wand in place. This will prevent the blinds from accidentally sliding open and keep them at the desired height.
When lowering vertical blinds, it’s important to use a gentle and controlled motion to avoid any sudden jerks or pulls that may damage the blinds or cause the slats to become misaligned. Keep in mind that the control chain or wand may have a specified direction for turning or pulling, so follow the manufacturer’s instructions if applicable.
To maintain the appearance of your vertical blinds, regularly dust or vacuum the slats using a soft brush attachment. For spot cleaning, use a mild detergent and a damp cloth to gently wipe away any stains or dirt. Be cautious not to saturate the fabric or vinyl slats, as excessive water can cause damage.
Lowering vertical blinds allows you to easily control the amount of light and privacy in your space. By following these simple steps, you can effortlessly lower your vertical blinds and create a comfortable and functional environment in your room.
Lowering Honeycomb Shades
Honeycomb shades, also known as cellular blinds, are a popular choice for curtain blinds due to their energy-efficient design and soft, textured appearance. These shades consist of honeycomb-shaped cells that trap air and provide insulation. Lowering honeycomb shades is a simple process that allows you to control light and privacy levels effectively. Here’s a step-by-step guide on how to lower honeycomb shades:
- Locate the control cord: The control cord is typically positioned on one side of the honeycomb shades. It may have a plastic or metal handle for easy gripping.
- Hold the control cord: Firmly hold the control cord with one hand, ensuring that you have a secure grip and enough slack to lower the shades.
- Lower the shades: With a smooth pulling motion, start lowering the honeycomb shades by gently pulling down on the control cord. As you pull, you will notice the shades lowering gradually to the desired height.
- Stop at the desired position: Lower the honeycomb shades to the desired height by releasing the control cord. The shades can be adjusted to different levels, allowing you to control the amount of natural light entering the room.
- Secure the control cord: If your honeycomb shades have a cord tensioner, use it to secure the control cord. Securing the cord will prevent the shades from accidentally rising up and help maintain their desired position.
When lowering honeycomb shades, be cautious not to pull too quickly or forcefully, as this can potentially damage the shades or cause them to become misaligned. Smooth and gentle movements are essential for maintaining the integrity and functionality of the shades.
To ensure the longevity of your honeycomb shades, regular maintenance is important. Dust the shades regularly using a feather duster or a soft brush attachment on your vacuum cleaner. For deeper cleaning, consult the manufacturer’s guidelines or consider professional cleaning services.
Lowering honeycomb shades allows you to enjoy the benefits of light control and insulation offered by these blinds. By following these simple steps, you can effortlessly lower your honeycomb shades and create a cozy and comfortable atmosphere in your living space.
Lowering Pleated Shades
Pleated shades are a popular choice for curtain blinds, known for their neat and streamlined appearance. These shades are made of a single piece of fabric that is pleated when raised and extends when lowered. Lowering pleated shades is a straightforward process that allows you to control light and privacy levels effectively. Here’s a step-by-step guide on how to lower pleated shades:
- Locate the control cord: The control cord is typically positioned on one side of the pleated shades. It may have a plastic or metal handle for easy gripping.
- Hold the control cord: Firmly hold the control cord with one hand, ensuring that you have a secure grip and enough slack to lower the shades.
- Lower the shades: With a smooth and controlled pulling motion, begin to lower the pleated shades by gently pulling down on the control cord. As you pull, you will notice the fabric extending and the shades lowering to the desired height.
- Stop at the desired position: Lower the pleated shades to the desired height by releasing the control cord. The shades can be adjusted to different levels, allowing you to control the amount of natural light entering the room.
- Secure the control cord: If your pleated shades have a cord cleat, use it to secure the control cord. This will prevent the shades from accidentally rising up and help maintain their desired position.
When lowering pleated shades, it’s important to lower them with a gentle and controlled motion to avoid any jerks or tugs that could damage the shades or disrupt their pleats. Smooth and steady movements will help preserve their appearance and functionality.
To keep your pleated shades looking their best, regularly dust or vacuum them using a soft brush attachment. If the shades become soiled or stained, consult the manufacturer’s guidelines for proper cleaning methods or consider professional cleaning services.
Lowering pleated shades allows you to enjoy the benefits of light control and privacy offered by these blinds. By following these simple steps, you can effortlessly lower your pleated shades and create an organized and inviting atmosphere in your living space.
Lowering Sheer Shades
Sheer shades are a beautiful and elegant option for curtain blinds, combining the features of curtains and blinds. These shades consist of horizontal fabric vanes that are sandwiched between two sheer fabric panels. Lowering sheer shades allows you to control the amount of light and privacy in your space effectively. Here’s a step-by-step guide on how to lower sheer shades:
- Locate the control cord or wand: The control cord or wand is typically positioned on one side of the sheer shades. It may have a plastic or metal handle for easy gripping.
- Hold the control cord or wand: Firmly hold the control cord or wand with one hand, ensuring that you have a secure grip and enough slack to lower the shades.
- Lower the shades: With a gentle pulling or turning motion, begin to lower the sheer shades by pulling down on the control cord or turning the wand. As you do so, you will see the fabric vanes moving and the shades lowering gradually towards the desired height.
- Stop at the desired position: Lower the sheer shades to the desired height by releasing the control cord or wand. The shades can be adjusted to different levels, allowing you to control the level of natural light and privacy in your room.
- Secure the control cord or wand: If your sheer shades have a cord cleat or wand holder, use it to secure the control cord or wand. This will prevent the shades from accidentally rising up and maintain the desired position.
When lowering sheer shades, always use smooth and gentle movements to avoid any sudden jerks or tugs that may damage the shades or disrupt their delicate fabric. Taking care during the lowering process will help preserve their beauty and functionality.
To keep your sheer shades looking their best, regularly dust them with a feather duster or use the soft brush attachment on your vacuum cleaner. For spot cleaning, lightly dab any stains with a mild detergent and a clean cloth. Avoid saturating the fabric, as excessive moisture can damage the shades.
Lowering sheer shades allows you to achieve a soft and diffused natural light while maintaining privacy. By following these simple steps, you can easily lower your sheer shades and create a peaceful and inviting ambiance in your living space.
Lowering Bamboo Blinds
Bamboo blinds are a popular choice for curtain blinds, known for their natural and organic look. These blinds are made from bamboo or woven wood material, creating a warm and inviting atmosphere in any room. Lowering bamboo blinds is a straightforward process that allows you to control light and privacy effectively. Here’s a step-by-step guide on how to lower bamboo blinds:
- Locate the control cord: The control cord is usually positioned on one side of the bamboo blinds. It may have a plastic or metal handle for easy gripping.
- Hold the control cord: Firmly hold the control cord with one hand, ensuring that you have a secure grip and enough slack to lower the blinds.
- Lower the blinds: With a smooth and controlled pulling motion, begin to lower the bamboo blinds by gently pulling down on the control cord. As you do so, you will notice the blinds unfurling and lowering to the desired height.
- Stop at the desired position: Lower the bamboo blinds to the desired height by releasing the control cord. The blinds can be adjusted to different levels to control the amount of natural light and privacy in the room.
- Secure the control cord: If your bamboo blinds have a cord cleat, use it to secure the control cord. This will prevent the blinds from accidentally rolling up and help maintain the desired position.
When lowering bamboo blinds, ensure that you lower them with slow and steady movements to avoid any jerking motions that may damage the blinds or cause them to become misaligned. A gentle pulling motion is key to preserving the integrity and functionality of the blinds.
To clean bamboo blinds, lightly dust them with a feather duster or use the soft brush attachment on your vacuum cleaner. For stubborn stains, you can use a damp cloth with mild soap and water, taking care not to saturate the blinds. Allow them to air dry fully before raising them again.
Lowering bamboo blinds adds a touch of natural beauty and texture to your windows, creating a cozy and inviting atmosphere. By following these simple steps, you can effortlessly lower your bamboo blinds and enhance the aesthetic appeal of your living space.
Troubleshooting Common Issues
While lowering curtain blinds is usually a simple process, there can be some common issues that may arise. Understanding how to troubleshoot these issues will help you overcome any obstacles and ensure the smooth operation of your blinds. Here are some common problems and their troubleshooting solutions:
- Blinds not lowering smoothly: If your blinds are not lowering smoothly, check for any obstructions or tangled cords. Clear away any objects that may be blocking the path of the blinds. Untangle any cords or chains that may have become twisted or caught.
- Blinds not staying at desired height: If your blinds are not staying at the desired height and keep rising or falling, inspect the cord tensioner or cleat. It may need to be adjusted or tightened to ensure proper tension. Alternatively, check if the control mechanism needs lubrication or if there are any damaged components that need to be replaced.
- Slat misalignment: If the slats of your blinds are misaligned, they may not lower or raise properly. Gently adjust the slats by hand to ensure they are aligned correctly. If the misalignment persists, check for any bent or damaged slats that may need to be replaced.
- Difficulty in turning tilt rod: If the tilt rod of your blinds is difficult to turn, it may be due to dirt or debris accumulated in the mechanism. Carefully clean the tilt rod and the surrounding area with a soft cloth. If it still doesn’t turn smoothly, you may need to lubricate the mechanism with a silicone-based lubricant.
- Motorized blinds not responding: If you have motorized blinds and they are not responding to the remote control or switch, check the batteries or power source. Replace the batteries if needed, or ensure that the power source is connected and functioning properly. If the issue persists, consult the manufacturer’s troubleshooting guide or contact customer support.
Remember to always refer to the manufacturer’s instructions or guidelines when troubleshooting specific issues with your curtain blinds. They may provide additional troubleshooting tips or contact information for technical support.
In the event that you are unable to resolve the issue on your own or if you encounter a more complex problem, it is advisable to seek assistance from a professional blinds installer or technician. They will have the expertise and knowledge to diagnose and fix any problems with your curtain blinds.
Being prepared to troubleshoot common issues will help you maintain the functionality and durability of your curtain blinds. By familiarizing yourself with the solutions to these issues, you can address any problems that arise and ensure the smooth operation of your blinds for years to come.
Maintaining and Cleaning Curtain Blinds
Proper maintenance and regular cleaning are essential for keeping your curtain blinds in good condition and prolonging their lifespan. By following these guidelines, you can ensure that your blinds continue to function properly and look their best. Here’s how to maintain and clean your curtain blinds:
- Regular dusting: Dust your blinds regularly using a feather duster or a soft cloth. This will help remove any surface dust or debris that may accumulate over time. Start from the top and work your way down, making sure to reach every slat or panel.
- Vacuuming: If your blinds have a lot of dust or pet hair buildup, you can use a vacuum cleaner with a brush attachment to gently vacuum the slats or panels. Be careful not to apply too much pressure, as it may cause damage.
- Spot cleaning: For stains or spots on your blinds, use a mild detergent or a specialized blind cleaner recommended by the manufacturer. Dilute the detergent in water and gently dab the affected area with a soft cloth. Avoid using harsh chemicals or abrasive scrubbers that may damage the blinds.
- Deep cleaning: Depending on the type of material and level of dirt accumulation, your blinds may require occasional deep cleaning. Follow the manufacturer’s instructions or consult a professional for the best method to deep clean your specific blinds.
- Cleaning the hardware: Don’t forget to clean the hardware or mechanisms of your blinds. Wipe them down with a soft cloth or use a small brush to remove dust and debris that may affect their operation.
- Avoid water saturation: When cleaning your blinds, avoid saturating them with water or any cleaning solution. Excessive moisture can damage the materials and cause warping or discoloration. Use minimal water or a damp cloth when necessary, ensuring the blinds are well-ventilated afterward to dry completely.
- Inspect for damage: Regularly inspect your blinds for any signs of damage, such as broken slats, loose strings, or malfunctioning mechanisms. Address these issues promptly to prevent further damage and ensure the proper function of your blinds.
- Follow manufacturer’s instructions: Always refer to the manufacturer’s instructions for specific maintenance and cleaning guidelines. Different types of blinds may require different methods and products, so it’s important to follow their recommendations for optimal care.
By incorporating regular maintenance and cleaning into your routine, you can keep your curtain blinds looking fresh and performing well for years to come. Not only will this enhance the appearance of your space, but it will also contribute to a cleaner and healthier living environment.
Remember, if you are unsure about any aspect of maintaining or cleaning your blinds, consult the manufacturer’s instructions or seek advice from a professional. They can provide guidance and ensure that you are caring for your curtain blinds effectively and safely.