
Assess the Problem
When faced with a curtain blind that is not functioning properly, the first step is to assess the problem. This will help you understand the root cause and determine the appropriate solution. Here are a few common issues you may encounter:
- Blinds not opening or closing: If your blinds are not responding when you pull the cord or rotate the wand, the issue may lie with the cord mechanism or tilter.
- Cord or chain damage: If you notice frayed cords, broken chains, or knots that prevent smooth operation, it’s essential to address these issues promptly to prevent further damage.
- Uneven slats or panels: Over time, blinds can become misaligned, resulting in slats or panels that are not level. This can affect their functionality and appearance.
- Tension spring issues: Tension springs are responsible for keeping the blind taut when it’s raised or lowered. If the blind is not staying in place, the tension spring may need adjustment or replacement.
Once you have identified the specific problem, you can move on to the next step, which is gathering the necessary tools to fix the issue. Remember, every blind repair project may require different tools, so it’s important to be prepared.
Gather the Necessary Tools
Before you can start fixing your curtain blind, it’s important to gather the necessary tools. Having the right tools on hand will ensure that you can efficiently and effectively address the problem. Here are some essential tools you may need:
- Screwdriver: A screwdriver will be needed to remove any screws or bolts that hold the blind in place or secure the mechanism.
- Pliers: Pliers are useful for gripping and pulling cords or chains, especially if they are damaged or tangled.
- Scissors or Knife: You may need scissors or a knife to cut and trim cords or replace damaged slats or panels.
- Replacement Parts: Depending on the specific issue, you may need to have replacement cords, chains, slats, panels, or tension springs on hand.
- Tape Measure: A tape measure can be useful for accurately measuring and cutting replacement parts to ensure a proper fit.
- Lubricant: If your blind is not moving smoothly, a lubricant such as silicone spray can help to ease any friction in the mechanism.
- Cleaning Supplies: If you’re planning to clean your blind while you have it removed, gather some mild detergent, a soft cloth, and a vacuum cleaner.
Having these tools readily available will save you time and frustration during the repair process. Once you have gathered all the necessary tools, you can proceed to the next step, which is removing the blind from the window.
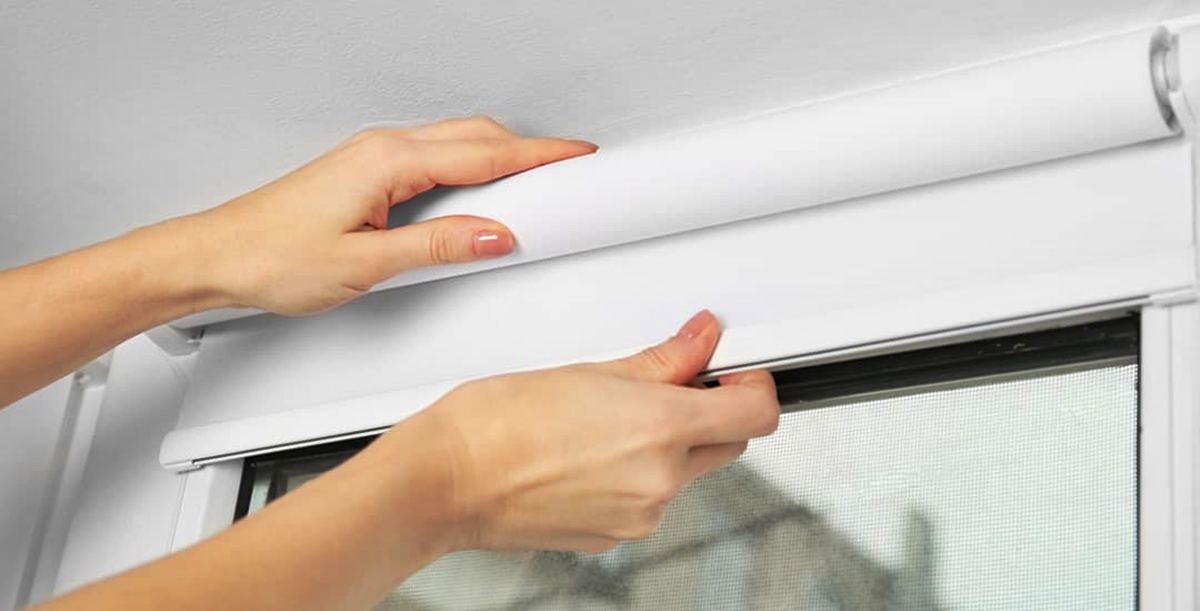
Remove the Blind from the Window
To effectively fix your curtain blind, it is often necessary to remove it from the window. Removing the blind will provide better access to the mechanism and allow you to work on it more comfortably. Here’s a step-by-step guide on how to remove the blind:
- Corded Blinds: If your blind has a cord, start by pulling the blind all the way up until it is fully raised. Then, locate the cord lock mechanism or brackets that hold the blind in place. Unscrew or unclip these brackets to release the blind.
- Chain or Wand Blinds: For blinds with a chain or wand control, simply rotate the wand or rotate the chain until the blind is fully raised. Look for the brackets that secure the blind and detach them by unscrewing or unclipping.
- Venetian Blinds: Venetian blinds typically have a set of brackets located at the top that fasten the blind to the window frame. Loosen the screws on these brackets to release the blind.
- Vertical Blinds: To remove vertical blinds, start by pushing the blind to one side. Look for a small plastic clip or latch at the top of the blind track. Depress or release this clip to free the blind from the track.
- Roller Blinds: Roller blinds usually have two brackets – one on each side of the blind. Locate the brackets and remove any screws or clips securing them to the window frame. Once the brackets are detached, gently lift the blind out of the brackets.
Remember to handle the blind carefully while removing it from the window to avoid any damage. Once you have successfully removed the blind, it’s time to move on to the next section, where you will examine the mechanism to identify the issue.
Examine the Mechanism
After removing the curtain blind from the window, the next step in the repair process is to examine the mechanism. Taking a closer look at how the blind operates will help you identify the specific issue and determine the necessary repairs or replacements. Here’s what you should do:
- Inspect the Cord or Chain: Carefully examine the cord or chain for any signs of damage, such as fraying, knots, or breaks. If you find any issues with the cord or chain, it may need to be repaired or replaced.
- Check the Tilter or Wand: If your blind has a tilter mechanism or wand control, check to see if it rotates smoothly. Any stiffness or resistance may indicate a problem that needs to be addressed.
- Examine the Slats or Panels: Inspect the slats or panels to ensure they are in good condition and not bent, cracked, or misaligned. Damaged slats or panels may need to be replaced for the blind to function properly.
- Check the Tension Spring or Chain: If your blind uses a tension spring or chain, examine it for any issues. It should be in good condition and properly attached. If the tension spring is loose or damaged, it may need adjustment or replacement.
- Look for any Obstructions: Sometimes, the blind may not be functioning correctly due to obstructions such as dirt, debris, or objects lodged within the mechanism. Carefully remove any obstructions to restore the proper functioning of the blind.
By carefully examining the blind’s mechanism, you can determine the necessary repairs or replacements needed to fix the problem. Once you have identified the issue, you can proceed to the next section for the specific steps on how to address it.
Repair or Replace the Cord
If the cord of your curtain blind is damaged, tangled, or not functioning properly, it will need to be repaired or replaced. Here are the steps to fix the cord:
- Assess the Damage: Determine the extent of the damage to the cord. If it is simply tangled or twisted, try untangling it carefully. If it is frayed, knotted, or broken, it will need to be replaced.
- Remove the Cord: If the cord needs replacement, remove the existing cord from the mechanism. This typically involves untying or unclipping the cord from the various components of the blind.
- Measure and Cut the Replacement Cord: Measure the length of the old cord and cut the new cord to the same length. Use sharp scissors or a knife to achieve clean cuts.
- Attach the New Cord: Attach one end of the new cord to the appropriate component of the blind mechanism. This can involve tying, threading, or looping the cord onto the designated areas.
- Thread the Cord through the Blind: Carefully thread the new cord through the necessary loops, pulleys, or holes in the blind, following the original path of the old cord. Ensure the cord is properly aligned and threaded for smooth operation.
- Secure the Cord: Once the cord is threaded through the blind, secure it in place using any clips, screws, or brackets provided by the manufacturer. This will ensure that the cord remains taut and functions properly.
If you are unsure about repairing or replacing the cord yourself, it may be best to seek professional assistance. Incorrectly fixing the cord may lead to further damage or compromise the functionality of the blind. Once the cord is repaired or replaced, you can move on to the next step to address any issues with the slats or panels, if necessary.
Replace the Slats or Panels
If the slats or panels of your curtain blind are damaged, bent, or misaligned, you will need to replace them to ensure the blind functions properly and looks aesthetically pleasing. Here is a step-by-step guide on how to replace the slats or panels:
- Remove the Damaged Slats or Panels: Start by removing the damaged slats or panels from the blind. This may involve unclipping them from the string ladder or removing any brackets or clips that hold them in place.
- Measure and Purchase Replacement Slats or Panels: Take precise measurements of the width and length of the existing slats or panels to ensure you purchase the correct size replacements. Then, visit a blind or home improvement store to find matching slats or panels.
- Prepare the Replacement Slats or Panels: If the new slats or panels are longer than needed, carefully trim them to the correct length using a sharp pair of scissors or a knife. Be sure to follow any manufacturer instructions for cutting.
- Attach the Replacement Slats or Panels: Insert the replacement slats or panels into the blind, making sure they align properly with the existing ones. If necessary, attach them using the same clips, brackets, or strings as the original slats or panels.
- Test the Functionality: Once all the replacement slats or panels are in place, test the functionality of the blind. Ensure that the slats or panels open, close, and rotate smoothly without any obstructions or misalignment.
Replacing the slats or panels of your curtain blind can breathe new life into the window covering and restore its functionality. However, if you are unsure about replacing the slats or panels yourself, it may be best to consult a professional. They can guide you through the process or take care of the replacement for you. Once the slats or panels are replaced, you can move on to the next section to address any issues with the tension spring or chain, if necessary.
Fix the Tension Spring or Chain
If your curtain blind utilizes a tension spring or chain mechanism and you are experiencing issues with it, such as the blind not staying in place or not raising and lowering smoothly, you will need to fix the tension spring or chain. Here are the steps to address this problem:
- Identify the Issue: Determine whether the tension spring is loose, damaged, or needs adjustment, or if the chain is tangled, broken, or not properly attached to the blind mechanism.
- Adjust the Tension Spring: If the tension spring seems loose, use pliers or your hands to tighten it. Carefully apply gentle pressure in the appropriate direction to increase the tension. Make sure it is properly secured and attached to the blind mechanism.
- Replace the Tension Spring: If the tension spring is damaged or cannot be adjusted, you will need to replace it. Purchase a replacement tension spring from a blind or home improvement store and carefully install it according to the manufacturer’s instructions.
- Fix the Chain: If the blind uses a chain mechanism, check if the chain is tangled or broken. Untangle any knots or snags in the chain and ensure it is properly aligned with the blind mechanism. If the chain is broken, it will need to be replaced.
- Replace the Chain: For a broken chain, purchase a new chain that matches the size and style of the original. Remove the old chain, and thread the new chain through the appropriate loops, pulleys, or connectors, following the same path as the original chain.
- Test the Functionality: Once you have fixed the tension spring or chain, test the blind’s functionality. Ensure that it stays in place when raised or lowered and that the chain operates smoothly without any snags or tangles.
Repairing or replacing the tension spring or chain will restore the proper functioning of your curtain blind and allow you to adjust it easily. If you are unsure about fixing the tension spring or chain yourself, it may be best to consult a professional for assistance. Once the tension spring or chain is fixed, you can proceed to the next section to reattach the blind to the window.
Reattach the Blind to the Window
Once you have completed the necessary repairs or replacements on your curtain blind, the next step is to reattach it to the window. Properly reattaching the blind will ensure it is securely in place and functions as intended. Follow these steps to reattach the blind:
- Prepare the Window: Ensure that the window area is clean and free of any dust, debris, or obstructions that could hinder the installation process.
- Position the Blind: Hold the blind in the desired position against the window frame. Make sure it is straight and aligned correctly.
- Secure the Brackets: Depending on the type of blind, use screws or clips to reattach the brackets to the window frame. Follow the manufacturer’s instructions and make sure the blind is tightly secured.
- Test the Stability: Once the blind is reattached, gently test its stability by pulling on the cords or chains and ensuring they move smoothly. Confirm that the blind stays in place when raised or lowered.
- Make Adjustments: If you notice any issues, such as misalignment or difficulty in operating the blind, make necessary adjustments. This may involve loosening or tightening screws, repositioning brackets, or adjusting tension mechanisms.
Properly reattaching the blind is crucial to its functionality and appearance. Take your time to ensure a secure installation, as a loose or improperly attached blind may lead to further damage or a compromised operation. Once the blind is securely reattached, you can proceed to the final section, which covers the cleaning and maintenance of the blind.
Test the Functionality
After completing the necessary repairs and reattaching your curtain blind, it is crucial to test its functionality to ensure that it operates smoothly and meets your expectations. Here are the steps to test the functionality of your blind:
- Operating the Cord or Chain: If your blind has a cord or chain mechanism, gently pull on the cord or rotate the chain to open and close the blind. Pay attention to the smoothness of the operation and ensure that the blind moves without any obstructions or resistance.
- Adjusting the Slats or Panels: If your blind has adjustable slats or panels, rotate the wand or tilt the slats to different angles to ensure they move freely and stay in place. Check for any misalignment, tightness, or difficulty in adjusting the slats.
- Testing the Tension Spring or Chain: If your blind uses a tension spring or chain mechanism, raise and lower the blind multiple times to see if it stays in place at the desired height. Make sure the tension is properly adjusted and that the blind stays at the desired position without slipping or falling.
- Examining the Overall Appearance: Step back and evaluate the overall appearance of the blind. Ensure that the slats or panels are aligned correctly, the cords or chains hang evenly, and the blind enhances the aesthetic of the window.
- Listening for Any Unusual Noises: During the testing process, listen for any unusual noises such as grinding, scraping, or clicking sounds. These sounds may indicate an underlying problem that needs to be addressed.
By testing the functionality of your curtain blind, you can identify any remaining issues or make any necessary adjustments. If you encounter any problems during the test, refer to the specific repair sections and make the appropriate fixes. Once you are satisfied with the functionality and appearance of your blind, you can move on to the final section, which focuses on the cleaning and maintenance of the blind.
Clean and Maintain the Blind
To keep your curtain blind looking its best and functioning properly, regular cleaning and maintenance are essential. Here are some steps to effectively clean and maintain your blind:
- Dust Regularly: Use a feather duster or a soft microfiber cloth to gently remove dust from the slats or panels. Start from the top and work your way down to ensure thorough cleaning.
- Vacuum Cleaning: For blinds that have accumulated more dirt or debris, use a vacuum cleaner with a brush attachment to gently remove any residue from the slats or panels. Be careful not to apply too much pressure to avoid damaging the blind.
- Spot Cleaning: If you notice any stains or spots on the slats or panels, lightly dampen a soft cloth with a mild detergent solution or a blind cleaning solution. Gently wipe the affected areas, being cautious not to saturate the blind with excessive moisture.
- Drying: After spot cleaning, make sure to dry the blind thoroughly to prevent any water damage or mold growth. Leave the blind open or tilted to allow proper air circulation and drying.
- Inspecting and Repairing: Regularly inspect the blind for any signs of wear and tear, loose cords or chains, or damaged slats or panels. Address any issues promptly to prevent further damage and ensure the blind’s functionality.
- Maintaining the Mechanism: Apply a silicone-based lubricant to the moving parts of the blind mechanism, such as pulleys or tilters, to keep them operating smoothly. Be sure to follow the manufacturer’s guidelines for the appropriate lubricant to use.
- Preventing Excessive Force: Avoid exerting excessive force on the blind’s cords, chains, or mechanism, as this can lead to damage. Always operate the blind gently and ensure that it moves smoothly without any resistance.
- Protecting from Sunlight: To prolong the life of your blind, consider using curtains or drapes to block direct sunlight, as prolonged exposure to UV rays can cause fading and deterioration of the blind materials.
By incorporating regular cleaning and maintenance into your curtain blind care routine, you can extend its lifespan, enhance its appearance, and ensure optimal functionality. Follow these tips to keep your blind in excellent condition for years to come.