
Materials Needed
Before you begin making your paper picture frame, it’s important to gather all the necessary materials. Here is a list of items you will need:
- Cardboard
- Decorative paper or scrapbook paper
- Scissors
- Ruler
- Pencil
- Adhesive glue or double-sided tape
- Clear plastic or glass sheet
- Photos or artwork
- Decorative embellishments (optional)
Cardboard will serve as the base of your picture frame, providing stability and support. You can use any type of cardboard, such as the back of a notepad or a sturdy cereal box. Ensure that it is large enough to fit your desired picture frame size.
For the frame itself, choose decorative paper or scrapbook paper that matches your style and complements the photo or artwork you plan to display. You can opt for patterned, textured, or solid-colored paper, depending on your preference.
Scissors will be necessary for cutting the cardboard and paper. Use a good pair of scissors that can easily cut through these materials. A ruler is also helpful for measuring and creating straight lines.
Don’t forget to have a pencil on hand for tracing and marking measurements on the cardboard and paper. This will ensure accuracy and precision in your cuts.
To assemble the frame, you’ll need adhesive glue or double-sided tape. Choose a strong and reliable adhesive that will securely hold the paper to the cardboard.
For the front of the frame, you’ll need a clear plastic or glass sheet to protect your photo or artwork. You can acquire a transparent sheet in a craft store or repurpose plastic packaging, such as a clear produce container.
If desired, you can also gather decorative embellishments to enhance the look of your frame. These can include stickers, ribbons, beads, sequins, or any other elements of your choosing.
With these materials on hand, you’re ready to embark on creating your very own paper picture frame.
Step 1: Choosing the Design and Size of the Frame
When it comes to making a paper picture frame, the first step is to decide on the design and size that you want. This will determine the overall look and feel of your frame, as well as the type of photos or artwork it can accommodate. Here are some tips to help you choose the perfect design and size:
Consider the Style: Think about the overall style and theme you want for your frame. Do you prefer something minimalist and modern, or perhaps something more elaborate and decorative? This will help guide your choice of paper and embellishments.
Match the Photo or Artwork: Take into account the image or artwork that you plan to display in the frame. Consider its colors, patterns, and overall aesthetic. Choose a frame design and patterned paper that will complement and enhance the visual appeal of the image.
Measure the Photo or Artwork: Carefully measure the dimensions of the photo or artwork that you want to display. This will help determine the appropriate size for your frame. Keep in mind that the frame should be slightly larger than the image to provide a border or frame effect.
Determine the Orientation: Decide whether you want your frame to be in portrait (vertical) or landscape (horizontal) orientation. This will depend on the orientation of your photo or artwork, as well as your personal preference.
Consider the Display Location: Think about where you plan to display your frame. Is it going on a wall, a desk, or a shelf? Consider the available space and choose a size and design that will fit well in that location.
Explore Different Shapes: Don’t limit yourself to traditional rectangular frames. Consider alternative shapes such as squares, circles, or even asymmetrical designs. This can add a unique and creative touch to your frame.
By taking these factors into account, you can choose a design and size that perfectly suits your vision for the paper picture frame. Once you have made your decision, you are ready to move on to the next steps of the process.
Step 2: Gathering Your Supplies
Now that you have decided on the design and size of your paper picture frame, it’s time to gather all the necessary supplies. By having everything prepared and organized, you can ensure a smooth and efficient crafting process. Here are the supplies you will need:
- Cardboard
- Decorative paper or scrapbook paper
- Scissors
- Ruler
- Pencil
- Adhesive glue or double-sided tape
- Clear plastic or glass sheet
- Photos or artwork
- Decorative embellishments (optional)
Start by gathering cardboard for the base of your frame. Look for a sturdy piece of cardboard that is larger than your desired frame size. You can repurpose old packaging material or use the back of a notepad or cereal box.
Next, choose your decorative paper or scrapbook paper. Consider the design, color, and patterns that align with your style and the photo or artwork you plan to display. Make sure the paper is large enough to cover the cardboard base and leave a border around the edges of the frame.
Having a good pair of scissors is essential for cutting both the cardboard and the paper. Find a pair of sharp scissors that can easily cut through these materials without fraying or tearing them.
A ruler will help you measure and create straight lines during the cutting process. Use a ruler with clear markings that is long enough to span the size of your frame.
Ensure you have a pencil on hand to mark measurements and make light outlines on the cardboard and paper. This will help guide your cutting and ensure accuracy in the dimensions of your frame.
For attaching the paper to the cardboard, you will need adhesive glue or double-sided tape. Choose a strong adhesive that will securely hold the paper in place without causing any damage or warping.
To protect your photo or artwork, you will need a clear plastic or glass sheet. This can be obtained from a craft store or repurposed from transparent packaging material.
Don’t forget to have your chosen photos or artwork ready. Ensure they are appropriately sized to fit your frame and are in good condition for display.
Lastly, consider adding decorative embellishments to enhance the look of your frame. These can include stickers, ribbons, beads, sequins, or any other elements that match your style and personal taste.
By gathering all these supplies upfront, you will save time and have everything you need to proceed to the next steps of assembling your paper picture frame.
Step 3: Cutting the Cardboard Base
With all your supplies gathered, it’s time to move on to the next step: cutting the cardboard base for your paper picture frame. The cardboard base will provide stability and structure to your frame, ensuring that it can properly hold and display your photo or artwork. Follow these steps to cut the cardboard base:
- Place the cardboard on a flat surface, ensuring it is clean and free from any debris.
- Measure and mark the dimensions of your frame on the cardboard using a pencil and ruler. Remember to leave a border around the edges to create the desired frame effect.
- Using the ruler as a guide, draw straight lines connecting the marked points to outline the shape of your frame. If you prefer a rectangular frame, ensure all angles are 90 degrees.
- Double-check the measurements and ensure the lines are straight and accurate.
- Carefully cut along the outline of the frame using a pair of sharp scissors. Take your time and make precise cuts to achieve clean and even edges.
- After cutting, check the frame’s size against your desired dimensions to ensure it matches perfectly. If adjustments are necessary, carefully trim the edges until you are satisfied with the size.
- Once the cardboard base is cut to the correct size, examine it for any rough edges or jagged corners. Smooth out any imperfections using sandpaper or by rubbing the edges gently with your fingers.
Remember to exercise caution while cutting the cardboard, as scissors can be sharp. Take your time and work slowly to minimize the risk of accidents or mistakes. It’s always better to cut slightly outside the marked lines and then trim the edges for a perfect fit.
By following these steps, you will have successfully cut the cardboard base for your paper picture frame. Now, it’s time to move on to the next step of the process – tracing and cutting the paper frame.
Step 4: Tracing and Cutting the Paper Frame
Now that you have your cardboard base ready, it’s time to move on to the next step: tracing and cutting the paper frame for your picture frame. The paper frame will add decoration and style to your frame while complementing the photo or artwork you plan to display. Follow these steps to trace and cut the paper frame:
- Lay the decorative paper or scrapbook paper flat on a clean surface.
- Place the cardboard base on top of the paper and align it to one edge.
- Using a pencil, lightly trace around the edges of the cardboard base, creating an outline of the frame on the paper.
- Remove the cardboard base from the paper and connect the traced lines to form a complete frame shape.
- If you want to add a decorative border or pattern to the frame, use stencils or draw freehand designs on the traced outline.
- Once satisfied with the design and shape, carefully cut along the traced lines using a pair of sharp scissors.
- Take your time to make precise cuts, ensuring smooth and clean edges.
- If your frame has intricate designs or patterns, you can use a craft knife and cutting mat for more precise cutting.
- After cutting, place the paper frame on top of the cardboard base to check for any adjustments needed.
- If necessary, trim the paper frame edges to ensure a perfect fit on the cardboard base.
It’s essential to handle the paper frame with care while cutting to avoid tearing or damaging the paper. Take your time and work slowly, especially if you have intricate designs or small details on the frame.
Tracing and cutting the paper frame allows you to customize the look and style of your picture frame. It’s a chance to get creative and add your personal touch. Once you have traced and cut the paper frame, you’re ready to move on to the next step – decorating the paper frame.
Step 5: Decorate the Paper Frame
Now that you have your paper frame cut out, it’s time to let your creativity shine by decorating the frame. This step allows you to personalize your paper picture frame and add unique touches that reflect your style and enhance the overall look. Follow these steps to decorate your paper frame:
- Gather your decorative embellishments such as stickers, ribbons, beads, sequins, or anything else that catches your eye and complements your frame design.
- Plan your design by visualizing how you want the decorative elements to be placed on the paper frame. You can create a theme, add patterns, or simply go with a minimalist approach.
- Use adhesive glue or double-sided tape to attach the embellishments onto the paper frame. Take your time and ensure that they are securely stuck in place.
- If you’re using stickers, carefully remove the backing and press them onto the frame in desired positions.
- If you’re using ribbons or beads, apply a small amount of adhesive to the back of each piece and carefully place them onto the frame.
- Experiment with different arrangements and placements to achieve the desired look before permanently attaching the embellishments.
- Consider using different textures and materials to add visual interest and depth to your frame.
- Avoid overcrowding the frame with too many decorative elements; choose a few key pieces that will make a statement.
- Step back and evaluate the overall design, making any adjustments if necessary. Ensure that all decorations are securely attached and that the frame looks balanced and aesthetically pleasing.
Remember that decorating the paper frame is an opportunity to let your creativity take center stage. Let your personal style and preferences guide your choices, whether you opt for a sleek and minimalist look or a bold and vibrant design. The goal is to make your paper picture frame a unique piece of art.
Once you are satisfied with the design and decorations, allow the adhesive to dry completely before moving on to the next step. Decorating the paper frame adds a personal touch and brings your frame to life, making it ready to hold and showcase your cherished photos or artwork.
Step 6: Gluing the Paper Frame onto the Cardboard Base
Now that you have decorated the paper frame, it’s time to securely attach it to the cardboard base. This step will ensure that your frame is sturdy and ready to display your chosen photo or artwork. Follow these steps to glue the paper frame onto the cardboard base:
- Prepare your adhesive glue or double-sided tape.
- Apply a thin and even layer of glue or adhesive on the back of the paper frame.
- Pay extra attention to the edges and corners of the frame to ensure proper adhesion.
- Carefully place the paper frame on top of the cardboard base, aligning the edges and ensuring it covers the entire surface.
- Press down firmly along the edges and corners to ensure a secure bond between the paper frame and the cardboard.
- If using double-sided tape, remove the backing and firmly press the paper frame onto the cardboard.
- Smooth out any air bubbles or wrinkles that may have formed during the gluing process.
- Allow the glue or adhesive to dry completely according to the manufacturer’s instructions before proceeding to the next step.
It’s important to use the right amount of glue or adhesive to ensure a strong bond without excessive oozing or seepage that could mar the appearance of your frame. Be mindful not to apply too much pressure during the gluing process to avoid tearing or damaging the paper frame.
Double-check that the paper frame is centered and aligned correctly on the cardboard base before the glue or adhesive sets. Any slight adjustments should be made promptly to ensure a perfectly positioned frame.
By securely gluing the paper frame onto the cardboard base, you’re ensuring the longevity and stability of your picture frame. Once the glue or adhesive has fully dried, you can move on to the next step of adding the glass or plastic cover to protect your photo or artwork.
Step 7: Adding the Glass or Plastic Cover
Adding a protective cover is a crucial step in completing your paper picture frame. The glass or plastic sheet will safeguard your photo or artwork from dust, moisture, and potential damage while allowing it to be easily visible. Follow these steps to add the glass or plastic cover:
- Select a clear plastic or glass sheet that is slightly larger than the opening of your frame.
- Make sure the sheet is clean and free from any smudges or scratches.
- Place the sheet gently on top of the frame, aligning it with the edges.
- If the sheet is larger than your frame, use a ruler and sharp utility knife to carefully trim it down to the exact size you need.
- If there are any protective films on the sheet, peel them off to reveal the clear surface.
- Alternatively, if you’re using a plastic packaging container, carefully cut it to size and remove any labels or stickers.
- Once the sheet is properly sized and positioned, secure it in place by applying a thin line of adhesive glue or double-sided tape along the edges of the frame.
- Press down gently to ensure the sheet adheres to the frame without any bubbles or gaps.
When choosing between glass and plastic, consider the weight and fragility of the materials. Glass provides a more substantial and traditional feel, while plastic is lightweight and less prone to breakage, making it a safer option, especially for frames that will be handled or displayed in households with children or pets.
Ensure that the glass or plastic sheet is clean and free from any debris or fingerprints before attaching it to the frame. This will guarantee a clear and unobstructed view of your photo or artwork.
If you’re working with glass, exercise caution to avoid any accidental breakage. Use protective gloves and handle the glass sheet gently to prevent any injuries or damage to yourself or the frame.
By adding the glass or plastic cover, you’re providing a protective barrier that keeps your photo or artwork safe while maintaining its clarity and visibility.
With the glass or plastic cover securely in place, your paper picture frame is now nearly complete. The next step is to attach the backing to provide stability and a finished appearance.
Step 8: Attaching the Backing
Attaching the backing to your paper picture frame is an essential step to provide stability and a finished appearance. The backing will hold everything in place and ensure that your photo or artwork remains securely in the frame. Follow these steps to attach the backing:
- Choose a piece of cardboard or thick cardstock in a color that complements your frame design.
- Measure and cut the backing material so that it is slightly smaller than the dimensions of your frame.
- Place the cut backing piece on the backside of the frame, ensuring it aligns with the edges.
- If desired, use a pencil and ruler to mark where you will be adding tabs or slots to hold the backing in place.
- Remove the backing and carefully cut the marked tabs or slots into the cardboard using scissors or a utility knife.
- Before attaching the backing, ensure that the tabs or slots align with the edges of the frame and are evenly spaced.
- Apply a thin layer of adhesive glue or double-sided tape along the edges of the frame.
- Place the backing onto the frame, aligning it with the edges and making sure the tabs or slots fit securely.
- Press down firmly to ensure a strong bond between the frame and the backing.
- Allow the adhesive glue to dry completely before handling or displaying the frame.
By attaching the backing, you are adding structural support to your paper picture frame. The backing keeps everything in place and ensures that your photo or artwork remains firmly held within the frame.
Choosing a backing material that complements your frame design adds an extra touch of aesthetic appeal. Consider using colored cardstock or patterned cardboard to create a visually pleasing contrast or complement the overall look of your frame.
The tabs or slots in the backing provide a simple and effective way to secure it to the frame. They prevent the backing from moving or shifting, keeping your photo or artwork consistently centered and in position.
Once the backing is securely attached and the adhesive has dried, your paper picture frame is almost ready to beautifully display your cherished photo or artwork. The final step is to add photos and proudly showcase your completed frame.
Step 9: Creating a Stand (Optional)
Creating a stand for your paper picture frame is an optional step that allows you to display it on a flat surface like a table or desk. Adding a stand provides versatility in how you showcase your frame, as it eliminates the need for hanging or mounting it on a wall. Follow these steps to create a stand for your paper picture frame:
- Start by choosing a sturdy and lightweight material for the stand, such as cardboard or thick cardstock.
- Measure and cut a rectangular strip from the material, ensuring it is wide enough to provide balance and support for the frame.
- Fold the strip of material in a zigzag or accordion-like pattern, creating a series of alternating mountain and valley folds.
- The width and height of each fold will vary depending on the desired height and angle of your stand.
- Once the folds are made, gently crease them to hold the shape of the stand.
- If necessary, trim the excess material from either end of the folded strip to create a neat and even shape.
- Apply adhesive glue or double-sided tape to the bottom of the folded strip, ensuring it covers the full width.
- Position the folded strip at the back of the frame, aligning the bottom edge of the strip with the bottom of the frame.
- Press down firmly to securely attach the stand to the frame.
- Allow the adhesive to fully dry before using the stand to display your frame.
Creating a stand for your paper picture frame adds versatility to where and how you can showcase it. It allows you to easily place it on tabletops, shelves, or any flat surface, making it a great option for displaying multiple frames or changing the location regularly.
Adjust the height and angle of the stand by varying the size and number of folds in the strip of material. Test different configurations to find the most stable and visually appealing position for your frame.
Remember to choose a sturdy material for the stand to ensure it can support the weight of the frame without tipping over. Cardstock or thick cardboard works well for this purpose, as they provide stability while remaining lightweight.
By creating a stand for your paper picture frame, you have the flexibility to showcase it in various settings and change its position easily. Now, it’s time for the final step of adding photos and proudly displaying your completed frame.
Step 10: Adding Photos and Displaying Your Frame
After all the hard work and creativity put into making your paper picture frame, it’s time to add your desired photos or artwork and proudly display your completed frame. This final step brings your frame to life and allows you to showcase your cherished memories or artwork. Follow these steps to add photos and display your frame:
- Choose the photos or artwork that you want to display in your frame.
- Ensure that your photos are printed or sized to fit the dimensions of the frame.
- Position the photo or artwork behind the glass or plastic cover of the frame.
- Center it within the frame, making any necessary adjustments for proper alignment.
- If your frame has a backing, gently insert the photo or artwork into the frame, ensuring it fits securely.
- If your frame doesn’t have a backing, you can secure the photo or artwork in place using adhesive tabs or double-sided tape.
- Double-check that the photo or artwork is adequately positioned and secured within the frame.
- Once the photo or artwork is in place, make any final adjustments to ensure it is properly centered and displayed.
- Find an ideal location to proudly display your completed frame.
- Consider placing it on a wall, on a shelf, or on a tabletop, depending on your preference and the design of the frame.
- Ensure that the frame is stable and secure in its display location.
Adding your desired photos or artwork completes the purpose of your paper picture frame – to beautifully showcase and protect the memories or artwork that hold sentimental value to you.
When choosing the display location, consider areas that highlight the frame and allow it to be appreciated. Make sure the frame is in a secure and stable position to avoid accidents or damage.
Take pride in your creation and share your completed paper picture frame with friends, family, or anyone who visits your home. It’s a testament to your creativity and a beautiful way to celebrate the memories or artwork you hold dear.
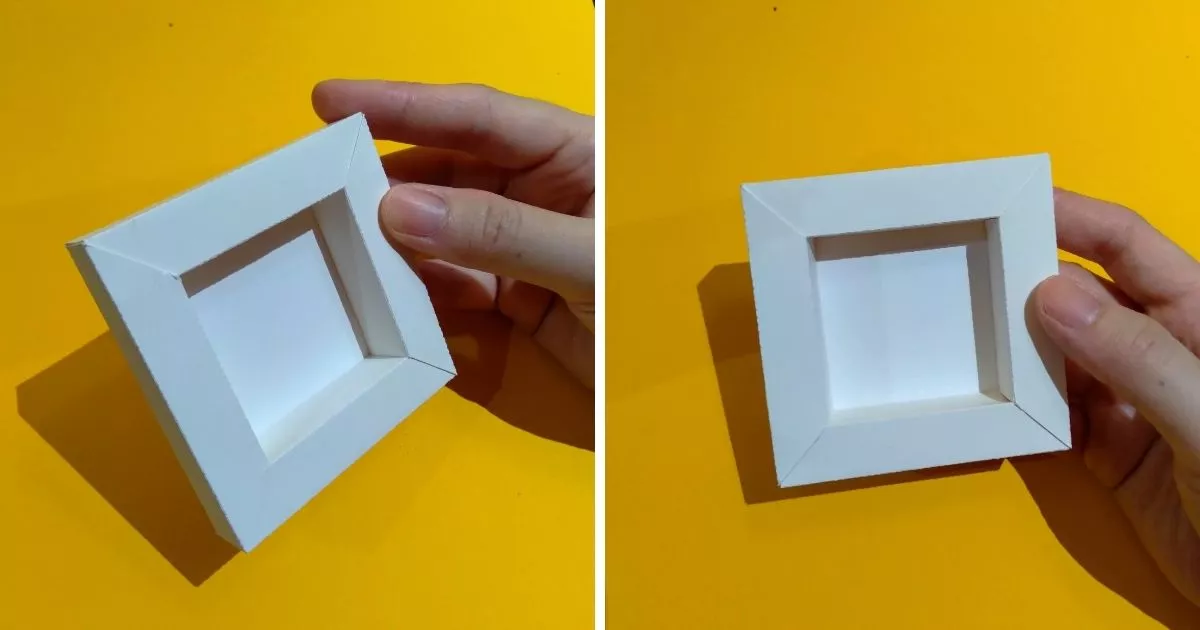
Now that you have added the photos and displayed your frame, take a moment to step back and admire the finished result. Your handmade paper picture frame is a unique and personalized piece of art that brings joy and beauty to your space.