
Why Emptying Your Rug Doctor Is Important
Emptying your Rug Doctor is an essential task that ensures the continued effectiveness and performance of this powerful carpet cleaning machine. Failing to empty the dirty water tank regularly can lead to a range of problems and can even damage your Rug Doctor in the long run. Here are the key reasons why emptying your Rug Doctor is so important:
- Maintaining Cleaning Efficiency: As you clean your carpets with the Rug Doctor, the dirty water and solution are collected in the dirty water tank. If this tank becomes full, the machine’s suction power will be compromised, affecting its ability to effectively remove dirt and grime from your carpets. By regularly emptying the dirty water tank, you ensure that the Rug Doctor can continue operating at peak efficiency.
- Preventing Mold and Mildew Growth: The dirty water tank is a perfect breeding ground for mold and mildew if left unemptied for too long. The moist environment combined with any trapped organic matter can create the ideal conditions for these fungi to thrive. Emptying the tank promptly after each use helps prevent the growth of mold and mildew, protecting your carpets and your health.
- Prolonging the Lifespan of Your Rug Doctor: A Rug Doctor is a significant investment, and proper maintenance is key to ensuring its longevity. By regularly emptying and cleaning the dirty water tank, you prevent the accumulation of debris, sediment, and bacteria that can potentially damage the machine’s internal components. Taking care of your Rug Doctor will enable it to serve you well for many years.
- Maintaining a Hygienic Cleaning Environment: Emptying the dirty water tank ensures that you start each cleaning session with a fresh and clean machine. This not only improves the overall effectiveness of the Rug Doctor but also maintains a hygienic environment as you are not reintroducing previously collected dirt and contaminants back onto your carpets.
By understanding the importance of regularly emptying your Rug Doctor, you can maintain its cleaning power, prevent potential issues, and extend its lifespan. Remember to empty the dirty water tank after each use to ensure optimal performance and prolong the life of your Rug Doctor.
Gather the Necessary Supplies
Before you start the process of emptying your Rug Doctor, it’s important to ensure that you have all the necessary supplies on hand. This will make the task more efficient and ensure that you have everything you need. Here are the supplies you will need:
- Gloves: To protect your hands from any bacteria or debris, it’s advisable to wear a pair of disposable gloves.
- Bucket or Container: You’ll need a bucket or container to collect the dirty water that you are going to empty from the Rug Doctor.
- Clean Water: Depending on the model of your Rug Doctor, you may need clean water to rinse out the dirty water tank after emptying it.
- Cleaning Solution (Optional): If you typically use a cleaning solution with your Rug Doctor, you might want to have some on hand to clean the dirty water tank thoroughly.
- Cleaning Cloth or Sponge: Having a cloth or sponge handy will allow you to wipe down the exterior and interior of the dirty water tank to ensure it’s clean.
It’s important to note that these supplies may vary depending on your specific needs and the model of your Rug Doctor. Take a moment to gather all the supplies before starting the cleaning process to avoid any interruptions or delays.
By having these supplies ready, you’ll be well-prepared to efficiently and effectively empty your Rug Doctor’s dirty water tank. Taking the time to gather the necessary supplies beforehand will help streamline the process and ensure that you can complete the task smoothly.
Prepare the Area
Before you begin emptying your Rug Doctor, it’s important to prepare the surrounding area to ensure a smooth and hassle-free process. By taking a few simple steps, you can protect your floors and furniture from any splashes or spills. Here’s how to prepare the area:
- Clear the Space: Remove any furniture, rugs, or obstacles that may be near the Rug Doctor. This will give you ample room to maneuver and prevent any accidents while emptying the dirty water tank.
- Lay Down Protective Sheets or Towels: To safeguard your floors from potential drips or spills, lay down protective sheets or towels around the Rug Doctor. This will catch any stray water and prevent it from seeping into your flooring.
- Open Windows or Ensure Proper Ventilation: Emptying the dirty water tank can release unpleasant odors, especially if the collected water is particularly dirty. To minimize any lingering smells, open windows or ensure proper ventilation in the room while you empty the tank.
- Have Cleaning Supplies Ready: Keep a cleaning cloth or sponge nearby to quickly clean up any accidental spills or drips that may occur during the emptying process.
By preparing the area before emptying your Rug Doctor, you can protect your floors, furniture, and ensure a smooth and stress-free experience. Taking these simple steps will help to prevent any unwanted messes or damages while you dispose of the dirty water.
Remember to prioritize safety and cleanliness during the entire process to make the overall emptying process as seamless as possible.
Turn off and Unplug Your Rug Doctor
Before you proceed with emptying the dirty water from your Rug Doctor, it’s crucial to ensure that the machine is turned off and safely unplugged. This is an essential safety step to prevent any accidents or damage. Here’s how to properly turn off and unplug your Rug Doctor:
- Switch off the Power: Locate the power switch on your Rug Doctor and turn it to the “Off” position. This will shut down all the internal components and prevent any accidental operation while you handle the machine.
- Unplug from the Power Outlet: Carefully unplug the power cord from the electrical outlet. This will not only prevent any electrical hazards but also give you the freedom to move around without any restrictions.
- Allow the Machine to Cool Down: It’s a good practice to give your Rug Doctor a few minutes to cool down before proceeding. This will prevent any potential burns or injuries that may occur if you touch hot surfaces, as the machine may still retain residual heat.
By following these steps and ensuring that your Rug Doctor is turned off and unplugged, you prioritize your safety and prevent any accidental damage to the machine. Always exercise caution when handling electrical appliances, and never attempt to empty the dirty water while the machine is still powered on.
With the Rug Doctor powered off and unplugged, you can proceed to the next steps with peace of mind, knowing that you’re taking the necessary precautions to complete the emptying process safely.
Locate the Dirty Water Tank
Before you can proceed with emptying the dirty water from your Rug Doctor, you need to locate the dirty water tank. This is where the collected dirt, grime, and water are stored during the cleaning process. Here’s how to locate the dirty water tank:
- Refer to the User Manual: If you’re unsure about the exact location of the dirty water tank, it’s always best to consult the user manual provided with your Rug Doctor. The manual will have detailed instructions and illustrations to help you locate the tank.
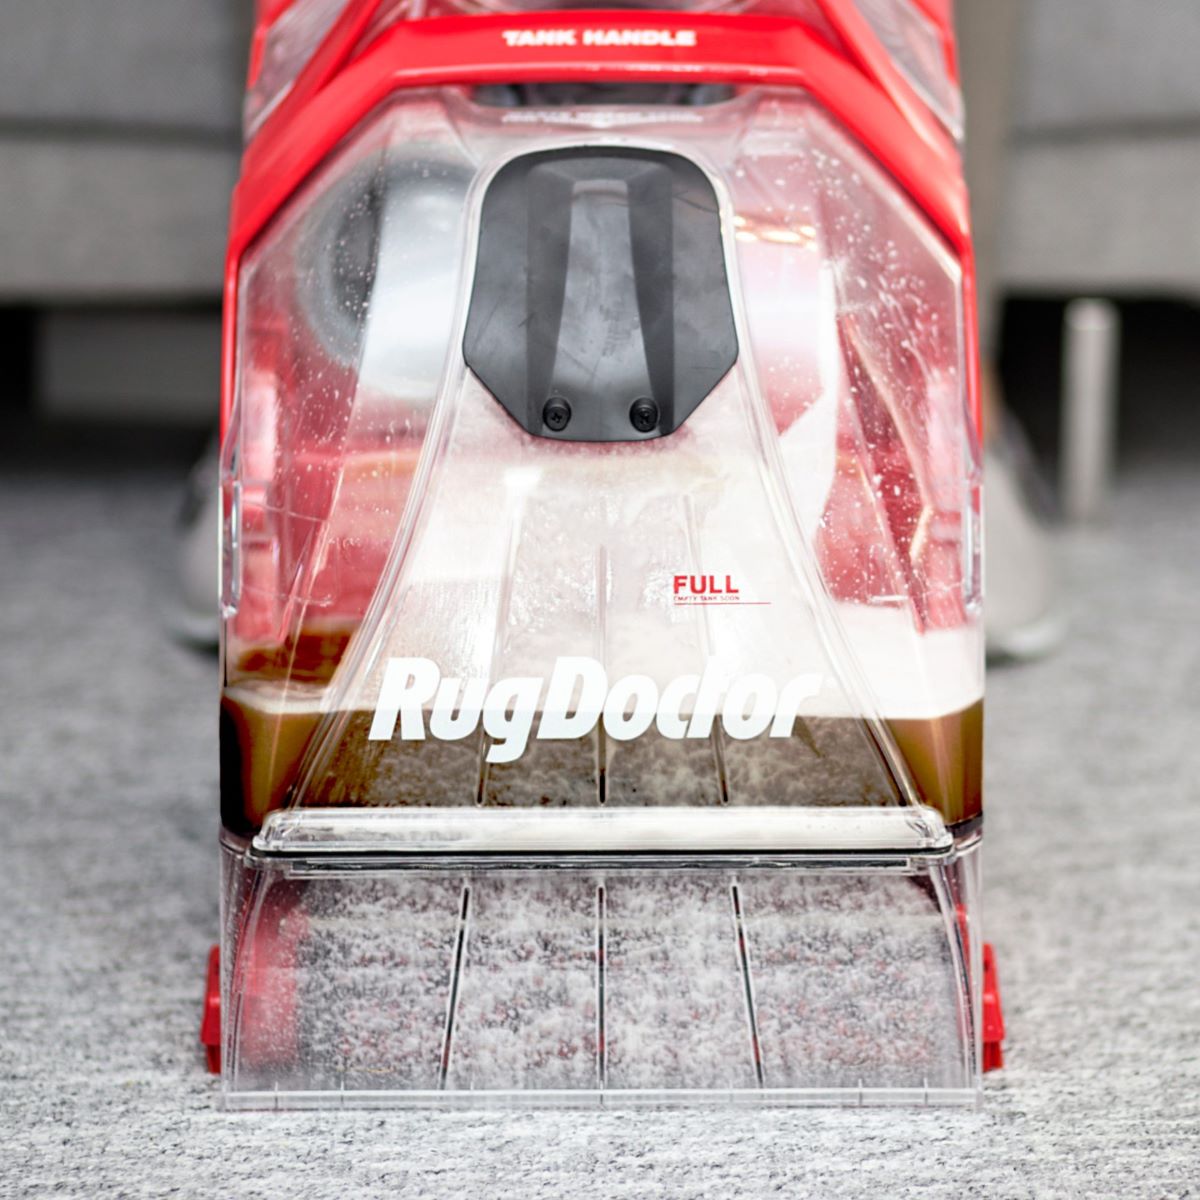
- Inspect the Machine: Take a close look at your Rug Doctor. Depending on the model, the dirty water tank is usually located at the front or back of the machine. It is typically a large, transparent or opaque container with a handle for easy removal.
- Look for Labels or Indicators: Manufacturers often mark the dirty water tank with labels or indicators for easy identification. These labels may include words like “dirty water” or an icon showing a water drop to indicate its location.
Locating the dirty water tank is an important step in the emptying process. Once you have located the tank, you’re ready to proceed with removing and emptying the collected dirt and water.
If you’re still having trouble finding the dirty water tank, don’t hesitate to reach out to customer support or refer to online resources specific to your Rug Doctor model. They can provide further guidance and assistance to ensure you can continue the emptying process smoothly.
Remove the Dirty Water Tank
Now that you have located the dirty water tank in your Rug Doctor, it’s time to remove it. The dirty water tank is where all the collected dirt, grime, and water are stored during the cleaning process. Here’s how to safely remove the dirty water tank:
- Ensure the Rug Doctor is Turned off and Unplugged: Before removing the tank, double-check that the machine is switched off and unplugged from the power outlet. This will prevent any electrical hazards and ensure your safety.
- Locate the Tank Release Latch or Button: Look for a latch or button near the base of the dirty water tank. This latch or button is designed to secure the tank in place during operation and needs to be released to remove the tank.
- Press or Release the Latch/Button: Press down on the latch or release the button to disengage it from the Rug Doctor. Different models may have different mechanisms, so refer to your user manual to understand how the tank is released.
- Gently Pull the Tank Out: Once the latch or button is released, carefully pull the dirty water tank out of the Rug Doctor. Be cautious not to tilt the tank too much to prevent any spillage.
By following these steps, you can safely remove the dirty water tank from your Rug Doctor. Take your time and ensure that the latch or button is fully released before attempting to pull out the tank. Removing the dirty water tank will allow you to proceed with emptying and cleaning it to maintain the efficiency of your Rug Doctor.
If you encounter any difficulties during the tank removal process, refer to your user manual or seek assistance from customer support. They can provide additional guidance to ensure a seamless and hassle-free removal of the dirty water tank.
Dispose of the Dirty Water
Once you have successfully removed the dirty water tank from your Rug Doctor, it’s important to properly dispose of the collected dirt, grime, and water. Here are the steps to responsibly dispose of the dirty water:
- Find a Suitable Drain: Locate a suitable drain or utility sink where you can safely empty the contents of the dirty water tank. Avoid disposing of the dirty water in areas where it can damage plants, contaminate water sources, or create a slip hazard.
- Pour the Dirty Water Carefully: Slowly and carefully pour the dirty water from the tank into the drain. To prevent splashes or spills, pour the water in a controlled manner. You can use the handle or spout on the tank to have better control over the flow.
- Check Local Disposal Regulations: Depending on your location and local regulations, there may be specific guidelines for disposing of dirty water. It’s always a good idea to check with your local authorities or waste management facilities to ensure you are following the proper disposal procedures.
- Rinse Away Remaining Residue: After pouring out the dirty water, rinse the tank with clean water to remove any remaining residue or debris. This ensures that the tank is clean and ready for the next use.
Dispose of the dirty water responsibly, adhering to environmental guidelines and regulations set by your local area. By following proper disposal practices, you contribute to the protection of the environment and prevent any potential harm.
Remember, it’s important to prioritize the responsible disposal of the dirty water to maintain a clean and safe environment for yourself and others.
Clean the Dirty Water Tank
After emptying the dirty water from your Rug Doctor, it’s essential to clean the dirty water tank thoroughly. Cleaning the tank helps remove any leftover residue, odor, or bacteria, ensuring that your Rug Doctor remains hygienic and ready for the next use. Here’s how to clean the dirty water tank:
- Prepare a Cleaning Solution: Mix a mild cleaning solution using warm water and a gentle detergent. Avoid using harsh chemicals or bleach, as these can damage the tank or leave behind unwanted residues.
- Remove any Detachable Parts: If your Rug Doctor’s dirty water tank has detachable parts, such as filters or lids, remove them before cleaning. This allows for a more thorough cleaning of all components.
- Scrub the Tank Interior: Use a soft brush or sponge soaked in the cleaning solution to scrub the interior of the dirty water tank. Pay special attention to any stubborn stains or residue, ensuring that you clean all surfaces effectively.
- Rinse the Tank: Once you’ve thoroughly scrubbed the tank, rinse it with clean water to remove any leftover cleaning solution. Ensure that no soapy residue remains in the tank.
- Dry the Tank: After rinsing, allow the dirty water tank to air dry completely before reattaching it to your Rug Doctor. This prevents the growth of mold, mildew, or unpleasant odors.
- Clean Detachable Parts: If you removed any detachable parts, such as filters or lids, clean them using the same cleaning solution and rinse them thoroughly. Allow them to dry completely before reassembling.
By following these steps, you can effectively clean the dirty water tank of your Rug Doctor. Cleaning the tank regularly helps maintain its functionality and keeps the machine in optimal condition for future use.
If you encounter persistent stains or lingering odors, consider using specialized cleaning products or contacting the Rug Doctor’s customer support for further guidance on deep cleaning techniques.
Reattach the Clean Water Tank
After you have cleaned the dirty water tank of your Rug Doctor, it’s time to reattach the clean water tank. The clean water tank is where the cleaning solution or water is stored for the carpet cleaning process. Here’s how to properly reattach the clean water tank:
- Ensure the Rug Doctor is still turned off and unplugged: Before reattaching the clean water tank, double-check that the machine is switched off and safely unplugged from the power outlet.
- Locate the Clean Water Tank: The clean water tank is usually located at the front or back of the Rug Doctor. It is typically a transparent or opaque container that holds the cleaning solution or water.
- Align the Tank with the Opening: Position the clean water tank in alignment with the opening on the Rug Doctor intended for the tank. Ensure that it is seated securely and properly aligned for a snug fit.
- Push the Tank into Place: Apply gentle pressure and push the clean water tank firmly into place. You may hear a click or feel a slight resistance when it is securely attached.
- Give it a Test: Once the clean water tank is attached, give it a gentle tug to ensure it is properly secured. It should not detach easily or feel loose.
By following these steps, you can successfully reattach the clean water tank to your Rug Doctor. It’s important to ensure the tank is firmly attached before proceeding with any cleaning tasks to prevent any leaks or interruptions during the process.
With the clean water tank securely reattached, you’re ready to resume using your Rug Doctor for effective carpet cleaning. Ensure that the tank is filled with the appropriate cleaning solution or water, according to the manufacturer’s instructions, before starting your cleaning session.
Check the Vacuum Motor Filter
As part of regular maintenance for your Rug Doctor, it’s important to check the vacuum motor filter. The vacuum motor filter is responsible for trapping dust, dirt, and debris, preventing it from clogging the motor and affecting the machine’s performance. Here’s how to check the vacuum motor filter:
- Turn off and unplug the Rug Doctor: Before inspecting the vacuum motor filter, ensure that the machine is turned off and safely unplugged from the power outlet. This is crucial for your safety.
- Locate the vacuum motor filter: The filter is typically housed in or near the dirty water tank or the motor housing of the Rug Doctor. Refer to the user manual for your specific model to find the exact location.
- Remove the filter: Depending on the model of your Rug Doctor, the filter may be removable or require cleaning in place. If it is removable, carefully take it out from its housing.
- Inspect the filter: Examine the filter for any signs of dirt, debris, or clogs. If it appears dirty or clogged, it needs to be cleaned or replaced.
- Clean or replace the filter: If the filter is washable, rinse it under running water to remove any accumulated dirt. Gently scrub it if necessary. If the filter is not washable or severely damaged, replace it with a new one according to the manufacturer’s instructions.
Regularly checking the vacuum motor filter is important for maintaining the performance and efficiency of your Rug Doctor. A clean and unclogged filter ensures proper suction and prevents debris from damaging the motor or reducing its lifespan.
Remember to clean or replace the filter as recommended by the manufacturer to ensure the continued optimal performance of your Rug Doctor. A well-maintained vacuum motor filter contributes to effective carpet cleaning and prolongs the life of your machine.
Clean or Replace the Vacuum Motor Filter if Necessary
After inspecting the vacuum motor filter of your Rug Doctor, you may find that it requires cleaning or replacement. Proper maintenance of the filter is essential for optimal performance and longevity of your machine. Here’s how to clean or replace the vacuum motor filter, if necessary:
- Cleaning the Filter: If the filter is washable, rinse it under running water to remove dirt, debris, and any clogs. Gently scrub it with a soft brush or cloth if necessary, ensuring all particles are removed. Allow the filter to air dry completely before reinserting it into the Rug Doctor.
- Replacing the Filter: If the filter is not washable or severely damaged, it will need to be replaced. Refer to the user manual or contact the manufacturer to identify the appropriate replacement filter for your specific Rug Doctor model. Follow the instructions provided to safely remove the old filter and install the new one.
- Regular Maintenance Schedule: It’s important to establish a regular maintenance schedule for your Rug Doctor and its vacuum motor filter. This ensures that the filter is always clean and functioning optimally. Refer to the manufacturer’s recommendations for the frequency of filter maintenance and replacement.
- Benefits of a Clean Filter: A clean and unclogged vacuum motor filter allows for proper airflow and suction, ensuring effective carpet cleaning. It prevents debris from entering the motor, minimizing the risk of damage. Additionally, a clean filter improves the overall performance and prolongs the lifespan of your Rug Doctor.
Proper care and maintenance of the vacuum motor filter are crucial for the longevity and efficiency of your Rug Doctor. Regularly cleaning or replacing the filter as needed will help maintain optimal performance and ensure that your machine continues to provide excellent carpet cleaning results.
Refer to the user manual or contact the manufacturer for specific instructions regarding the cleaning and replacement of the vacuum motor filter, as different Rug Doctor models may have variations in their maintenance procedures.
Reattach the Dirty Water Tank
Once you have cleaned or replaced the vacuum motor filter of your Rug Doctor, it’s time to reattach the dirty water tank. The dirty water tank is where the collected dirt, grime, and water are stored during the carpet cleaning process. Here’s how to properly reattach the dirty water tank:
- Ensure the Rug Doctor is turned off and unplugged: Before reattaching the dirty water tank, double-check that the machine is switched off and safely unplugged from the power outlet. This is important for your safety.
- Locate the dirty water tank opening: Align the dirty water tank with the opening on the Rug Doctor designated for the tank. The tank opening is usually located at the front or back of the machine.
- Position the tank correctly: Hold the dirty water tank at a slight angle and slide it into place, making sure it is securely seated. You may need to exert a small amount of pressure to ensure proper alignment.
- Engage the tank latch or locking mechanism: Some Rug Doctor models have a latch or locking mechanism to secure the dirty water tank. If your model has this feature, ensure that it is fully engaged or locked to prevent the tank from accidentally detaching during use.
- Check for a secure attachment: Give the dirty water tank a gentle tug to ensure it is securely attached to the Rug Doctor. It should not detach easily or feel loose.
By following these steps, you can successfully reattach the dirty water tank to your Rug Doctor. It’s important to ensure that the tank is securely and properly attached before resuming any carpet cleaning tasks.
With the dirty water tank securely reattached, you can confidently operate your Rug Doctor, knowing that it is ready to effectively collect dirty water during the cleaning process. Ensure that the tank is empty and clean before starting a new cleaning session.
Plug in and Turn on Your Rug Doctor
After reattaching the dirty water tank to your Rug Doctor and ensuring that everything is in place, it’s time to plug in and turn on your machine. Here’s how to properly plug in and turn on your Rug Doctor:
- Position the Rug Doctor: Place the Rug Doctor in the desired area where you will be using it for carpet cleaning. Ensure that it is on a stable surface and close to an electrical outlet for easy access.
- Untangle the Power Cord: Ensure that the power cord is untangled and free from any obstructions. Straighten it out to avoid any potential tripping hazards during operation.
- Insert the Power Plug: Insert the power plug firmly into a nearby electrical outlet. Ensure that it is securely connected without any loose connections.
- Switch on the Power: Locate the power switch on your Rug Doctor. Depending on your model, it may be a simple on/off switch or a button. Toggle the switch to the “On” position or press the button to turn on the machine.
- Listen for Motor Activation: Once you have switched on the power, listen for the sound of the motor activating. This indicates that your Rug Doctor is now ready for operation.
- Check for Proper Functionality: Give the Rug Doctor a quick test to ensure that all functions are working properly. Check that the suction, spray, and brush operations are functioning smoothly.
By following these steps, you can safely plug in and turn on your Rug Doctor, preparing it for your next carpet cleaning session. It’s important to ensure that all connections are secure and that the machine is operating effectively before starting your cleaning tasks.
Remember to familiarize yourself with the operating instructions specific to your Rug Doctor model found in the user manual. This will ensure that you have a seamless and efficient cleaning experience each time you use your Rug Doctor.
Dispose of the Dirty Water Properly
Properly disposing of the dirty water collected from your Rug Doctor is crucial for both environmental and safety reasons. Here are the steps to ensure the responsible disposal of the dirty water:
- Find a Suitable Drain or Utility Sink: Locate a drain or utility sink that is appropriate for disposing of the dirty water. Avoid discarding it in areas where it can contaminate water sources or damage the environment.
- Use a Filter or Strainer (Optional): To prevent any large debris from entering the drain, consider using a filter or strainer. This will help catch any particles and prevent clogs in the drain system.
- Pour the Dirty Water Slowly: Carefully pour the dirty water from the Rug Doctor into the drain or utility sink. Pour it slowly and steadily to avoid any splashing or spills.
- Rinse the Dirty Water Container: After emptying the dirty water, rinse the container thoroughly with clean water. This ensures that any residue or particles are washed away before storing the container.
- Comply with Local Regulations: It’s important to adhere to local regulations regarding the disposal of dirty water. Some areas may have specific guidelines or restrictions. Check with your local authorities or waste management facilities for any applicable rules.
Remember, the dirty water collected by your Rug Doctor may contain dirt, chemicals, and other contaminants. It is important to dispose of it responsibly to protect the environment and prevent any potential harm.
By following these steps and abiding by local regulations, you can ensure the proper disposal of the dirty water from your Rug Doctor. This not only helps maintain a clean environment but also contributes to the overall well-being of your community.