
Why is it important to clean your makeup brushes?
Keeping your makeup brushes clean is an essential part of maintaining healthy skin and achieving flawless makeup application. Here are a few key reasons why regularly cleaning your makeup brushes is so important:
1. Preventing bacteria buildup: Makeup brushes come into contact with various products, including foundation, concealer, and powder, which can trap bacteria and debris. If left unwashed, these brushes can become a breeding ground for harmful bacteria, leading to breakouts, infections, and skin irritations.
2. Promoting smoother application: Over time, makeup brushes can accumulate product buildup, such as foundation and eyeshadow residue. This buildup can affect the performance of your brushes, making it challenging to achieve a smooth and even application. Clean brushes allow for better product distribution and blending, resulting in flawless makeup looks.
3. Extending the lifespan of your brushes: Investing in high-quality makeup brushes can be costly, and proper cleaning can help prolong their lifespan. When you clean your brushes regularly, you remove product buildup and prevent bristle damage, ensuring that your brushes maintain their shape, softness, and effectiveness over time.
4. Avoiding product contamination: Using dirty makeup brushes can lead to cross-contamination of products. For instance, using the same brush for different shades of eyeshadow can mix the colors, resulting in muddy or distorted eye makeup. Regularly cleaning your brushes helps maintain the integrity of your makeup products and prevents unintended color mixing.
5. Enhancing overall skin health: Clean brushes reduce the risk of clogged pores and acne breakouts caused by oil, dirt, and bacteria. By eliminating these skin-clogging agents, you can maintain a clear complexion and minimize the likelihood of developing skin issues due to unsanitary makeup application.
6. Achieving better makeup color payoff: Dirty brushes can affect the color payoff of your makeup products. If there is leftover residue on your brushes, it can alter the true color of the makeup you are applying. Regularly cleaning your brushes ensures that you get the desired color intensity, allowing your makeup to look vibrant and true to its original shade.
Cleaning your makeup brushes regularly is an essential step in your beauty routine. Not only does it promote healthier skin, but it also enhances the performance of your makeup products, extending the lifespan of your brushes, and ensuring that you achieve flawless makeup application every time.
How often should you clean your makeup brushes?
The frequency of cleaning your makeup brushes depends on how often you use them and the type of products you apply. Here are some general guidelines to help you determine how often you should clean your makeup brushes:
1. Foundation Brushes: Foundation brushes should be cleaned after every use. Since foundation is applied directly to the skin, it can leave behind oils and bacteria on the bristles. Regular cleaning prevents product buildup and contamination.
2. Concealer Brushes: Similar to foundation brushes, concealer brushes should be cleaned after each use. Concealer is often used on blemishes or under-eye circles, making it important to keep the brush sanitary to avoid spreading bacteria.
3. Powder Brushes: Powder brushes can be cleaned every 1-2 weeks, depending on how frequently you use them. Since powders are dry products, they are less likely to accumulate bacteria. However, regular cleaning helps remove any residual product and ensures more effective application.
4. Eyeshadow Brushes: Eyeshadow brushes should be cleaned every 1-2 weeks, especially if you use different shades or textures frequently. Cleaning these brushes helps prevent color mixing and ensures accurate application of eyeshadow.
5. Blush and Bronzer Brushes: Blush and bronzer brushes can be cleaned every 2-3 weeks, as they come into contact with dry powder products. However, if you notice product buildup or change in color payoff, it is advisable to clean them more frequently to maintain optimal performance.
6. Lip Brushes: Lip brushes should be cleaned after every use, as they come into contact with products that can easily transfer bacteria or lip color residue. Regular cleaning prevents cross-contamination and ensures hygienic application.
Remember, these are general recommendations, and you may need to clean your brushes more frequently if you have sensitive or acne-prone skin. Additionally, if you use your brushes on others or in a professional setting, it is crucial to clean them thoroughly between uses to prevent the spread of bacteria and infections.
By regularly cleaning your makeup brushes, you maintain their effectiveness, ensure hygienic application, and protect your skin from potential issues caused by bacteria and product buildup.
What are the signs that your makeup brushes need to be cleaned?
Regularly cleaning your makeup brushes is essential, but how do you know when it’s time to give them a deep cleanse? Here are some signs that indicate your makeup brushes need to be cleaned:
1. Excessive product buildup: If you notice that your brushes have a significant buildup of product on the bristles, it’s a clear sign that they need to be cleaned. Product buildup can affect the performance of your brushes and make it difficult to achieve a seamless application.
2. Discoloration or change in brush color: Over time, makeup products can stain the bristles of your brushes, resulting in discoloration or a change in the original color. If you notice that your brushes no longer look clean or have become a different color, it’s a sign that they need a thorough cleaning.
3. Unpleasant odor: Dirty brushes can develop a foul odor due to the accumulation of bacteria, oils, and product residue. If your brushes have a noticeable smell, it’s a clear indication that they are overdue for a cleaning.
4. Bristle stiffness or clumping: As you apply makeup products, the bristles of your brushes can become stiff or clump together due to residue buildup. This can make it difficult to blend or apply makeup smoothly. If your brushes no longer feel soft and flexible, it’s time to give them a thorough cleaning.
5. Skincare breakouts or irritations: Using dirty makeup brushes can lead to clogged pores, breakouts, and skin irritations. If you notice an increase in acne or skin sensitivity after using your brushes, it’s a sign that they are harboring bacteria and need to be cleaned.
6. Product transfer or color mixing: When your brushes are not properly cleaned, old product residue can transfer onto new products, resulting in color mixing or distorted shades. If you notice that your makeup colors are not true to their original pigmentation or they appear muddy, it’s a sign that your brushes need a deep clean.
Pay attention to these signs and make it a habit to clean your makeup brushes regularly. By doing so, you ensure optimal performance, prevent skin issues, and prolong the lifespan of your brushes.
What are the potential dangers of using dirty makeup brushes?
Using dirty makeup brushes can have several potential dangers that can impact both your skin health and makeup application. Here are some risks associated with using dirty brushes:
1. Bacterial infections: Dirty brushes can accumulate bacteria over time. When you use these brushes on your face, you risk transferring these bacteria onto your skin, which can lead to infections, breakouts, and other skin issues.
2. Acne breakouts: Clogged pores are a common result of using dirty makeup brushes. When oils, dead skin cells, and bacteria get trapped in the bristles, they can transfer onto your skin, clogging your pores and resulting in acne breakouts.
3. Skin irritations: Bacteria and allergens can accumulate on dirty brushes, causing skin irritations such as redness, itching, and inflammation. If you have sensitive skin, using dirty brushes can exacerbate these issues and lead to discomfort.
4. Allergic reactions: Dirty makeup brushes can also trigger allergic reactions in some individuals. Chemicals or ingredients from previous products may still be present on the brush and can come into contact with your skin, causing itching, swelling, or other allergic responses.
5. Inefficient makeup application: When your brushes are laden with product buildup, it becomes challenging to achieve precise and even makeup application. The residue on the brushes can interfere with the color payoff, blending, and smoothness of your makeup, resulting in a less desirable finished look.
6. Cross-contamination: If you use the same brush for multiple products without cleaning it in between, you risk cross-contaminating your makeup. This can lead to unwanted mixing of colors, compromising the integrity of your makeup products.
7. Reduced brush lifespan: Accumulated product, bacteria, and oils can deteriorate the bristles of your makeup brushes over time. Using dirty brushes without proper cleaning can cause the bristles to become frayed, misshapen, and less effective at applying makeup.
To mitigate these potential dangers, it is crucial to clean your makeup brushes regularly. By doing so, you not only protect your skin from infections and irritations but also enhance the performance of your brushes, ensuring optimal makeup application.
How to clean synthetic makeup brushes
Cleaning synthetic makeup brushes is a straightforward process that helps remove product buildup, bacteria, and oils. Here’s a step-by-step guide on how to effectively clean your synthetic makeup brushes:
Step 1: Gather your supplies: You will need a mild liquid soap or brush cleanser, a bowl or sink filled with lukewarm water, a clean towel or paper towel, and a brush cleaning mat or your hand.
Step 2: Wet the brush: Thoroughly wet the bristles of your synthetic makeup brush under running lukewarm water. Be mindful not to get water into the ferrule, as it can loosen the glue that holds the bristles together.
Step 3: Apply cleanser: Dispense a small amount of mild liquid soap or brush cleanser onto your brush cleaning mat or in the palm of your hand. Gently swirl the brush bristles in the cleanser, working up a lather.
Step 4: Deep clean the brush: Using your brush cleaning mat or your fingers, massage the bristles in circular motions to thoroughly cleanse the brush. Pay extra attention to the base of the bristles where product buildup tends to accumulate.
Step 5: Rinse the brush: Rinse the bristles under lukewarm water, gently squeezing out the soap until the water runs clear. Continue rinsing until no soap residue remains.
Step 6: Remove excess water: Gently squeeze the bristles with your fingers to remove excess water. Avoid tugging or pulling on the bristles, as this can cause damage.
Step 7: Reshape and dry: Gently reshape the brush bristles with your fingers to restore their original shape. Lay the brushes flat on a clean towel or paper towel, allowing them to air dry completely. Avoid standing them upright during the drying process, as this can lead to water seeping into the ferrule.
Step 8: Optional – condition the bristles: If your synthetic brushes feel dry or stiff after cleaning, you can use a small amount of hair conditioner or brush conditioner to nourish and soften the bristles. Rinse thoroughly afterward to remove any residue.
Step 9: Store your brushes properly: Once your synthetic brushes are dry, store them in a clean, well-ventilated area or in a brush holder to maintain their shape and cleanliness.
Cleaning your synthetic makeup brushes regularly will help keep them free from bacteria and product buildup, ensuring that they perform optimally and that your makeup application remains flawless.
How to clean natural hair makeup brushes
Cleaning natural hair makeup brushes requires extra care and attention to avoid damaging the delicate bristles. Here’s a step-by-step guide on how to effectively clean your natural hair makeup brushes:
Step 1: Gather your supplies: You will need a gentle brush cleanser or mild liquid soap, lukewarm water, a clean bowl or sink, a towel or paper towel, and a brush cleaning mat or your hand.
Step 2: Wet the brush: Thoroughly wet the bristles of your natural hair brush under running lukewarm water, taking care not to wet the ferrule as it can cause the bristles to loosen.
Step 3: Apply cleanser: Apply a small amount of gentle brush cleanser or mild liquid soap onto your brush cleaning mat, or in the palm of your hand. Swirl the brush bristles in the cleanser, working up a lather.
Step 4: Cleanse the brush: Gently massage the bristles in circular motions on the brush cleaning mat or between your fingers to deep clean the brush. Be gentle to avoid damaging the delicate natural hair bristles.
Step 5: Rinse the brush: Rinse the bristles under lukewarm water, ensuring that you thoroughly remove the cleanser from the brush until the water runs clear. Massage the bristles gently to remove all the soap residue.
Step 6: Remove excess water: Use a clean towel or paper towel to gently squeeze out the excess water from the brush. Be careful not to pull or tug on the bristles, as they can easily break or become misshapen.
Step 7: Reshape and dry: Gently reshape the bristles with your fingers, carefully returning them to their original shape. Lay the brushes flat on a clean towel or paper towel, allowing them to air dry completely. Avoid standing them upright, as moisture may seep into the ferrule and damage the brush.
Step 8: Optional – condition the bristles: If your natural hair brushes feel dry or stiff after cleaning, you can use a small amount of hair conditioner or brush conditioner to nourish and soften the bristles. Rinse thoroughly to remove any residue.
Step 9: Store your brushes properly: Once the brushes are fully dry, store them in a clean, well-ventilated area or a brush holder to maintain their shape and cleanliness.
It’s vital to clean natural hair makeup brushes regularly to avoid product buildup and bacterial growth while ensuring their longevity. By following these steps, you can keep your natural hair brushes clean and in excellent condition for continued optimal performance.
What products can you use to clean your makeup brushes?
There are several options available for cleaning your makeup brushes, ranging from specific brush cleansers to everyday household items. Here are some of the products you can use to effectively clean your makeup brushes:
1. Brush cleansers: Brush cleansers are specially formulated to deep clean and sanitize makeup brushes. These cleansers are often alcohol-free and contain mild ingredients that effectively remove product buildup, bacteria, and oils without damaging the bristles.
2. Mild liquid soaps: Non-abrasive and gentle liquid soaps such as baby shampoo, gentle facial cleansers, or mild hand soaps can be used to clean makeup brushes. These types of cleansers help break down oils and remove makeup residue while being gentle on the bristles.
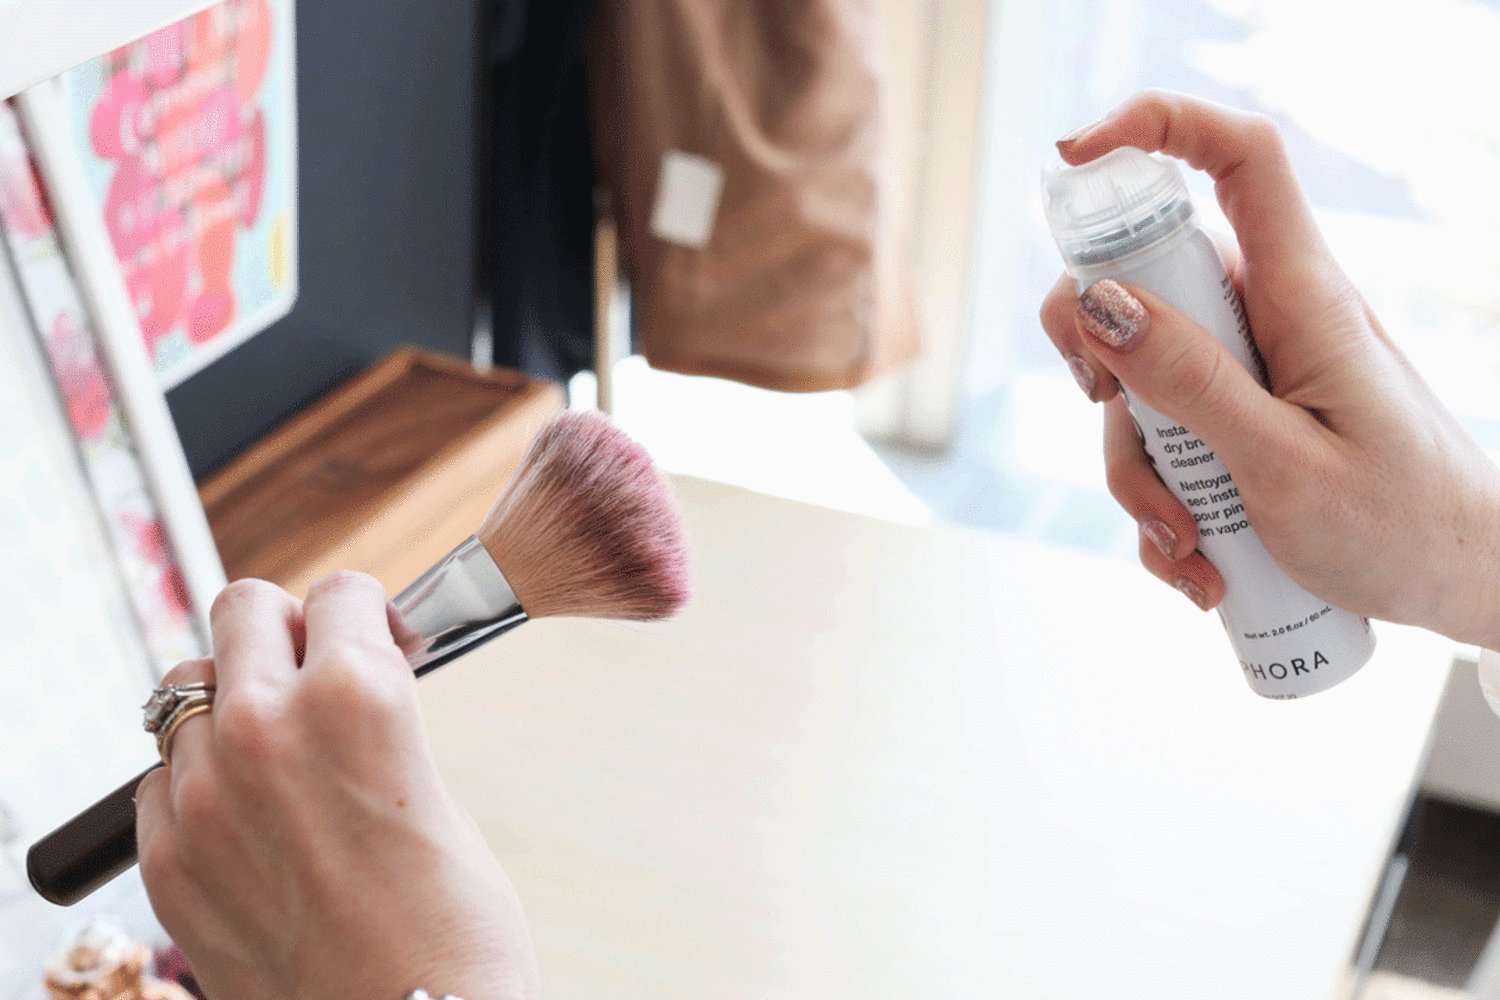
3. Brush cleaning sprays: Brush cleaning sprays are convenient options for quick cleaning between uses. These sprays contain cleansing agents that help sanitize and refresh the bristles, making them suitable for spot-cleaning brushes during makeup applications.
4. Natural ingredients: Some household ingredients can be used to clean makeup brushes effectively. White vinegar diluted with water is a natural disinfectant that can help remove bacteria from brushes. Olive oil mixed with mild soap can be used to break down stubborn makeup residue while nourishing the bristles.
5. Solid brush cleansers: Solid brush cleansers come in the form of bars or disks and offer a convenient and mess-free option for cleaning brushes. These cleansers typically contain gentle cleansing agents that effectively remove makeup residue while preserving the bristles.
6. DIY brush cleaning solutions: You can create your own brush cleansers using a combination of ingredients such as liquid soap, olive oil, and water. There are many DIY recipes available online, allowing you to customize the formula to suit your preferences.
When choosing a cleaning product for your makeup brushes, consider the type of bristles and your skin sensitivity. It’s important to select products that are suitable for your specific brushes to prevent damage or irritation. Additionally, remember to follow the instructions provided by the product manufacturer for effective and safe cleaning.
Regularly cleaning your makeup brushes with the appropriate products ensures that they remain in optimal condition, free from bacteria, product buildup, and oils, which, in turn, helps you achieve flawless makeup application and maintain healthy skin.
Step-by-step guide to cleaning your makeup brushes
Cleaning your makeup brushes is an important part of your beauty routine to maintain hygienic application and extend the lifespan of your brushes. Follow this step-by-step guide to effectively clean your makeup brushes:
Step 1: Gather your supplies: You will need a gentle brush cleanser or mild liquid soap, lukewarm water, a clean bowl or sink, a towel or paper towel, and a brush cleaning mat or your hand.
Step 2: Wet the brush: Thoroughly wet the bristles of your brush under lukewarm water. Be careful not to soak the entire brush, as water can loosen the glue holding the bristles together.
Step 3: Apply cleanser: Apply a small amount of gentle brush cleanser or mild liquid soap onto your brush cleaning mat or in the palm of your hand. Swirl the brush bristles in the cleanser, working up a lather.
Step 4: Deep clean the brush: Gently work the bristles of the brush in circular motions on the brush cleaning mat or between your fingers to thoroughly clean the bristles. Pay extra attention to the base of the bristles where product buildup tends to accumulate.
Step 5: Rinse the brush: Rinse the bristles under lukewarm water, gently squeezing out the cleanser until the water runs clear. Continue rinsing until no soap residue remains on the bristles.
Step 6: Remove excess water: Gently squeeze the bristles with your fingers to remove excess water from the brush. Avoid pulling or tugging on the bristles, as they can easily become misshapen.
Step 7: Reshape and dry: Gently reshape the bristles with your fingers, carefully returning them to their original shape. Lay the brushes flat on a clean towel or paper towel, allowing them to air dry completely. Avoid standing them upright during the drying process, as this can cause water to seep into the ferrule.
Step 8: Optional – condition the bristles: If your brushes feel dry or stiff after cleaning, you can use a small amount of hair conditioner or brush conditioner to condition and soften the bristles. Rinse thoroughly to remove any residue.
Step 9: Store your brushes properly: Once dry, store your clean makeup brushes in a clean, well-ventilated area or in a brush holder to maintain their shape and cleanliness until your next use.
Cleaning your makeup brushes regularly is essential to ensure hygienic application and maintain the quality of your brushes. By following these steps, you can keep your brushes clean and in excellent condition, allowing you to achieve flawless makeup looks every time.
How to dry your makeup brushes
Properly drying your makeup brushes is just as important as cleaning them. Here is a step-by-step guide on how to effectively dry your makeup brushes:
Step 1: Gently remove excess water: After rinsing your makeup brushes, squeeze out any excess water from the bristles using your fingers. Be gentle and avoid pulling or twisting the bristles too forcefully to prevent damage.
Step 2: Reshape the bristles: Using your fingers, reshape the bristles to their original form. This step ensures that the bristles maintain their shape as they dry.
Step 3: Blot with a clean towel or paper towel: Lay a clean towel or paper towel flat on a surface and gently press the bristles of your brushes onto it. This will help absorb additional moisture from the bristles.
Step 4: Air dry horizontally: Lay your makeup brushes flat on a clean towel or paper towel to air dry. Make sure the bristles are spread out and not touching each other to allow proper airflow. Avoid standing the brushes upright during the drying process, as this can cause water to seep into the ferrule, potentially loosening the bristles.
Step 5: Rotate the brushes: To ensure even drying, periodically rotate the brushes to expose all sides of the bristles to the air. This helps to prevent any residual moisture from being trapped within the bristles.
Step 6: Allow sufficient drying time: The drying time can vary depending on the size and density of the brushes. It is recommended to leave them to air dry for at least 4-6 hours, or overnight if possible. Larger brushes or denser brushes may require more drying time.
Step 7: Check for dryness before use: Before using your cleaned and dried makeup brushes, make sure they are completely dry. Gently touch the bristles to ensure they feel dry to the touch. If any moisture is still present, give them more time to dry before using them again.
Step 8: Store in a well-ventilated area: Once your brushes are fully dry, store them in a clean and well-ventilated area to prevent any potential moisture buildup that could lead to bacterial growth.
By following these steps and allowing your makeup brushes to dry properly, you ensure that they retain their shape, bristle integrity, and cleanliness, keeping them in optimal condition for future use.
How to store your makeup brushes properly
Proper storage of your makeup brushes is crucial to maintain their shape, cleanliness, and overall longevity. Here are some tips on how to store your makeup brushes properly:
1. Keep them upright: When not in use, store your makeup brushes upright in a brush holder or cup. This allows the bristles to remain in their natural form and prevents them from getting squashed or misshapen.
2. Separate different brush types: It is recommended to keep different types of brushes separated to prevent cross-contamination and damage. Group together face brushes, eye brushes, and lip brushes to keep them organized and easily accessible.
3. Avoid overcrowding: Ensure that your makeup brushes have enough space in the storage container. Overcrowding can cause bristles to get bent or frayed, compromising their performance.
4. Keep them clean: Before storing your brushes, make sure they are clean and fully dry. Dirty brushes can harbor bacteria that can multiply over time and impact the performance and hygiene of your brushes.
5. Consider protective caps or covers: If you’re traveling or need extra protection for your brushes, consider using protective caps or covers. These are designed to keep the bristles intact and prevent damage while on the go.
6. Avoid storing in damp areas: Moisture can lead to mold or mildew growth, which is harmful to your makeup brushes. Avoid storing your brushes in damp areas like bathrooms and opt for a dry, well-ventilated location instead.
7. Store in a dust-free environment: Dust accumulation can settle on your brushes and compromise their cleanliness. Store your brushes in a dust-free environment, such as a closed drawer or a covered makeup brush case.
8. Consider brush rolls or organizers: If you prefer a compact and organized storage solution, opt for a brush roll or organizer. These keep your brushes in place and protected while allowing easy access.
9. Regularly clean and sanitize your storage containers: Ensure that the storage containers or brush holders you use are clean and free from bacteria. Regularly wipe them down with a mild disinfectant to keep your brushes and storage area sanitary.
By following these storage tips, you can preserve the quality and integrity of your makeup brushes, ensuring they remain in excellent condition and ready for flawless makeup application.
Tips for maintaining clean makeup brushes
Regular cleaning is essential, but there are additional practices you can follow to maintain the cleanliness and longevity of your makeup brushes. Here are some tips to help you keep your brushes pristine:
1. Clean your brushes regularly: Establish a routine for cleaning your makeup brushes. Aim to deep clean them at least once a week, or more frequently if you use them daily or have acne-prone skin.
2. Spot clean between uses: Use a quick-drying brush cleaner or cleansing spray to spot clean your brushes between uses. This helps remove surface-level residue and maintains the cleanliness of your brushes.
3. Avoid sharing brushes: Sharing brushes can transfer bacteria and germs. Whenever possible, use your own brushes and avoid borrowing or lending them to others.
4. Wash your hands before using brushes: Before applying makeup with your brushes, make sure your hands are clean and free from bacteria. This reduces the risk of transferring dirt or oils onto your brushes.
5. Keep makeup products off ferrules: When applying makeup, avoid getting products on the ferrule (the metal part) of the brush as it can lead to residue buildup and potentially loosen the bristles.
6. Store brushes properly: Store your brushes upright in a clean and well-ventilated area. This prevents dirt, dust, and debris from settling onto the bristles and keeps them hygienic.
7. Avoid excessive force: Avoid applying excessive pressure when cleaning or drying your brushes as it can damage the bristles. Be gentle and use a light touch throughout the cleaning and drying process.
8. Trim frayed bristles: Regularly inspect your brushes for any frayed or damaged bristles. If you notice any, trim them gently with small scissors to maintain the shape and functionality of the brush.
9. Replace brushes when necessary: Even with proper care, brushes have a lifespan. If you notice excessive shedding, rough bristles, or the inability to achieve desired makeup application, it may be time to replace your brushes.
10. Avoid storing brushes in airtight containers: Storing brushes in airtight containers can lead to moisture buildup and mold growth. Opt for containers that allow for airflow and prevent moisture accumulation.
11. Clean makeup products regularly: Dirty makeup products can transfer bacteria onto your brushes. Periodically clean and sanitize your makeup products to prevent contamination and maintain the cleanliness of your brushes.
By following these tips, you can ensure that your makeup brushes remain clean, hygienic, and in excellent condition, allowing for flawless makeup application and a healthier beauty routine.
Frequently asked questions about cleaning makeup brushes
Here are some common questions and answers regarding the cleaning of makeup brushes:
Q: How often should I clean my makeup brushes?
A: It is recommended to clean your makeup brushes at least once a week. However, if you have sensitive or acne-prone skin, you may want to clean them more frequently to prevent breakouts and maintain a hygienic routine.
Q: Can I use regular soap to clean my makeup brushes?
A: Yes, you can use mild liquid soap or gentle facial cleansers to clean your makeup brushes effectively. However, avoid using harsh soaps, as they can cause damage to the bristles.
Q: Do I need to buy a specific brush cleanser?
A: While specific brush cleansers are formulated to clean brushes effectively, you can use mild liquid soap as an alternative. However, brush cleansers are specifically designed to cleanse and sanitize brushes without damaging the bristles.
Q: How do I deep clean my makeup brushes?
A: To deep clean your makeup brushes, wet the bristles under lukewarm water, apply a small amount of cleanser, gently massage the bristles to remove residue, rinse thoroughly, and allow them to air dry flat.
Q: Can I use a blow dryer to dry my brushes?
A: It is not recommended to use a blow dryer to dry your brushes. The heat can damage the bristles and alter their shape. Air drying is the preferred method to maintain the integrity of the brushes.
Q: Can I clean my makeup brushes with alcohol?
A: While alcohol can be used to sanitize brushes, it is not recommended for regular cleaning. Alcohol can dry out the bristles and cause them to become brittle over time. Stick to using gentle cleansers for routine cleaning.
Q: Can I clean my makeup brushes in the washing machine?
A: No, it is not advisable to clean makeup brushes in a washing machine. The rough agitation and high heat can damage the brushes, causing them to lose their shape and become unusable.
Q: How long does it take for brushes to dry completely?
A: Typically, it takes around 4-6 hours for makeup brushes to dry completely, but it may vary depending on brush size and density. It is best to leave them to air dry overnight for optimal drying time.
Q: Can I use the same cleaner for both synthetic and natural hair brushes?
A: Yes, you can use the same cleaning solution for both synthetic and natural hair brushes. However, natural hair brushes are more delicate, so make sure to be gentle when cleaning and avoid harsh chemicals that may damage the bristles.
Q: How do I know when it’s time to replace my brushes?
A: If you notice excessive shedding, rough bristles, or the inability to achieve desired makeup application despite proper cleaning, it may be time to replace your brushes. Regularly inspect your brushes for any signs of wear and tear.
Remember, regularly cleaning your makeup brushes is essential for maintaining healthy skin, optimal makeup application, and the longevity of your brushes. If you have any specific concerns or questions, it is always best to consult with the brush manufacturer or a beauty professional.