
Choosing the Right Fabric for Your Roman Shade
When it comes to making a Roman shade on a curtain rod, the choice of fabric plays a crucial role in the overall look and functionality of your shade. Here are some considerations to help you select the right fabric for your project.
1. Light Filtering or Room Darkening: Determine whether you want your Roman shade to filter light or block it out completely. If you prefer a softer, diffused glow in the room, opt for a light filtering fabric. On the other hand, if you need a darker environment for better sleep or privacy, choose a room darkening fabric.
2. Fabric Weight: The weight of the fabric affects how your Roman shade will hang and operate. Lighter weight fabrics create a more delicate and airy look, while heavier fabrics add substance and durability. Consider the thickness and texture of the fabric to ensure it will fold neatly when the shade is raised.
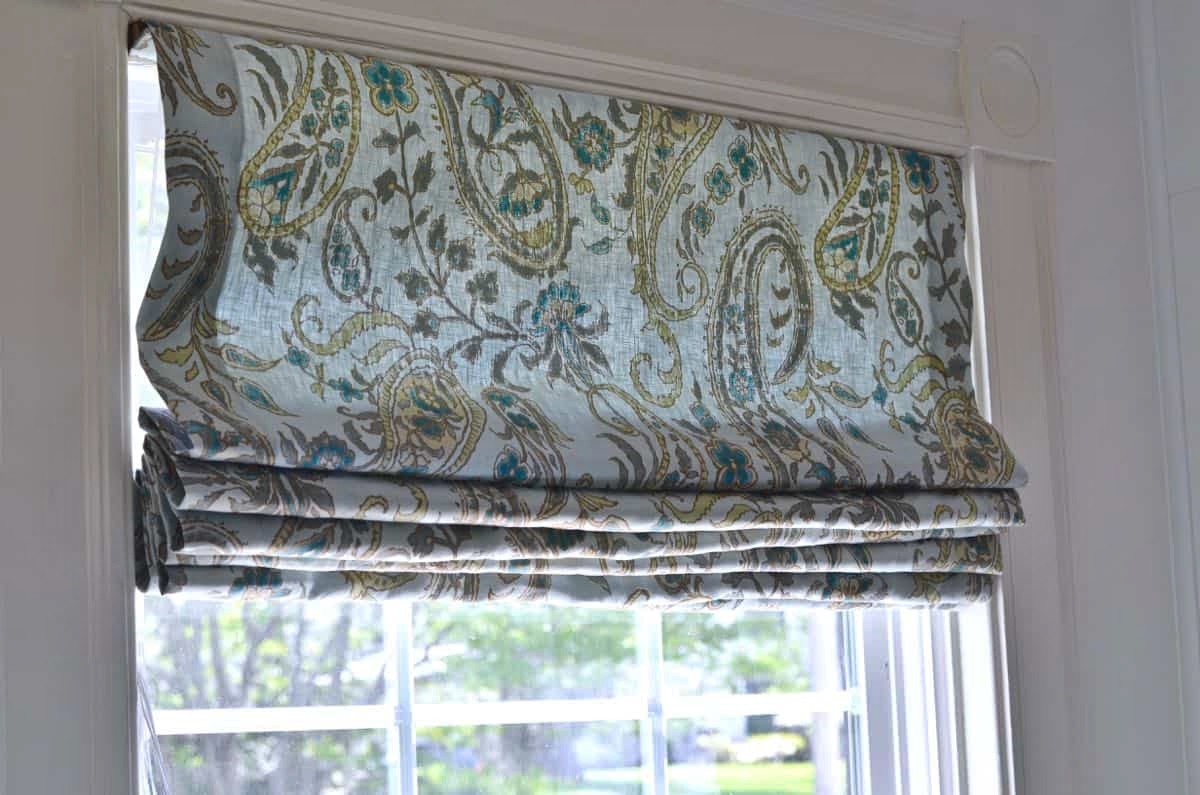
3. Pattern and Color: Think about the design and color scheme of your room. Are you looking to make a statement with bold patterns or do you prefer more subtle and minimalist designs? Harmonize the fabric pattern and color with the existing decor to create a cohesive and visually appealing look.
4. Durability and Cleaning: Consider how easy it will be to clean and maintain the fabric. If your Roman shade will be exposed to direct sunlight, choose a fabric that is fade-resistant. Additionally, opt for a fabric that is machine washable or easy to spot clean for convenience.
5. Budget: Set a budget for your fabric and stick to it. While it’s tempting to splurge on luxurious materials, there are plenty of budget-friendly options available that can achieve a similar effect. Keep in mind that the cost of the fabric may depend on its quality, pattern, and designer brand.
By carefully considering these factors, you can choose the perfect fabric for your Roman shade on a curtain rod. Remember to measure the curtain rod and calculate the fabric requirements before making your purchase. With the right fabric, your Roman shade will not only add functionality but also elevate the style of your space.
Calculating the Measurements for Your Roman Shade
Accurate measurements are key to ensure a properly fitting Roman shade on your curtain rod. Follow these steps to calculate the measurements required for your project.
1. Width: Measure the width of the window area where you want to hang the Roman shade. Add an extra 4-6 inches to this measurement to allow for the fabric to wrap around the edges of the curtain rod. This additional width will ensure a clean and finished look when the shade is raised or lowered.
2. Length: Determine the desired length of your Roman shade. To achieve the desired finished length, measure from the top of the curtain rod down to where you want the bottom edge of the shade to hang. Add an extra 6-8 inches to this measurement to allow for hems and the rod pocket.
3. Pattern Placement: If your fabric has a specific pattern or motif, consider how you want it to be displayed on the Roman shade. Measure the repeat distance of the pattern and determine its placement on the shade. This step ensures that your pattern is centered and visually appealing when the shade is raised or lowered.
4. Lining: If you plan to add a lining to your Roman shade for added privacy or insulation, measure the width and length of the lining fabric separately. The lining fabric should be slightly smaller than the main fabric to prevent it from peeking out of the sides when the shade is raised.
5. Installation Height: Measure the distance from the top of the curtain rod down to where you want the Roman shade to be installed. This measurement will help determine the placement of the rings and cord locks as you assemble the shade.
By taking accurate measurements, you can ensure a well-fitted and functional Roman shade on your curtain rod. Double-check your calculations before cutting the fabric to avoid any mistakes. Remember, it’s always better to measure twice and cut once!
Cutting and Hemming the Fabric for Your Roman Shade
Once you have chosen the perfect fabric and calculated the measurements for your Roman shade, it’s time to cut and hem the fabric. This step-by-step process will guide you through the cutting and hemming stage of your project.
1. Prepare the Fabric: Lay your fabric flat on a large work surface, such as a table or clean floor. Smooth out any wrinkles or folds to ensure accurate cutting and even hems.
2. Marking the Cutting Lines: Use a fabric measuring tape or ruler to mark the cutting lines on your fabric. Make sure to align the marks according to your measurements for the width and length of the shade.
3. Cutting the Fabric: Carefully cut along the marked lines using fabric scissors. Take your time to ensure clean and straight cuts. If your fabric has a pattern, make sure to align the pattern with the cutting lines for a visually pleasing result.
4. Hemming the Sides: Fold the sides of the fabric over by about 1/2 inch and press them with an iron to create a crease. Then, fold the edges over again by 1/2 inch and press them to create a double-fold hem. Pin the hems in place and sew them using a sewing machine or by hand. Repeat this process for both sides of the fabric.
5. Hemming the Bottom: On the bottom edge of the fabric, fold it over by about 2 inches and press it with an iron to create a crease. Fold the edge over again by 2 inches to create a double-fold hem. Pin and sew the hem in place, ensuring it is secure and neat.
6. Hemming the Top: Create a rod pocket at the top of the fabric by folding it over by about 2 inches and pressing it with an iron. Fold the fabric over once more by about 3 inches to create a double-fold hem. Pin and sew the hem, leaving a small opening to insert the curtain rod later.
By following these steps, you can successfully cut and hem the fabric for your Roman shade. Take your time, measure accurately, and sew with care to achieve professional-looking hemlines that will enhance the overall appearance of your shade.
Sewing the Rod Pockets on Your Roman Shade
Creating sturdy and properly fitted rod pockets is essential when sewing a Roman shade for your curtain rod. Follow these steps to sew rod pockets onto your fabric.
1. Measure and Mark: Determine the desired height of your rod pocket. Measure and mark this distance from the top edge of your fabric. Use a fabric pencil or chalk to make clear and visible marks.
2. Fold and Pin: Fold the fabric at the marked line to create the rod pocket. The fold should be deep enough to accommodate the diameter of your curtain rod. Pin the fabric in place to prevent it from shifting during sewing.
3. Sew the Edges: Starting from one end of the rod pocket, sew along the folded edge, moving gradually towards the other end. Use a straight stitch or a decorative stitch to secure the fabric. Backstitch at the beginning and end of your seams to reinforce them.
4. Test the Fit: Insert your curtain rod into the newly sewn rod pocket to ensure a proper fit. The curtain rod should slide easily without being too loose or too tight. If necessary, adjust the stitch line and re-sew the rod pocket to achieve the desired fit.
5. Repeat if Required: If your Roman shade has multiple rod pockets, repeat the above steps to sew the additional pockets. Ensure that they are evenly spaced and aligned along the width of the fabric.
6. Double-Check the Seams: Once all the rod pockets are sewn, double-check the seams to make sure they are secure. Trim any loose threads and give the rod pockets a final press with an iron to flatten them.
By sewing the rod pockets onto your Roman shade, you are creating a practical and functional component that will allow you to easily hang and adjust the shade on the curtain rod. Take your time, sew with precision, and test the fit to ensure a successful outcome.
Attaching Rings and Cord Locks to Your Roman Shade
Adding rings and cord locks to your Roman shade is the key to smoothly raising and lowering it. Follow these steps to attach the rings and cord locks to your fabric.
1. Determine the Placement: Decide where you want to position the rings on the back of your Roman shade. Ideally, they should be evenly spaced along the width of the fabric, typically around 6-8 inches apart. Mark the positions with a fabric pencil or chalk.
2. Attach the Rings: Start by folding the fabric at the marked positions to create small loops. Sew the loops in place, making sure to reinforce the stitches for added strength. You can use a horizontal or diagonal stitch pattern to secure the rings.
3. Install Cord Locks: Determine the desired location for your cord locks on the back of your Roman shade, typically near the bottom corners. Mark the positions and attach the cord locks by sewing them securely to the fabric. Make sure they are centered and aligned.
4. Thread the Cords: Cut long lengths of cord, allowing for extra length to ensure easy maneuvering of the Roman shade. Thread the cords through the rings, starting from the bottom and working your way up to the top. Ensure that the cords are threaded in a zigzag pattern to evenly distribute the weight of the shade.
5. Secure the Cords: Tie a secure knot at the bottom of the cords to prevent them from slipping through the rings and cord locks. You can also add cord cleats to the wall near the bottom corners of the shade to wrap and secure the cords when the shade is raised.
6. Test and Adjust: Carefully test the raising and lowering mechanism of your Roman shade by pulling on the cords. Ensure that the shade moves smoothly and evenly. If needed, make any necessary adjustments to the cord lengths to achieve the desired level of tension.
By attaching rings and cord locks to your Roman shade, you are creating a functional and easy-to-use mechanism for operating the shade. Take your time to position and sew the rings and cord locks accurately. And don’t forget to test the shade’s functionality before hanging it on the curtain rod.
Installing the Curtain Rod for Your Roman Shade
Proper installation of the curtain rod is crucial for the successful hanging of your Roman shade. Follow these steps to ensure a secure and stable curtain rod for your shade.
1. Choose the Right Location: Determine the ideal placement for your curtain rod. Measure and mark the position on the wall or window frame, ensuring it is level and centered.
2. Preparing the Wall: Before installing the curtain rod brackets, make sure the wall surface is clean and free of any debris or dust. Use a stud finder to locate the wall studs for added support. Mark the spots where the screws will be inserted.
3. Install the Brackets: Using a power drill or screwdriver, attach the curtain rod brackets to the wall or window frame. Make sure to align them with the marked spots and secure them tightly. If no studs are available, use wall anchors to provide extra stability.
4. Adjusting the Brackets: Once the brackets are installed, double-check their alignment and adjust them if necessary. They should be level and evenly spaced to ensure the proper hanging of the curtain rod.
5. Mounting the Curtain Rod: Slide the curtain rod into the rod pockets of your Roman shade. Carefully insert the ends of the rod into the brackets, ensuring a snug fit. Give the rod a gentle shake to make sure it is securely in place.
6. Test and Adjust: Test the functionality of the curtain rod by raising and lowering the Roman shade. Ensure that it moves smoothly without any resistance or slippage. If adjustments are needed, carefully remove the rod from the brackets and make the necessary changes.
7. Finishing Touches: Once the curtain rod is properly installed, make any final adjustments to the Roman shade to ensure it hangs evenly and straight. Smooth out any wrinkles or folds, and arrange the fabric to achieve the desired appearance.
By following these steps, you can confidently install the curtain rod for your Roman shade. Make sure to take accurate measurements and use the appropriate tools for a secure and stable installation. Once completed, step back and admire your newly hung Roman shade, adding both functionality and style to your space.
Mounting the Roman Shade onto the Curtain Rod
Now that your curtain rod is securely installed, it’s time to mount your Roman shade onto it. Follow these steps to ensure a proper and seamless attachment of your shade to the curtain rod.
1. Prepare the Shade: Double-check that your Roman shade is in the fully raised position. This will make it easier to mount the shade onto the curtain rod.
2. Insert the Rod into the Rod Pocket: Take one end of the curtain rod and gently insert it into the rod pocket at the top of the Roman shade. Slowly slide the rod through the pocket until it extends across the entire width of the shade.
3. Align the Shade: Carefully adjust the fabric of the Roman shade along the curtain rod so that it hangs evenly and aligns with the brackets. Make sure that any pattern on the fabric is aligned properly and centered.
4. Secure the Ends: Once the fabric is properly aligned, ensure that both ends of the curtain rod are securely inserted into the brackets. Give the rod a gentle shake to confirm that it is firmly held in place.
5. Test the Movement: Test the functionality of your Roman shade by gently lowering and raising it. Check for any obstructions or resistance that may hinder the smooth movement of the shade. Adjust the fabric or rod if necessary to ensure it operates effortlessly.
6. Make Final Adjustments: Stand back and observe your Roman shade to ensure that it hangs straight and even. Make any necessary adjustments by gently repositioning the fabric or tightening the rod in the brackets.
7. Enjoy Your Roman Shade: With your Roman shade securely mounted on the curtain rod, you can now enjoy the added beauty and functionality it brings to your space. Adjust the shade to your desired height and let the natural light flow into the room or create a cozy and private ambiance when closed.
By following these steps, you can successfully mount your Roman shade onto the curtain rod. Take your time and ensure that the fabric is aligned properly and the rod is securely inserted into the brackets. Enjoy the elegant and versatile look of your Roman shade as it enhances the aesthetic appeal of your room.