
Requirements for Watching Videos on Car Screen
Watching videos on your car screen can be a great way to keep yourself and your passengers entertained during long drives. However, before you can enjoy your favorite movies or shows on the go, there are a few requirements you need to consider. Let’s take a look at what you’ll need to make this possible.
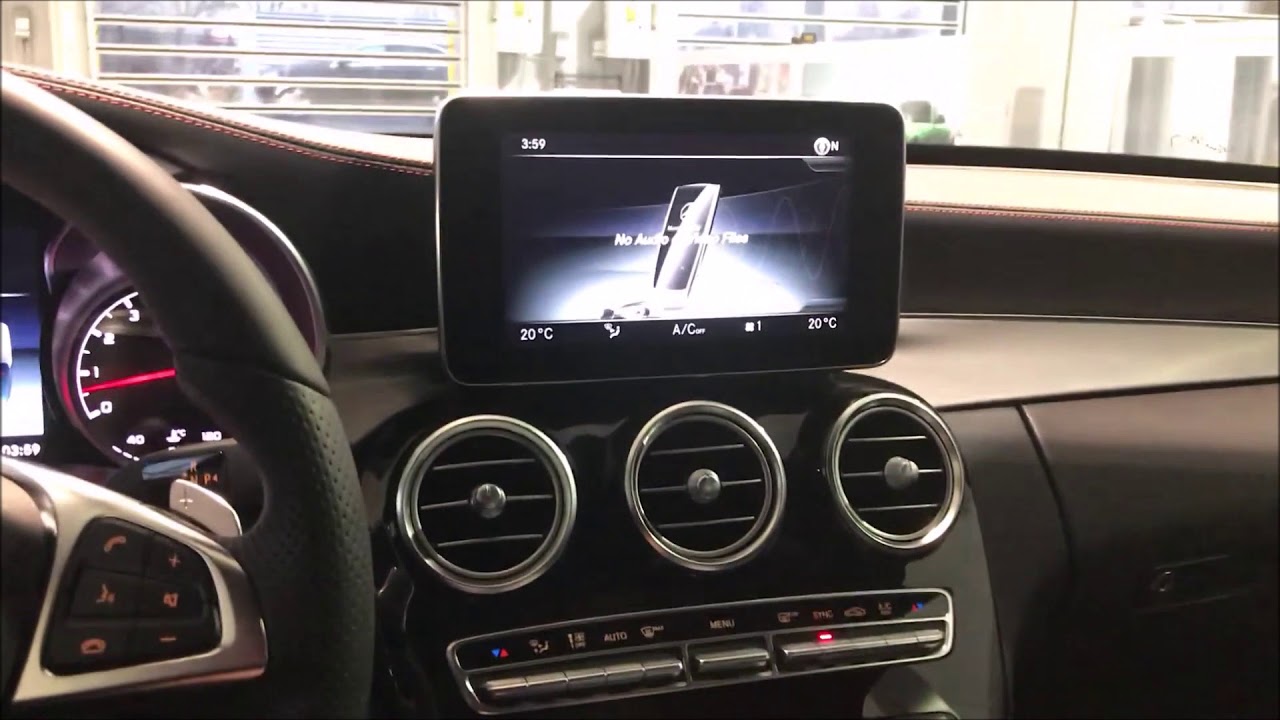
1. A compatible car entertainment system: The first requirement is a car screen or entertainment system that supports video playback. Most modern cars come with built-in screens, but if you don’t have one, you can consider installing an aftermarket car stereo with video capabilities.
2. Auxiliary input or USB ports: Your car screen should have either auxiliary input jacks or USB ports to connect your video-playing device. These ports will allow you to connect various devices, such as smartphones, tablets, or USB drives, to play videos on the screen.
3. Video formats supported: Make sure that the car screen supports the video formats you want to play. Common video formats include MP4, AVI, MKV, and WMV. Check the user manual or consult the manufacturer’s website to find out which video formats are compatible.
4. Power source: Watching videos on your car screen can drain the battery, so it’s essential to have a reliable power source. Your car’s battery should be in good condition, and if you plan on using your device extensively, consider investing in a car charger or power inverter to keep your device charged during the journey.
5. Quality of video files: To ensure a smooth playback experience, it’s advisable to have high-quality video files. Low-resolution or poorly encoded videos may not display correctly on the car screen. It’s recommended to use videos with a decent resolution (720p or higher) and properly encoded files for optimal playback.
Remember, always prioritize safety while watching videos on your car screen. It’s crucial to keep your focus on the road and avoid any activities that may distract you from driving. Ensure that the video playback is set up in a way that doesn’t obstruct your view or interfere with your ability to operate the vehicle safely.
By meeting these requirements, you’ll be able to enjoy your favorite videos and movies on your car screen, making those long journeys more entertaining and enjoyable for both you and your passengers.
Connecting Your Device to the Car Screen
Once you have ensured that your car screen meets the necessary requirements for video playback, the next step is to connect your device to the car screen. Depending on your device and the available ports on your car screen, there are several methods you can use to establish a connection. Let’s explore some of the common ways to connect your device to the car screen.
1. Using an HDMI cable: If your car screen has an HDMI input, you can connect your device using an HDMI cable. Most smartphones, tablets, and some laptops have HDMI output ports. Simply connect one end of the HDMI cable to your device’s HDMI port and the other end to the car screen’s HDMI input. Set the car screen to the correct HDMI input source, and you should see your device’s screen mirrored on the car screen.
2. Using a USB cable: Many car screens have USB ports that support video playback. If your device has a USB output, you can connect it directly to the car screen using a USB cable. Make sure to use a cable that is compatible with your device and the car screen. Once connected, select the USB input source on your car screen, and you should be able to access and play videos from your device.
3. Wireless connectivity options: Some car screens are equipped with wireless connectivity options, such as Bluetooth or Wi-Fi. If your device supports these wireless technologies, you can connect to the car screen wirelessly. Pair your device with the car screen via Bluetooth or connect to the car screen’s Wi-Fi network. Once connected, you can stream videos from your device directly to the car screen or use screen mirroring features if available.
4. Using an auxiliary cable: If your car screen has an auxiliary input, you can use an auxiliary cable to connect your device. Most devices, including smartphones and MP3 players, have a 3.5mm headphone jack that can be connected to the car screen’s auxiliary input. Plug one end of the auxiliary cable into your device’s headphone jack and the other end into the auxiliary input of the car screen. Switch the car screen to the correct auxiliary input, and you should hear the audio and see the video from your device on the car screen.
Remember to consult your car screen’s user manual for specific instructions on connecting devices and accessing different input sources. Additionally, ensure that the audio and video settings on both your device and the car screen are properly adjusted for the best playback experience.
By following these steps, you’ll be able to connect your device to the car screen and enjoy your favorite videos and movies on a larger display while on the road.
Playing Videos from USB Drive on Car Screen
If your car screen supports USB playback, playing videos from a USB drive is a convenient way to enjoy your favorite content while on the road. Here’s a step-by-step guide on how to play videos from a USB drive on your car screen.
1. Format the USB drive: Before transferring videos to the USB drive, ensure that it’s formatted in a compatible file system. Most car screens support the FAT32 or exFAT file system. Use your computer to format the USB drive to one of these file systems to ensure compatibility.
2. Transfer videos to the USB drive: Once your USB drive is formatted correctly, transfer the video files you want to play onto the USB drive. Make sure the video files are in a supported format (e.g., MP4, AVI, MKV) and that they are properly encoded for optimal playback.
3. Connect the USB drive to the car screen: Locate the USB port on your car screen and insert the USB drive into it. Depending on the car screen, the USB port may be located on the front panel or in the glove compartment. Once connected, the car screen should detect the USB drive automatically.
4. Access the USB input source: On your car screen, select the USB input source. This can usually be done by pressing the “Source” or “Input” button on the car screen’s control panel. You might see different USB input options, such as “USB 1” or “USB 2.” Select the appropriate input source corresponding to the USB port where you connected your USB drive.
5. Browse and play the videos: Once you’ve accessed the USB input source, you should see a list of the video files stored on the USB drive. Use the car screen’s navigation controls or touch interface, if available, to browse through the videos. Select the video you want to play, and it should start playing on the car screen.
6. Adjust video settings, if necessary: Depending on your car screen’s settings, you may have options to adjust the video playback settings, such as brightness, contrast, or aspect ratio. Use the on-screen menu or dedicated buttons on the car screen’s control panel to make any necessary adjustments for optimal viewing experience.
By following these steps, you’ll be able to effortlessly play videos from a USB drive on your car screen. This allows you to enjoy your favorite movies, TV shows, or home videos during your travels, making your journey more entertaining and enjoyable.
Streaming Videos from your Phone to Car Screen
Streaming videos from your phone to your car screen is a convenient way to access and enjoy your favorite content while on the go. By utilizing wireless connectivity options and apps, you can seamlessly mirror your phone’s screen or stream videos directly to your car screen. Here’s how you can stream videos from your phone to your car screen:
1. Check for wireless connectivity options: Determine the wireless connectivity options available on your phone and car screen. Common options include Bluetooth and Wi-Fi. Ensure that both devices support the same wireless technology and that they are paired or connected to each other.
2. Enable screen mirroring: If your phone and car screen support screen mirroring, enable this feature on your phone. On Android devices, you can typically find this option in the display settings or under the “Connectivity” section. On iPhones, navigate to your control center, tap on the screen mirroring icon, and select your car screen from the available devices.
3. Use a streaming app: Install a streaming app on your phone that supports video playback on external screens. Apps like Apple CarPlay, Android Auto, or MirrorLink allow you to connect your phone to your car screen and use compatible apps to stream videos. These apps provide a simplified interface and ensure a seamless streaming experience.
4. Connect your phone to the car screen: Use a USB cable, Bluetooth, or Wi-Fi to connect your phone to the car screen. The specific method may vary depending on your car’s features and the supported wireless connectivity options. Follow the pairing or connection process as per your car screen’s instructions.
5. Select video and start streaming: Once your phone is connected to the car screen, select the streaming app on your phone and navigate to the video you want to watch. Choose the car screen as the playback destination, and the video will start streaming on the car screen.
6. Control playback from your phone: While streaming, you can control playback functions directly from your phone. Pause, play, skip, or adjust the volume using the controls on your phone’s screen or the connected Bluetooth or USB accessories.
Keep in mind that streaming videos from your phone to your car screen may consume data, especially if you’re using mobile data for internet connectivity. To avoid excessive data usage or potential buffering, ensure you have a stable internet connection or consider downloading videos to your phone beforehand.
By using the wireless connectivity options and streaming apps available, you can easily stream videos from your phone to your car screen, providing entertainment and convenience during your journeys.
Watching Videos through a DVD Player in the Car
If your car has a built-in DVD player or if you have a portable DVD player, you can enjoy watching videos on the car screen by playing DVDs. This method allows you to access a wide range of movies and TV shows in a physical format. Follow these steps to watch videos through a DVD player in the car:
1. Ensure compatibility: Confirm that your car screen or DVD player is capable of playing DVDs. Most car DVD players support standard DVDs, but some may also be compatible with formats like CD/DVD-R/RW, MP3, or DivX. Read the user manual or check the specifications of your car DVD player for supported formats.
2. Prepare your DVDs: Gather the DVDs you want to watch and ensure they are in good condition without scratches or damage. Wipe them clean if necessary to ensure smooth playback. Remember to choose DVDs that contain the desired videos or movies you wish to watch during your car journey.
3. Insert the DVD: Locate the DVD player or DVD slot in your car and insert the DVD carefully. Make sure it is inserted with the label facing up or as instructed by the DVD player. The car screen should detect the DVD and begin reading the content.
4. Access the DVD input source: On your car screen, select the DVD input source. Depending on your car’s entertainment system, you may need to press the “Source” or “Input” button to switch to the DVD input source. Once selected, the car screen will display the DVD’s main menu or start playing the video automatically.
5. Navigate and control playback: Use the controls on your car screen or the remote control that comes with the DVD player to navigate the DVD’s menu and control playback. You can use options like play, pause, stop, fast-forward, or rewind to enjoy your videos. Additionally, some car screens may allow you to adjust audio settings, subtitles, or other preferences.
6. Take caution and prioritize safety: While watching DVDs in the car, it is crucial to prioritize safety and avoid any distractions while driving. The driver should not operate the DVD player or adjust the settings while on the road. Instead, passengers can handle the controls or choose the content to ensure the driver’s full attention is on driving.
By following these steps and ensuring compatibility, you can enjoy watching videos through a DVD player in your car. It provides a convenient way to access a wide variety of movies and shows during your travel, keeping you and your passengers entertained on long journeys.
Adjusting the Video Settings on Car Screen
When watching videos on your car screen, it’s important to ensure that the video settings are properly adjusted to enhance your viewing experience. Depending on your car’s entertainment system, you may have various options to customize the video playback settings. Here are some aspects you can consider when adjusting the video settings on your car screen:
1. Brightness and Contrast: The brightness and contrast settings determine the overall picture quality. Adjust these settings to achieve a balanced display that is neither too dark nor too bright. Increase the brightness if the video looks dim, and adjust the contrast to improve the clarity and color vibrancy.
2. Aspect Ratio: The aspect ratio determines the width and height ratio of the video display. Most car screens offer different aspect ratio options, such as 4:3 (standard) or 16:9 (widescreen). Select the appropriate aspect ratio that matches the video format to ensure proper display proportions and avoid any stretching or cropping.
3. Color Settings: Fine-tuning the color settings can greatly enhance the visual experience. Adjust options like saturation, hue, and color temperature to achieve accurate and vibrant colors that suit your personal preference. Experiment and find the settings that make the video look more appealing to you.
4. Sharpness: The sharpness setting determines the level of detail and crispness in the video. Use this setting to enhance the edges and improve the overall clarity. However, be cautious not to set it too high, as it may create artificial artifacts and distortions in the image.
5. Audio Settings: In addition to video settings, adjust the audio settings on your car screen to optimize the sound quality. Options like equalizer settings, surround sound effects, and audio balance can significantly enhance your audio experience while watching videos.
6. Subtitle and Language Settings: If your car screen supports subtitle playback, adjust the subtitle settings to display subtitles that are clear and synchronized with the video. Additionally, explore language options to switch between different audio tracks or choose the preferred language for audio playback.
7. Save and Recall Settings: Some car screens allow you to save your personalized video settings for future use. Take advantage of this feature to save your preferred settings, so you don’t have to manually adjust them every time you watch a video. This ensures a consistent viewing experience each time.
Remember that the optimal video settings may differ based on personal preference, lighting conditions, and the content being played. Experiment with different settings and make adjustments accordingly until you achieve the desired video display on your car screen.
By adjusting the video settings on your car screen, you can tailor the visual experience to your liking, ensuring that the videos you watch on the road are displayed in the best possible way.
Troubleshooting Common Issues when Watching Videos on Car Screen
While watching videos on your car screen can be enjoyable, you may encounter some common issues that can hinder your viewing experience. Here are some common problems and troubleshooting tips to help you overcome them:
1. No video signal: If you’re not getting any video signal on your car screen, ensure that the cables or connections are secure and properly inserted. Check for any loose connections or damaged cables. Additionally, make sure you have selected the correct input source on your car screen to receive the video signal.
2. Poor video quality: If the video quality is low, first check if the video files themselves are of poor quality. Ensure that you are playing video files with a decent resolution and properly encoded for optimal playback. If the video quality is still poor, adjust the brightness, contrast, and sharpness settings on your car screen to improve the visual display.
3. Audio issues: If you’re experiencing audio problems, verify that the volume is not muted and that you have selected the correct audio source on your car screen. If the issue persists, check the audio settings on your car screen and make sure the audio cables or connections are secure. You can also try adjusting the equalizer settings or balance to enhance the audio quality.
4. Incompatible video formats: If some videos are not playing on your car screen, it may be due to incompatible video formats. Make sure that the video files you are trying to play are in a format supported by your car screen. Convert the videos to a compatible format if necessary using video conversion software or apps.
5. Video playback freezing or buffering: If the video playback freezes or buffers frequently, it may be due to slow or unstable internet connectivity if you’re streaming videos. Check your internet connection and ensure that it is stable. If you’re using a USB drive or DVD, make sure they are in good condition without any scratches or damage that can affect the playback.
6. External device not recognized: If your car screen is not recognizing external devices like USB drives or smartphones, try disconnecting and reconnecting the device. Ensure that the USB port or auxiliary input is functioning properly. If the issue persists, consult the car screen’s user manual or seek professional assistance.
7. Overheating or power issues: If your car screen or DVD player is overheating or experiencing power issues, check the power connections and ensure that the device is properly ventilated. Avoid using the device for extended periods and disconnect it from the power source if necessary. If the problem persists, consult a professional technician for further assistance.
If these troubleshooting tips do not resolve your issue, it is recommended to refer to the user manual or contact the manufacturer’s support for specific guidance related to your car screen or DVD player.
By understanding and troubleshooting these common issues, you can ensure a smoother and more enjoyable video watching experience on your car screen.