
Understanding VHS Tapes
Before delving into the process of watching VHS tapes, it’s important to have a fundamental understanding of what VHS tapes are and how they work. VHS, which stands for Video Home System, was the dominant home video format in the 1980s and 1990s. These rectangular-shaped cassettes contained magnetic tape that stored video and audio signals.
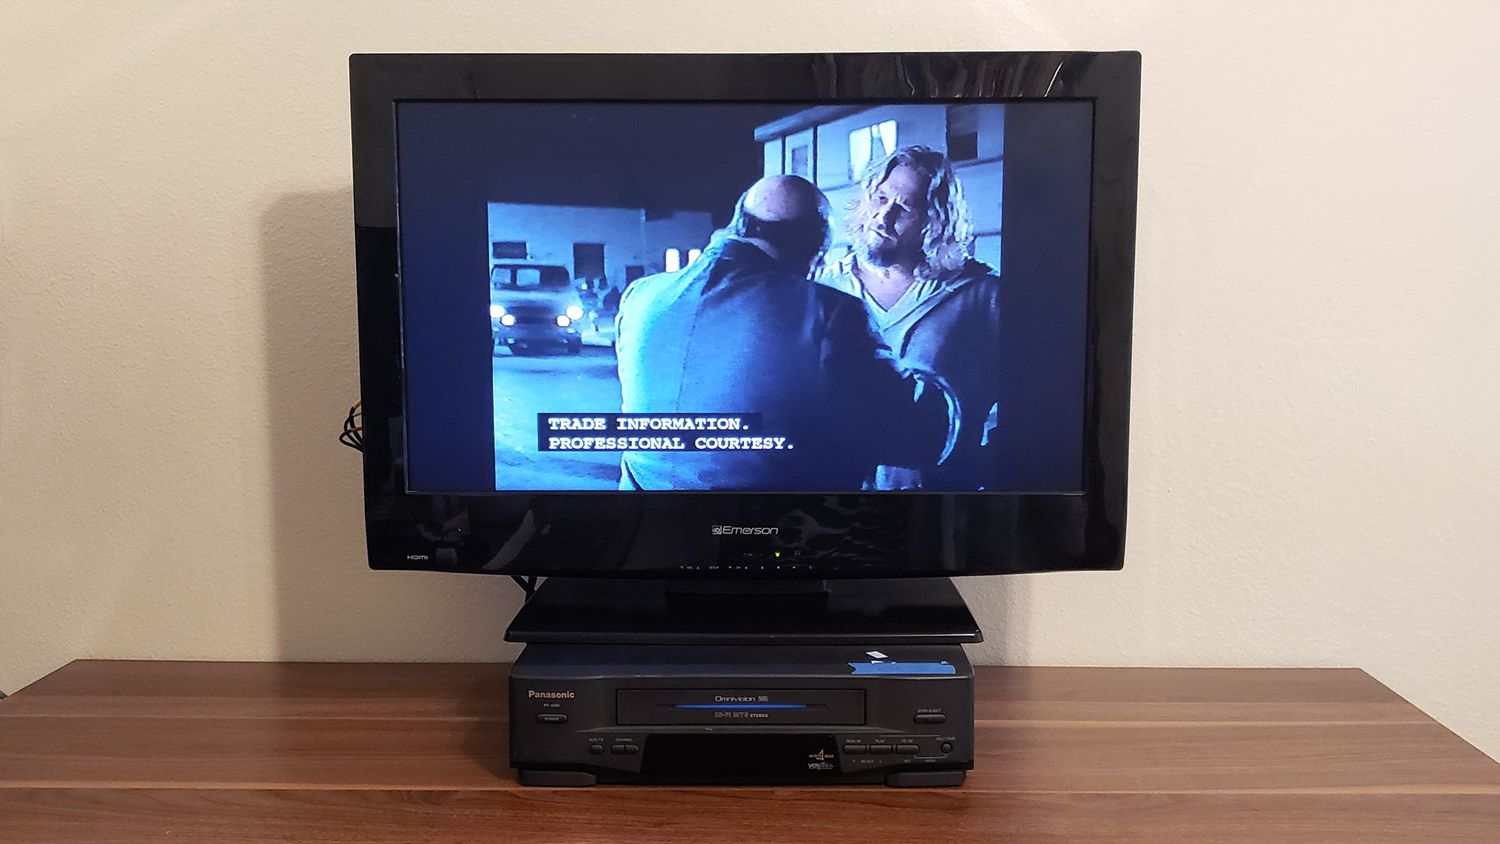
VHS tapes allowed people to record and watch movies, TV shows, and other video content from the comfort of their homes. The tapes were played on VHS players or VCRs (Video Cassette Recorders) connected to a television.
It’s worth mentioning that VHS tapes have certain limitations compared to modern digital formats. The quality of video and audio on VHS tapes is lower resolution and can be affected by degradation over time. Additionally, the rewind and fast-forward functions can be time-consuming compared to the instant navigation capabilities of digital media.
Despite these limitations, VHS tapes have a nostalgic charm that many people appreciate. They offer the unique experience of interacting with physical media and the ability to rediscover classic movies and personal recordings.
In the next sections, we will guide you through the process of watching VHS tapes and provide tips on how to optimize your viewing experience.
Gathering the Necessary Tools
Before you can start watching VHS tapes, you’ll need to gather a few essential tools. Here’s what you’ll need:
- A VCR (Video Cassette Recorder): This is the device that plays the VHS tapes.
- A television: You’ll need a television with a composite or component video input to connect the VCR.
- VHS tapes: Of course, you’ll need the VHS tapes themselves to watch the content.
- Audio and video cables: You’ll need RCA cables to connect the VCR to the television. Make sure you have the appropriate cables for the type of connection your VCR and television support.
- A power outlet: Ensure that you have a power outlet nearby to plug in your VCR and television.
- Optional: If you want to record content from your television onto VHS tapes, you may need an additional cable to connect the TV output to the VCR input.
It’s a good idea to check if you already have some of these items at home before purchasing anything. You might find that you have an old VCR lying around, or your grandparents might have a stash of VHS tapes gathering dust in their basement.
If you don’t have a VCR or any of the necessary components, you can often find them at thrift stores, online marketplaces, or even borrow them from friends or family. Just keep in mind that depending on where you acquire them, the devices might require a bit of cleaning or maintenance to ensure proper functioning.
Once you have all the necessary tools, you’re ready to move on to the next steps of setting up your VCR and connecting it to your television.
Setting Up Your VCR
Setting up your VCR is a crucial step in the process of watching VHS tapes. Follow these steps to ensure a proper setup:
- Choose a suitable location: Find a stable surface for your VCR near your television. Make sure there is enough space for the VCR to properly ventilate and for you to access the tape compartment.
- Plug in the VCR: Connect the power cord of the VCR to a power outlet. Ensure that the power switch on the VCR is turned off before plugging it in.
- Connect the audio and video cables: Take the RCA cables and connect the yellow (video), white (left audio), and red (right audio) plugs on one end to the corresponding output jacks on the VCR. Then connect the other end of the cables to the matching input jacks on your television.
- Switch on the VCR and TV: Turn on your television and set it to the appropriate video input channel. Then, turn on the VCR by pressing the power button. The VCR should now show a blue screen or menu on your television.
- Set the VCR channel: Use the channel buttons on the VCR or its remote control to set the channel to the same channel your television is set to receive the video signal. Alternatively, you can set your television to the proper channel for receiving the VCR signal.
- Perform a test run: Insert a VHS tape into the VCR’s tape compartment and press the play button to test if the video and audio are properly playing on your television. If everything is working correctly, you’re ready to start watching your VHS tapes.
Setting up your VCR might require some trial and error, especially if you’re unfamiliar with the process. Don’t hesitate to consult the user manual for your specific VCR model or seek assistance from someone experienced in setting up VCRs.
Once your VCR is set up and ready to go, you can move on to the next step of connecting it to your television for playback.
Connecting Your VCR to a Television
Now that your VCR is set up, it’s time to connect it to your television for optimal viewing. Follow these steps to establish the connection:
- Locate the video input ports: Check the back of your television for video input ports. Depending on your TV model, you may have composite (yellow), component (red, green, blue), or HDMI input ports. Look for the corresponding input that matches the type of cables you’re using.
- Connect the video cable: Take the yellow video cable and insert one end into the video output port on your VCR. Then, connect the other end to the corresponding video input port on your television.
- Connect the audio cables: Take the white (left audio) and red (right audio) cables and insert one end of each into the audio output ports on your VCR. Connect the other ends to the matching audio input ports on your television.
- Verify the connections: Once you’ve made all the connections, double-check that the cables are securely attached and properly plugged into their respective ports. Loose connections can result in poor video and audio quality.
- Set the correct input source: Use the input/source button on your television’s remote control to select the corresponding video input channel that you connected the VCR to. You may need to cycle through different input options until you see the VCR’s video output on your television screen.
After following these steps, you should have successfully connected your VCR to your television. Test the setup by playing a VHS tape in your VCR. If the video and audio play properly on your television, you’re ready to enjoy your VHS tapes.
It’s worth noting that the quality of the video will be limited to the capabilities of the VHS format. Don’t be alarmed if you notice a lower resolution and some visual artifacts. This is part of the charm of VHS tapes and adds to the nostalgia of watching them.
In the next section, we will discuss how to prepare a VHS tape for playback to ensure the best viewing experience.
Preparing the VHS Tape
Before inserting a VHS tape into your VCR and pressing play, it’s essential to prepare the tape properly to ensure optimal playback and prevent any potential issues. Here are the steps to follow:
- Inspect the tape: Examine the VHS tape for any signs of damage, such as twists or breaks. If you notice any visible damage, it’s best to avoid using the tape to prevent damage to your VCR.
- Clean the tape heads: Over time, the video heads inside the VCR can accumulate dust and dirt, which can affect the playback quality. To clean the heads, you can purchase a VCR head cleaning tape from electronic stores or online retailers. Simply insert the cleaning tape into the VCR and let it play for a few seconds. This will help ensure a clearer playback on your VHS tape.
- Rewind the tape: If the VHS tape is not already rewound, use the rewind button on your VCR to rewind it before inserting it into the VCR. This will prevent any confusion or difficulties when accessing specific scenes or starting from the beginning.
- Handle the tape carefully: When handling the VHS tape, hold it by its edges and avoid touching the tape itself. Fingerprints or smudges on the tape can cause playback issues, so it’s crucial to keep it clean and free from any contaminants.
By taking these steps to prepare your VHS tape, you can ensure a smoother and better-quality playback experience. Remember to regularly clean the video heads of your VCR to maintain optimal performance and extend the lifespan of both your VCR and tapes.
Once you have prepared the VHS tape, you are ready to insert it into the VCR and begin the playback process. In the next section, we will guide you through inserting the tape and playing it on your television.
Inserting and Playing the VHS Tape
Now that you have prepared your VHS tape, it’s time to insert it into the VCR and start enjoying the content. Follow these steps:
- Locate the VCR’s tape compartment: Most VCRs have a flip-up panel or a sliding door that covers the tape compartment. Locate and open the compartment to reveal the tape loading area.
- Insert the VHS tape: Hold the VHS tape by its edges and carefully align it with the guides inside the tape compartment. Slide the tape into the compartment until it clicks into place. Close the compartment door or push the panel back into position.
- Start playback: Use the VCR’s remote control or the buttons on the VCR itself to start playback. Press the play button and wait for the tape to begin playing. You should see the video and hear the audio on your television screen.
- Control playback: Use the VCR’s controls to pause, rewind, fast-forward, or adjust the volume during playback. Each VCR may have slightly different control buttons, so refer to the user manual if you’re unsure how to use specific functions.
Remember to handle the VCR and tape gently to avoid any damage. Avoid forcefully inserting or removing the tape, as this can lead to tape jams or even damage the VCR mechanism.
If the playback doesn’t start automatically, check if the VCR is set to the correct input channel on your television. Also, ensure that the connections between the VCR and the television are secure and properly plugged in.
Enjoy the nostalgic experience of watching your favorite movies, TV shows, or personal recordings on VHS tape!
In the next section, we will explore how to adjust the playback settings on your VCR to improve the viewing experience.
Adjusting the Playback Settings
To optimize your viewing experience while watching VHS tapes, it’s important to familiarize yourself with the playback settings on your VCR. Here are some adjustments you can make:
- Tracking adjustment: Tracking helps to stabilize the playback image and minimize distortions. If you notice fuzzy or unstable video quality, use the tracking button or knob on your VCR to adjust the tracking until the picture becomes clear and stable.
- Brightness and contrast: If the video appears too dark or too bright, you can adjust the brightness and contrast settings on your television. Look for these controls either on the television itself or in the on-screen menu.
- Audio settings: Some VCRs allow you to adjust the audio settings, such as volume level or audio balance. Use the audio settings on your VCR or television to make any necessary adjustments to enhance the sound quality while watching VHS tapes.
- Picture mode: If your television has different picture modes (e.g., Standard, Vivid, Movie), you might want to experiment with these settings to find the one that best enhances the VHS playback. Different modes can affect the color saturation, sharpness, and overall appearance of the video.
It’s important to note that the available settings might vary depending on your specific VCR model and television. Refer to the user manuals for both devices to explore the available options and understand how to adjust the settings effectively.
Feel free to experiment with the settings to find the combination that suits your preferences and provides the best viewing experience for your VHS tapes. Adjustments like tracking and picture settings can significantly improve the quality of the playback and enhance your overall enjoyment.
In the next section, we will address some common issues that you might encounter while watching VHS tapes and how to troubleshoot them.
Troubleshooting Common Issues
While watching VHS tapes, you may encounter certain issues that can impact your viewing experience. Here are some common issues and troubleshooting steps to resolve them:
- No picture or sound: If you’re not getting any picture or sound when playing a VHS tape, first ensure that the VCR is powered on and the connections between the VCR and television are secure. Check that the television is set to the correct input channel for receiving the VCR signal. If the issue persists, try playing another VHS tape to determine if the problem is with the tape itself.
- Poor video quality: If the video quality appears fuzzy, distorted, or black and white, there may be tracking issues. Adjust the tracking controls on your VCR to stabilize the video. Additionally, clean the video heads of the VCR using a head cleaning tape as mentioned in a previous section.
- Audio problems: If the audio is distorted or there’s no audio output, check the audio connections between the VCR and television. Make sure the audio cables are connected properly. If the issue persists, adjust the audio settings on the VCR or television and ensure that the audio track on the VHS tape is intact.
- Tape jamming or ejecting issues: If the VHS tape gets stuck or doesn’t eject properly, avoid forcing it out, as this can damage the tape and the VCR. Instead, gently press the eject button and try to assist the tape by carefully guiding it out of the VCR. If the issue persists, seek assistance from a professional or refer to the VCR’s user manual for troubleshooting steps.
- Interference or static on the screen: If you notice interference or static lines on the screen during playback, ensure that there are no sources of electromagnetic interference nearby, such as speakers or mobile devices. Move these items away from the VCR and television to minimize interference.
Remember to always handle VHS tapes and the VCR with care to avoid any unnecessary damage. If you are unable to resolve a specific issue or if the problem persists, you may want to consult a technician or seek professional assistance to diagnose and repair the VCR.
In the next section, we will cover the steps for rewinding and ejecting the VHS tape properly.
Rewinding and Ejecting the VHS Tape
When you’re finished watching a VHS tape, it’s important to know how to properly rewind it and safely eject it from the VCR. Here are the steps:
- Rewinding the tape: To rewind the VHS tape, press the rewind button on your VCR or its remote control. Wait for the tape to fully rewind to the beginning before proceeding to the next step.
- Ejecting the tape: Once the tape is fully rewound, press the eject button on your VCR or its remote control. The tape compartment will open, allowing you to safely remove the VHS tape.
- Handling the tape: When removing the tape, hold it by its edges to avoid touching the exposed tape. This helps prevent fingerprints, dirt, or damage to the tape. Place the VHS tape back in its protective case to keep it safe and protected from dust.
It’s important to let the tape finish rewinding before attempting to eject it to avoid potential tape damage or issues with the VCR mechanism. If the tape doesn’t eject smoothly, avoid forcing it out, as this can cause further damage. Instead, consult the VCR’s user manual or seek professional assistance if necessary.
Properly rewinding and ejecting the VHS tape ensures its longevity and optimal playback quality for future use. Take the time to handle the tapes with care and store them in a cool, dry place, away from direct sunlight or extreme temperatures.
In the next section, we will discuss cleaning and maintaining VHS tapes and VCRs to prolong their lifespan.
Cleaning and Maintaining VHS Tapes and VCRs
To ensure optimal playback quality and prolong the lifespan of your VHS tapes and VCR, regular cleaning and maintenance are essential. Here are some tips to keep them in good condition:
- Cleaning VHS tapes:
- Handle tapes with clean hands: Before touching a VHS tape, make sure your hands are clean and free from dirt, oil, or other contaminants.
- Use a VCR head cleaning tape: Regularly clean the video heads of your VCR using a VCR head cleaning tape. Follow the instructions provided with the cleaning tape to effectively remove dust and debris.
- Avoid using liquids: Do not use any cleaning liquids or solvents directly on the VHS tape as it can damage the tape. If needed, use a soft, lint-free cloth lightly dampened with water to gently clean the surface of the tape.
- Store tapes properly: When not in use, store VHS tapes in their original cases or in a cool, dry place, away from direct sunlight, heat, or extreme humidity.
- Maintaining your VCR:
- Clean the VCR exterior: Use a soft cloth to remove dust and dirt from the exterior of your VCR. Avoid using harsh chemicals or abrasive materials that can cause scratches.
- Ventilation: Ensure that the VCR has proper ventilation to prevent overheating. Keep the vents clear of any blockages and avoid placing objects on top of the VCR.
- Regular maintenance: Periodically inspect the VCR for any signs of wear or damage. If you notice any issues, such as difficulty in tape playback or unusual noises, consult the user manual or seek professional assistance for repairs.
By implementing these cleaning and maintenance practices, you can optimize the performance of your VHS tapes and VCR, reducing the likelihood of playback issues and prolonging their lifespan.
Lastly, it’s important to note that while VHS tapes and VCRs offer a nostalgic viewing experience, it’s always a good idea to digitize any important or sentimental recordings to ensure long-term preservation. This way, you can enjoy your memories without the risk of deteriorating tapes or VCR malfunctions.
In the final section, we will provide some additional tips and tricks to enhance your VHS tape viewing experience.
Additional Tips and Tricks
While watching VHS tapes can be a nostalgic and enjoyable experience, here are some additional tips and tricks to enhance your viewing journey:
- Explore thrift stores and online marketplaces: Look for secondhand VHS tapes at thrift stores, flea markets, or online marketplaces. You may find hidden gems, rare films, or nostalgic favorites at affordable prices.
- Keep your VCR in good condition: Regularly clean the VCR’s tape heads and maintain proper ventilation to ensure optimal performance. If you experience persistent issues with your VCR, consider seeking professional help for servicing or repairs.
- Organize your VHS tape collection: Create a system to organize your VHS tape collection to easily find the tape you want to watch. You can categorize them by genre, alphabetical order, or personal preference.
- Connect your VCR to a digital converter: If you want to preserve your VHS tapes digitally, consider connecting your VCR to a digital converter. This will allow you to transfer the content to a computer or external storage device for future viewing or archival purposes.
- Create a cozy viewing setup: Set up a comfortable space for watching VHS tapes. Arrange a cozy seating area, have some snacks on hand, and dim the lights to enhance the nostalgic atmosphere.
- Join VHS enthusiast communities: Engage with online communities or forums dedicated to VHS tape enthusiasts. Share your love for VHS tapes, exchange recommendations, and learn from others about rare or obscure titles to expand your collection.
Remember to respect copyright laws when it comes to VHS tapes. Avoid duplicating or distributing copyrighted material without appropriate permission or licensing.
By implementing these tips and tricks, you can make your VHS tape viewing experience even more enjoyable and discover the unique charm of this vintage format.
With all the knowledge and guidance provided in this article, you are now well-equipped to watch and appreciate VHS tapes. Enjoy your journey into the world of analog video nostalgia!