
What is a DVD?
A DVD, short for Digital Versatile Disc, is a type of optical disc storage medium that was introduced in the late 1990s. It has the ability to store large amounts of data, including high-quality video and audio, making it ideal for movies and other multimedia content. DVDs come in different formats, such as DVD-R, DVD+R, DVD-RW, DVD+RW, and DVD-ROM.
These discs have a significantly larger storage capacity than CDs, allowing for the storage of up to 4.7 GB (single-layer) or 8.5 GB (dual-layer) of data. This makes them perfect for storing movies, TV series, software, and other large files. DVD discs are widely used around the world and have become a popular medium for distributing movies and other video content.
DVDs are typically played using a DVD player, which can be connected to a TV or a computer. However, with the increasing popularity of laptops and the advancement of technology, many modern laptops do not come equipped with built-in DVD drives.
Why do laptops not come with DVD players?
In recent years, laptops have undergone significant design changes to become thinner, lighter, and more portable. As a result, many manufacturers have made the decision to remove DVD drives from their laptops to prioritize space and weight reduction. There are several reasons why laptops no longer come with built-in DVD players:
1. Streaming and digital media: With the rise of streaming services like Netflix, Amazon Prime Video, and Hulu, more and more people are consuming media online. These platforms offer a wide range of movies and TV shows that can be accessed instantly, eliminating the need for physical DVDs.
2. Shift towards digital downloads: Many software programs, games, and multimedia content can now be downloaded directly from the internet. This has made DVDs less necessary for installing and playing software, further diminishing the need for built-in DVD drives in laptops.
3. Compact and lightweight design: As mentioned earlier, modern laptops are becoming increasingly slim and portable. Built-in DVD drives add bulk and weight to the overall design. Removing them allows for a more streamlined and lightweight laptop that is easier to carry around.
4. Cost considerations: Eliminating the DVD drive from laptops not only reduces the manufacturing cost but also eliminates the need for additional hardware components. This cost-saving strategy has become more appealing to manufacturers who aim to produce more affordable laptops.
5. Focus on other connectivity options: Laptops today offer a wide range of connectivity options, including USB ports, HDMI ports, and memory card readers. These alternatives provide more versatile ways to transfer and share data, making the DVD drive less essential.
Despite the absence of a built-in DVD player, there are several alternative options available for laptop users to watch DVD content, which we will explore in the following sections.
Option 1: External DVD drives
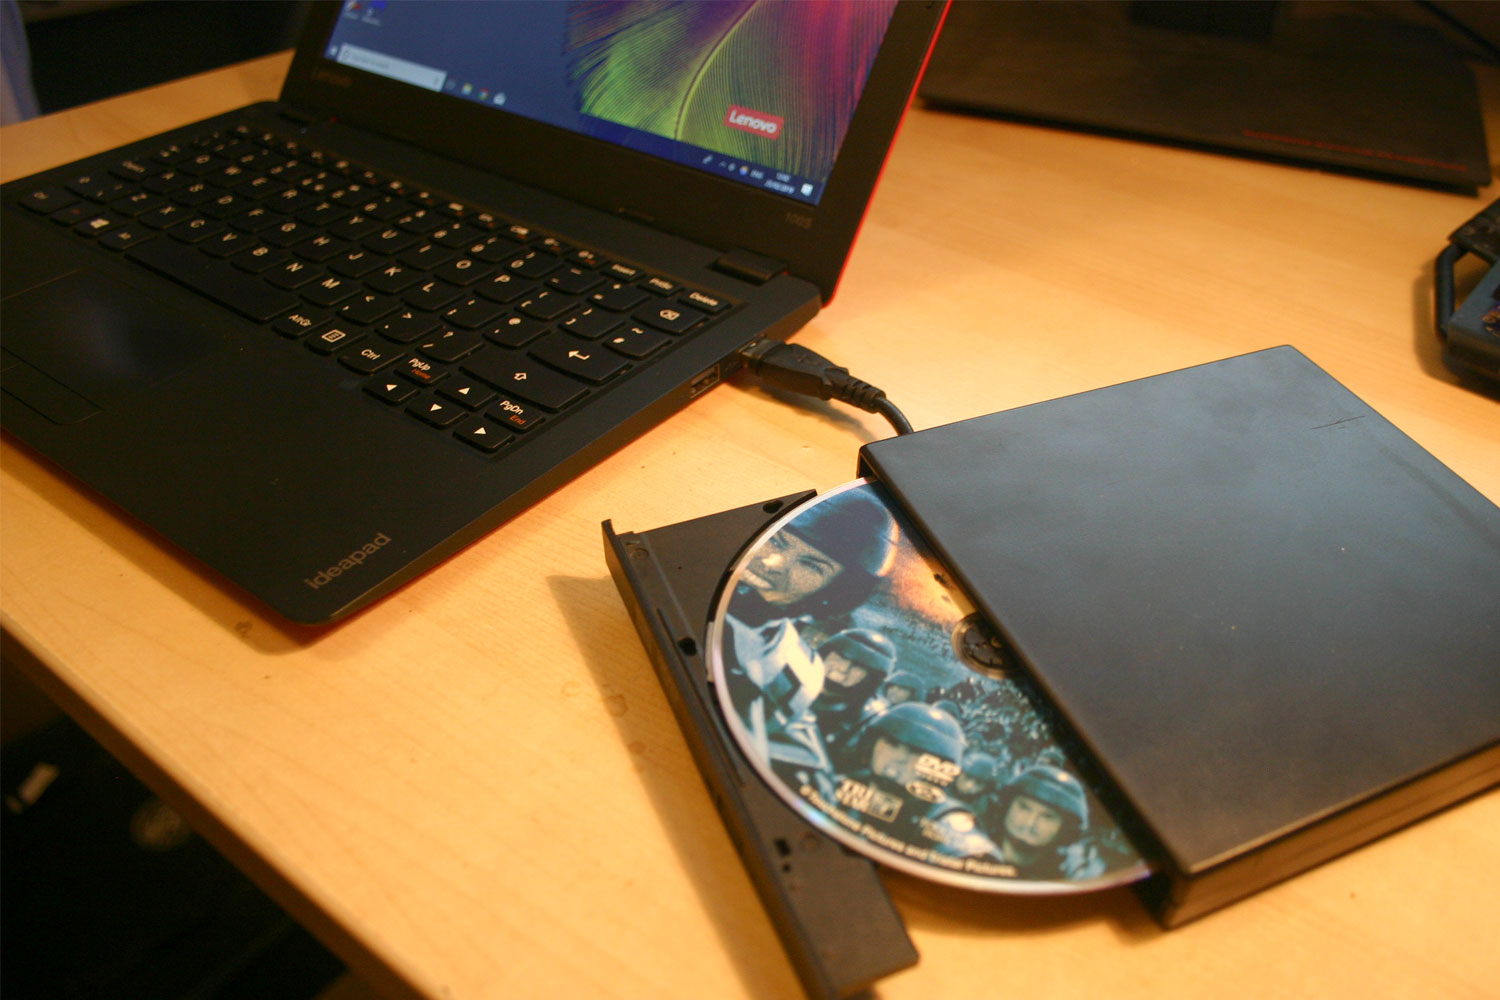
One of the easiest and most convenient options to watch DVDs on a laptop without a built-in DVD player is by using an external DVD drive. These drives are portable, compact, and can be easily connected to your laptop through a USB port. Here’s how it works:
1. Purchase an external DVD drive: You can find external DVD drives available in various models and price ranges. Look for one that is compatible with your laptop’s operating system and has good reviews.
2. Connect the external DVD drive to your laptop: Plug in the USB cable provided with the external DVD drive into an available USB port on your laptop. Ensure that the drive is securely connected.
3. Insert the DVD into the external drive: Open the external DVD drive tray and carefully place the DVD into the tray. Close the tray once the DVD is inserted.
4. Play the DVD: Your laptop should recognize the external DVD drive as a new device. Depending on your operating system, you may be prompted with options to open or play the DVD. Follow the on-screen instructions to start watching the DVD.
External DVD drives provide a convenient solution for watching DVDs on laptops without sacrificing portability. You can easily carry the external drive with you and use it whenever you want to watch a DVD. It’s worth noting that external DVD drives can also be used to burn DVDs or CDs, making them versatile devices for various purposes.
Overall, an external DVD drive is a practical option for those who occasionally need to watch DVDs on their laptops and don’t want to invest in other alternatives. It’s a straightforward plug-and-play solution that doesn’t require any additional software or complex setup.
Option 2: DVD ripping software
Another option to watch DVDs on a laptop without a built-in DVD player is by using DVD ripping software. This method allows you to convert the DVD into a digital format that can be played on your laptop. Here’s how it works:
1. Install DVD ripping software: There are various DVD ripping software programs available, both free and paid. Choose one that suits your needs and install it on your laptop.
2. Insert the DVD into an external DVD drive: If you have an external DVD drive, insert the DVD into the drive. If not, you can try using an internal DVD drive if your laptop has one.
3. Open the DVD ripping software: Launch the DVD ripping software on your laptop. It should detect the inserted DVD and display its contents.
4. Select the desired settings: The DVD ripping software allows you to choose various settings according to your preferences. You can select the output format, video quality, subtitles, and audio tracks.
5. Start the ripping process: Once you have selected the desired settings, click on the rip or convert button to start the process. The software will convert the DVD into a digital format compatible with your laptop.
6. Play the ripped DVD: After the ripping process is complete, you can play the ripped DVD on your laptop using a media player software. Most laptops come with pre-installed media players, but you can also download free media player software like VLC media player or Windows Media Player.
Using DVD ripping software allows you to have a digital copy of the DVD that you can access and watch on your laptop whenever you want. This method is particularly useful if you have a large DVD collection and want to create a digital library for easy access and portability. However, it’s important to note that ripping copyrighted DVDs may violate copyright laws in some countries, so make sure to only rip DVDs that you own or have the necessary rights to.
Overall, DVD ripping software provides a practical solution for watching DVDs on laptops without a built-in DVD player. It gives you the flexibility to convert your DVDs into digital files that can be easily played on a laptop, providing convenience and portability.
Option 3: Streaming services
With the advent of high-speed internet and the popularity of streaming platforms, using streaming services to watch movies and TV shows has become a common choice for many people. By subscribing to streaming services such as Netflix, Amazon Prime Video, Hulu, or Disney+, you can enjoy a wide variety of content without the need for a DVD player. Here’s how it works:
1. Choose a streaming service: Select a streaming service of your choice and sign up for a subscription plan. Most streaming services offer a free trial period to try out their service before committing to a subscription.
2. Install the streaming app: Download and install the streaming app corresponding to the service you have subscribed to. These apps are available for various platforms, including Windows, Mac, iOS, and Android.
3. Launch the streaming app: Open the streaming app on your laptop and sign in to your account using your credentials.
4. Browse and select content: Use the app’s interface to browse through the available movies and TV shows. You can search for specific titles or explore different genres to find something that interests you.
5. Start watching: Once you have selected a movie or TV show, simply click on the play button to start streaming it immediately. The content will be streamed directly to your laptop over the internet.
Streaming services offer a vast library of content with the convenience of on-demand viewing. You can watch movies, TV shows, documentaries, and even exclusive original series, all without the need for physical DVDs or a DVD player.
Furthermore, streaming services often provide additional features like personalized recommendations, multiple profiles, offline downloads, and the ability to resume watching across different devices. This makes it even more convenient to enjoy your favorite content wherever and whenever you want.
Keep in mind that streaming services usually require a stable internet connection with sufficient bandwidth to ensure smooth playback. Additionally, streaming services typically require a subscription fee, although the cost is often much lower than purchasing individual DVDs.
Overall, streaming services offer a convenient and flexible way to watch movies and TV shows on your laptop without the need for a DVD player. With a wide selection of content at your fingertips, you can enjoy endless entertainment options without the hassle of physical discs.
Option 4: Converting DVD to digital formats
Converting DVDs into digital formats is another viable option for watching DVD content on a laptop without a built-in DVD player. This method allows you to create digital copies of your DVDs, making it easier to store, access, and play them on your laptop. Here’s how you can convert DVDs to digital formats:
1. Choose DVD ripping software: Select a reliable and reputable DVD ripping software that supports the conversion of DVDs to digital formats. There are both free and paid software options available, each with their own features and capabilities.
2. Install the DVD ripping software: Download and install the chosen DVD ripping software on your laptop. Make sure to choose the version that is compatible with your operating system.
3. Insert the DVD into an external DVD drive: If you have an external DVD drive, insert the DVD that you want to convert into the drive. Alternatively, you can also use an internal DVD drive if your laptop has one.
4. Launch the DVD ripping software: Open the DVD ripping software on your laptop. Most software programs provide a user-friendly interface with clear instructions on how to proceed.
5. Select the output format: Choose the digital output format that you want the DVD to be converted into. Popular formats include MP4, AVI, MKV, and MOV, which are widely supported by media players.
6. Customize settings: Depending on the DVD ripping software you are using, you may have the option to customize various settings, such as video quality, audio tracks, subtitles, and file size. Adjust these settings according to your preferences.
7. Start the conversion process: Once you have made the necessary settings, click on the “Start” or “Convert” button to initiate the DVD-to-digital conversion process. The software will convert the DVD into the specified format and save the digital copy onto your laptop’s hard drive.
After the conversion process is completed, you can play the digital copy of the DVD on your laptop using a media player software. It’s important to note that converting DVDs to digital formats is typically legal for personal use, as long as you own the original DVD and do not distribute or share the digital copy.
Converting DVDs to digital formats offers several advantages, including easy access to your DVD collection without the need for physical discs, improved portability, and the ability to organize and store your movies digitally. This option also eliminates the risk of DVDs getting scratched or damaged over time.
However, it’s essential to ensure that you are adhering to copyright laws and only converting DVDs that you own or have the necessary rights to. Additionally, keep in mind that the process of converting DVDs to digital formats can be time-consuming, especially for large DVD collections, so be prepared for the time investment required.
Option 5: Using a DVD player app
If you want to watch DVDs on your laptop without a built-in DVD player, using a DVD player app is a convenient solution. DVD player apps are software programs that allow you to play DVD content directly on your laptop. Here’s how you can use a DVD player app:
1. Choose a DVD player app: Look for a reputable DVD player app that is compatible with your laptop’s operating system. There are both free and paid options available, each with its own set of features and functionalities.
2. Install the DVD player app: Download and install the chosen DVD player app on your laptop. Make sure to choose the correct version for your operating system, whether it’s Windows, macOS, or Linux.
3. Insert the DVD into an external DVD drive: If you have an external DVD drive, connect it to your laptop and insert the DVD into the drive. If you have an internal DVD drive, insert the DVD directly into the drive.
4. Launch the DVD player app: Open the DVD player app on your laptop. It should detect the inserted DVD and automatically start playing it. If not, you may need to select the DVD manually within the app.
5. Control DVD playback: Use the DVD player app’s interface to control the playback of the DVD. Most DVD player apps provide standard controls such as play, pause, stop, rewind, and fast forward. You can also navigate through the DVD menu and access special features, if available.
DVD player apps typically offer additional features, such as customizable settings for video and audio playback, support for various DVD formats, and the ability to take screenshots or capture video clips. Some DVD player apps may also provide built-in codecs for smooth playback of different video and audio formats.
Using a DVD player app is a convenient option as it eliminates the need for purchasing additional hardware or converting DVDs to digital formats. It provides a straightforward way to watch DVDs directly on your laptop, making it suitable for occasional DVD playback.
It’s worth noting that DVD player apps may not be able to decrypt or play DVDs with copy protection. In such cases, you might need to install additional software or plugins to overcome the copy protection. Additionally, DVD player apps may consume system resources and require a capable hardware configuration for smooth playback, especially if the DVD contains high-definition content.
Overall, using a DVD player app allows you to enjoy DVD content on your laptop without the need for a built-in DVD player. With the right app, you can have a seamless DVD playback experience and enjoy your favorite movies and TV shows with ease.
Option 6: Virtual DVD drives
Virtual DVD drives offer an alternative solution for watching DVDs on laptops without a built-in DVD player. These virtual drives mimic the functionality of physical DVD drives by creating a virtual disc image that can be mounted and played on your laptop. Here’s how you can use a virtual DVD drive:
1. Install a virtual DVD drive software: There are several virtual DVD drive software programs available, such as DAEMON Tools, Virtual CloneDrive, and PowerISO. Choose a reliable software and download it onto your laptop.
2. Install the virtual DVD drive software: Follow the installation instructions provided by the software. Once installed, the virtual DVD drive software will create a virtual drive on your laptop.
3. Mount the DVD image: Obtain or create an image file of the DVD you want to watch. This can be a disc image file in formats like ISO, BIN, or IMG. Open the virtual DVD drive software, locate the “Mount” or “Add Image” option, and select the DVD image file.
4. Access the virtual DVD drive: Once the DVD image file is mounted, it will be recognized as a virtual disc drive on your laptop. You can access it through the file explorer or the software interface of the virtual DVD drive program.
5. Play the DVD: Open the virtual DVD drive and start playing the DVD content using a media player software. Most laptops come with pre-installed media players, or you can download free media player software like VLC media player or Windows Media Player.
Virtual DVD drives provide a convenient way to watch DVDs on laptops without the need for a physical DVD drive. They allow you to access and play DVD content directly from your laptop’s hard drive, eliminating the need for carrying around physical discs. Furthermore, virtual DVD drives can support various DVD formats and offer additional features like fast disc access and customizable settings.
It’s important to note that virtual DVD drives require sufficient storage space on your laptop’s hard drive to store the DVD image files. Additionally, using virtual DVD drives may consume system resources, so it’s advisable to have a capable hardware configuration for optimal performance.
Overall, virtual DVD drives offer a convenient and efficient solution for watching DVDs on laptops without built-in DVD players. By creating virtual disc images, you can enjoy your favorite DVDs with ease, flexibility, and portability, all within the comfort of your laptop.
Option 7: Rent or borrow an external DVD drive
If you only need to watch DVDs on your laptop occasionally and don’t want to invest in an external DVD drive, another option is to rent or borrow one. This allows you to temporarily access a DVD drive without the need for a permanent purchase. Here’s how you can rent or borrow an external DVD drive:
1. Check with friends and family: Reach out to friends, family members, or colleagues who may have an external DVD drive that you can borrow. They may be willing to lend it to you for a short period of time.
2. Rent from local electronics store: Some local electronics stores, computer rental shops, or libraries may offer external DVD drives for rental. Check with your area’s rental services to see if they have DVD drives available for short-term rental.
3. Online rental services: Explore online rental services that offer external DVD drives. These services typically provide a wide range of tech gadgets for short-term rentals. Make sure to check the terms and conditions, including rental fees and return policies.
4. Seek DVD drive sharing communities: Online communities and forums often have groups or individuals who are willing to lend or rent out their external DVD drives. Look for dedicated communities or platforms where you can connect with people who are willing to share their drives.
When you rent or borrow an external DVD drive, make sure to handle it with care and follow any guidelines provided by the owner or rental service. Return the drive promptly and in the same condition as you received it to maintain a good relationship with the owner or rental provider.
Renting or borrowing an external DVD drive offers a cost-effective solution for occasional DVD playback on your laptop. It allows you to access and enjoy DVD content without the need for a permanent investment in a DVD drive. However, keep in mind that availability may vary depending on your location and network of contacts, so it’s important to explore different options close to you.
Additionally, if you frequently find yourself in need of a DVD drive, it may be worth considering purchasing one or exploring alternative options discussed in the previous sections.
Remember to return the rented or borrowed external DVD drive in a timely manner and express your gratitude to the owner or rental provider for their assistance.
Option 8: Buy an internal DVD drive
If you frequently need to watch DVDs on your laptop or prefer a more permanent solution, buying an internal DVD drive is a viable option. While many modern laptops no longer come with built-in DVD drives, you can purchase an external DVD drive and install it internally in your laptop. Here’s how you can buy and install an internal DVD drive:
1. Research compatible internal DVD drives: Before purchasing an internal DVD drive, ensure that it is compatible with your laptop’s make and model. Check the specifications of your laptop or consult the manufacturer’s website for information on compatible drives.
2. Purchase the internal DVD drive: Look for reputable retailers or online stores that sell internal DVD drives. Make sure to choose one that matches your laptop’s interface, such as SATA or IDE, and has good reviews.
3. Back up your laptop: Before installing the internal DVD drive, it’s always a good idea to back up your laptop’s data to prevent any loss in case of unexpected issues during installation.
4. Prepare the laptop: Shut down your laptop and disconnect it from any power source. Remove the battery if possible. Refer to your laptop’s manual or online resources for instructions on how to safely access the internal components.
5. Install the internal DVD drive: Carefully insert the new internal DVD drive into the appropriate slot in your laptop. Securely attach any required connectors, such as cables or screws, to ensure proper installation. Follow the specific instructions provided with the drive or consult online resources for guidance.
6. Reassemble and test: Put your laptop back together, ensuring that all components are properly secured. Once reassembled, power on your laptop and check if the new internal DVD drive is recognized by the system. If necessary, install any drivers or software provided by the manufacturer to enable proper functionality.
Buying an internal DVD drive allows you to have a dedicated DVD drive directly integrated into your laptop. This provides convenience and eliminates the need for carrying around external drives or relying on alternative methods.
However, it’s important to note that installing an internal DVD drive requires technical knowledge and proficiency. If you are not comfortable with the process, it’s advisable to seek the assistance of a professional or someone experienced in laptop hardware installation.
In addition, purchasing and installing an internal DVD drive may not be economical if you only occasionally need to watch DVDs. Consider your usage requirements and weigh the benefits and costs before deciding to buy and install an internal drive.
Remember to properly maintain and clean your internal DVD drive to extend its lifespan and ensure optimal performance. Follow the manufacturer’s guidelines for usage and keep up with any firmware or driver updates as necessary.
Overall, buying and installing an internal DVD drive can provide a long-term solution for watching DVDs on your laptop. It offers convenience and eliminates the need for external devices or software solutions while giving you easy access to your DVD collection whenever you need it.