
Choosing the Right DVD Software
When it comes to watching DVDs on your laptop, having the right DVD software is crucial. Without the proper software, you may encounter playback issues or be limited in your options. Here are some important factors to consider when choosing the right DVD software for your laptop:
- Compatibility: Ensure that the DVD software you choose is compatible with your laptop’s operating system. Whether you’re using Windows, Mac, or Linux, there are DVD software options available for each platform. Make sure to check the system requirements before downloading or purchasing the software.
- Features: Look for DVD software that offers a wide range of features to enhance your viewing experience. Some advanced features to consider include support for HD DVDs, DVD menu navigation, subtitle customization, audio track selection, and video enhancements.
- User-Friendly Interface: Opt for DVD software with a user-friendly interface that makes it easy to navigate and control playback. A clean and intuitive interface will ensure that you can quickly and effortlessly access the features you need without any confusion or frustration.
- Performance: Consider the performance of the DVD software. Look for software that runs smoothly, doesn’t consume excessive system resources, and provides seamless playback without any lag or buffering issues.
- Codec Support: Check if the DVD software supports a wide range of audio and video codecs. This will ensure that you can play DVDs encoded in various formats without any compatibility issues.
Take your time to research and read reviews about different DVD software options available in the market. Look for software that has positive user feedback and is regularly updated with bug fixes and new features. By choosing the right DVD software, you can enjoy a seamless and high-quality DVD viewing experience on your laptop.
Checking Your Laptop’s DVD Drive
Before you can watch DVDs on your laptop, it’s important to ensure that your laptop’s DVD drive is in working condition. Here are some steps to follow in order to check your laptop’s DVD drive:
- Physical Examination: Start by visually inspecting your laptop’s DVD drive. Check for any physical damage or obstructions such as dust or debris that may be affecting its functionality.
- Device Manager: Open the Device Manager on your laptop. In Windows, you can do this by right-clicking on the Start button and selecting Device Manager. Look for the DVD/CD-ROM drives category and expand it to see if your DVD drive is listed.
- Driver Status: Check the status of your DVD drive’s driver. Right-click on your DVD drive in the Device Manager and select Properties. Under the Driver tab, you should see the driver status. Make sure it is listed as “This device is working properly.”
- Update Driver: If your DVD drive is not working properly, you may need to update the driver. You can do this by right-clicking on your DVD drive in the Device Manager and selecting Update driver. Follow the on-screen instructions to update the driver software.
- Restart Your Laptop: After updating the driver, it’s a good idea to restart your laptop to apply the changes effectively.
- External Drive: If your laptop doesn’t have a built-in DVD drive, you can consider using an external DVD drive. These are portable and can be connected to your laptop via USB. Make sure the external drive is compatible with your laptop and follow the manufacturer’s instructions for installation.
If you have completed the above steps and your DVD drive is in working condition, you can proceed to the next steps of installing DVD player software and playing DVDs on your laptop. However, if you’re experiencing ongoing issues with your DVD drive, it may be necessary to consult a computer technician for further assistance.
Installing DVD Player Software
In order to watch DVDs on your laptop, you will need to install DVD player software. Follow these steps to install DVD player software on your laptop:
- Research and Choose Software: Start by researching different DVD player software options available for your operating system. Look for reputable software that has positive user reviews and offers the features you desire.
- Download or Purchase: Once you have chosen the DVD player software, proceed to either download it from the official website or purchase it if it is a paid software. Make sure to download or purchase the software from a reliable source to avoid any malware or security risks.
- Run the Installer: After the software has finished downloading, locate the installer file and double-click on it to run the installation process. Follow the on-screen instructions to proceed with the installation.
- Agree to Terms and Conditions: During the installation process, you may be prompted to review and accept the software’s terms and conditions. Read through them carefully and click on the “Agree” or “Accept” button to proceed.
- Choose Installation Options: Some DVD player software may offer customizable installation options. You may be able to choose the installation location or select additional features to install. Make your preferred selections and proceed with the installation process.
- Wait for the Installation: The software installation may take a few minutes. Be patient and allow the installation process to complete. Avoid interrupting or closing the installer while it is still running.
Once the installation is complete, you will have the DVD player software installed on your laptop. You can now proceed to the next steps of updating the software, adjusting settings, and playing DVDs on your laptop. Enjoy your movie watching experience!
Updating Your DVD Player Software
Regularly updating your DVD player software is important to ensure optimal performance and compatibility with the latest DVDs. Follow these steps to update your DVD player software on your laptop:
- Check for Updates: Open the DVD player software on your laptop. Look for an option or menu item labeled “Updates,” “Check for Updates,” or something similar. Click on it to check for any available updates.
- Download Updates: If updates are available, the software will prompt you to download them. Follow the on-screen instructions to start the download process. Make sure you have a stable internet connection to ensure a smooth download.
- Install Updates: Once the updates have finished downloading, the software will typically prompt you to install them. Click on the “Install” or “Update” button to begin the installation process. This may take a few moments.
- Restart if Necessary: After the updates have been installed, it’s recommended to restart your laptop. This will help apply the updates effectively and ensure that any necessary changes are implemented properly.
- Automatic Updating: Some DVD player software may have an option for automatic updates. If this feature is available, it’s a good idea to enable it. Automatic updates will ensure that your software stays up to date without requiring manual intervention.
It’s important to note that the process of checking for updates and updating your DVD player software may vary depending on the specific software you are using. Always refer to the software’s documentation or support resources for detailed instructions.
By keeping your DVD player software up to date, you can enjoy the latest features, bug fixes, and improvements. Additionally, updated software ensures compatibility with newer DVD releases, allowing you to enjoy a seamless movie-watching experience on your laptop.
Adjusting DVD Player Settings
After installing DVD player software on your laptop, it’s important to adjust the settings to optimize your DVD viewing experience. Here are some key settings you may want to consider:
- Audio Output: Determine how you want the audio to be outputted. You can choose from options such as stereo, surround sound, or digital audio. Make sure the selected output matches your audio setup or preferences.
- Subtitle Settings: Some DVDs come with subtitle options, and you can adjust the settings to display them as desired. You may have the option to change the font size, color, position, or even enable automatic subtitle display.
- Aspect Ratio: Adjust the aspect ratio to match the screen you are using. Common options include 4:3 (standard) and 16:9 (widescreen). Choose the appropriate aspect ratio to avoid any distortion or black bars on the screen.
- Screen Display: Depending on your preferences and screen size, you may want to adjust the screen display options. You can typically choose between fullscreen, windowed mode, or a custom size.
- Playback Speed: Some DVD player software allows you to adjust the playback speed of the DVD. This can be useful if you want to watch a movie at a faster or slower pace. However, it’s recommended to watch movies at their original speed for the best viewing experience.
- Video Filters: Explore any available video filters that the DVD player software offers. These filters can enhance the picture quality, adjust brightness, contrast, or apply other visual effects to optimize your movie-watching experience.
Remember, the specific settings and options available may vary depending on the DVD player software you are using. Take the time to explore the software’s preferences or settings menu to discover all the available customization options.
By adjusting the DVD player settings to meet your preferences and hardware capabilities, you can enjoy a personalized and immersive DVD viewing experience on your laptop.
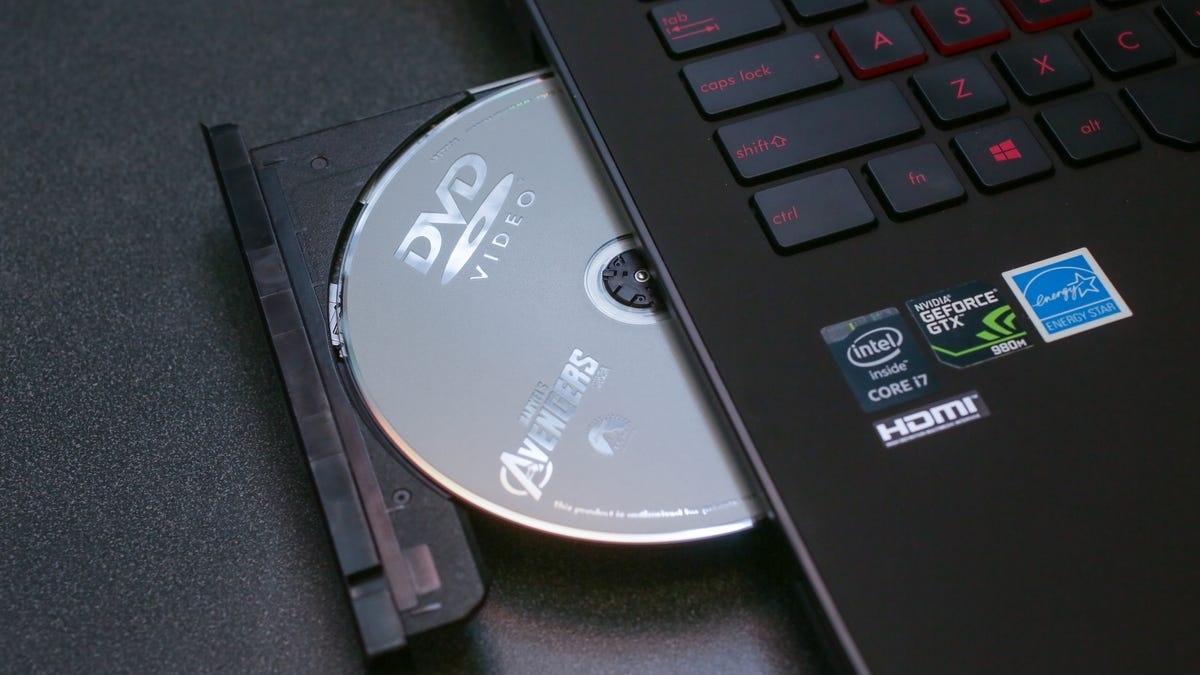
Inserting the DVD into Your Laptop
Once you have chosen the right DVD software and adjusted the settings, it’s time to insert the DVD into your laptop. Follow these simple steps to properly insert a DVD into your laptop:
- Power On Your Laptop: Make sure your laptop is powered on and ready to use. Connect your laptop to a power source if needed, as playing DVDs can consume a significant amount of battery power.
- Locate the DVD Drive: Locate the DVD drive on your laptop. It is typically located on the side or front of the laptop, identified by a small icon or the letters “DVD.” Some laptops have a tray-based DVD drive that needs to be opened manually, while others have a slot-loading drive that accepts the DVD directly.
- Open the DVD Drive: If your laptop has a tray-based DVD drive, gently press the eject button located near the drive to open it. If you have a slot-loading drive, there is no need to open anything as the DVD can be directly inserted into the slot.
- Insert the DVD: Carefully insert the DVD into the open DVD drive or slot, making sure it is seated properly. Do not force the DVD in or apply excessive pressure. The DVD should slide in smoothly without any resistance.
- Close the DVD Drive: If you have a tray-based DVD drive, gently push the tray back into the laptop until it clicks into place. For slot-loading drives, the DVD will be automatically pulled inside once it is inserted.
- Wait for Auto-Play: In most cases, your laptop will recognize the inserted DVD and initiate the playback automatically. Wait for the DVD player software to launch and start playing the DVD. If the DVD player software doesn’t automatically start, you can manually launch it and select the DVD from the software’s interface.
It’s important to note that some laptops may require additional software or drivers to recognize and play DVDs. If your laptop doesn’t recognize the DVD or if you encounter any issues playing it, refer to the laptop’s documentation or check the manufacturer’s website for any necessary updates or troubleshooting steps.
By following these steps, you can successfully insert a DVD into your laptop and begin enjoying your favorite movies or TV series on the go.
Playing the DVD on Your Laptop
Once you have inserted the DVD into your laptop, it’s time to start playing it. Here are the steps to play a DVD on your laptop:
- Launch DVD Player Software: Open the DVD player software on your laptop. You can typically find it in your Start Menu or by clicking on the software’s desktop icon. If the software doesn’t automatically launch, you can manually start it.
- Select the DVD: Once the DVD player software is open, you will usually see an option to select the DVD or a button that says “Play DVD.” Click on this option to indicate that you want to play the DVD you just inserted.
- Wait for Playback to Start: The DVD player software will start reading the DVD and initializing the playback. This may take a few seconds, especially if it’s the first time you are playing the DVD on this laptop. Be patient and wait for the playback to begin.
- Navigate the DVD Menu: Some DVDs have interactive menus that allow you to navigate through chapters, select audio tracks, or enable subtitles. You can use the navigation buttons or menus provided by the DVD player software to access these options and customize your viewing experience.
- Enjoy the Movie: Once the DVD starts playing, sit back, relax, and enjoy the movie on your laptop. You can use the controls provided by the DVD player software to pause, rewind, fast forward, or adjust the volume as per your preferences.
If you encounter any issues during playback, such as stuttering, freezing, or audio problems, try closing any unnecessary programs running in the background and ensure that you are using the latest version of the DVD player software. Additionally, make sure your laptop meets the system requirements for smooth DVD playback.
Playing DVDs on your laptop allows you to enjoy your favorite movies or TV shows wherever you go. Sit back, grab some popcorn, and immerse yourself in the cinematic experience right from your laptop.
Troubleshooting DVD Playback Issues on Your Laptop
Experiencing issues with DVD playback on your laptop can be frustrating. Here are some troubleshooting steps you can follow to resolve common DVD playback issues:
- Clean the DVD: If the DVD is dirty or scratched, it may cause playback problems. Gently clean the DVD with a soft, lint-free cloth, wiping from the center to the edges. Avoid using harsh chemicals or abrasive materials that could further damage the disc.
- Update DVD Player Software: Ensure that you are using the latest version of the DVD player software on your laptop. Check for updates within the software or visit the official website to download the latest version. Updating the software can address any compatibility issues or bugs that may be affecting DVD playback.
- Check DVD Region Code: DVDs are often region-encoded, meaning they can only be played on DVD players with matching region codes. Make sure the DVD you are trying to play matches the region code of your DVD player software. Some DVD player software allows you to change the region code, but be aware that there are limitations and it may not work for all DVDs.
- Adjust Hardware Acceleration: Hardware acceleration settings in your laptop’s graphics card drivers can sometimes cause issues with DVD playback. Lowering the hardware acceleration settings can help resolve stuttering or freezing playback. To adjust the hardware acceleration, right-click on your desktop, select “Display settings” or “Graphics properties,” navigate to the “Advanced” or “Troubleshoot” tab, and adjust the hardware acceleration slider.
- Update Graphics Drivers: Outdated or incompatible graphics card drivers can cause DVD playback issues. Visit the website of your laptop manufacturer or the graphics card manufacturer to download and install the latest drivers for your graphics card. Updated drivers can improve compatibility and performance for DVD playback.
- Disable Background Programs: Other programs running in the background of your laptop can consume system resources and interfere with DVD playback. Close any unnecessary programs and disable antivirus or firewall software temporarily to see if it resolves the issue.
If none of the above steps resolve the DVD playback issues, consider contacting the customer support of your DVD player software or seeking assistance from a computer technician. They can provide further guidance to diagnose and resolve any technical issues specific to your laptop’s configuration.
By troubleshooting DVD playback issues, you can ensure a smooth and enjoyable movie-watching experience on your laptop.
DVD Playback Tips and Tricks
To enhance your DVD viewing experience on your laptop, consider these helpful tips and tricks:
- Adjust Display Settings: Calibrate your laptop’s display settings to optimize your DVD playback. Adjust the brightness, contrast, and color settings to your preference to enhance the visual quality.
- Use Headphones or External Speakers: Consider using headphones or external speakers for better audio quality. This can provide a more immersive and enjoyable audio experience while watching DVDs.
- Utilize Keyboard Shortcuts: Most DVD player software provides keyboard shortcuts for easy and convenient navigation. Familiarize yourself with these shortcuts to control playback, adjust volume, and access menu options without reaching for the mouse.
- Explore Picture-in-Picture: Some DVD player software supports picture-in-picture functionality. This allows you to watch a DVD while also doing other tasks on your laptop. Take advantage of this feature to multitask and make the most of your time.
- Customize Subtitles: If your DVD includes subtitles, explore the options within the DVD player software to customize the subtitle appearance. You can change the font, size, color, and even adjust the timing to ensure optimal readability and enjoyment.
- Make Use of Audio and Video Effects: Many DVD player software applications offer built-in audio and video effects. Experiment with these effects to enhance your viewing experience. You can adjust the brightness, add filters, or even apply equalizer settings to optimize the audio output.
- Take Breaks and Pause: While watching longer movies or TV series, take breaks and pause as needed. This allows you to rest and prevent fatigue, ensuring that you fully enjoy the viewing experience.
- Organize Your DVD Collection: If you have a large DVD collection, consider organizing them in a dedicated DVD storage case or shelf. This makes it easier to find and select your desired DVD for playback on your laptop.
- Backup DVDs: Consider creating backup copies of your DVDs for convenient and safe storage. This can protect your original DVDs from damage and allow you to watch the backup copies without the need to handle the physical discs.
- Explore Bonus Features: DVDs often come with bonus features such as behind-the-scenes footage, interviews, or deleted scenes. Take the time to explore these extra features to gain deeper insights into your favorite movies or TV shows.
By implementing these tips and tricks, you can enhance your DVD viewing experience, making it more enjoyable, immersive, and customized to your preferences.
Final Thoughts
Watching DVDs on your laptop can provide you with a convenient and portable way to enjoy your favorite movies, TV shows, and other video content. By following the steps outlined in this guide, you can successfully watch DVDs on your laptop and overcome any potential challenges that may arise. Remember to choose the right DVD software, check your laptop’s DVD drive, adjust the settings, and troubleshoot any playback issues that may occur.
Keep in mind that technology is constantly evolving, and new advancements may affect DVD playback in the future. Stay updated with the latest software updates, drivers, and system requirements to ensure smooth and seamless DVD playback on your laptop.
Lastly, don’t forget to sit back, relax, and enjoy the cinematic experience that DVDs offer. Whether you’re rewatching an old favorite or discovering a new film, the joy of watching movies on your laptop is unparalleled. Enhance your viewing experience by adjusting settings, exploring bonus features, and making use of various tips and tricks.
Now, grab some popcorn, insert your favorite DVD into your laptop, and embark on a captivating movie-watching journey from the comfort of your own laptop screen.