Choosing the Right Materials
When it comes to drawing a watch, choosing the right materials is essential to ensure a high-quality result. Here are some tips on selecting the best tools and materials for your watch drawing:
Paper: Start by choosing a smooth and sturdy paper that can handle watercolor or marker ink without bleeding or warping. Consider using a heavier weight paper, such as Bristol board or illustration board, for better durability.
Pencils: Begin the sketching process with a set of high-quality graphite pencils. Different lead hardnesses, ranging from 2H (hard) to 6B (soft), will allow you to achieve a variety of shading effects. Experiment with different pencil grades to find the ones that suit your drawing style.
Erasers: Invest in a good quality kneaded eraser, as it can be shaped to erase fine details and create subtle highlights. Additionally, have a vinyl or plastic eraser for more precise erasing and correcting mistakes.
Rulers and Compass: To ensure accuracy in your watch drawing, have a straightedge ruler and a compass. These tools will help you create straight lines, perfect circles, and precise measurements.
Inking Pens: Once you have finished the initial pencil sketch, you may want to outline and define your drawing using waterproof inking pens. Micron pens or technical pens with various nib sizes are popular choices among artists.
Colored Pencils or Markers: If you plan to add color to your watch drawing, colored pencils or markers are excellent options. Colored pencils allow for more control and blending, while markers provide vibrant and smooth coverage.
Watercolor or Acrylic Paints: For a more advanced approach, you can incorporate watercolor or acrylic paints to bring your watch drawing to life. Use high-quality paints and brushes to achieve the desired color intensity and texture.
By selecting the right materials, you can elevate the overall quality of your watch drawing. Remember to experiment and find the tools that best suit your preferences and artistic style. With the right materials in hand, you are ready to move on to the next step: understanding the basic shapes of a watch.
Understanding the Basic Shapes of a Watch
Before diving into the details of drawing a watch, it’s important to understand the basic shapes that make up its structure. By breaking down the watch into simple shapes, you can create a solid foundation for your drawing. Here are the key elements to consider:
Circle: The watch face, also known as the dial, is typically in the shape of a circle. This circular shape serves as the canvas for the rest of the watch’s components. It’s important to get the proportions and placement of the circle right, as it sets the stage for the rest of the drawing.
Ovals and Ellipses: Watches often have oval or elliptical shapes for the case and bezel. These shapes can vary in size and orientation depending on the style of the watch. Pay attention to the angles and perspective to accurately depict the three-dimensional form of the watch.
Rectangles and Squares: The watch face is usually surrounded by a rectangular or square-shaped frame called the case. This frame houses the inner workings of the watch and provides a boundary for the display. Take note of the proportions and angles of the case to ensure the overall balance of your drawing.
Curves and Arcs: Watches often have curved components, such as the lugs and crown guards. These curves add elegance and functionality to the design. Pay attention to the subtle curves and arcs within the watch’s structure to capture its distinctive look.
Lines and Segments: Various lines and segments help define the details of a watch. These include the watch hands, markers or numbers on the dial, subdials, and the crown. Pay close attention to the angles, lengths, and thicknesses of these lines to accurately depict the watch’s features.
Proportions and Symmetry: Achieving proper proportions and symmetry is crucial in drawing a realistic watch. Take note of the relative sizes and placements of the different components. Use guidelines and measurements to ensure accuracy and symmetry throughout your drawing.
By understanding the basic shapes that make up a watch, you can start sketching its overall structure with confidence. Familiarize yourself with these shapes and their relationships before moving on to adding the intricate details of the watch face. With a solid foundation, you’ll be well on your way to creating a stunning watch drawing.
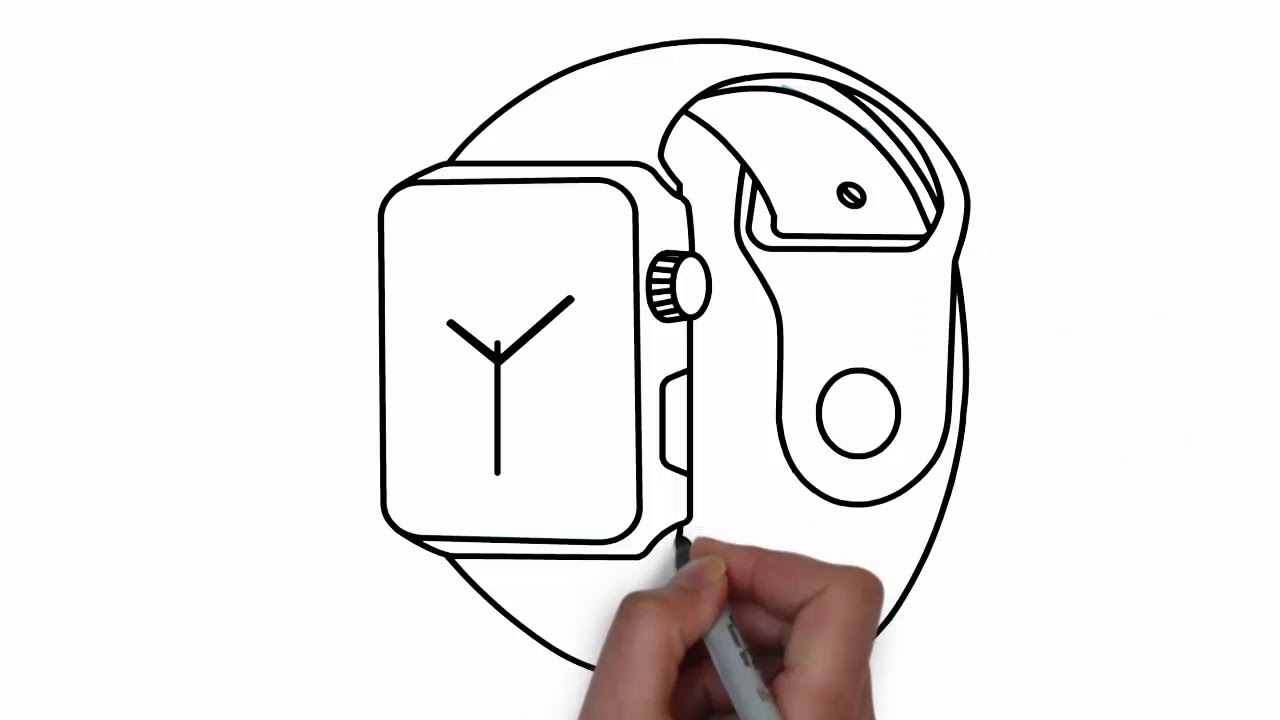
Sketching the Outer Frame of the Watch
Now that you have a solid understanding of the basic shapes of a watch, it’s time to sketch the outer frame. This step lays the groundwork for the rest of your drawing and helps establish the size and proportions of the watch. Follow these steps to sketch the outer frame:
Step 1: Start with the watch face: Begin by lightly sketching a circle to represent the watch face. Use guidelines or construction lines to ensure the circle is symmetrical and centered on your paper. Adjust the size of the circle according to your desired proportions for the watch.
Step 2: Add the case: Next, draw a rectangle or square around the watch face to represent the case. Pay attention to the perspective and angles to make it appear three-dimensional. Use light, thin lines for this initial sketch, as you might need to make adjustments later.
Step 3: Sketch the lugs: The lugs are the metal attachments on the sides of the case that hold the strap or bracelet. They often have a curved or angular shape. Draw these lugs extending out from the case, taking care to maintain the correct proportions and angles.
Step 4: Define the crown: Locate the position of the crown, which is the small knob used for adjusting the time. Depending on the watch style, it can be positioned at various locations on the case. Draw a small circle or oval shape where the crown should be.
Step 5: Refine the outer frame: Once you have sketched the basic components, go over the lines to refine the outer frame of the watch. Use slightly thicker and darker lines to add more definition and clarity. Adjust any proportions or angles that need fine-tuning to ensure a balanced and accurate representation.
Step 6: Erase unnecessary guidelines: Use an eraser to remove any construction lines or guidelines that are no longer needed. Be careful not to erase any essential lines, such as the outer frame or component details. Lightly erase the unnecessary lines to maintain the integrity of your sketch.
Remember, during this stage, keep your lines light and loose. It’s okay if your initial drawings are not perfect – they are meant to serve as a guide for the subsequent steps. Once you are satisfied with the outer frame, you’re ready to move on to the next step: adding details to the watch face.
Adding Details to the Watch Face
With the outer frame of the watch sketched, it’s time to focus on adding details to the watch face. This step brings the watch to life and gives it its distinct character. Follow these steps to add details to the watch face:
Step 1: Draw the hour markers: Begin by marking the positions for the hour markers. These can be represented by simple lines or numbers, depending on the style of the watch. Consider the size, length, and spacing of the markers to ensure they are evenly distributed around the dial.
Step 2: Add the minute markers: Next, sketch the minute markers between the hour markers. These shorter lines or smaller divisions help indicate the minutes more precisely. Again, ensure equal spacing and accuracy in the placement of these markers.
Step 3: Incorporate subdials or complications: If the watch you are drawing has additional features like subdials or complications, now is the time to add them. These smaller dials or displays may show the date, chronograph functions, or other information. Pay attention to their placements and proportions.
Step 4: Sketch the hands: Draw the hour, minute, and second hands of the watch. These can vary in length, width, and shape depending on the design. Be mindful of their positions relative to the hour markers, ensuring they align correctly to indicate the time. Use light, flowing lines to create a sense of movement.
Step 5: Define the watch logo: Many watches have a logo or brand name on the watch face. Research the specific watch you’re drawing and replicate the logo or emblem with attention to detail. Keep in mind that logos might vary in size or placement.
Step 6: Refine and add depth: Go over your initial sketches, adding more definition and depth to the watch face. Use darker lines or shading techniques to create contrast and give the watch a three-dimensional appearance. Pay attention to highlights and shadows to make the details pop.
Remember to refer to reference images or actual watches for accurate placement and proportions of the details. Taking your time to add these intricate details to the watch face will bring it closer to its final form. Once you’re satisfied with the details, you can move on to the next step: drawing the hour and minute hands.
Drawing the Hour and Minute Hands
The hour and minute hands are critical elements of a watch’s design, as they indicate the time. Drawing them accurately and proportionally is crucial to achieving a realistic depiction. Follow these steps to draw the hour and minute hands:
Step 1: Determine the length and thickness: Decide on the desired length and thickness of the hour and minute hands. Consider the size and style of the watch, as well as any specific design elements that may influence the shape and dimensions of the hands.
Step 2: Start with the hour hand: Begin by drawing the hour hand, which is typically shorter and thicker than the minute hand. Position it at the appropriate hour, aligning it with the corresponding hour marker on the watch face. Draw a straight or slightly tapered shape, depending on the design.
Step 3: Draw the minute hand: Next, sketch the longer, thinner minute hand. Position it at the correct minute, aligning it with the appropriate minute marker or division on the dial. The minute hand is often narrower and more pointed than the hour hand.
Step 4: Add depth and style: To make the hour and minute hands stand out, add depth and style to them. This can be achieved by drawing a slight curve or taper along the length of the hands. Consider incorporating details such as a pointed tip or a different color at the base of the hands.
Step 5: Fine-tune the proportions: Pay close attention to the proportions and alignment of the hour and minute hands. Ensure that they are in proportion to the watch face and correctly positioned relative to the hour and minute markers. Use reference images or actual watches for accuracy.
Step 6: Erase unnecessary guidelines: Once you are satisfied with the hour and minute hands, erase any unnecessary guidelines or construction lines that were used as a reference. Be careful not to erase any essential parts of the hands or details on the watch face.
Remember that the hour and minute hands should be visually distinct from each other and easy to differentiate at a glance. Taking the time to carefully draw and refine these elements will enhance the overall realism and accuracy of your watch drawing. With the hands in place, you can move on to the next step: adding numbers or markers to the watch face.
Adding Numbers or Markers to the Watch Face
Adding numbers or markers to the watch face is an essential step in drawing a watch, as it helps to indicate the precise time. These elements add visual interest and functionality to the design. Follow these steps to add numbers or markers to the watch face:
Step 1: Choose a style: Consider the style and aesthetic of the watch you are drawing. Decide whether you want to use Arabic numerals, Roman numerals, or simple marker dots to indicate the hours. Each style can lend a different tone to your watch drawing.
Step 2: Position the numbers or markers: Start by positioning the numbers or markers at their corresponding hours on the watch face. Use light pencil marks or dots to guide you in placing them accurately. Ensure that they align correctly with the hour and minute hands.
Step 3: Determine the size and spacing: Decide on the size and spacing of the numbers or markers. Consider the overall dimensions of the watch face and the desired legibility. Ensure that the size and spacing are consistent and aesthetically pleasing.
Step 4: Add the numbers or markers: Carefully draw the numbers or markers on the watch face using a thin and precise line. If you’re using numerals, make sure they are evenly shaped and proportioned. For markers, keep them uniform in size and shape for a cohesive look.
Step 5: Refine and add style: Go over the initial markings, making them more defined and distinct. Use thicker or darker lines to give the numbers or markers a polished appearance. Consider adding styling details, such as serifs to the numerals or different shapes for the markers.
Step 6: Erase unnecessary guidelines: Once you are satisfied with the placement and style of the numbers or markers, erase any unnecessary guidelines or construction lines. Be gentle while erasing, ensuring that you don’t accidentally remove any essential details or other elements on the watch face.
Adding numbers or markers to the watch face enhances its functionality and adds a finishing touch to your drawing. Remember to pay attention to proportions, alignment, and legibility. With the numbers or markers in place, you can proceed to the next step: creating a strap or band for the watch.
Creating a Strap or Band for the Watch
One of the distinguishing features of a watch is its strap or band. Creating a strap that complements the design of the watch enhances its overall appearance. Follow these steps to create a strap or band for your watch drawing:
Step 1: Choose a style: Consider the style and material of the strap you want to depict. There are various options, such as leather, metal, fabric, or rubber. Think about the overall look and feel you want to achieve for your watch drawing.
Step 2: Determine the width: Decide on the width of the strap, taking into account the size and proportion of the watch. The width may vary depending on the style of the watch and personal preference.
Step 3: Sketch the strap: Start sketching the strap by drawing two parallel lines on either side of the watch case. These lines represent the top and bottom edges of the strap. Pay attention to the angles and curves where the strap connects to the case.
Step 4: Add details: Depending on the material and style of the strap, add appropriate details. For a leather strap, you can draw stitching lines along the edges. For a metal bracelet, depict individual links. Use reference images or actual watches as a guide for accuracy.
Step 5: Adjust the length: Consider the length of the strap in relation to the size of the watch. Ensure it is long enough to wrap comfortably around the wrist. You can extend the strap beyond the watch case and add a buckle or clasp detail if desired.
Step 6: Refine and add texture: Go over the initial strap sketch, refining the lines and adding texture or patterns as necessary. For example, you can add shading or cross-hatching to create a textured appearance for a leather strap. Make sure to maintain consistency in the thickness and style of the lines.
Step 7: Erase unnecessary guidelines: Once you are satisfied with the strap, erase any construction lines or guidelines that are no longer needed. Be careful not to erase any essential parts of the strap or details on the watch face.
Creating a strap or band for the watch completes the overall look and adds depth to your drawing. Remember to consider the style, width, and material of the strap to ensure it complements the watch’s design. With the strap in place, you can move on to the next step: refining and erasing guidelines.
Refining and Erasing Guidelines
Once you have sketched the main components of the watch, it’s time to refine your drawing and remove any unnecessary guidelines or construction lines. This step polishes your work, making it cleaner and more visually appealing. Follow these steps to refine your drawing and erase guidelines:
Step 1: Assess your drawing: Take a step back and evaluate your drawing as a whole. Look for any areas that may require adjustments or refinement. Pay attention to proportions, symmetry, and overall balance.
Step 2: Pencil or eraser: Use a soft pencil to darken the final lines of your drawing. Make sure to maintain a consistent line weight and style throughout. For areas where guidelines overlap or need to be removed, use a kneaded eraser or a vinyl eraser.
Step 3: Erase lightly: When erasing guidelines, do so gently and lightly to avoid smudging or damaging the paper. Use precise, controlled movements to remove the unwanted lines, ensuring that you don’t erase any essential parts of your drawing.
Step 4: Focus on details: Pay attention to the smaller details of your drawing. Refine the shapes, curves, and angles to achieve a more polished appearance. Add finer lines or shading where necessary to enhance the three-dimensional effect.
Step 5: Check for symmetry: Ensure that your drawing is symmetrical by comparing both sides. Make any adjustments needed to correct any discrepancies. A symmetrical drawing creates a more balanced and pleasing visual composition.
Step 6: Evaluate the overall look: Step back and observe your drawing from a distance. Check if the lines and details flow smoothly and if the watch looks accurate and well-proportioned. Make any final adjustments or refinements that you feel are necessary to achieve your desired result.
Remember, the goal of refining and erasing guidelines is to enhance your drawing and bring out its best qualities. Take your time and be patient with this step, as it can greatly impact the final outcome of your watch drawing. With the guidelines refined and erased, you can now move on to the next step: inking the final lines of the watch.
Inking the Final Lines of the Watch
Inking the final lines of your watch drawing adds a professional and finished appearance to your artwork. It involves creating clean and precise lines that make your drawing stand out. Follow these steps to ink the final lines of your watch:
Step 1: Choose the right pen: Select a pen or marker that suits your preferred line style and thickness. Fine-tip drawing pens or technical pens are commonly used for inking. Experiment with different pen sizes to find the one that best suits your drawing needs.
Step 2: Start with the outlines: Begin by outlining the outer frame of the watch. Use confident, smooth strokes to carefully trace over the pencil lines. Take your time and pay attention to the details to ensure accuracy and precision.
Step 3: Continue with the details: Once you have outlined the outer frame, move on to inking the rest of the components, such as the hour and minute hands, numbers or markers, and any other design elements. Ink each part with steady, deliberate lines.
Step 4: Refine and correct mistakes: As you ink, keep an eye out for any inconsistencies or mistakes. Use correction fluid or white ink to fix any errors, ensuring that your lines remain clean and crisp. Take your time to achieve the desired level of precision.
Step 5: Consider line variation: To add visual interest to your watch drawing, vary the line weight in areas where it makes sense. Thicker lines can be used to emphasize certain details or areas of shadow, while thinner lines can denote lighter areas or subtle outlines.
Step 6: Let the ink dry: Allow the ink to dry completely before erasing any remaining pencil marks. This will prevent smudging or smearing of the ink. Take this time to ensure that you haven’t missed any details or areas that need to be filled in.
Inking the final lines of your watch drawing adds definition and refinement to your artwork. The clean and precise lines achieved through inking elevate the overall quality and make your drawing visually striking. With the final lines inked, you’re ready to move on to the next step: coloring and shading the watch.
Coloring and Shading the Watch
Adding color and shading to your watch drawing brings it to life and adds depth and dimension. By carefully selecting and applying colors, you can enhance the realism and visual appeal of your artwork. Follow these steps to effectively color and shade your watch:
Step 1: Choose your color palette: Decide on the colors you want to use for the different elements of the watch. Consider reference images or the actual watch you are drawing for accuracy. Experiment with different shades and tones to achieve the desired effect.
Step 2: Establish light source: Determine the direction of the light source in your drawing. This will influence how the shadows and highlights are positioned. Consistency in the placement of light and shadows is crucial for a realistic appearance.
Step 3: Base color: Start by applying the base color to each component of the watch. Use light, even layers and blend colors as necessary. Consider the material of each part and use reference images or objects as a guide for color accuracy.
Step 4: Add shadows and shading: Use a slightly darker shade of the base color or a complementary color to create shadows. Observe where shadows would naturally fall based on the light source and add them accordingly. Gradually build up the shading, blending it smoothly for a realistic effect.
Step 5: Highlight areas: Identify the areas that would catch the most light and add highlights. Use a lighter shade or even a metallic color for reflective surfaces. Apply these highlights sparingly and blend them softly into the surrounding colors for a subtle, three-dimensional effect.
Step 6: Texture and detailing: Consider adding texture and small details to enhance the realism of your watch. For example, on a metal surface, use stipling or cross-hatching techniques to mimic texture. Use a fine-tipped pen or marker to add precise details such as engraved patterns or logos.
Step 7: Review and refine: Step back and evaluate your coloring and shading. Ensure that the colors are well-balanced and that the shading accurately represents the form and structure of the watch. Make any necessary adjustments or refinements to achieve your desired result.
Coloring and shading play a crucial role in elevating your watch drawing. Take your time and build up the colors and shading gradually to achieve a realistic and visually captivating artwork. With the watch colored and shaded, you’re ready to move on to the next step: adding highlights and reflections.
Adding Highlights and Reflections
Adding highlights and reflections to your watch drawing adds a touch of realism and enhances the overall visual appeal. These elements bring out the shine, dimension, and reflective properties of various surfaces. Follow these steps to effectively add highlights and reflections to your watch:
Step 1: Identify light sources: Determine the position and intensity of the light sources in your drawing. This will influence where highlights and reflections appear on the watch’s surfaces. Consistency in light sources across the entire drawing is essential for a cohesive look.
Step 2: Highlight metallic surfaces: For metallic surfaces such as the watch case or metal bracelet, identify areas that would catch and reflect light the most. Use a lighter shade or metallic color to apply highlights to these areas. Subtly blend the highlights into the surrounding colors for a realistic effect.
Step 3: Use reflective surfaces: Watch faces often have reflective surfaces such as glass or polished metal. Create reflections by adding lighter tones or white highlights where the light hits these surfaces. Be mindful of the shape and angle of the reflections, ensuring they correspond accurately with the watch’s form.
Step 4: Add depth to textured surfaces: If the watch has textured surfaces like a brushed metal finish or a textured strap, emphasize the depth by selectively adding shading and highlights. Use a combination of darker tones in the recessed areas and lighter tones on the raised parts to create the desired effect.
Step 5: Consider glass or crystal elements: If the watch has a glass or crystal cover, depict reflections and highlights on its surface. Use lighter tones or even white to represent light reflecting off the glass. Pay attention to the angles and curves of the glass to ensure the reflections are positioned realistically.
Step 6: Review and refine: Step back and assess your highlights and reflections. Ensure that they are consistent with the light sources and add depth and dimension to your drawing. Make any necessary adjustments or refinements to achieve the desired level of realism.
Adding highlights and reflections takes your watch drawing to the next level by capturing the play of light and enhancing the materials and surfaces. Take your time and be observant of the real-life counterparts of the watch you are drawing to achieve a convincing result. With the highlights and reflections added, your watch drawing is complete and ready for display.