
Common Causes of Dropped Signals
Having reliable wireless internet is essential for our interconnected lives. However, it can be frustrating when our Wi-Fi signals suddenly drop, disrupting our online activities. Understanding the common causes of dropped signals can help troubleshoot and improve your wireless connection. Let’s explore some of the key factors that can contribute to this issue.
1. Interference from other devices: Other electronic devices, such as cordless phones, baby monitors, or microwave ovens, can interfere with Wi-Fi signals. Make sure your router is placed away from these potential sources of interference.
2. Distance from the router: The farther you are from the router, the weaker the Wi-Fi signal becomes. If possible, try moving closer to the router to improve the signal strength in your area.
3. Obstacles in the way: Thick walls, floors, or furniture can obstruct Wi-Fi signals. Consider repositioning your router or removing any physical barriers that may be blocking the signal.
4. Outdated router firmware: Router manufacturers periodically release firmware updates to address bugs, improve performance, and add new features. Check for firmware updates for your router and install them to ensure optimal performance.
5. Channel interference: Wi-Fi routers can operate on different channels, and if multiple routers in your area are using the same channel, it can cause interference. Access your router’s settings and switch to a less crowded channel.
6. Overloaded network: If too many devices are connected to the Wi-Fi network simultaneously, the network’s performance can suffer. Consider limiting the number of devices connected or upgrading to a higher-capacity router.
By understanding these common causes, you can troubleshoot and address the dropped signal issues effectively. In the following section, we will discuss some troubleshooting steps to help you overcome spotty connections and improve your overall experience.
Interference from other devices
One of the common causes of dropped signals and spotty Wi-Fi connections is interference from other devices. Electronic devices like cordless phones, baby monitors, and microwave ovens operate on frequencies that can interfere with Wi-Fi signals. This interference can weaken the Wi-Fi signal strength and cause disruptions in your connection.
To minimize interference from other devices, it’s important to ensure that your Wi-Fi router is placed away from them. Keep your router at a good distance from cordless phones and baby monitors, preferably in a different room. These devices can emit signals on frequencies that overlap with Wi-Fi signals, leading to signal degradation or dropouts.
Microwave ovens, especially older models, can also interfere with Wi-Fi signals. The electromagnetic waves generated by microwave ovens operate in a similar frequency range as Wi-Fi signals. So, try to keep your router away from the kitchen or any other areas where microwave ovens are frequently used.
If you notice that your Wi-Fi connection deteriorates when using certain devices, it might be worth considering upgrading to newer models that operate on different frequencies and have better interference shielding. This can help alleviate the interference issues and improve your overall Wi-Fi performance.
Keep in mind that not only external devices but also neighboring Wi-Fi networks can cause interference. In crowded areas where multiple Wi-Fi networks are present, the channels used by these networks can overlap, leading to signal interference. Access your router’s settings and explore the available channels to find one that is less congested. By switching to a different channel, you can minimize the chances of interference from neighboring networks and enhance your Wi-Fi connection stability.
Distance from the router
The distance between your device and the Wi-Fi router plays a crucial role in determining the strength of the Wi-Fi signal you receive. The farther you are from the router, the weaker the signal becomes, which can result in dropped signals and spotty connections.
When you are closer to the router, the signal has less distance to travel, and hence, it is stronger and more stable. However, as you move farther away, obstacles such as walls, floors, and furniture can attenuate the Wi-Fi signal, leading to a decrease in signal strength.
If you are experiencing frequent dropped signals, check the location of your router. It is recommended to position the router in a central and elevated location in your home or office. This allows for better signal distribution and coverage throughout the desired area.
If the router is located in a different room or on a different floor from where you primarily use your devices, consider moving closer to the router or positioning it closer to your main work or living area. This can significantly improve the Wi-Fi signal strength and reduce the chances of dropped signals.
In some cases, you may find it challenging to move closer to the router, especially in larger homes or spaces with multiple floors. In such situations, you can consider using Wi-Fi range extenders or mesh network systems. These devices help extend the reach and coverage of your Wi-Fi network, ensuring a stronger signal even in far corners of your home.
It’s important to note that while the distance from the router affects the signal strength, it is not the only factor that impacts your Wi-Fi connection. Interference from other devices, obstacles, and network congestion can also contribute to dropped signals. Therefore, it’s crucial to consider all these factors and implement the necessary steps to enhance your Wi-Fi connection stability.
Obstacles in the way
Obstacles in the path between your device and the Wi-Fi router can significantly impact the strength and stability of your wireless connection. Common obstacles include walls, floors, furniture, and other physical barriers that obstruct the Wi-Fi signal.
When Wi-Fi signals encounter obstacles, they can be absorbed, reflected, or diffused, causing signal loss and weakening the overall strength. Thick walls made of concrete or brick, for example, are especially effective at blocking Wi-Fi signals, resulting in reduced coverage and increased potential for dropped signals.
To improve your Wi-Fi connection and minimize the impact of obstacles, there are a few simple steps you can take:
Reposition your router: Try to position your router in a central location within your home, away from dense walls or large pieces of furniture. This will help ensure that the Wi-Fi signals are able to reach all areas without too many obstructions. Additionally, placing the router on a higher shelf or mounting it on a wall can help improve signal propagation.
Remove physical barriers: Identify any physical objects that may be blocking the Wi-Fi signal and try to reposition them. For example, if you have a large bookshelf or a cabinet placed in front of the router, consider moving it to another location to allow for better signal transmission.
Consider Wi-Fi signal extenders: If you have areas in your home that consistently experience weak Wi-Fi signals due to physical obstacles, you may want to consider using Wi-Fi signal extenders or repeaters. These devices can amplify the signal and extend its reach into hard-to-reach areas.
Use a mesh network: Mesh network systems consist of multiple interconnected devices that communicate with one another to provide seamless Wi-Fi coverage throughout your home. These systems can overcome obstacles and interference by creating a network of interconnected access points.
By addressing obstacles and optimizing your Wi-Fi network’s physical layout, you can improve the signal strength and minimize the likelihood of experiencing dropped signals. Remember to experiment with different router placements and consider using additional devices to extend and enhance your wireless coverage.
Outdated router firmware
Router firmware serves as the operating system of your Wi-Fi router, and like any software, it requires regular updates to address bugs, security vulnerabilities, and enhance performance. If your router is running outdated firmware, it can contribute to dropped signals and spotty connections.
Router manufacturers release firmware updates periodically to improve the overall functionality and stability of their devices. These updates often include optimizations for network performance, bug fixes, and security enhancements. Therefore, it is essential to keep your router’s firmware up to date.
Updating router firmware is relatively straightforward. Most modern routers have a built-in web interface that allows you to access the router’s settings and check for firmware updates. To update your router’s firmware, follow these steps:
- Launch a web browser on a device connected to your Wi-Fi network.
- Enter your router’s IP address in the address bar. You can find the IP address in the router’s documentation or on the bottom of the router itself.
- Enter the router’s administrative username and password when prompted. If you haven’t changed these credentials, they are often set to default values such as “admin” for both the username and password.
- Navigate to the firmware update section. This may vary depending on your router model, but it is usually located under the “Advanced settings” or “Administration” tab.
- Check for firmware updates. If a new update is available, follow the on-screen instructions to download and install it.
- After the firmware update is complete, restart the router to apply the changes.
By regularly updating your router’s firmware, you can ensure that you have the latest features, bug fixes, and security patches. This can help optimize your Wi-Fi connection, improve signal stability, and reduce instances of dropped signals.
It’s worth noting that some newer routers have the option to automatically check for and install firmware updates. If your router supports this feature, enable it to ensure you are always running the latest firmware without manual intervention.
Keeping your router’s firmware up to date should be on your regular maintenance checklist to maintain optimal Wi-Fi performance.
Channel interference
Wi-Fi routers operate on different channels within the 2.4 GHz and 5 GHz frequency bands. When multiple routers in close proximity use the same channel, it can lead to channel interference, resulting in inconsistent Wi-Fi performance and dropped signals.
Channel interference can occur in crowded environments such as apartment buildings or offices where several Wi-Fi networks overlap. The interference disrupts the Wi-Fi signals, leading to reduced signal strength and increased chances of dropped connections.
To mitigate channel interference and improve your Wi-Fi connection stability, follow these steps:
- Access your router’s settings by entering the router’s IP address into a web browser.
- Enter the administrative username and password to log in.
- Locate the wireless settings or Wi-Fi settings section.
- Look for the option to change the channel. It might be labeled as “Channel” or “Wireless Channel.”
- Select a different channel from the available options. Channels 1, 6, and 11 are typically recommended for the 2.4 GHz band, as they have the least overlap.
- Save the changes and restart the router for the new channel settings to take effect.
By switching to a less congested channel, you can reduce the likelihood of interference and improve your Wi-Fi signal strength and connection stability.
It’s worth noting that modern routers may offer an option called “Auto” for channel selection. Enabling this feature allows the router to automatically choose the least congested channel, optimizing your Wi-Fi performance without manual intervention.
Additionally, some routers can perform automatic channel scanning, monitoring the wireless environment for interference and adjusting the channel settings accordingly. If your router has this capability, enable it to ensure that you are always on the best channel for optimal Wi-Fi performance.
Regularly checking and adjusting your router’s channel settings can help minimize interference, improve signal quality, and reduce the chances of experiencing dropped signals or spotty connections.
Overloaded network
An overloaded network with too many devices connected simultaneously can strain the bandwidth and cause dropped signals and spotty Wi-Fi connections. When multiple devices compete for the available network resources, it can lead to congestion and degraded performance.
Here are some steps you can take to address an overloaded network:
1. Limit the number of connected devices: Consider reducing the number of devices connected to your Wi-Fi network, especially if some of them are not actively in use. Disconnecting or disabling Wi-Fi on devices that are not being utilized can free up network resources and improve overall performance.
2. Upgrade your router: If your router is an older model with limited processing power and bandwidth capabilities, it may struggle to handle a high number of connected devices. Upgrading to a newer, more powerful router can alleviate network congestion and provide better performance.
3. Enable Quality of Service (QoS): Quality of Service is a feature available on many routers that allows you to prioritize certain types of network traffic over others. By enabling QoS and setting priorities, you can ensure that essential tasks like video streaming or online gaming receive preferential treatment, reducing the likelihood of dropped signals during critical activities.
4. Separate networks for specific devices: Some routers support the creation of multiple networks, allowing you to create separate networks for specific devices or groups of devices. This can help distribute the load and prevent network congestion. For example, you can have a separate network for smart home devices, leaving the primary network dedicated to computers and smartphones.
5. Optimize your network settings: Check your router’s settings for options like bandwidth allocation, channel width, and transmit power. Adjusting these settings based on your specific needs and the number of connected devices can help optimize your network performance and reduce the chances of dropped signals.
6. Upgrade your internet plan: If you consistently experience network congestion and dropped signals despite optimizing your router and network settings, consider upgrading your internet plan with a higher bandwidth or speed. A faster internet connection can better accommodate multiple devices and relieve the strain on your network.
By implementing these measures, you can alleviate network congestion, distribute the load more efficiently, and minimize the likelihood of experiencing dropped signals and spotty connections.
Troubleshooting Spotty Connections
Dealing with spotty Wi-Fi connections can be frustrating, but there are several troubleshooting steps you can take to improve your wireless experience. Here are some tips to help you address spotty connections:
1. Check your Wi-Fi signal strength: Start by checking the signal strength on your device. If the signal is weak, it may be an indicator of distance from the router or other interference issues. Move closer to the router to see if the signal strengthens, or consider repositioning the router for better coverage.
2. Restart your router and modem: Sometimes, a simple reboot of your router and modem can resolve connectivity issues. Turn off both devices, wait for a few seconds, then turn them back on. This can refresh the network connection and potentially resolve any temporary glitches or conflicts.
3. Update your router firmware: As mentioned before, outdated firmware can contribute to spotty connections. Check for firmware updates for your router and install them to ensure optimal performance and compatibility with the latest devices.
4. Change your Wi-Fi channel: If you’re experiencing interference from neighboring Wi-Fi networks, accessing your router’s settings and switching to a less crowded channel can help improve connection stability. Experiment with different channels to find the one with the least interference.
5. Clear your device cache: Over time, cached files and data on your devices can accumulate and weigh down your Wi-Fi connection. Clearing the cache can help optimize your device’s performance and potentially improve connectivity. Consult your device’s settings or user manual for instructions on clearing the cache.
6. Adjust your router’s antenna position: Some routers have adjustable antennas that can be repositioned for better signal reception. Experiment with different antenna positions, such as angling them vertically or horizontally, to find the optimal orientation for your particular environment.
These troubleshooting steps can often address spotty Wi-Fi connections and improve your overall network performance. However, in some cases, you may require more advanced solutions to tackle persistent issues.
In the next section, we’ll look at some advanced solutions you can consider if you’re still experiencing wireless problems despite troubleshooting.
Check your Wi-Fi signal strength
When experiencing spotty Wi-Fi connections, the first step is to check the signal strength on your device. Poor signal strength can be a primary cause of connection issues, indicating that your device is too far away from the Wi-Fi router or encountering obstructions that weaken the signal.
To check the Wi-Fi signal strength, look for the Wi-Fi icon or signal bars on your device’s screen. If the signal bars are low or the Wi-Fi icon appears weak, it indicates a weak signal. The further away you are from the router, the weaker the signal becomes.
If you notice a weak signal, there are a few actions you can take to improve it:
Move closer to the router: If you are in a different room or far away from the router, try moving closer. The closer your device is to the router, the stronger and more stable the Wi-Fi signal will be.
Reposition the router: Check the location of your Wi-Fi router and ensure it is placed in a central location in your home or office. Avoid placing the router near walls, floors, or large objects that may obstruct the Wi-Fi signal. Consider elevating the router or moving it to a higher position to help improve signal distribution.
Reduce interference: Other electronic devices, such as cordless phones, baby monitors, or microwave ovens, can interfere with Wi-Fi signals. Keep your router away from these devices to minimize interference and improve signal strength.
Consider Wi-Fi boosters or extenders: If you are unable to move closer to the router, you can use Wi-Fi boosters or extenders. These devices amplify the Wi-Fi signal and extend its range, allowing it to reach areas with weaker signals.
Use a Wi-Fi analyzer app: Install a Wi-Fi analyzer app on your smartphone or tablet to identify Wi-Fi dead spots in your home or office. These apps can provide real-time information on signal strength and help you determine the best positions for your device and router.
By checking and improving the Wi-Fi signal strength, you can greatly enhance the stability and reliability of your wireless connection. However, if you’re still experiencing issues, proceed to the next troubleshooting steps to further address the problem.
Restart your router and modem
If you’re experiencing spotty Wi-Fi connections, a simple and effective troubleshooting step is to restart your router and modem. This can help resolve connectivity issues caused by temporary glitches or conflicts.
Here’s how you can restart your router and modem:
- Locate the power cords of both your router and modem.
- Unplug the power cord from each device.
- Wait for about 10-15 seconds to allow the devices to fully power down.
- Plug the power cord back into your modem first, and wait for it to fully initialize and establish a connection with your internet service provider.
- Once the modem has fully restarted, plug the power cord back into your router.
- Wait for both the router and modem to power up and establish a connection. This may take a few minutes.
Restarting your router and modem can help clear any temporary issues that may be affecting your connection. It allows the devices to start fresh, establish new connections, and reestablish proper communication with your internet service provider.
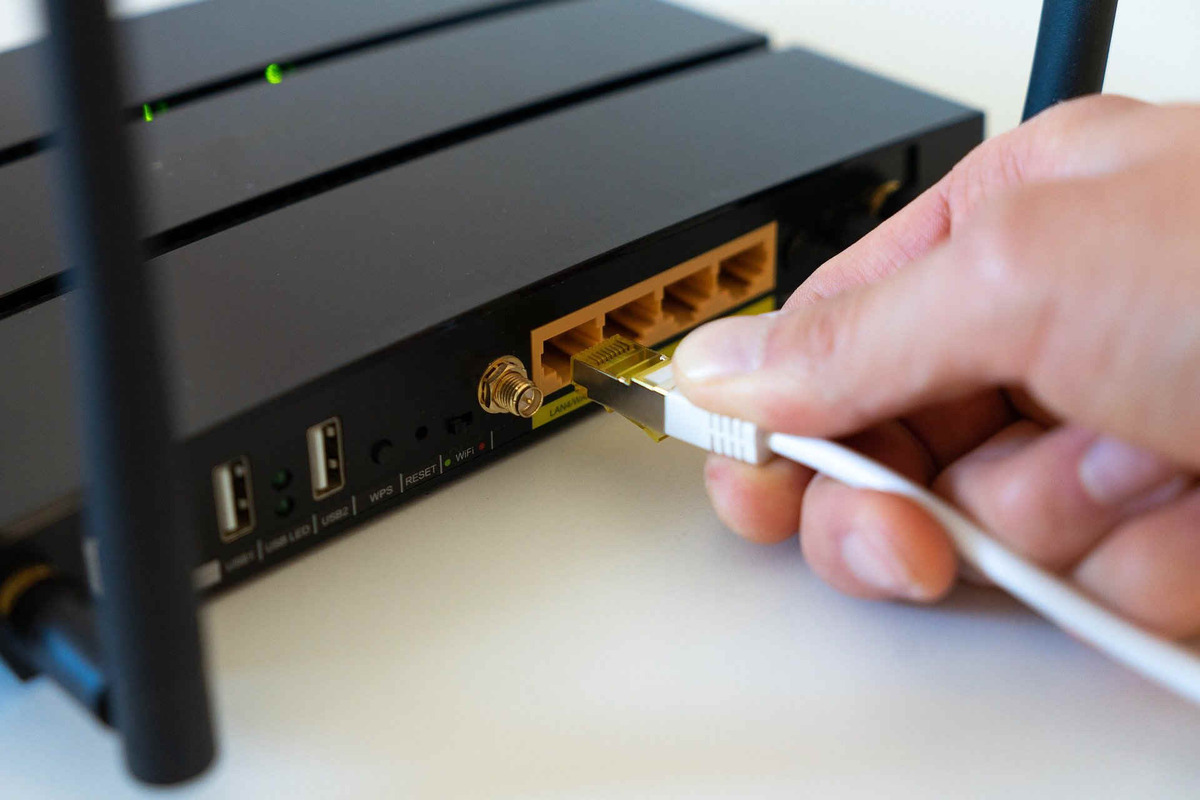
During the restart process, it’s also a good idea to check the physical connections between your modem and router. Ensure that all cables are securely plugged in and that there are no loose or damaged connections. A simple loose cable can cause intermittent connection problems.
After both the router and modem have fully restarted, try connecting to your Wi-Fi network again and check if the spotty connection issues have improved. In many cases, a restart can resolve temporary connectivity problems, allowing you to enjoy a consistent and stable Wi-Fi connection.
If the spotty connection issues persist even after restarting your router and modem, proceed to the next troubleshooting steps to further diagnose and address the problem.
Update your router firmware
Outdated firmware in your router can contribute to spotty Wi-Fi connections. Router manufacturers release firmware updates periodically to address bugs, security vulnerabilities, and improve overall performance. Keeping your router’s firmware up to date is essential for maintaining a stable and reliable Wi-Fi connection.
To update your router’s firmware, follow these steps:
- Identify your router’s brand and model. This information is usually found on the router itself or in the documentation that came with it.
- Visit the manufacturer’s website and navigate to the support or downloads section.
- Search for your router’s model number and locate the firmware update for your specific device.
- Download the latest firmware version that is compatible with your router.
- Access your router’s web-based interface by entering its IP address into a web browser.
- Log in to the router’s interface using the administrative username and password.
- Navigate to the firmware update section and follow the instructions provided by the manufacturer to upload and install the new firmware file.
- Wait for the update to complete, and do not turn off or unplug the router during the process.
- Once the firmware update is installed, restart your router for the changes to take effect.
Updating your router’s firmware ensures that you have the latest features, bug fixes, and security patches. It can address known issues that may be causing spotty Wi-Fi connections and improve the overall performance and reliability of your network.
Some routers have the option to automatically check and install firmware updates. If this feature is available on your router, it’s advisable to enable it to ensure that you always have the most up-to-date firmware without manual intervention.
Regularly checking for and installing firmware updates should be part of your routine maintenance for your router. It is a simple yet effective way to optimize your Wi-Fi connection and minimize the chances of experiencing spotty connections.
Change your Wi-Fi channel
If you’re experiencing spotty Wi-Fi connections, one possible culprit could be channel interference. Wi-Fi routers operate on different channels within the 2.4 GHz and 5 GHz frequency bands. When multiple routers in close proximity use the same channel, it can lead to interference and result in inconsistent Wi-Fi performance.
To improve your Wi-Fi connection stability, consider changing your Wi-Fi channel. Here’s how you can do it:
- Access your router’s settings by typing your router’s IP address into a web browser.
- Enter your router’s administrative username and password to log in.
- Find the wireless settings or Wi-Fi settings section in the router’s interface.
- Look for the option to change the channel. It may be labeled as “Channel” or “Wireless Channel.”
- Select a channel different from the one currently in use. Channels 1, 6, and 11 are often recommended for the 2.4 GHz band, as they are non-overlapping channels.
- Save the changes and restart your router for the new channel settings to take effect.
By switching to a less crowded channel, you can reduce interference from nearby Wi-Fi networks. This can result in improved Wi-Fi signal quality and a more stable connection.
Keep in mind that some modern routers have the option to automatically select the least congested channel using features like Automatic Channel Selection (ACS). If your router supports this feature, consider enabling it to ensure that your Wi-Fi network is using the optimal channel for minimal interference.
It’s important to note that changing the Wi-Fi channel will only have an impact on the 2.4 GHz band, as the 5 GHz band has more available channels with less congestion. If your devices support the 5 GHz band, consider connecting to it, as it is less prone to interference from neighboring Wi-Fi networks.
Regularly checking and adjusting your Wi-Fi channel settings can help minimize interference, optimize your Wi-Fi performance, and reduce the chances of experiencing spotty connections.
Clear your device cache
If you’re experiencing spotty Wi-Fi connections, one troubleshooting step you can take is to clear your device cache. Over time, cached files and data can accumulate on your device, affecting its performance and potentially impacting your Wi-Fi connection.
Clearing your device cache can help optimize its performance and improve the stability of your Wi-Fi connection. Here’s how you can clear the cache on different devices:
For Android devices:
- Go to the “Settings” menu on your Android device.
- Find and select the “Storage” or “Storage & USB” option.
- Tap on “Cached data” and confirm when prompted to clear the cache.
For iOS devices:
- Open the “Settings” app on your iOS device.
- Navigate to “General” and then tap on “iPhone/iPad Storage” (depending on your device).
- Scroll down and select the app for which you want to clear the cache.
- Tap on “Offload App” to remove the app and its associated cache, or tap on “Delete App” to uninstall the app and all its data.
For Windows and Mac computers:
- Open your preferred web browser.
- Press the Ctrl+Shift+Delete keys simultaneously on Windows or Command+Shift+Delete on Mac to open the Clear browsing data menu.
- Select the appropriate options, such as “Cached images and files” or “Temporary Internet files,” then click on “Clear” or “Delete” to clear the cache.
Clearing the cache on your device frees up storage space and removes any temporary files that may be causing conflicts or hindering smooth Wi-Fi connectivity.
It’s important to note that clearing the cache will not delete any important data, such as saved passwords or personal files. It simply removes temporary files that are no longer needed.
After clearing the cache, restart your device and attempt to connect to your Wi-Fi network again. This process can help optimize your device’s performance and potentially resolve any issues related to cached data affecting your spotty Wi-Fi connection.
Adjust your router’s antenna position
If you’re experiencing spotty Wi-Fi connections, the position of your router’s antennas can play a crucial role in optimizing signal strength and coverage. By adjusting the antenna position, you can potentially improve the stability and reliability of your Wi-Fi connection.
Here are some tips to help you adjust your router’s antenna position:
1. Know your router’s antenna type: Different routers have different antenna types, such as dipole antennas or omnidirectional antennas. Understanding the type of antenna your router has can help you determine the best approach to adjusting its position.
2. Position the antennas vertically: In most cases, positioning the antennas vertically results in optimal signal distribution. If your router has external antennas, try pointing them straight up.
3. Angle the antennas: Experiment with angling the router’s antennas to find the best position for signal reception. Slight adjustments, such as tilting the antennas at a 45-degree angle, can sometimes enhance the Wi-Fi signal’s range and strength.
4. Adjust each antenna independently: If your router has multiple antennas, make adjustments to each antenna individually. This allows for further fine-tuning to optimize the signal for specific directions or areas.
5. Consider the 2.4 GHz and 5 GHz bands: Some routers have separate antennas for the different frequency bands. Take note of this and adjust the positions accordingly. Keep in mind that the 2.4 GHz band tends to have a longer range but lower speed, while the 5 GHz band offers higher speeds but shorter range.
6. Avoid physical obstructions: Ensure that there are no physical obstructions, such as walls or furniture, blocking the signal path between the router and your devices. Adjusting the router’s position or removing obstacles can help improve the Wi-Fi signal’s reach and stability.
Remember to test your Wi-Fi connection after adjusting the antenna position to see if there is any noticeable improvement. Keep in mind that not all routers have adjustable antennas, especially in compact or integrated designs. In such cases, carefully positioning the router itself can also help optimize signal distribution.
By taking the time to adjust your router’s antenna position, you can potentially enhance the Wi-Fi signal’s coverage, improve connection stability, and reduce spotty Wi-Fi connections.
Advanced Solutions for Wireless Problems
If you’ve tried troubleshooting steps and are still experiencing wireless problems, there are advanced solutions you can consider to overcome persistent issues and improve your Wi-Fi connection. These solutions go beyond the basic troubleshooting steps and may require additional equipment or professional assistance.
1. Upgrade your router: If your current router is outdated or doesn’t meet your network’s demands, upgrading to a newer model can significantly improve your Wi-Fi connection. Look for routers that support the latest Wi-Fi standards (such as 802.11ac or Wi-Fi 6) and offer features like beamforming and MU-MIMO for better performance and increased capacity.
2. Use a Wi-Fi range extender: Wi-Fi range extenders, also known as repeaters or boosters, can help extend your Wi-Fi coverage by amplifying and rebroadcasting the Wi-Fi signal. They can be placed strategically to bridge the gap between your router and areas with weaker signals, improving connectivity in hard-to-reach spots of your home or office.
3. Set up a mesh network: Mesh network systems utilize multiple interconnected devices that work together to create a seamless Wi-Fi network. They eliminate dead zones and provide consistent coverage throughout your home or office. Mesh systems offer excellent performance, easy setup, and the ability to expand coverage by adding more nodes if needed.
4. Consider a powerline adapter: Powerline adapters utilize your home’s electrical wiring to create a wired network connection. They can be useful in situations where Wi-Fi signals struggle to reach certain areas. By connecting one adapter to your router and another near the device you want to connect, you can establish a reliable wired connection without the need for additional cables.
5. Enable Quality of Service (QoS): Quality of Service settings allow you to prioritize certain types of network traffic, ensuring that bandwidth is allocated to critical tasks such as streaming or online gaming. Enabling QoS can help prevent spotty connections and interruptions caused by other devices consuming a significant portion of your network’s bandwidth.
6. Consult a professional: If you’ve exhausted all troubleshooting steps and advanced solutions but are still struggling with wireless problems, it may be time to seek help from a professional. Consult a network specialist or hire a professional technician who can assess your network setup, identify specific issues, and offer expert advice or assistance.
Keep in mind that these advanced solutions may involve additional costs and may not be necessary for everyone. Assess your specific needs and the extent of your wireless problems before considering these options.
Remember that maintaining a reliable Wi-Fi connection involves a combination of factors, including signal strength, network configuration, and environmental considerations. By exploring advanced solutions and seeking professional guidance when needed, you can work towards achieving a stable and efficient wireless network.
Upgrade your router
If you’re experiencing persistent wireless problems, one effective solution is to upgrade your router. Older routers may not have the necessary capabilities to handle the demands of modern devices and networks, leading to spotty connections and slow performance. Upgrading to a newer model can significantly improve your Wi-Fi experience.
When considering a router upgrade, here are some key factors to consider:
Wi-Fi standards: Look for a router that supports the latest Wi-Fi standards, such as 802.11ac (Wi-Fi 5) or Wi-Fi 6 (802.11ax). These standards offer faster speeds, better coverage, and enhanced performance compared to older standards.
Speed and capacity: Consider the speed and capacity requirements of your network. If you have multiple devices that require high-bandwidth activities like streaming or gaming, choose a router with sufficient speed and capacity to handle the traffic without congestion or slowdowns.
Number of antennas: Routers with multiple antennas can provide better signal coverage and performance. Look for routers with external antennas, as they often offer more flexibility in adjusting signal direction and optimizing coverage.
Advanced features: Consider routers that offer features like beamforming and MU-MIMO (Multi-User Multiple Input Multiple Output), which can improve signal strength and overall network performance, particularly in multi-device environments.
Security features: Ensure that the router has robust security features, such as WPA3 encryption, a firewall, and the ability to create guest networks. These features help protect your network and safeguard your data from potential threats.
Before making a purchase, it’s also helpful to read reviews and compare different router models to find one that best suits your specific needs and budget.
When you upgrade your router, follow these steps to ensure a smooth transition:
- Back up your current router’s settings:
- Disconnect the old router and connect the new one:
- Configure and set up the new router:
- Update the firmware:
- Perform network tests:
With a new and improved router, you can enjoy faster speeds, broader coverage, and a more stable and reliable Wi-Fi connection throughout your home or office.
Use a Wi-Fi range extender
If you’re struggling with Wi-Fi coverage in certain areas of your home or office, using a Wi-Fi range extender can help extend the reach of your wireless network. A range extender, also known as a repeater or booster, amplifies and rebroadcasts the existing Wi-Fi signal, allowing it to reach areas with weaker signals.
Here’s how you can use a Wi-Fi range extender to enhance your wireless coverage:
1. Placement: Position the range extender within the range of your existing Wi-Fi router. Place it in an area where the signal is still reasonably strong but can be extended to cover the desired weak spots.
2. Connection: Use the instructions provided with the range extender to connect it to your existing Wi-Fi network. Most range extenders can be set up using a web-based interface or a mobile app.
3. Configuration: Once connected, follow the configuration steps provided by the range extender’s manufacturer. This typically involves logging into the range extender’s interface and selecting your existing Wi-Fi network for extension.
4. Testing: After the configuration is complete, test the extended Wi-Fi network’s coverage in the previously weak areas. Ensure that the signal strength has improved and that you can connect to the network without any issues.
5. Fine-tuning: If needed, try adjusting the placement of the range extender or the antennas (if it has any) to further optimize signal strength and coverage. Experiment with different positions until you achieve the best possible results.
Wi-Fi range extenders are particularly useful in larger homes or offices with multiple floors or distance-related coverage challenges. They can help eliminate Wi-Fi dead zones and provide a more reliable connection in areas that were previously out of range.
Keep in mind that a range extender can affect network performance due to signal loss during transmission. While it can extend the Wi-Fi network’s coverage, the speed and reliability may be slightly affected compared to being directly connected to the main router. However, for most everyday activities like browsing the internet or streaming videos, the impact is typically minimal.
When selecting a range extender, choose one that matches the Wi-Fi specifications and capabilities of your current router. This ensures compatibility and optimal performance between the router and the range extender.
With a Wi-Fi range extender, you can enjoy expanded Wi-Fi coverage and eliminate frustrating dead zones, providing a reliable and consistent wireless connection throughout your home or office.
Set up a mesh network
If you’re looking for a comprehensive solution to improve your Wi-Fi coverage and eliminate dead zones, setting up a mesh network can be highly effective. A mesh network consists of multiple interconnected devices, known as nodes, working together to provide seamless Wi-Fi coverage throughout your home or office.
Here’s how you can set up a mesh network:
1. Choose a mesh network system: Look for a mesh network system from a reputable brand that suits your needs in terms of coverage area and number of nodes. Consider factors such as the maximum number of devices supported, Wi-Fi standard compatibility, and additional features.
2. Position the primary node: Start by placing the primary node, which acts as the main router, in a central location within range of your modem. Connect the primary node to the modem using an Ethernet cable.
3. Set up additional nodes: Follow the manufacturer’s instructions to set up the additional nodes. Typically, this involves connecting the node to a power source and using a mobile app or web interface to configure and connect it to the mesh network created by the primary node.
4. Locate additional nodes: Position the additional nodes strategically throughout your home or office, placing them in areas with weaker Wi-Fi coverage or potential dead zones. The goal is to ensure seamless coverage with minimal signal loss or interference.
5. Optimize mesh network settings: Use the provided app or web interface to optimize the mesh network settings. You may have options to customize network names (SSIDs), set up guest networks, enable parental controls, prioritize devices, or access advanced features based on the mesh system’s capabilities.
6. Test and fine-tune: Once the mesh network is set up, test the Wi-Fi coverage in different areas of your home or office. Make adjustments to the placement of the nodes as needed to achieve optimal signal strength and coverage. Experiment with different node positions until you achieve the best possible performance.
A mesh network eliminates Wi-Fi dead zones by creating a unified network that seamlessly transitions devices between nodes as you move around your space. This allows for consistent and reliable Wi-Fi coverage throughout your entire home or office, without the need for separate network names or manual switching between access points.
Keep in mind that while mesh networks offer excellent coverage and performance, they may be a more expensive solution compared to traditional routers or Wi-Fi range extenders. However, the investment can be well worth it for those seeking a hassle-free, comprehensive Wi-Fi solution with extensive coverage and seamless connectivity.
By setting up a mesh network, you can enjoy reliable Wi-Fi connectivity throughout your space, eliminating frustrating dead zones and ensuring a seamless online experience for all your devices.
Consider a powerline adapter
If you’re facing spotty Wi-Fi connections and Wi-Fi range extenders or mesh networks are not suitable for your situation, another option to improve your network performance is to consider a powerline adapter. A powerline adapter utilizes your home’s electrical wiring to create a wired network connection, providing a reliable and stable alternative to Wi-Fi in certain scenarios.
Here’s how a powerline adapter works and how you can set it up:
1. Understand the powerline adapter: A powerline adapter typically consists of two units: one that connects to your router and plugs into a wall outlet, and another that connects to the device you want to connect to the network and plugs into a wall outlet near the device.
2. Plug in the first adapter: Connect one powerline adapter to your router using an Ethernet cable. Plug it into an electrical outlet near the router.
3. Connect the second adapter: Take the second adapter and plug it into an electrical outlet near the device you want to connect to the network. Connect this adapter to the device using another Ethernet cable.
4. Pair the adapters: Many powerline adapters come pre-paired, meaning they automatically connect to each other. If your adapters require pairing, follow the manufacturer’s instructions to do so.
5. Test the connection: Once the adapters are paired and set up, check the connection between the router and the device connected to the second adapter. Verify that you have a stable and reliable network connection.
Powerline adapters are especially useful in situations where Wi-Fi signals struggle to reach certain areas, such as in large homes or buildings with thick walls. They can provide a more consistent and potentially faster connection compared to relying solely on Wi-Fi.
It’s important to note that the performance of powerline adapters can be affected by the quality and age of your home’s electrical wiring. Older or poorly maintained electrical systems may experience reduced speeds or connectivity issues. Consider checking the wiring and ensure it is in good condition for optimal performance.
Powerline adapters also require all devices to be on the same electrical circuit. If you have multiple electrical panels or your electrical circuits are not interconnected, the adapters may not function correctly.
Overall, powerline adapters are a viable alternative for individuals seeking a stable wired connection without the need to run long Ethernet cables throughout the property or rely solely on Wi-Fi signals. They can be a practical and convenient option for improving network performance and reliability in specific scenarios.
Enable Quality of Service (QoS)
If you’re experiencing issues with spotty Wi-Fi connections, enabling Quality of Service (QoS) on your router can help prioritize certain types of network traffic and improve overall performance. QoS allows you to allocate bandwidth to specific devices, applications, or services that require a higher priority, ensuring a consistent and reliable connection for critical tasks.
Here’s how you can enable QoS on your router:
1. Access your router’s settings: Open a web browser and enter your router’s IP address into the address bar. This typically looks like 192.168.1.1 or 192.168.0.1. Enter your router’s username and password when prompted to log in.
2. Locate the QoS settings: Depending on your router’s interface, the QoS settings may be under a section labeled “QoS,” “Traffic Control,” or “Bandwidth Control.” If you’re unsure, consult your router’s user manual or manufacturer’s website for guidance.
3. Enable QoS: Once you’ve found the QoS settings, enable it by toggling the option to “On” or “Enable”.
4. Prioritize traffic: Depending on your router’s QoS capabilities, you can prioritize certain applications, services, or devices by assigning them a higher priority or setting a maximum bandwidth limit for other lower-priority traffic.
5. Save and apply changes: After configuring the desired QoS settings, save your changes and apply them to enable the new QoS rules.
With QoS enabled, your router will intelligently allocate bandwidth to ensure that important tasks like video streaming, online gaming, or video conferencing receive priority over less critical activities like web browsing or file downloads. This helps prevent bandwidth congestion and minimizes the chances of experiencing spotty connections or lag in critical applications.
Keep in mind that QoS settings may be limited by the capabilities of your router. Some routers offer more advanced QoS features, allowing for granular control and customization, while others may have simpler options to prioritize general traffic categories.
Ensure that you regularly review and adjust the QoS settings based on your network’s needs. As network usage patterns change or new devices are added, you may need to update the prioritization rules to maintain optimal performance.
Enabling QoS can be particularly beneficial in situations where multiple devices are simultaneously connected to the network and competing for bandwidth. By implementing QoS, you gain control over network traffic distribution, reducing the likelihood of spotty connections and ensuring a smooth online experience for all users.
Consult a professional
If you’ve exhausted all troubleshooting steps and advanced solutions, and you’re still experiencing persistent wireless problems, it may be time to seek professional assistance. Consulting a network specialist or hiring a professional technician can provide expert guidance to diagnose and address complex Wi-Fi issues.
Here’s how a professional can help:
Expert assessment: A professional can perform a comprehensive assessment of your network setup, analyzing factors like signal strength, channel congestion, network interference, and device configurations. They can identify the root causes of your wireless problems and provide targeted solutions.
Advanced diagnostics: Professionals have access to specialized tools and equipment to perform advanced diagnostics. They can analyze signal quality, interference patterns, and network performance metrics to pinpoint the exact issues affecting your Wi-Fi connection.
Optimal network configuration: A professional can optimize your network configuration, ensuring that your router settings, channel selection, and connection protocols are properly configured for optimal performance. They can fine-tune your Wi-Fi network to minimize interference and maximize coverage.
Equipment recommendations: If your current router or network equipment is outdated or inadequate for your needs, a professional can suggest suitable replacements based on your specific requirements and budget. They can recommend reliable, high-performance routers or other networking devices to enhance your Wi-Fi experience.
Installation and setup: If you decide to upgrade your network equipment, a professional technician can handle the installation and setup process. They can ensure proper connectivity, optimal placement of devices, and configure advanced features to maximize performance and security.
Troubleshooting guidance: Professionals can provide you with troubleshooting guidance tailored to your specific situation. They can offer recommendations for future maintenance practices, network monitoring tools, or other strategies to address potential challenges and minimize wireless problems in the long run.
While consulting a professional comes with a cost, it can save you time and frustration by quickly resolving persistent Wi-Fi issues. Their expertise and specialized equipment can help you achieve a stable and reliable wireless connection, providing peace of mind and enhancing your overall internet experience.
When seeking professional assistance, consider working with reputable network specialists, IT consultants, or certified technicians who have experience in diagnosing and resolving Wi-Fi problems.
Remember to communicate your specific concerns, provide detailed information about your network setup, and ask any questions you may have. By collaborating with a professional, you can overcome complex Wi-Fi challenges and ensure a robust and seamless wireless connection.