
What is DLNA?
DLNA, which stands for Digital Living Network Alliance, is a standard that allows different devices in your home to share media files seamlessly. It enables you to stream videos, music, and photos from one device to another, creating a connected and interactive digital ecosystem.
The primary goal of DLNA is to eliminate the barriers between devices and make media sharing effortless. Whether you want to watch a movie from your computer on your smart TV or listen to music from your phone on your wireless speakers, DLNA makes it possible.
DLNA employs a set of guidelines and protocols to ensure compatibility and interoperability between devices from different manufacturers. This means that you can mix and match DLNA-certified devices, regardless of their brand or operating system.
DLNA relies on a client-server model, where the server is responsible for hosting the media files, and the client device plays the files. The server and client devices communicate with each other over your home network, enabling you to access your media collection from any DLNA-compatible device in your network.
One of the notable features of DLNA is its support for various media formats. Whether you have MP3, FLAC, AVI, MKV, or JPEG files, DLNA ensures smooth playback across devices. This versatility makes DLNA suitable for managing different types of media content, be it music, photos, or videos.
DLNA also supports transcoding, which means if the receiving device doesn’t support a certain file format, the server can convert it on the fly to a compatible format. This allows you to enjoy your media collection without worrying about format compatibility issues.
To summarize, DLNA is a standard that enables devices in your home to communicate and share media files wirelessly. It provides seamless integration between different devices, supports various media formats, and offers a user-friendly experience for accessing and streaming your media collection.
How does DLNA work?
DLNA operates on a set of networking protocols and guidelines to facilitate the seamless sharing of media files between devices. Understanding how DLNA works can help you get the most out of this technology and make the most of your media collection.
The key components in the DLNA ecosystem are the DLNA server and the DLNA client devices. The server stores the media files, while the client devices play them. Both the server and client devices must be connected to the same local network for DLNA to function.
When you initiate media streaming using DLNA, here’s what happens:
- The DLNA server scans and indexes the media files stored on its storage device, such as a computer or a Network Attached Storage (NAS) drive. It categorizes the files based on their metadata, such as artist, album, title, and genre.
- The client device, which could be a smart TV, a gaming console, or a wireless speaker, sends a request to the DLNA server asking for access to the media files.
- The DLNA server responds by providing a list of available media files to the client device.
- The client device displays the list of available media files, allowing you to browse and select the desired content.
- Once you make a selection, the DLNA server streams the media file directly to the client device over the local network.
- The client device receives the media file and starts playing it using its built-in media player or a compatible app.
DLNA utilizes several networking protocols to enable communication between the server and client devices. These protocols include Universal Plug and Play (UPnP), Internet Protocol (IP), and HTTP. UPnP allows devices to automatically discover and connect to each other, while IP and HTTP facilitate the transfer of data over the network.
DLNA also incorporates Digital Rights Management (DRM) and content protection mechanisms to ensure that copyrighted content is securely transmitted and accessed by authorized devices only.
Overall, DLNA works by establishing a networked connection between the server and client devices, allowing for easy browsing and streaming of media files. It simplifies the process of accessing and enjoying your media collection across different devices, enhancing your home entertainment experience.
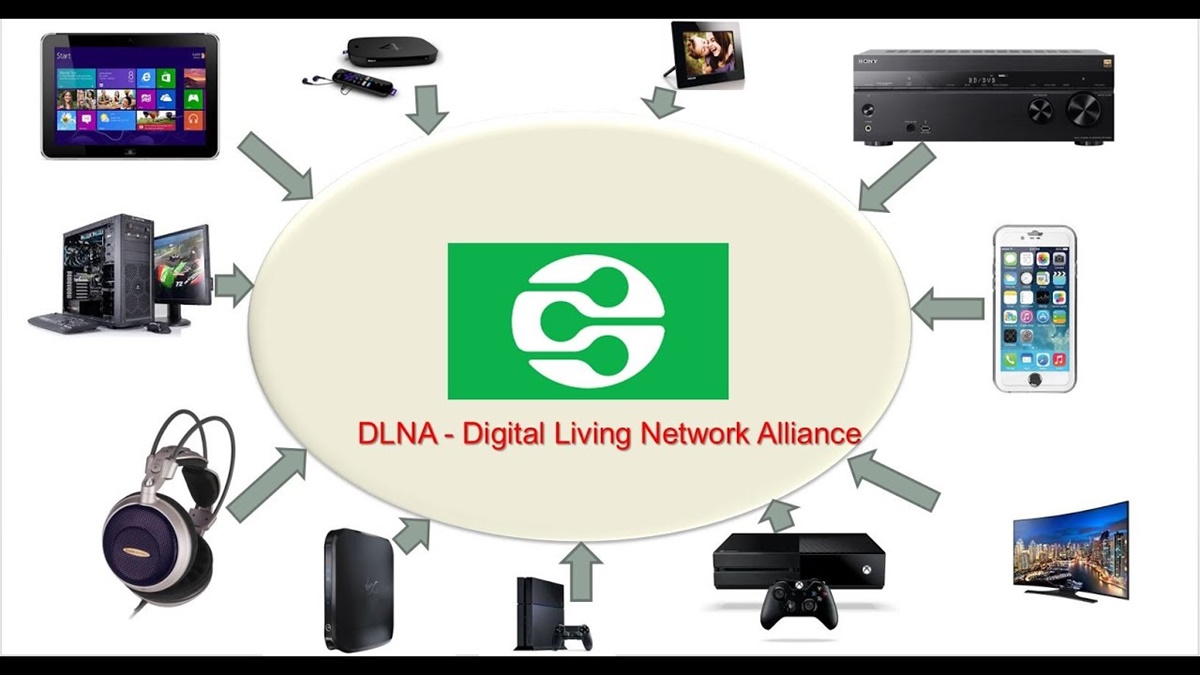
DLNA devices
DLNA technology has gained widespread adoption, and as a result, there is a wide range of DLNA-certified devices available in the market. These devices come in various forms and serve different purposes, providing a seamless media sharing experience throughout your home network.
Here are some common DLNA devices:
- Smart TVs: Many modern smart TVs come with built-in DLNA support, allowing you to stream media directly from DLNA servers without the need for additional devices. You can access and play your favorite movies, TV shows, and music on your big screen with ease.
- Media Players: Standalone media players, such as Roku, Apple TV, and Chromecast, often come with DLNA capabilities. These devices connect to your TV and provide access to a variety of streaming services, including DLNA streaming from your other devices.
- Game Consoles: Gaming consoles, such as PlayStation and Xbox, not only offer gaming experiences but also double as DLNA clients. You can enjoy streaming media from your DLNA servers and even use the gaming console as a media hub to access various online services.
- Wireless Speakers: DLNA-enabled wireless speakers allow you to stream music from your DLNA server and enjoy high-quality audio in any room of your house. You can easily create a multi-room audio system by connecting multiple DLNA speakers together.
- Smartphones and Tablets: Many smartphones and tablets support DLNA functionality through dedicated apps or built-in features. This enables you to access and stream media from your DLNA server directly on your handheld devices, offering flexibility and convenience.
- Computers and Laptops: DLNA servers are often installed on computers and laptops, allowing you to share media files stored on them with DLNA client devices. This means you can stream movies and music from your computer to your TV or any other DLNA-enabled device.
- Network Attached Storage (NAS) devices: NAS devices are dedicated storage solutions that can act as DLNA servers. With a DLNA-certified NAS, you can centralize your media collection and access it from any DLNA-compatible device in your network.
- Printers and Cameras: Some printers and cameras come with DLNA functionality, allowing for easy access and printing of photos directly from DLNA servers. This eliminates the need for transferring photos to a computer before printing or sharing.
These are just a few examples of the diverse range of DLNA devices available. From TVs and game consoles to smartphones and printers, the DLNA ecosystem offers a comprehensive solution for all your media sharing needs.
Setting up DLNA
Setting up DLNA in your home network requires a few steps to ensure smooth media sharing between devices. Follow these guidelines to get started with DLNA:
- Check device compatibility: Ensure that your devices support DLNA. Look for the DLNA logo or check the device specifications to confirm compatibility. Most modern smart TVs, media players, game consoles, smartphones, and computers have built-in DLNA support.
- Connect devices to the same network: Ensure that all DLNA-enabled devices are connected to the same local network. This can be done via Wi-Fi or Ethernet for wired connections.
- Enable DLNA on the server: If you’re using a computer or a NAS device as the DLNA server, check the settings or preferences to enable DLNA. Different software or operating systems may have varying steps, but there is usually a DLNA option that needs to be enabled.
- Configure server settings: Configure the DLNA server settings according to your preferences. This includes selecting the media folders you want to share, setting access permissions, and organizing your media collection with metadata.
- Install DLNA client apps: If you’re using a smartphone or tablet as a DLNA client, install a DLNA-compatible app from the respective app store. There are many options available, such as BubbleUPnP for Android or AirPlay/DLNA Receiver for iOS.
- Discover DLNA servers: On your DLNA client device, open the DLNA app and allow it to scan for DLNA servers on your network. Once the servers are detected, they should appear in the app’s interface.
- Browse and play media: Use the DLNA client app to browse the available media files on the DLNA server. You can typically navigate through different categories, such as music, photos, or videos, and select the file you want to play.
- Control playback: The DLNA client app provides playback controls, allowing you to pause, rewind, or skip to the next track as needed. You can also adjust the volume and select different output devices, depending on their availability.
- Enjoy media on different devices: With DLNA, you can enjoy your media collection on various devices. Stream movies to your smart TV, listen to music on wireless speakers, or view photos on your tablet – the possibilities are endless.
By following these steps, you can set up DLNA in your home network and experience seamless media sharing between your DLNA-enabled devices. Remember to keep your devices updated with the latest firmware and software to ensure compatibility and optimal performance.
DLNA server software
DLNA server software plays a crucial role in enabling media sharing in a DLNA network. It allows you to turn your computer, NAS device, or even a dedicated server into a DLNA server, making your media files accessible to DLNA client devices. Here are some popular DLNA server software options:
- Plex: Plex is a versatile media server software that offers DLNA compatibility along with a range of other features. It organizes your media collection, provides robust transcoding capabilities, and supports streaming to various devices, including DLNA clients. Plex also offers a user-friendly interface and remote access to your media files.
- Universal Media Server: Universal Media Server is an open-source DLNA server software that runs on Windows, macOS, and Linux. It streams media to DLNA clients and supports a wide range of media formats. Universal Media Server offers extensive customization options, including subtitle support and audio channel configuration.
- Emby: Emby is a media server software that also supports DLNA streaming. It organizes your media collection, offers transcoding capabilities, and provides a sleek user interface for accessing and streaming media. Emby allows you to manage your media library, create playlists, and even share your media with friends and family.
- Kodi: Although primarily known as a popular media center application, Kodi can also function as a DLNA server. By installing Kodi on your computer or NAS device and enabling the DLNA server option, you can stream your media files to DLNA clients. Kodi offers extensive customization, add-on support, and a wide range of media format compatibility.
- Windows Media Player: If you’re a Windows user, Windows Media Player offers built-in DLNA server functionality. Simply set up your media library within Windows Media Player and enable sharing. Your media files will be accessible to DLNA clients on your network. While not as feature-rich as dedicated media server software, it provides basic DLNA streaming capabilities.
- Serviio: Serviio is a feature-rich DLNA server software available for Windows, macOS, and Linux. It offers comprehensive media management, transcoding, and real-time video thumbnail generation. Serviio supports a wide range of media formats and allows you to categorize your media collection for easy browsing on DLNA clients.
These are just a few examples of DLNA server software available. Each software may have its own unique features and user interface, so it’s essential to explore and choose the one that best suits your needs and preferences. Remember to check the system requirements and compatibility before installing any DLNA server software.
By utilizing DLNA server software, you can transform your computer or NAS device into a powerful media server, facilitating seamless streaming and access to your media files across DLNA client devices in your network.
DLNA client devices
DLNA client devices play a crucial role in accessing and streaming media from DLNA servers in your home network. These devices come in various forms and provide a seamless media playback experience. Here are some common DLNA client devices:
- Smart TVs: Many smart TVs today come with built-in DLNA capabilities, allowing you to stream media directly from DLNA servers. Whether it’s watching movies, viewing photos, or listening to music, smart TVs provide a convenient way to enjoy DLNA content on a larger screen.
- Media Players: Standalone media players, such as Roku, Apple TV, and Amazon Fire TV, often support DLNA streaming. These devices connect to your TV and provide access to a variety of online services, including DLNA playback from your other devices.
- Gaming Consoles: Gaming consoles, such as PlayStation and Xbox, not only offer gaming experiences but also act as DLNA client devices. They allow you to access and stream media files from DLNA servers, transforming your gaming console into a multimedia hub.
- Wireless Speakers: DLNA-enabled wireless speakers provide a convenient way to enjoy music throughout your home network. With DLNA, you can stream music from your DLNA server directly to these speakers, creating a wireless multi-room audio system.
- Smartphones and Tablets: Many smartphones and tablets have DLNA functionality through dedicated apps or built-in features. This allows you to access and stream media from DLNA servers directly on your handheld devices, whether it’s watching a video or listening to music on the go.
- Computers and Laptops: DLNA client software can be installed on computers and laptops, transforming them into DLNA clients. This enables you to stream media files from DLNA servers to your computer or laptop for convenient playback on the device’s screen.
- Smart Displays: Smart displays, such as the Amazon Echo Show or Google Nest Hub, often support DLNA playback. These devices combine the functionality of a smart speaker with a screen, allowing you to stream videos, view photos, and access DLNA content with voice commands.
- Set-Top Boxes: Some set-top boxes, like the NVIDIA Shield TV or Mi Box, offer DLNA support. These devices connect to your TV and provide access to various streaming platforms, including DLNA streaming from other devices in your network.
These are just a few examples of DLNA client devices available. DLNA compatibility ensures that you can enjoy your media collection on different devices across your home network. Whether it’s streaming movies to your smart TV, listening to music on wireless speakers, or accessing media on your smartphone, DLNA client devices provide versatility and convenience in accessing your media files.
Connecting DLNA devices
Connecting DLNA devices is a straightforward process that allows you to establish a seamless network for sharing and streaming media files. Here’s a guide on how to connect DLNA devices:
- Set up your home network: Ensure that all DLNA devices are connected to the same local network. This can be done either via Wi-Fi or Ethernet. Make sure that your network is stable and reliable for smooth media streaming.
- Enable DLNA on the server: On the device that will serve as the DLNA server, such as a computer or NAS device, enable DLNA functionality. This is usually done through the device’s settings or specific DLNA server software.
- Configure DLNA server settings: Customize the DLNA server settings according to your preferences. This may include selecting the media folders you want to share, setting access permissions, and organizing your media collection with metadata.
- Discover DLNA servers: On your DLNA client device, such as a smart TV or smartphone, use the device’s DLNA client app or built-in functionality to scan and discover DLNA servers on your network. The app should detect and display the available DLNA servers.
- Choose the DLNA server: From the list of discovered DLNA servers, select the one you want to connect to. This will establish a connection between the client device and the server.
- Browse and play media: Use the DLNA client app or interface to browse the media files available on the DLNA server. Depending on the client device and app, you may be able to navigate through different categories, such as music, photos, or videos, and select the file you wish to play.
- Control playback: The DLNA client app provides playback controls, allowing you to pause, rewind, or skip to the next track as needed. You can also adjust the volume and select different output devices, depending on their availability in your DLNA network.
- Enjoy media on different devices: With DLNA, you can enjoy your media collection on various devices across your network. Stream movies to your smart TV, listen to music on wireless speakers, or view photos on your handheld device – all seamlessly connected through DLNA.
- Expand your DLNA network: As you add more DLNA devices to your network, such as additional smart TVs, smartphones, or wireless speakers, follow the previous steps to connect them to the existing DLNA ecosystem. This will allow for greater flexibility and accessibility in sharing and enjoying media files.
By following these steps, you can easily connect DLNA devices in your home network and enjoy seamless media streaming and sharing from your DLNA server to DLNA client devices. Remember to keep your devices updated with the latest firmware and software to ensure compatibility and optimal performance.
DLNA media streaming
DLNA media streaming is at the core of the DLNA technology, allowing seamless playback and sharing of media files across DLNA-compatible devices. Whether it’s streaming music, videos, or photos, DLNA ensures a smooth and consistent media streaming experience. Here’s how DLNA media streaming works:
- DLNA server setup: Set up the DLNA server on your computer, NAS device, or dedicated server. Configure the server settings, including the media folders you want to share and any relevant access permissions.
- Client device discovery: On your DLNA client device, such as a smart TV, smartphone, or media player, open the DLNA client app or interface and enable device discovery. The client device will scan the local network to discover available DLNA servers.
- Browsing and selecting media: Once the DLNA server is discovered, you can browse and navigate through different media categories, such as music albums, videos, or photo albums. Choose the media file you want to stream.
- Streaming initiation: When you select a media file, the DLNA client device sends a streaming request to the DLNA server. The server acknowledges the request and begins streaming the media file over the local network to the client device.
- Playback on client device: The DLNA client device receives the streamed media file and begins playing it using its built-in media player or a compatible app. The client device may also offer playback controls, allowing you to pause, rewind, skip tracks, adjust volume, and more.
- Real-time transcoding: If the media file format is not natively supported by the DLNA client device, the DLNA server may perform real-time transcoding. This process converts the media file to a compatible format on the fly, ensuring smooth playback regardless of device capabilities.
- Multi-room streaming: With DLNA, you can create a multi-room streaming setup by connecting multiple DLNA client devices and speakers to your network. This allows you to enjoy synchronized music playback in multiple rooms or have different media playing on different devices simultaneously.
- Stream control and remote access: DLNA client devices often offer additional features, such as remote control through mobile apps or web interfaces. You can control the media streaming, manage playlists, adjust settings, and access your media library remotely, even when you’re away from home.
- Seamless handover between devices: DLNA also supports seamless handover, allowing you to switch playback between DLNA client devices without interruption. For example, you can start streaming a video on your smartphone and then seamlessly continue watching it on your smart TV.
DLNA media streaming ensures that your media files can be accessed and enjoyed on a variety of DLNA-compatible devices in your network. Whether you’re streaming movies to your smart TV, listening to music on wireless speakers, or viewing photos on your handheld device, DLNA provides a versatile and seamless media streaming experience.
Using DLNA with a smartphone or tablet
DLNA technology allows you to leverage the power of your smartphone or tablet to access and stream media files from DLNA servers. With DLNA-enabled apps or built-in functionality, you can transform your handheld device into a portable media player. Here’s how to use DLNA with a smartphone or tablet:
- Check DLNA support: Verify that your smartphone or tablet supports DLNA. Most modern devices, regardless of the operating system (Android, iOS, Windows), have built-in DLNA compatibility or offer DLNA apps through respective app stores.
- Install DLNA app: If your device doesn’t have built-in DLNA functionality, download and install a DLNA-compatible app from your app store. There are several options available, such as BubbleUPnP for Android or AirPlay/DLNA Receiver for iOS.
- Connect to the same network: Ensure that your smartphone or tablet is connected to the same local network as the DLNA server. This can be done via Wi-Fi or mobile data, depending on your network setup and availability.
- Open the DLNA app: Launch the DLNA app on your smartphone or tablet. The app will automatically scan and detect DLNA servers available on your network.
- Select the DLNA server: From the list of discovered DLNA servers, choose the one you want to connect to. This establishes a connection between your handheld device and the DLNA server.
- Browse and play media files: After connecting to the DLNA server, you can browse the available media files within the DLNA app. Depending on the app, you may be able to navigate through different categories, such as music, videos, or photos.
- Choose media file and start streaming: Select the media file you want to stream from the DLNA server. The media file will start streaming and playing on your smartphone or tablet’s media player or within the DLNA app itself.
- Control playback and settings: Use the playback controls provided by the DLNA app or your device’s media player to pause, play, rewind, adjust volume, and skip tracks. Additionally, you can access settings within the DLNA app to customize your media streaming experience.
- Enjoy media on the go: With DLNA streaming, you can enjoy your media collection on your smartphone or tablet, no matter where you are in your home or even when you’re away. You can access and stream your favorite movies, music, and photos without the need for physical storage on your device.
- Expand DLNA capabilities: Expand the DLNA capabilities of your smartphone or tablet by connecting it to other DLNA-enabled devices such as smart TVs or wireless speakers. This allows you to stream media to these devices directly from your handheld device.
Using DLNA with a smartphone or tablet gives you the freedom to access and stream media files from DLNA servers in a portable and convenient manner. Whether you’re on the go or relaxing at home, DLNA makes it easy to enjoy your media collection on your handheld device.
Troubleshooting DLNA connections
While DLNA technology simplifies media sharing, you may encounter occasional connectivity or playback issues. Troubleshooting DLNA connections can help you resolve common problems and ensure a smooth streaming experience. Here are some troubleshooting tips:
- Check network connectivity: Ensure that all DLNA devices, including the server and client devices, are connected to the same local network. Make sure the network connection is stable and reliable by restarting your router or modem if necessary.
- Update firmware and software: Keep your DLNA devices and apps updated with the latest firmware and software versions. Manufacturers often release updates that improve compatibility, performance, and fix known issues.
- Restart devices: If you’re experiencing connectivity issues, try restarting all DLNA devices, including the server and client devices. Power off each device, wait for a few seconds, then power them back on. This can help reset any temporary glitches or network conflicts.
- Check DLNA server settings: Verify the DLNA server settings, including media sharing permissions and folder configurations. Ensure that the media folders you want to share are properly selected and accessible by the DLNA clients.
- Review DLNA client settings: Double-check the settings in your DLNA client app or device to ensure it is configured correctly. Make sure it is set to discover DLNA servers and has the necessary permissions to access and stream media files.
- Test with different media files: If you encounter issues with specific media files, try streaming different files to see if the problem persists. Occasionally, certain files may have compatibility issues or corruption that affects playback.
- Verify file formats: Ensure that the media files you are trying to stream are in formats supported by both the DLNA server and client devices. Some devices may have limitations on the supported codecs or file extensions.
- Ensure network firewall settings: Check your network’s firewall or security settings to ensure that they are not blocking DLNA communication. Configure any necessary firewall rules or exceptions to allow DLNA traffic within your local network.
- Restart DLNA services: If you’re using dedicated DLNA server software, you can try restarting the DLNA service or software on the server device. This action may resolve any service-related issues or conflicts.
- Reset device settings: In rare cases, resetting the DLNA-enabled devices to their default settings may help resolve persistent issues. Keep in mind that this action will require you to reconfigure your settings and set up the DLNA connections again.
By following these troubleshooting steps, you can address common DLNA connectivity or playback issues and ensure a streamlined media streaming experience. If the problem persists, consult the support documentation or reach out to the manufacturer for further assistance.
DLNA alternatives
While DLNA is a widely adopted standard for media sharing, there are alternative technologies and protocols available that offer similar functionality. These alternatives provide different approaches to media streaming and may better suit specific needs or preferences. Here are some DLNA alternatives to consider:
- Apple AirPlay: AirPlay is a proprietary protocol developed by Apple that enables wireless streaming of media content from iOS devices to compatible Apple TV, speakers, and other AirPlay-enabled devices. It offers seamless integration within the Apple ecosystem and supports mirroring and multi-room audio.
- Google Cast (Chromecast): Google Cast, commonly known as Chromecast, allows you to cast media from your mobile devices, computers, and supported apps to a Chromecast device plugged into your TV. It supports a wide range of apps, offers multi-room audio functionality, and allows for easy mirroring of your device’s screen.
- Bluetooth: Bluetooth is a wireless technology found in many devices, providing a direct connection for streaming media. While it offers limited range and typically supports one-to-one connections, Bluetooth is widely supported by smartphones, speakers, headphones, and car audio systems.
- Media Servers with Web Interface: Some media server software, such as Jellyfin and Emby, provide web interfaces that allow streaming media content through a browser. This enables access to media files on a wide range of devices, including smartphones, tablets, computers, and smart TVs.
- Streaming Apps and Services: Subscription-based streaming services like Netflix, Hulu, and Spotify offer extensive libraries of movies, TV shows, and music available for streaming on various devices. These platforms provide convenient access to a vast array of media content without the need for personal media servers.
- Cloud storage and streaming: Storing your media files in cloud-based storage services, such as Google Drive, Dropbox, or OneDrive, allows you to access and stream them from any device with internet access. These services often provide dedicated apps for smartphones, tablets, and computers for easy streaming.
- Sonos: Sonos is a wireless audio system that offers multi-room audio and streaming capabilities. It supports a wide range of music streaming services and can be controlled through dedicated apps on smartphones, tablets, and computers.
- UPnP (Universal Plug and Play): UPnP is a networking protocol that allows devices to discover and communicate with each other on a local network. It can be used for media streaming, similar to DLNA, and is supported by many devices and software applications.
These DLNA alternatives provide different options for media streaming and sharing, catering to different ecosystems and preferences. Depending on your specific needs, you can explore these alternatives alongside DLNA to find the solution that best fits your requirements.