
Understanding the Speaker Connector
Before diving into the process of repairing a broken speaker connector, it’s essential to understand the role and structure of this vital component. The speaker connector serves as the interface between the amplifier or audio source and the speaker, enabling the transmission of audio signals. Typically, the connector consists of metal conductors encased in a protective housing, allowing for a secure and reliable connection.
There are various types of speaker connectors, including banana plugs, spade connectors, and binding posts, each with its unique design and functionality. Understanding the specific type of connector involved is crucial for a successful repair, as it dictates the repair approach and tools needed.
Furthermore, familiarizing oneself with the internal wiring and configuration of the speaker connector is paramount. This knowledge facilitates the identification of any damage or faults within the connector, guiding the repair process effectively. Additionally, understanding the wiring layout aids in reassembling the connector correctly after the repair is completed.
Moreover, recognizing the significance of the speaker connector within the audio system highlights the necessity of maintaining its integrity. A faulty or broken connector can significantly degrade audio quality, disrupt the signal transmission, or even lead to complete audio loss. Therefore, addressing any issues with the speaker connector promptly is essential to ensure optimal audio performance.
By comprehending the fundamental role, types, and internal structure of the speaker connector, individuals can approach the repair process with confidence and precision, ultimately restoring seamless audio connectivity and quality.
Assessing the Damage
Before embarking on the repair of a broken speaker connector, a thorough assessment of the damage is imperative. This initial step involves a detailed examination to identify the extent and nature of the issue, guiding the subsequent repair process.
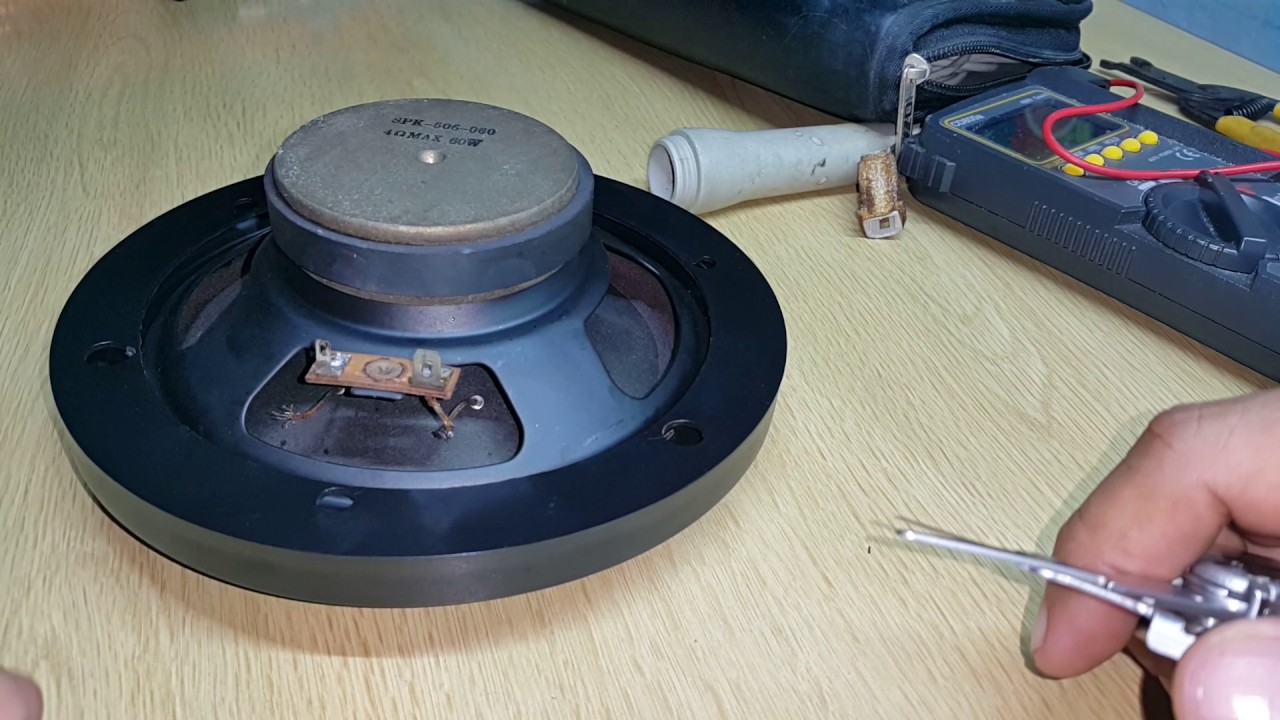
Firstly, visually inspect the exterior of the speaker connector for any visible signs of damage, such as cracks, bends, or breakage. Additionally, check for loose or detached components, as these could indicate internal damage affecting the connector’s functionality.
Next, assess the wiring and internal components of the connector. Carefully examine the conductors, terminals, and solder joints for any signs of wear, corrosion, or physical damage. It’s crucial to ensure that the wiring connections are secure and undamaged, as these elements directly impact the connector’s performance.
Furthermore, testing the continuity and resistance of the connector using a multimeter can provide valuable insights into the extent of the damage. By measuring the electrical conductivity and resistance across the connector’s terminals, any faults or irregularities in the electrical pathway can be identified, aiding in the precise diagnosis of the issue.
Additionally, if the speaker connector is part of a larger audio system, it’s essential to assess the impact of the damage on the overall audio output. Conduct a comprehensive evaluation of the audio quality and signal transmission to determine the specific effects of the damaged connector on the system’s performance.
By thoroughly assessing the damage to the speaker connector, individuals can gain a comprehensive understanding of the issue, enabling them to proceed with the repair process effectively. This proactive approach ensures that the repair efforts are targeted and tailored to address the specific damage, ultimately leading to a successful restoration of the connector’s functionality.
Gathering the Necessary Tools and Materials
Preparing for the repair of a broken speaker connector involves assembling the essential tools and materials required to execute the repair process effectively. By ensuring that the necessary items are readily available, individuals can streamline the repair procedure and minimize interruptions during the restoration of the connector.
The following tools and materials are commonly required for repairing a broken speaker connector:
- Screwdriver Set: A set of screwdrivers with various head types, including flathead and Phillips, is essential for disassembling the speaker connector and accessing its internal components.
- Wire Strippers: These tools are necessary for removing the insulation from the speaker wires, enabling access to the conductors for repair or replacement.
- Soldering Iron and Solder: A soldering iron and high-quality solder are indispensable for rejoining broken or damaged solder connections within the speaker connector, ensuring secure and reliable electrical connections.
- Multimeter: This device is vital for testing the continuity, resistance, and electrical characteristics of the speaker connector, aiding in the diagnosis of faults and the verification of successful repairs.
- Replacement Connectors: Depending on the nature of the damage, it may be necessary to have replacement connectors on hand to replace irreparably damaged components within the speaker connector.
- Electrical Tape and Heat Shrink Tubing: These insulating materials are essential for safeguarding repaired or spliced wires, providing electrical insulation and mechanical protection.
- Cleaning Supplies: Isopropyl alcohol, cotton swabs, and a soft brush can be used to clean the internal components of the connector, removing any debris, oxidation, or contamination that may affect its performance.
By gathering these essential tools and materials in advance, individuals can ensure that they are well-equipped to address a wide range of potential issues during the repair process. This proactive approach minimizes delays and enhances the efficiency of the repair, ultimately leading to a successful restoration of the broken speaker connector.
Disassembling the Speaker Connector
Disassembling the speaker connector is a critical step in the repair process, allowing access to its internal components for assessment and repair. Proper disassembly requires careful attention to detail and the use of appropriate tools to ensure that the connector is dismantled without causing further damage.
The following steps outline the disassembly process for a typical speaker connector:
- Power Off and Disconnect: Before beginning the disassembly, ensure that the audio system is powered off, and the speaker wires are disconnected from the connector to prevent electrical hazards and interference.
- Examine the Housing: Inspect the outer housing of the connector for any screws, clips, or fasteners that secure it in place. Use the appropriate tools, such as screwdrivers, to remove any fasteners and detach the housing.
- Internal Component Access: Once the outer housing is removed, carefully examine the internal components of the connector, including the terminals, conductors, and solder joints. Take note of the wiring configuration and the interconnections between components.
- Document the Disassembly: It is advisable to document the disassembly process, either through photographs or written notes, to aid in the reassembly of the connector after the repair is completed.
- Secure Component Removal: If the damage is localized to a specific component within the connector, such as a broken solder joint or damaged conductor, carefully remove the component using appropriate tools, ensuring that adjacent components are not disturbed.
- Organize and Store Components: As components are removed, organize and store them in a safe and systematic manner to prevent misplacement or damage. Utilize small containers or labeled bags to keep track of the disassembled parts.
It is essential to approach the disassembly process methodically and patiently, taking care to avoid unnecessary force or stress on the connector’s components. By following these steps and exercising caution, individuals can disassemble the speaker connector effectively, setting the stage for the subsequent repair and restoration efforts.
Repairing the Broken Speaker Connector
Once the speaker connector has been disassembled and the extent of the damage assessed, the repair process can commence. Repairing a broken speaker connector involves targeted interventions to address the specific issues identified during the assessment, restoring the connector’s functionality and integrity.
The following steps outline the general process for repairing a broken speaker connector:
- Addressing Solder Joints: If the damage involves broken or damaged solder joints, carefully clean the affected areas and reflow fresh solder to establish secure electrical connections. Ensure that the solder adheres to the conductors and terminals, creating reliable electrical pathways.
- Replacing Damaged Components: In cases where individual components within the connector, such as terminals or conductors, are irreparably damaged, carefully remove the defective parts and replace them with suitable replacements. Securely solder the new components in place, ensuring proper alignment and electrical continuity.
- Splicing and Insulating Wires: If the speaker wires themselves are damaged, use wire strippers to trim the affected sections and splice in new, undamaged sections of wire. Secure the splices with solder and insulate them using electrical tape or heat shrink tubing to prevent short circuits and ensure reliable connections.
- Cleaning and Decontamination: Thoroughly clean the internal components of the connector using isopropyl alcohol and a soft brush to remove any debris, oxidation, or contamination that may affect its performance. Ensure that the components are completely dry before proceeding with reassembly.
- Verification and Testing: After the repair work is completed, use a multimeter to verify the continuity and electrical characteristics of the repaired connections. Test the repaired speaker connector with a suitable audio source and speaker to ensure that the audio signal is transmitted effectively and without distortion.
Throughout the repair process, meticulous attention to detail and precision is crucial to ensure that the speaker connector is restored to optimal working condition. By following these steps and exercising care during the repair, individuals can effectively address the damage and revive the functionality of the broken speaker connector, enabling seamless audio connectivity and performance.
Reassembling the Speaker Connector
Once the repair of the broken speaker connector is successfully completed, the reassembly process is a critical step in restoring the connector to its functional state. Proper reassembly ensures that the internal components are securely reinstated within the connector, facilitating reliable audio signal transmission and connectivity.
The following steps outline the systematic approach to reassembling the speaker connector:
- Component Positioning: Begin by carefully positioning the repaired or replaced components within the connector, aligning them according to the documented configuration from the disassembly phase. Ensure that the conductors, terminals, and solder joints are appropriately oriented for secure connections.
- Housing Alignment: If the connector features an outer housing or casing, align it with the internal components and carefully maneuver it into place, taking care not to disturb the internal wiring or connections. Secure the housing using any fasteners or clips that were removed during disassembly.
- Secure Fastening: Utilize the appropriate tools, such as screwdrivers, to secure the housing in place, ensuring that it encloses the internal components securely and provides protection against external elements and mechanical stress.
- Wire Routing and Management: Organize and route the speaker wires within the connector as per the original configuration, ensuring that they are neatly arranged and do not exert undue strain on the internal connections. Avoid sharp bends or pinching that could compromise the integrity of the wires.
- Final Inspection: Conduct a thorough visual inspection of the reassembled connector, verifying that all components are securely positioned, the wiring is correctly routed, and the housing is properly fastened. Address any discrepancies or misalignments before proceeding to the testing phase.
By meticulously following these steps and exercising care during the reassembly process, individuals can ensure that the repaired speaker connector is reinstated to its original configuration, ready to deliver reliable audio connectivity and performance within the audio system.
Testing the Repaired Speaker Connector
After the meticulous reassembly of the speaker connector, the final crucial step in the repair process is testing the connector to verify its functionality and performance. Testing serves to validate the effectiveness of the repair work and ensure that the connector can reliably facilitate audio signal transmission without any issues.
The testing phase involves the following key procedures:
- Audio Signal Transmission: Connect the repaired speaker connector to a compatible audio source, such as an amplifier or receiver, and attach a speaker to the other end of the connector. Ensure that the connections are secure and the polarity is aligned correctly to prevent phase and polarity issues.
- Signal Verification: Play an audio signal through the connected speaker and assess the quality and clarity of the sound. Listen for any distortions, crackling, or intermittent audio, which may indicate underlying issues with the connector’s functionality.
- Continuity and Resistance Testing: Use a multimeter to measure the continuity and resistance across the terminals of the repaired connector. Verify that the electrical pathways are intact and that the resistance values align with the specifications for the connector type.
- Stress Testing: Subject the repaired speaker connector to stress testing by adjusting the audio levels and conducting prolonged playback sessions. Monitor the connector for any signs of overheating, intermittent connectivity, or performance degradation under sustained usage.
- Connection Stability: Verify the stability and integrity of the connections by gently manipulating the connector and speaker wires. Ensure that the connections remain secure and that there are no intermittent interruptions in the audio signal during movement.
By diligently performing these testing procedures, individuals can ascertain the efficacy of the repair work and the reliability of the repaired speaker connector. Any anomalies or irregularities observed during testing can prompt further adjustments or refinements to ensure the optimal functionality of the connector within the audio system.
Upon successful completion of the testing phase, the repaired speaker connector can be confidently integrated into the audio setup, delivering seamless audio connectivity and contributing to an enhanced audio experience.