
Assessing the Damage
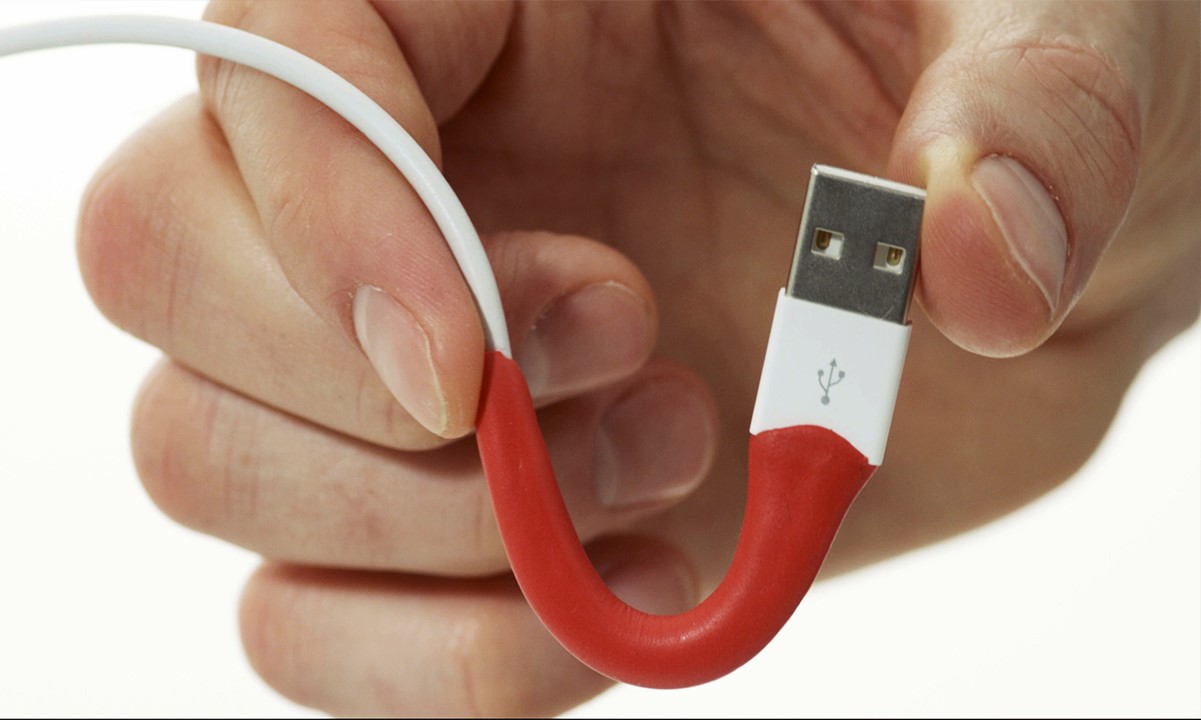
When faced with a broken USB connector, the first step is to carefully assess the extent of the damage. This initial evaluation will provide crucial insights into the necessary steps to rectify the issue. Here are some key aspects to consider when assessing the damage:
- Physical Examination: Begin by visually inspecting the USB connector. Look for any visible signs of damage such as bent or broken pins, cracks, or loose components. Additionally, check for any foreign objects that may be obstructing the connection.
- Functionality Test: Connect the USB cable to a device and observe if it securely latches onto the port. Attempt to transfer data or charge the device to determine if the connection is stable. If the device fails to recognize the USB connection or if there are intermittent disruptions, it indicates a faulty connector.
- Internal Inspection: If the external examination does not reveal the cause of the issue, consider using a magnifying glass or a digital microscope to inspect the internal components of the connector. Look for any loose wires, soldering damage, or other internal faults that may be impeding the connection.
- Continuity Check: Use a multimeter to check for continuity between the connector pins and the internal wiring. This will help identify any breaks in the electrical pathway, providing valuable information for the repair process.
By thoroughly assessing the damage, you can gain a comprehensive understanding of the issues affecting the USB connector. This preliminary investigation sets the stage for the subsequent steps in the repair process, enabling you to proceed with confidence and precision.
Gathering the Necessary Tools
Before embarking on the task of fixing a broken USB connector, it is essential to assemble the appropriate tools and equipment. Having the right tools at your disposal will streamline the repair process and ensure that the task is carried out effectively. Here’s a list of essential tools for this undertaking:
- Soldering Iron: A reliable soldering iron with adjustable temperature settings is crucial for soldering the new USB connector onto the cable. Ensure that the soldering iron tip is clean and in good condition to facilitate precise and efficient soldering.
- Solder and Flux: High-quality solder and flux are indispensable for creating strong and reliable electrical connections. Opt for lead-free solder for environmental and safety considerations, and use flux to promote proper solder flow and adhesion.
- Wire Cutters and Strippers: Sharp wire cutters and strippers are essential for preparing the USB cable for the installation of the new connector. These tools enable precise cutting and stripping of the cable’s outer insulation and internal wires.
- Multimeter: A multimeter is invaluable for diagnosing electrical issues and ensuring proper connectivity. Use it to perform continuity checks, measure voltage, and troubleshoot any underlying electrical problems in the USB cable.
- Desoldering Pump or Wick: In the event that the broken connector needs to be desoldered, a desoldering pump or wick is indispensable for removing excess solder and clearing the solder pads on the USB cable.
- Tweezers and Magnifying Glass: Precision tools such as tweezers and a magnifying glass aid in handling small components and inspecting intricate details during the repair process. These tools are particularly useful when working with tiny connector pins and delicate soldering joints.
- New USB Connector: Acquire a high-quality replacement USB connector that is compatible with the USB cable. Ensure that the new connector matches the specifications of the original connector to guarantee a proper fit and functionality.
By gathering these essential tools, you will be well-equipped to tackle the task of repairing the broken USB connector with confidence and precision. Having the right tools at hand is a critical first step towards a successful repair endeavor.
Removing the Broken Connector
Once the damage assessment is complete and the necessary tools are assembled, the next step in the repair process involves safely removing the broken USB connector. This delicate task requires patience and precision to avoid further damage to the USB cable and its internal components. Here’s a systematic guide to effectively remove the broken connector:
- Secure the USB Cable: Prior to beginning the removal process, ensure that the USB cable is firmly secured in place to prevent unnecessary movement. This can be achieved by using a helping hand tool, a vise, or any other suitable clamping mechanism to stabilize the cable during the operation.
- Desoldering Preparation: If the broken connector is soldered to the cable, prepare for desoldering by heating the solder joints with the soldering iron. Apply flux to the soldered connections to facilitate the desoldering process and ensure smooth and clean removal of the connector.
- Desoldering Technique: Carefully apply the heated soldering iron to the solder joints while simultaneously using a desoldering pump or wick to remove the molten solder. Exercise caution to avoid overheating the cable’s insulation or adjacent components, and maintain a steady hand to extract the broken connector without causing damage to the cable’s conductors.
- Inspect for Residue: After removing the broken connector, inspect the solder pads and conductors for any residual solder or debris. Use a magnifying glass to examine the area closely and ensure that the solder pads are clean and free from any obstructions that may hinder the installation of the new connector.
- Trimming Excess Wires: If the cable’s internal wires were previously soldered to the broken connector, carefully trim the exposed wire ends to remove any damaged or contaminated sections. This will prepare the wires for the subsequent soldering of the new connector.
By following these steps, you can safely and effectively remove the broken USB connector, setting the stage for the subsequent stages of the repair process. Exercise caution and meticulousness during this phase to ensure that the USB cable remains intact and ready for the installation of the new connector.
Preparing the USB Cable
After successfully removing the broken USB connector, the next crucial phase in the repair process involves preparing the USB cable for the installation of the new connector. This meticulous preparation is essential to ensure a secure and reliable connection that withstands everyday use. Here’s a detailed guide on how to prepare the USB cable for the subsequent soldering process:
- Stripping the Insulation: Using precision wire strippers, carefully strip the outer insulation of the USB cable to expose the internal wires. Exercise caution to avoid damaging the delicate internal conductors while ensuring that a sufficient length of the wires is exposed for the soldering process.
- Separating the Wires: Once the insulation is removed, identify the individual wires within the cable, typically color-coded as red (power), black (ground), green (data-), and white (data+) for standard USB cables. Gently separate and arrange the wires, ensuring that they remain intact and undamaged during the process.
- Tinning the Wires: To enhance the conductivity and facilitate the soldering process, carefully tin the exposed ends of the wires by applying a small amount of solder to each conductor. This step helps prevent fraying and ensures a secure bond between the wires and the new connector.
- Applying Heat Shrink Tubing: For added insulation and strain relief, slide appropriate-sized heat shrink tubing over each tinned wire. Position the tubing to cover the exposed conductors and extend slightly beyond the soldering points. Heat the tubing with a heat gun or a soldering iron to shrink it and form a snug, protective covering around the wires.
- Ensuring Wire Alignment: Prior to soldering the new connector, verify that the tinned wires are correctly aligned and positioned according to the pin configuration of the replacement connector. This meticulous attention to detail ensures that the connections are accurate and that the USB cable will function seamlessly after the repair.
By meticulously preparing the USB cable in accordance with these steps, you establish a solid foundation for the subsequent soldering of the new connector. Attention to detail and precision during this phase is instrumental in ensuring a successful and durable repair of the USB cable.
Soldering the New Connector
With the USB cable meticulously prepared, the next critical step in the repair process involves soldering the new connector onto the cable. This intricate procedure demands precision, patience, and a steady hand to ensure a secure and reliable connection. Here’s a detailed guide on how to effectively solder the new connector:
- Positioning the Connector: Carefully align the new USB connector with the prepared cable, ensuring that the exposed wires correspond to the appropriate pins on the connector. Secure the connector in place using a helping hand tool or a vise to maintain stability during the soldering process.
- Applying Flux: Prior to soldering, apply a small amount of flux to the exposed conductors and the soldering pads on the connector. Flux promotes solder flow and adhesion, facilitating a strong and reliable electrical connection.
- Soldering Technique: Using a clean and adequately heated soldering iron, carefully solder each wire to its respective soldering pad on the connector. Apply the soldering iron to the wire and pad simultaneously, allowing the solder to melt and form a secure bond. Exercise caution to avoid creating solder bridges between adjacent pads.
- Ensuring Solid Connections: After soldering each wire, gently tug on the wires to verify that they are securely attached to the connector. Inspect the solder joints to ensure that they are smooth, free from excess solder, and exhibit a shiny appearance, indicating a proper soldering technique.
- Applying Heat Shrink Tubing: Once the soldering is complete and the connections have been verified, slide the heat shrink tubing over the soldered connections. Apply heat to the tubing to shrink it, forming a protective barrier around the solder joints and providing strain relief for the newly soldered connections.
- Inspecting the Completed Connection: After the soldering and heat shrinking process, thoroughly inspect the newly soldered connections to ensure that they are properly aligned, insulated, and free from any defects. Use a magnifying glass to examine the solder joints closely and confirm the integrity of the connections.
By following these meticulous steps and exercising precision during the soldering process, you can effectively secure the new connector to the USB cable, paving the way for a fully restored and reliable USB connection. Attention to detail and a methodical approach are paramount in achieving a successful soldering outcome.
Testing the Connection
After completing the intricate process of soldering the new connector onto the USB cable, the final and crucial step in the repair process involves thoroughly testing the connection to ensure its functionality and reliability. This comprehensive testing phase serves as a validation of the repair work and provides assurance that the USB cable is fully operational. Here’s a detailed guide on how to effectively test the connection:
- Visual Inspection: Begin by visually inspecting the newly soldered connector and the surrounding area to ensure that there are no loose wires, exposed conductors, or stray solder residues. Verify that the heat shrink tubing is securely in place and that the solder joints exhibit a clean and uniform appearance.
- Continuity Check: Use a multimeter to perform a continuity test on the soldered connections. Confirm that there is uninterrupted electrical continuity between the corresponding pins on the new connector and the internal wires of the USB cable. Any breaks in continuity indicate a faulty connection that requires immediate attention.
- Connection Stability Test: Gently wiggle the USB cable near the soldered connector while observing the device it is connected to. Verify that the connection remains stable and does not intermittently disconnect or malfunction when subjected to slight movements. A secure and stable connection is indicative of a successful repair.
- Data Transfer and Charging Test: Connect the USB cable to a compatible device and perform data transfer operations, such as copying files or syncing data. Additionally, test the cable’s ability to charge the connected device effectively. Verify that data transfer is seamless and that the device charges without any issues, confirming the restored functionality of the USB cable.
- Visual Indicator Confirmation: If the device features a visual indicator for USB connectivity, such as an LED light, observe the indicator to ensure that it illuminates when the cable is connected and remains steady during data transfer or charging activities. A responsive visual indicator signifies a successful and stable connection.
By meticulously conducting these comprehensive tests, you can confidently ascertain the effectiveness of the repair work and validate the functionality of the newly restored USB connection. Thorough testing provides the assurance that the repaired USB cable is fully operational and ready to reliably serve its intended purpose.