
Common Problems with Headphone Jacks
Headphone jacks are essential for enjoying your favorite music, podcasts, or videos. However, like any other electronic component, they can encounter problems over time. Understanding the common issues that can arise with headphone jacks will help you troubleshoot and fix them more effectively. Here are some of the most common problems:
- Loose Connection: One of the primary problems with headphone jacks is a loose connection. This occurs when the jack becomes worn out or damaged, causing the headphones to frequently disconnect or produce poor sound quality.
- Broken Jack: Another issue you may encounter is a broken headphone jack. This can happen due to physical damage or excessive force applied to the jack. As a result, no sound can be heard through the headphones.
- Bent Pins: Headphone jacks often have delicate pins inside them. If these pins become bent or misaligned, the headphones may not work properly. It can also cause sound to come out only from one side.
- Dirty Jack: Dust, lint, or debris can accumulate inside the headphone jack over time, leading to a poor connection or distorted sound. Cleaning the jack regularly is essential to maintain optimal performance.
- Incompatible Devices: Sometimes, compatibility issues between headphones and devices can cause problems. For example, if you have a headphone with a 3.5mm jack and the device only supports a USB-C connection, you will need an adapter to use your headphones.
These common problems can significantly impact your listening experience. However, with the right tools and knowledge, you can easily fix many of these issues yourself. In the following sections, we will provide you with step-by-step guides to address each problem and get your headphone jack back in working order.
Tools and Materials You Will Need
Before you begin fixing your headphone jack, it’s important to gather the necessary tools and materials. Having everything on hand will make the process smoother and more efficient. Here are the essential items you will need:
- Small Screwdriver: A small screwdriver with the appropriate size and type of head will be needed to open up your device if necessary.
- Soldering Iron: If you’re dealing with a broken or loose connection, a soldering iron will be required to solder the wires back to the jack and ensure a secure connection.
- Replacement Headphone Jack: In case you need to replace the entire headphone jack, having a new one ready will save you time and effort.
- Needle Nose Pliers: These pliers will help you manipulate small parts, such as bent pins, without causing further damage to the jack.
- Isopropyl Alcohol: If you’re dealing with a dirty headphone jack, isopropyl alcohol can help clean off dirt and debris. Make sure to use 90% or higher concentration for maximum effectiveness.
- Q-tips or Microfiber Cloth: Use these to apply the isopropyl alcohol and gently clean the inside of the headphone jack.
- Adhesive: If you need to secure any parts back into place, such as loose wires or the jack itself, having adhesive like super glue or electrical tape on hand can be helpful.
- Patience and a Well-Lit Workspace: Repairing your headphone jack can be a delicate process that requires focus and patience. Ensure you have a well-lit workspace where you can comfortably perform the necessary repairs.
Gathering all the required tools and materials beforehand will save you from unnecessary frustration and delays during the repair process. With these items at your disposal, you’ll be well-equipped to tackle any headphone jack problem that comes your way.
Step-by-Step Guide to Fixing a Loose Headphone Jack
If you’re experiencing a loose headphone jack that frequently disconnects or has poor sound quality, here’s a step-by-step guide to help you fix it:
- Unplug Your Headphones: Start by removing your headphones from the device and any other connections.
- Inspect the Jack: Examine the headphone jack for any visible signs of damage, such as cracks or loose components.
- Tighten the Jack: If the headphone jack is slightly loose, you can try tightening it by carefully inserting a small screwdriver into the gap and gently rotating it clockwise.
- Check the Wires: If the jack is still loose, open up the device if possible and inspect the wires connected to the jack. Make sure they are securely attached and not frayed or damaged.
- Solder the Wires: If the wires are loose or detached, use a soldering iron to reattach them to the correct terminals on the jack. Be careful not to overheat the wires or the jack during the process.
- Reassemble the Device: Once the wires are securely soldered, carefully reassemble the device, ensuring all components are properly aligned and connected.
- Test the Headphones: Plug your headphones back into the device and check if the loose connection issue has been resolved. Listen for clear sound and ensure that the headphones stay securely plugged in.
If these steps don’t fix the issue or if you’re uncomfortable performing the repairs yourself, it’s recommended to consult a professional technician or contact the device manufacturer for further assistance. Remember to handle all electronic components with care and caution to avoid additional damage.
Step-by-Step Guide to Fixing a Broken Headphone Jack
If your headphone jack is completely broken and is not producing any sound, follow this step-by-step guide to fix it:
- Disconnect Your Headphones: Start by disconnecting your headphones from the device.
- Inspect the Jack: Examine the broken headphone jack for any visible damage, such as a loose or detached connector.
- Remove the Broken Jack: If the jack is removable, use a small screwdriver to carefully unscrew and remove it from the device.
- Prepare the Replacement Jack: If you have a replacement headphone jack, prepare it by ensuring it is compatible with your device and any necessary wires are properly attached.
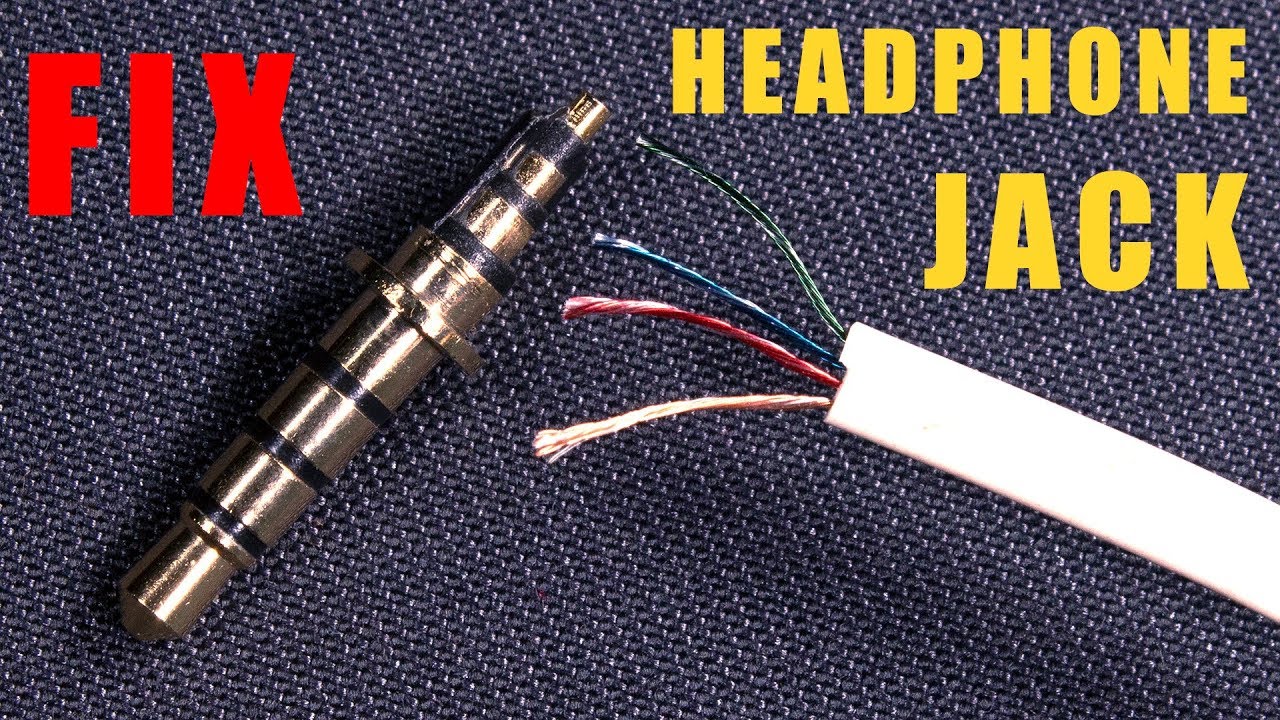
- Solder the Wires: Using a soldering iron, connect the wires from the replacement jack to the corresponding terminals on your device, following any color-coded or labeled instructions.
- Secure the Replacement Jack: Carefully place the replacement jack back into the device and secure it with screws or clips, if applicable.
- Reassemble and Test: Reassemble your device, making sure all components are properly aligned and connected. Then, plug your headphones into the replacement jack and test for sound. If everything is working correctly, you have successfully fixed your broken headphone jack.
If you are not comfortable with the repair process or if the broken jack is not removable or replaceable, it is advised to seek professional assistance from a technician or contact the manufacturer for further support. Always exercise caution when working with electronic components to prevent any additional damage.
Step-by-Step Guide to Fixing a Bent Headphone Jack
If your headphone jack has bent pins or connectors, causing sound to come out only from one side or not at all, follow this step-by-step guide to fix it:
- Remove Your Headphones: Start by disconnecting your headphones from the device.
- Inspect the Bent Pins: Carefully examine the headphone jack for any visibly bent or misaligned pins.
- Use Needle Nose Pliers: Gently grip the bent pin with needle nose pliers and apply slight pressure to straighten it. Be cautious not to exert too much force or break the pin.
- Repeat for Other Bent Pins: If there are multiple bent pins, repeat the previous step for each one, ensuring they are all properly aligned.
- Test the Headphones: Plug your headphones back into the device and check if the sound comes through both sides. If not, repeat the process for any remaining bent pins.
- Consider Applying Adhesive: If the pins are prone to bending or becoming misaligned, you may choose to apply a small amount of adhesive, such as super glue or electrical tape, to keep them in place and prevent future bending.
- Reassemble and Test: Once the pins are straightened and, if necessary, secured with adhesive, reassemble your device carefully. Then, plug your headphones in again and test for sound. If both sides are working properly, you have successfully fixed the bent headphone jack.
Remember to handle the delicate parts with care and avoid using excessive force when straightening the pins. If the issue persists or if you’re unsure about the repair process, it is recommended to seek assistance from a professional technician or contact the manufacturer for further support.
Step-by-Step Guide to Cleaning a Dirty Headphone Jack
If you’re experiencing poor sound quality or a distorted audio output from your headphones, it might be due to a dirty headphone jack. Follow this step-by-step guide to clean it:
- Remove Your Headphones: Begin by disconnecting your headphones from the device.
- Inspect the Jack: Examine the headphone jack for any visible dirt, dust, or debris that might be obstructing the connection.
- Prepare Isopropyl Alcohol: Take a Q-tip or dip a corner of a microfiber cloth in 90% or higher concentration isopropyl alcohol. Avoid using excessive liquid to prevent any damage to the device.
- Clean the Inside of the Jack: Gently insert the Q-tip or cloth into the headphone jack and rotate it in a circular motion. This will remove any dirt or debris that may be present. Avoid applying excessive pressure to prevent any damage.
- Repeat the Process: If needed, repeat the cleaning process with a fresh Q-tip or a different part of the cloth until the inside of the jack appears clean.
- Allow to Dry: Give the headphone jack a few moments to fully dry before reconnecting your headphones. This will prevent any chances of short-circuiting or damage due to moisture.
- Test the Headphones: Plug your headphones back into the device and test for clear sound. If the sound quality has improved or the distortions have disappeared, you have successfully cleaned your headphone jack.
Regularly cleaning your headphone jack can help maintain optimal audio quality and prevent future problems. However, if the issue persists after cleaning or if you suspect there might be additional underlying issues, it is advisable to seek professional assistance or contact the manufacturer for further support.
Tips and Tricks for Preventing Future Headphone Jack Issues
To avoid encountering problems with your headphone jack in the future, consider implementing the following tips and tricks:
- Handle with Care: Treat your headphone jack gently and avoid yanking or bending the connector excessively. Rough handling can lead to damage or loosening of the connections.
- Keep it Clean: Regularly clean the headphone jack using isopropyl alcohol and a soft cloth or cotton swab. Removing dirt and debris can prevent them from obstructing the connection and causing issues.
- Protect from Moisture: Keep your headphones and devices away from moisture, such as rain or water spills. Moisture can damage the internal components of the jack and lead to corrosion or short-circuiting.
- Use Proper Storage: When not in use, store your headphones in a safe and secure location. Avoid wrapping them tightly around devices or storing them in places where they can get tangled or crushed.
- Choose High-Quality Cables: Invest in headphones with high-quality cables that are resistant to wear and tear. Using cheap or flimsy cables can result in frequent cable and jack issues.
- Be Mindful of Compatibility: Ensure that your headphones are compatible with the device you are using. Using adapters or connectors that are not designed for your specific device can put strain on the headphone jack and cause damage.
- Unplug Correctly: When removing your headphones, always grasp the plug firmly and pull it straight out. Tugging or twisting the cable can stress the jack and weaken the connection over time.
- Regularly Check for Loose Connections: Periodically inspect the headphone jack for any signs of looseness or wiggling. If you notice any issues, address them as soon as possible to prevent further damage.
- Seek Professional Help: If you encounter persistent problems with your headphone jack or do not feel comfortable performing repairs yourself, it is best to seek assistance from a professional technician or contact the manufacturer for support.
By following these tips and tricks, you can prolong the lifespan of your headphone jack and enjoy uninterrupted audio experiences. Prevention and maintenance are key to avoiding future headphone jack issues.