
Check the Sound Settings
When your MacBook sound isn’t working, the first step is to check your sound settings. Sometimes, the volume may be turned down or muted, causing the sound to appear to be not working. Here’s how you can ensure your sound settings are correct:
- Click on the Apple menu at the top left corner of your screen and select “System Preferences.”
- In the System Preferences window, click on the “Sound” icon.
- Make sure the “Output” tab is selected.
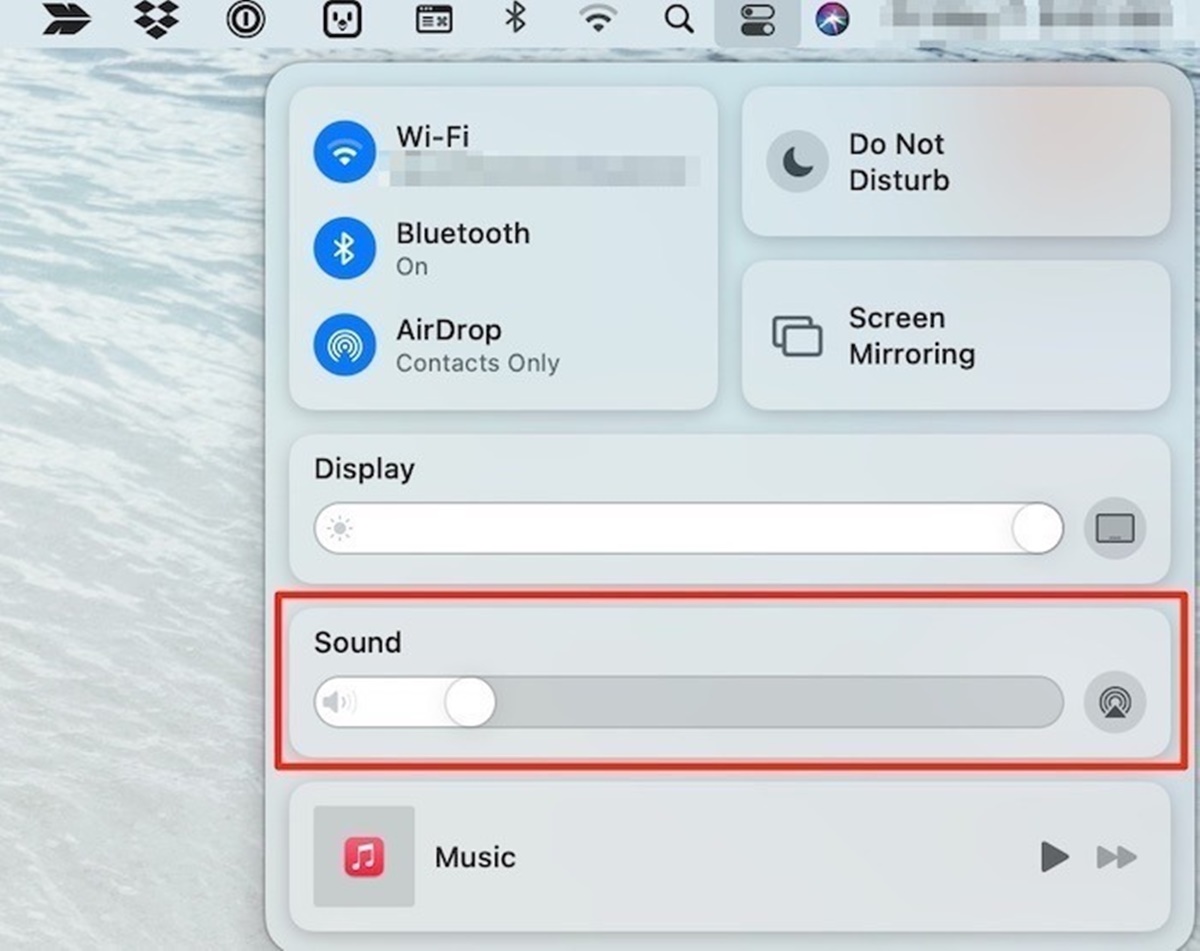
- Check the volume slider and ensure it is not set to the lowest level or muted. Adjust the slider to an appropriate level.
- If using headphones or external speakers, make sure they are properly connected to your MacBook.
- If you see any external output devices listed, such as HDMI or USB audio devices, ensure the correct one is selected from the drop-down menu.
- Click on the “Input” tab and ensure the correct input device is selected if you are using an external microphone.
Once you have checked and adjusted the sound settings as needed, try playing audio or video on your MacBook to see if the sound issue has been resolved.
If the sound still isn’t working, it’s time to move on to the next troubleshooting steps.
Restart your MacBook
Restarting your MacBook can often resolve various software-related issues, including sound problems. It allows the operating system to reset and clears any temporary glitches that may be causing the sound to malfunction. Here’s how you can restart your MacBook:
- Click on the Apple menu at the top left corner of your screen and select “Restart.”
- Alternatively, you can press and hold the power button until the option to restart appears on the screen. Then, click on “Restart.”
Once your MacBook restarts, try playing audio or video to check if the sound is working properly. If the sound is still not functioning, proceed to the next troubleshooting steps.
Restarting your MacBook is a simple yet effective solution that can resolve many minor software issues. It refreshes the system and can often reset any temporary glitches that may have been causing the sound problem. However, if restarting doesn’t fix the issue, further troubleshooting steps are necessary.
Update macOS
Keeping your MacBook’s operating system up to date is crucial for the overall performance and stability of your device, including its sound functionality. Apple regularly releases updates that may include fixes for known issues, including sound-related problems. Here’s how you can update your macOS:
- Click on the Apple menu at the top left corner of your screen and select “System Preferences.”
- In the System Preferences window, click on “Software Update.”
- If a software update is available, click on “Update Now” to start the update process.
- Follow the on-screen instructions to download and install the update. Your MacBook may need to restart during this process.
After your MacBook has been updated, check if the sound issue has been resolved. Playing audio or video files can help determine if the update has fixed the problem.
Updating macOS is vital as it includes bug fixes and improvements that can address sound-related issues. It ensures that your MacBook’s software is optimized for better performance and compatibility. However, if updating macOS doesn’t resolve the sound problem, we need to explore other potential solutions.
Check for Software Updates
In addition to updating macOS, it’s important to check for updates for the specific applications or drivers that are related to sound functionality on your MacBook. Sometimes, outdated software or drivers can cause compatibility issues and result in sound problems. Here’s how you can check for software updates:
- Open the App Store on your MacBook.
- Click on the “Updates” tab at the top of the App Store window.
- If any updates are available for your installed applications, click on the “Update” button next to each application to install the latest version.
- If you’re using any third-party audio software or drivers, check the developer’s website or support forums for updates or patches specifically related to sound issues.
- Restart your MacBook after installing any updates or patches to ensure they take effect.
Once you have updated your applications and drivers, test the sound on your MacBook to see if the problem has been resolved. Playing audio or video files is a good way to check for sound functionality.
Checking for software updates ensures that your applications and drivers are up to date, which can address compatibility issues and enhance the performance of your MacBook’s sound system. However, if the sound problem persists, we will explore other troubleshooting steps.
Disable Bluetooth
In some cases, Bluetooth connectivity issues can interfere with the sound output on your MacBook. Disabling Bluetooth temporarily can help determine if a Bluetooth device is causing the sound problem. Follow these steps to disable Bluetooth:
- Click on the Apple menu at the top left corner of your screen and select “System Preferences.”
- In the System Preferences window, click on “Bluetooth.”
- Toggle the switch button to turn off Bluetooth. The switch will turn gray when Bluetooth is disabled.
Once Bluetooth is disabled, check if the sound is working properly on your MacBook. If the sound now functions correctly, it indicates that a Bluetooth device was causing the interference.
If Bluetooth was not the cause of the sound issue, you can re-enable it by following the same steps and toggling the switch button to turn it back on.
Disabling Bluetooth can help identify any conflicts between Bluetooth devices and sound output on your MacBook. It’s a simple troubleshooting step that can provide insights into the source of the sound problem. However, if disabling Bluetooth doesn’t resolve the issue, we will move on to the next troubleshooting steps.
Check External Devices
If you’re using external audio devices, such as speakers or headphones, it’s important to ensure they are properly connected and functioning correctly. Here’s how you can check your external devices:
- Verify that your external speakers or headphones are securely plugged into the correct audio ports on your MacBook.
- If you’re using a headphone jack adapter, make sure it is connected tightly and functioning properly.
- Try connecting your external audio devices to a different port, if available, to rule out any issues with a specific port on your MacBook.
- If possible, test your external devices on another device to check if they are working properly. This will help determine if the issue lies with the external device or your MacBook.
If the sound works fine with external audio devices connected to another device, it suggests that the problem may be with your MacBook. However, if the sound issue persists with multiple devices, the problem may be with the external devices themselves.
Checking your external audio devices ensures that they are properly connected and functioning correctly. This step can help identify whether the issue lies with the devices or your MacBook. If the sound problem persists even after checking the external devices, we will move on to the next troubleshooting steps.
Reset the PRAM/NVRAM
Resetting the PRAM (Parameter Random-Access Memory) or NVRAM (Non-Volatile Random-Access Memory) can help resolve various hardware-related issues, including sound problems on your MacBook. Resetting these memory settings allows your MacBook to clear and restore certain settings to their default values. Here’s how you can reset the PRAM/NVRAM:
- Shut down your MacBook.
- Press the power button and immediately press and hold the Command + Option + P + R keys on your keyboard.
- Keep holding the keys until you hear the startup sound for the second time, or if your MacBook has a T2 chip, until you see the Apple logo and progress bar appear and disappear twice.
- Release the keys and let your MacBook continue starting up.
After your MacBook has started up, check if the sound issue has been resolved. Test the sound by playing audio or video files.
Resetting the PRAM/NVRAM can help clear any corrupt settings that may be causing sound problems on your MacBook. This step restores the settings to their default values and can rectify various hardware-related issues. However, if resetting the PRAM/NVRAM doesn’t resolve the sound issue, we will move on to the next troubleshooting steps.
Reset the SMC
The System Management Controller (SMC) on your MacBook is responsible for managing various hardware functions, including sound. Resetting the SMC can help resolve issues related to power management, hardware functionality, and sound problems. Here’s how you can reset the SMC:
- Shut down your MacBook.
- Connect your MacBook to a power source.
- On the built-in keyboard, press and hold the Shift + Control + Option keys, then press the power button at the same time.
- Release all the keys and the power button simultaneously.
- Turn on your MacBook by pressing the power button.
After resetting the SMC, check if the sound issue has been resolved. Test the sound by playing audio or video files.
Resetting the SMC can help recalibrate hardware functions, including sound, on your MacBook. It can resolve power-related issues that may be interfering with the sound output. However, if resetting the SMC doesn’t fix the sound problem, we will proceed to the next troubleshooting steps.
Check the Audio Ports
If your MacBook has multiple audio ports, such as headphone jacks or USB-C ports, it’s important to check them to ensure they are not causing the sound problem. Here’s how you can check the audio ports:
- Inspect the audio ports on your MacBook for any visible damage or debris. Use a flashlight if needed.
- If you’re using headphones or external speakers, try plugging them into different audio ports to see if the sound works on any of them.
- If you’re using USB-C audio devices, test different USB-C ports to check if the sound works on any of them.
- If you’re using an adapter for your headphones or speakers, ensure that the adapter is functioning properly. Try using a different adapter, if available.
Checking the audio ports ensures that they are not physically damaged or obstructed, which can affect the sound output. By testing different ports, you can determine if there is a specific issue with a particular port on your MacBook.
If the sound works fine on a different audio port, it may indicate a problem with the specific port you were originally using. In such cases, you can consider using a different port or seeking further assistance to address the issue.
Checking the audio ports helps identify any physical issues that may be causing the sound problem on your MacBook. However, if the sound issue persists even after checking the ports, we will proceed to the next troubleshooting steps.
Test with Different Headphones or Speakers
If you’re experiencing sound issues on your MacBook, it’s important to rule out any problems with your headphones or speakers. Testing with different headphones or speakers can help determine if the sound issue is specific to the device you’re using. Here’s how you can test with different headphones or speakers:
- Disconnect the current headphones or speakers from your MacBook.
- Connect a different pair of headphones or a different set of speakers to your MacBook.
- Play audio or video on your MacBook and check if the sound is working with the new headphones or speakers.
- If the sound works fine with the different headphones or speakers, it indicates that the original device may be causing the issue.
- If you don’t have access to different headphones or speakers, try using the original device on another device to determine if it works properly.
Testing with different headphones or speakers helps isolate whether the sound issue lies with the device you’re using or with your MacBook. By using a different device or trying the original device on another device, you can confirm if the problem is specific to your MacBook or the headphones/speakers themselves.
If the sound works fine with different headphones or speakers, you may need to replace or repair the original device. However, if the sound issue persists even with different devices, we will proceed to the next troubleshooting steps.
Reset Sound Preferences
If you’re still experiencing sound problems on your MacBook, resetting the sound preferences can help resolve any misconfigurations or corrupted settings that may be causing the issue. Resetting the sound preferences will restore the default audio settings. Here’s how you can reset the sound preferences:
- Click on the Apple menu at the top left corner of your screen and select “System Preferences.”
- In the System Preferences window, click on the “Sound” icon.
- Go to the “Output” tab and select the internal speaker as the default output device.
- Go to the “Input” tab and select the internal microphone as the default input device, if applicable.
- Close the System Preferences window.
- Restart your MacBook.
After your MacBook has restarted, check if the sound is working properly. Play audio or video files to verify if the issue has been resolved.
Resetting the sound preferences can help fix any misconfigurations or corrupted settings that may have been causing the sound problem on your MacBook. It refreshes the audio settings to their default state and allows for a fresh start. However, if resetting the sound preferences doesn’t resolve the issue, we will proceed to the next troubleshooting steps.
Use Terminal Command to Reset Core Audio
If you’re still encountering sound issues on your MacBook, you can try resetting the Core Audio framework using Terminal. This can help resolve any underlying software issues related to audio processing. Here’s how you can use Terminal to reset Core Audio:
- Open Terminal on your MacBook. You can find it in the Utilities folder within the Applications folder, or by using Spotlight search.
- Once Terminal is open, type the following command:
sudo killall coreaudiodNote: You may be asked to enter your administrator password.
- Press Enter to execute the command. Terminal will force quit the Core Audio process, and it will automatically restart.
After executing the command and the Core Audio process is restarted, test the sound on your MacBook to see if the issue has been resolved. Play audio or video files to check if the sound is working properly.
Resetting the Core Audio framework using Terminal can help fix software-related issues that may be affecting sound processing on your MacBook. It essentially restarts the audio system and can resolve common audio problems. However, if the sound issue persists, we will proceed to the next troubleshooting steps.
Reset the Headphone Jack
If you’re experiencing sound issues specifically with the headphone jack on your MacBook, resetting the headphone jack can help resolve the problem. This method is applicable if you’re not getting any sound through headphones or if the sound quality is distorted. Here’s how you can reset the headphone jack:
- Ensure that there are no headphones or external devices connected to the headphone jack.
- Gently insert a cotton swab or a small soft-bristle brush into the headphone jack.
- Very softly and carefully rotate the cotton swab or brush inside the jack, making sure to clean any dust or debris that may be lodged inside.
- Do not use excessive force or insert any sharp objects into the jack, as this can cause damage.
- After cleaning, wait for a few minutes before reconnecting headphones or external devices.
Once you have reset the headphone jack, reconnect your headphones or external devices and test the sound. Play audio or video files to check if the sound is working properly and if the issue has been resolved.
Resetting the headphone jack by cleaning it can help remove any debris or dust particles that may be obstructing proper audio output. This simple procedure can often restore functionality to the headphone jack and improve the sound quality. However, if the sound issue persists, we will move on to the next troubleshooting steps.
Check for Hardware Issues
If you’ve tried the previous troubleshooting steps and still have sound issues on your MacBook, it’s time to check for potential hardware problems. Here are a few steps to help you identify any hardware issues:
- Inspect the audio ports, such as headphone jacks or USB-C ports, for any physical damage or debris. Use a flashlight if needed.
- If your MacBook has external speakers, test them on another device to confirm if they’re functioning properly.
- If available, connect different headphones or speakers to your MacBook and check if the sound works with them. This will help determine if the issue is specific to the original audio device.
- Try using your MacBook’s built-in speakers. If you can’t hear any sound, it may indicate a hardware problem.
- If you’re comfortable doing so, you can consider resetting the internal audio cables by following appropriate hardware guides specific to your MacBook model. However, it’s advisable to consult an authorized technician for such tasks.
If you suspect a hardware issue, it’s recommended to reach out to Apple Support or visit an Apple Authorized Service Provider for further assistance. They can diagnose and repair any potential hardware problems with your MacBook’s sound system.
Checking for hardware issues helps identify if there are any physical problems affecting the sound functionality of your MacBook. If hardware issues are confirmed, it’s best to consult professionals for proper diagnosis and resolution.
Contact Apple Support
If you’ve exhausted all the troubleshooting steps and still haven’t been able to resolve the sound issues on your MacBook, it’s time to reach out to Apple Support for further assistance. Apple’s customer support team consists of experts who can provide personalized guidance and solutions tailored to your specific issue. Here’s how you can contact Apple Support:
- Visit the Apple Support website and navigate to the MacBook section.
- Choose the appropriate support option, such as live chat, phone call, or scheduling an appointment at an Apple Store.
- Provide detailed information about the sound issue you’re experiencing, including any troubleshooting steps you’ve already taken.
- Follow the instructions provided by Apple Support to troubleshoot further or arrange for service if necessary.
Apple Support is well-equipped to handle a wide range of technical issues, including sound problems on your MacBook. Their expertise and resources can help identify and resolve complex issues that may require specialized solutions or repairs.
Remember to have your MacBook’s serial number and warranty information readily available when contacting Apple Support, as it may be required for troubleshooting or repair services.
Don’t hesitate to reach out to Apple Support. They are there to assist you and will work diligently to find a resolution to your sound issue.