Check the Headset Connection
One of the first things to do when your Xbox One controller headphone jack isn’t working is to check the headset connection. While it may seem simple, sometimes the issue can be as simple as a loose or faulty connection.
Start by disconnecting the headset from the controller and then plugging it back in firmly. Give it a couple of gentle twists and ensure that it is securely inserted into the jack. Sometimes, over time, the connection can become loose, which can cause audio problems. By reseating the headset, you may be able to fix the issue.
If reseating the headset doesn’t work, try using a different headset or pair of headphones. This will help determine if the problem lies with the headset itself or the controller. If another headset works fine with your controller, then you may need to replace your original headset.
Additionally, check the cable for any signs of damage or wear. Sometimes, a broken or frayed cable can cause connectivity issues. If you notice any damage, it’s best to replace the headset or cable to ensure optimal performance.
It’s also worth checking if the headset works properly on another device, such as a smartphone or computer. This will help confirm whether the problem is specific to the Xbox One controller or if it’s an issue with the headset itself.
By carefully checking the headset connection, trying a different headset, and inspecting the cable for any damage, you can determine if the problem lies with the connection or if there are other underlying issues that need to be addressed.
Ensure the Controller’s Firmware is Up to Date
If you’re experiencing issues with the Xbox One controller headphone jack, it’s important to ensure that the controller’s firmware is up to date. Firmware updates often include bug fixes and performance improvements that can help resolve issues with various functions, including the headphone jack.
To check if your controller’s firmware is up to date, follow these steps:
- Connect your controller to the Xbox One console using a USB cable.
- Press the Xbox button on your controller to open the Xbox guide.
- Navigate to the System tab and select Settings.
- Within the Settings menu, choose Devices & connections.
- Select Accessories and then select your controller.
- Under the Firmware version section, check if there’s an available update.
- If an update is available, follow the on-screen instructions to install it.
After updating the firmware, restart your console and check if the headphone jack is now functioning properly. Sometimes, firmware updates can resolve compatibility issues and improve the overall performance of the controller, including the audio functionality.
If there’s no available update or if updating the firmware doesn’t solve the problem, try connecting the controller to a different USB port on the console. This can help troubleshoot any potential issues with the USB connection, which can indirectly affect the headphone jack.
It’s important to keep your controller’s firmware up to date to ensure the best performance and functionality. Regularly checking for updates and installing them when available can help prevent and solve various issues, including problems with the headphone jack.
Restart Your Xbox One Console
If you’re facing issues with the Xbox One controller headphone jack, a simple and effective troubleshooting step is to restart your console. Restarting can help resolve temporary glitches or software conflicts that may be causing the problem.
To restart your Xbox One console, follow these steps:
- Press and hold the Xbox button on the front of the console for about 10 seconds.
- The console will power off completely. Wait for a few seconds.
- Press the Xbox button on the console again to turn it back on.
Once the console restarts, reconnect your controller and check if the headphone jack is now functioning correctly. This simple step can often resolve minor issues and restore normal functionality.
If a simple restart doesn’t solve the problem, consider performing a full power cycle of your console. To do this, follow these steps:
- Press and hold the Xbox button on the front of the console for about 10 seconds until it powers off completely.
- Unplug the power cord from the back of the console and wait for at least 10 seconds.
- Plug the power cord back in and wait for the console to power on.
- Once the console has restarted, reconnect your controller and test the headphone jack.
A full power cycle can help clear any lingering temporary issues and refresh the system, potentially resolving more stubborn problems with the headphone jack.
By restarting or power cycling your Xbox One console, you give it a chance to reset and eliminate any temporary glitches that may be affecting the headphone jack. Often, this simple step can restore proper functionality without the need for further troubleshooting.
Verify the Sound Settings on Your Console
When facing issues with the Xbox One controller headphone jack, it’s important to verify the sound settings on your console. Sometimes, incorrect audio settings or misconfigured options can cause problems with the headphone jack.
To check and adjust the sound settings on your console, follow these steps:
- Press the Xbox button on your controller to open the Xbox guide.
- Navigate to the System tab and select Settings.
- Within the Settings menu, choose General, then select Volume & audio output.
- Check if the “Headset audio” options are set correctly. Ensure that the volume levels are appropriate and not muted.
- If you’re using a different audio output device, such as speakers or a home theater system, select the appropriate option under the “Speaker audio” settings.
Additionally, you may want to check the audio settings within specific games or applications. Some games have their own audio settings that can override the system settings, so make sure to verify and adjust them if necessary.
If you’re using a wireless headset, ensure that it’s properly connected to the console and that the wireless dongle or adapter is securely plugged in. Wireless headsets may have their own specific settings or require additional setup steps, so refer to the manufacturer’s instructions for guidance.
By verifying and adjusting the sound settings on your console, you can ensure that the audio output is correctly routed to the headphone jack and that there are no conflicting configurations that may be causing the problem.
If adjusting the sound settings doesn’t resolve the issue, continue to the next troubleshooting steps to further diagnose and fix the problem with the Xbox One controller headphone jack.
Try a Different Headset or Controller
If you’re still experiencing problems with the Xbox One controller headphone jack, it’s worth trying a different headset or controller to determine if the issue is isolated to a specific device.
Start by borrowing a friend’s headset or controller, if possible, and connect it to your Xbox One console. Test the headphone jack with the alternate device to see if it works properly. If the audio comes through without any issues, it suggests that the problem lies with your original headset or controller.
If you don’t have access to another headset or controller, you can also try connecting your existing headset to a different Xbox One console. This will help determine if the issue is specific to your console or if it’s related to the headset itself.
By swapping out different headsets or controllers, you can identify whether the problem lies with the device or if there are underlying issues with your Xbox One console. This information will be helpful for further troubleshooting or when contacting Xbox Support for assistance.
If you determine that the problem is with your headset, you may need to replace it. Contact the headset manufacturer or consider purchasing a new headset that is compatible with the Xbox One console. It’s important to choose a headset that is designed specifically for use with Xbox One to ensure compatibility and optimal performance.
Similarly, if the issue is with your controller, you may need to replace or repair it. Contact Xbox Support for further guidance and assistance with troubleshooting or finding a solution for your controller.
Trying a different headset or controller can help pinpoint the source of the problem and guide you towards the appropriate solution. Whether it’s a faulty device or an issue with your console, understanding the root cause will make it easier to fix and get your Xbox One controller headphone jack working again.
Clean the Headphone Jack and Controller Port
If you’re facing issues with the Xbox One controller headphone jack, it’s possible that dirt, debris, or dust may be causing connectivity problems. Cleaning the headphone jack and controller port can help resolve any potential blockages and improve the overall performance of the audio output.
To clean the headphone jack and controller port, follow these steps:
- Turn off your Xbox One console and disconnect the controller.
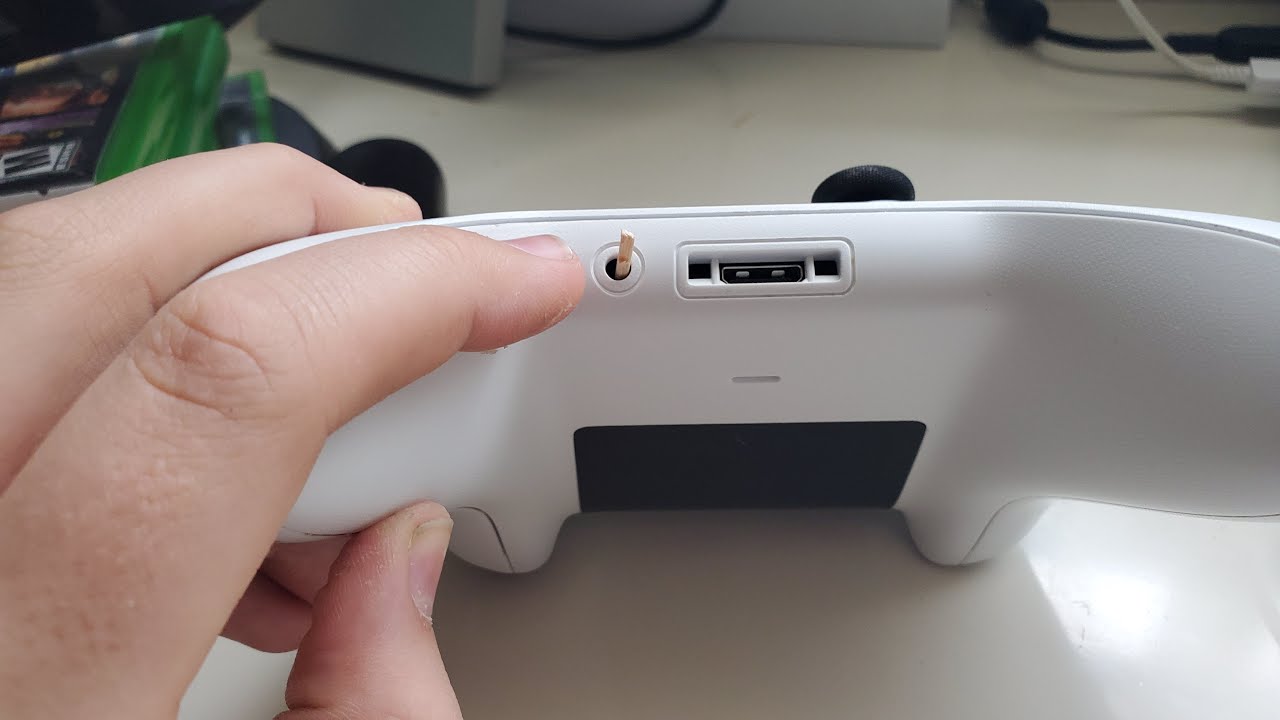
- Using a flashlight, carefully inspect the headphone jack and controller port for any visible debris.
- If you notice any dirt or debris, use a can of compressed air to blow into the headphone jack and controller port. This can help dislodge any loose particles.
- Alternatively, you can use a soft-bristled brush, such as a clean toothbrush, to gently sweep away any visible dirt or debris.
- After cleaning, reconnect the controller to the Xbox One console and test the headphone jack.
It’s important to exercise caution and not use any sharp objects or abrasive materials when cleaning the headphone jack and controller port. This can cause damage and further worsen the issue.
If the issue persists after cleaning, consider using another method to clean the connection points. One such method is to slightly dampen a cotton swab with isopropyl alcohol and gently clean the headphone jack and controller port. Ensure that the cotton swab is not too wet to avoid any liquid damage.
By cleaning the headphone jack and controller port, you can eliminate any potential obstructions that may be preventing proper connectivity. This simple maintenance step can often resolve issues with audio output and restore functionality to the Xbox One controller headphone jack.
If cleaning doesn’t solve the problem, proceed to the next troubleshooting steps to further diagnose and address the issue.
Reset Your Xbox One Controller
If you’re still experiencing issues with the Xbox One controller headphone jack, performing a reset on the controller itself could potentially resolve the problem. Resetting the controller can help clear any temporary glitches or settings that may be causing the audio issue.
To reset your Xbox One controller, follow these steps:
- With the controller connected to the console, press and hold the Xbox button for about 10 seconds.
- The controller will power off completely. Release the Xbox button.
- Press the Xbox button again to turn on the controller.
After the controller restarts, reconnect it to the Xbox One console and test the headphone jack. This reset can often resolve minor issues and restore the proper functionality of the controller, including the audio output.
If a simple reset doesn’t solve the problem, you can also try updating the controller’s firmware (as mentioned in a previous section). Sometimes, outdated or incompatible firmware can cause issues with various functions, including the headphone jack.
If the reset and firmware update don’t fix the issue, consider trying the controller on a different Xbox One console or using a different controller on your console. This can help determine if the problem lies with the specific controller or if it’s related to the console itself.
By resetting your Xbox One controller, you give it a chance to refresh its settings and potentially resolve any software-related issues affecting the headphone jack. If the problem persists, further steps may be needed to diagnose and address the issue.
Continue to the next troubleshooting steps or consult Xbox Support for further assistance and guidance with your Xbox One controller headphone jack issue.
Contact Xbox Support for Further Assistance
If you’ve tried all the previous troubleshooting steps and are still unable to resolve the issue with the Xbox One controller headphone jack, it may be time to reach out to Xbox Support for further assistance. They have a dedicated team of experts who can provide guidance and help you find a solution.
Xbox Support offers several ways to get in touch:
- Visit their official website and access the support section. Here, you can find troubleshooting articles, community forums, and contact options.
- Utilize the Xbox Support Twitter account or other social media channels to communicate with their support team.
- Call the Xbox Support phone number for personalized assistance and guidance.
When contacting Xbox Support, be sure to provide them with detailed information about the issue you’re experiencing. Describe the troubleshooting steps you’ve already taken and any specific error messages you may have encountered. This will help them understand the problem better and provide more targeted assistance.
Xbox Support may guide you through additional troubleshooting steps specific to your issue or may advise sending in the controller for repairs or replacement, especially if it’s still under warranty.
Remember to be patient and polite with the support team, as they are there to assist you. They will do their best to help you resolve the issue and get your Xbox One controller headphone jack working properly again.
By reaching out to Xbox Support, you can get expert help and access to additional resources to address the problem with your Xbox One controller headphone jack.