
What is a Wago Connector?
A Wago connector is a versatile and reliable tool used to create secure electrical connections without the need for traditional wire nuts or crimp connectors. This innovative device features a simple yet effective design, making it a popular choice for electricians, DIY enthusiasts, and professionals in various industries. Wago connectors are known for their ease of use, durability, and ability to streamline the process of joining wires, making them an essential component in electrical installations and repairs.
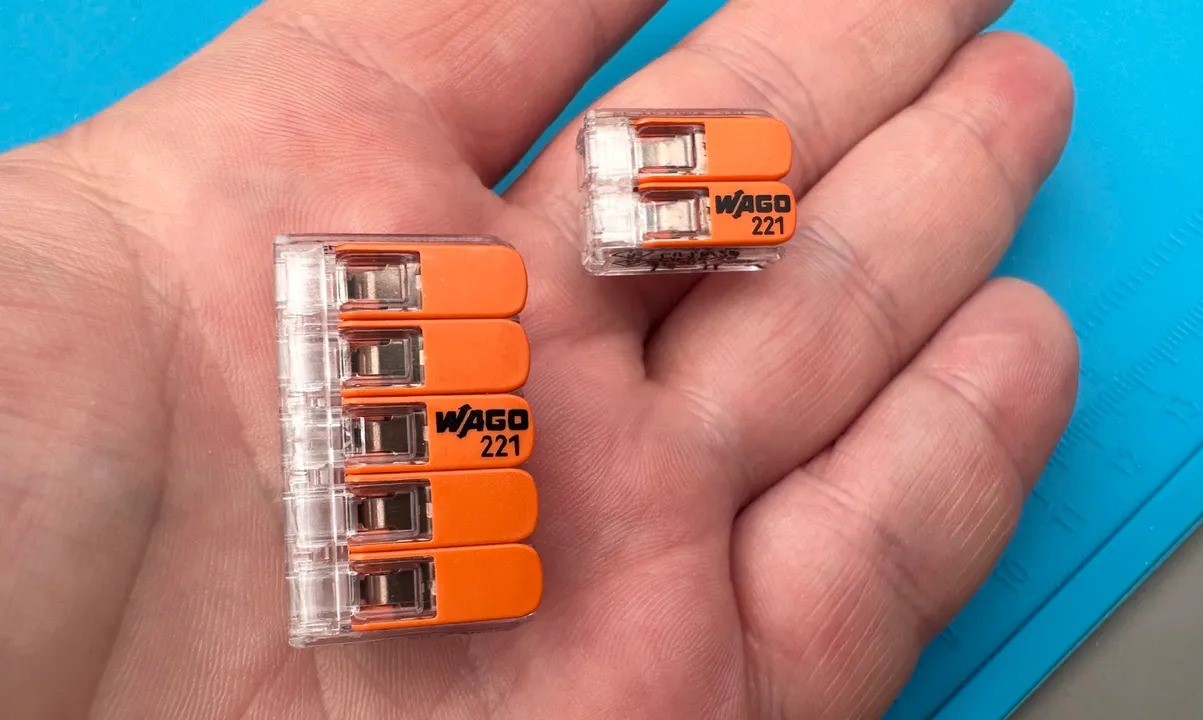
Wago connectors are available in various configurations, including lever connectors, push-wire connectors, and lighting connectors, each designed to accommodate specific wiring needs. The lever connectors, for example, feature a user-friendly lever that opens and closes to secure the wires in place, while push-wire connectors utilize a push-in system for effortless wire insertion. Furthermore, lighting connectors are tailored for connecting solid and stranded conductors, offering a reliable solution for lighting applications.
These connectors are designed to accommodate a wide range of wire sizes and types, including solid, stranded, and fine-stranded wires, making them suitable for diverse electrical projects. With their compact size and compatibility with different wire gauges, Wago connectors provide flexibility and convenience, allowing users to create secure connections in confined spaces and challenging environments.
In addition to their versatility, Wago connectors are engineered to ensure a safe and dependable electrical connection. Their robust construction and advanced clamping mechanism help prevent wire damage and maintain consistent contact pressure, reducing the risk of loose connections and electrical faults. This reliability makes Wago connectors a trusted choice for applications where secure and stable electrical connections are paramount.
Overall, Wago connectors offer a practical and efficient solution for joining wires in various electrical applications. Their user-friendly design, compatibility with different wire types, and emphasis on safety make them an indispensable component for anyone working with electrical systems.
The next steps will guide you through the process of using a Wago connector to create secure and reliable electrical connections.
Step 1: Gather Your Materials
Before you begin using a Wago connector, it’s essential to gather the necessary materials and tools to ensure a smooth and efficient process. Having the right equipment at hand will enable you to create secure electrical connections with ease. Here’s what you’ll need:
- Wago Connectors: Select the appropriate Wago connectors based on the type and gauge of the wires you intend to join. Ensure that the connectors are in good condition, free from damage or deformities that could affect their performance.
- Wire Strippers: Use wire strippers to carefully remove the insulation from the ends of the wires, exposing the conductors for insertion into the Wago connectors. Choose wire strippers that are suitable for the gauge of the wires you are working with.
- Wire Cutters: Have wire cutters on hand to trim the wires to the required length, ensuring a neat and precise fit within the Wago connectors.
- Electrical Tape (Optional): While not always necessary, electrical tape can be used to provide an extra layer of insulation and protection once the wires are connected. It can also help secure the Wago connectors in place if needed.
- Personal Protective Equipment (PPE): Depending on the specific electrical work being performed, it’s important to prioritize safety by wearing appropriate PPE, such as insulated gloves and safety glasses, to protect against potential electrical hazards.
- Work Area Preparation: Ensure that your work area is well-lit and free from any potential obstructions. A clean and organized workspace will contribute to a safe and efficient process.
By gathering these materials and preparing your work area, you’ll be ready to move on to the next step of using a Wago connector to create reliable electrical connections.
Step 2: Prepare the Wires
Before inserting the wires into the Wago connector, it’s crucial to prepare the wires properly to ensure a secure and reliable connection. Follow these steps to prepare the wires:
- Strip the Insulation: Using the appropriate wire strippers, carefully strip the insulation from the ends of the wires to expose the conductors. Take care to strip an appropriate length of insulation, typically around 1/2 to 3/4 inch, to ensure that an adequate portion of the conductor will be inserted into the Wago connector.
- Inspect the Conductors: Once the insulation is removed, visually inspect the exposed conductors to ensure that they are clean, straight, and free from any damage or fraying. Trim any damaged or uneven portions of the conductors using wire cutters to maintain a uniform and smooth surface for insertion into the Wago connector.
- Twist Stranded Wires (If Applicable): If you are working with stranded wires, gently twist the individual strands together to form a tight and uniform bundle. This will help prevent the strands from splaying or fraying during insertion into the Wago connector, ensuring a secure connection.
- Confirm Wire Compatibility: Verify that the wire type and gauge are compatible with the selected Wago connector. Ensure that the wires are clean and free from any debris or contaminants that could interfere with the connection.
By meticulously preparing the wires according to these steps, you will set the stage for successful insertion into the Wago connector, ultimately resulting in a robust and dependable electrical connection. With the wires properly prepared, you are ready to proceed to the next step of using the Wago connector.
Step 3: Insert the Wires into the Wago Connector
With the wires prepared, it’s time to insert them into the Wago connector to create a secure and reliable electrical connection. Follow these steps to properly insert the wires:
- Open the Connector: If using a lever-operated Wago connector, lift the lever to open the connector. For push-wire connectors, ensure that the wire insertion point is clear and unobstructed.
- Insert the Wires: Gently insert the prepared wires into the designated ports of the Wago connector. Ensure that each conductor is fully inserted and makes contact with the connector’s internal clamping mechanism. For push-wire connectors, push the wires into the designated slots until they are fully seated.
- Verify Proper Insertion: Confirm that the conductors are securely inserted and make direct contact with the connector’s internal components. Check for any signs of resistance or obstruction during the insertion process, as this could indicate improper alignment or incomplete insertion.
- Close the Connector (Lever Connectors Only): If using a lever-operated Wago connector, firmly press the lever down to close the connector, securing the wires in place. You should hear a distinct click, indicating that the connector is fully closed and the wires are clamped securely.
- Check for Secure Connection: Once the wires are inserted, gently tug on each wire to ensure that it is firmly held in place within the Wago connector. Verify that there is no visible movement or slippage, indicating a secure and reliable connection.
By following these steps, you will successfully insert the wires into the Wago connector, creating a stable and durable electrical connection. With the wires securely in place, you are ready to proceed to the next step of using the Wago connector.
Step 4: Secure the Wires
After inserting the wires into the Wago connector, it’s essential to secure them in place to ensure a stable and dependable electrical connection. Follow these steps to properly secure the wires within the Wago connector:
- Verify Proper Clamping: Ensure that the Wago connector’s clamping mechanism is securely holding each wire in place. Visually inspect the connector to confirm that the conductors are fully engaged and clamped within the connector, providing a reliable connection.
- Utilize Lever Locking Mechanism (Lever Connectors Only): If using a lever-operated Wago connector, engage the lever locking mechanism to prevent accidental opening of the connector. This additional step enhances the security of the connection, particularly in environments where vibration or movement may be present.
- Apply Electrical Tape (Optional): If desired, you can use electrical tape to provide an extra layer of insulation and protection around the Wago connector and the connected wires. This step can be particularly beneficial in applications where additional insulation is required or where the connector may be exposed to environmental factors.
- Organize and Neaten the Wires: Arrange the wires and any excess length in a tidy and organized manner, minimizing the risk of accidental tugs or pulls on the connected wires. Neatly bundling and securing the wires can contribute to a cleaner and more professional installation.
- Perform a Visual Inspection: Conduct a final visual inspection of the secured wires and the Wago connector to ensure that everything is in order. Look for any signs of improper clamping, loose wires, or other irregularities that may require attention.
By following these steps, you will effectively secure the wires within the Wago connector, promoting a stable and resilient electrical connection. Taking the time to verify the security of the connection and implement additional measures as needed will contribute to the overall reliability of the electrical installation.
Step 5: Check the Connection
After securing the wires within the Wago connector, it’s crucial to thoroughly check the connection to ensure its integrity and reliability. Follow these steps to perform a comprehensive check of the connection:
- Visual Inspection: Begin by visually inspecting the Wago connector and the connected wires. Look for any signs of damage, irregularities, or loose components that may compromise the connection. Ensure that the wires are neatly arranged and securely held within the connector.
- Tug Test: Gently tug on each wire to assess the strength of the connection. The wires should remain firmly held within the Wago connector, with no visible movement or slippage. Performing a tug test helps verify the stability and security of the connection.
- Electrical Continuity Test (Optional): If necessary, use a multimeter or continuity tester to verify the electrical continuity of the connection. This test confirms that the conductors are effectively joined within the Wago connector, ensuring the uninterrupted flow of electrical current.
- Check for Proper Insulation: Confirm that the exposed conductors are adequately insulated within the Wago connector. Ensure that no bare conductors are visible outside the connector and that any additional insulation, such as electrical tape, is applied as needed for enhanced protection.
- Verify Lever Engagement (Lever Connectors Only): If using a lever-operated Wago connector, ensure that the lever is fully engaged and locked in place, securing the wires within the connector. The lever should exhibit a secure and stable position, indicating proper closure of the connector.
By meticulously checking the connection using these steps, you can confirm that the electrical connection created with the Wago connector is robust, secure, and compliant with safety standards. This thorough assessment contributes to the overall reliability and performance of the electrical installation.
Step 6: Repeat for Additional Wires
If your electrical project involves multiple wires that need to be connected, it’s important to follow the same precise process for each additional wire. By repeating the steps for each wire, you can ensure that all connections are secure and reliable. Here’s how to proceed when working with multiple wires:
- Prepare Each Wire Individually: Treat each wire as a separate entity and meticulously prepare them for insertion into the Wago connector. This includes stripping the insulation, inspecting the conductors, and ensuring compatibility with the chosen Wago connector.
- Insert Wires into Separate Ports: If using a Wago connector with multiple ports, insert each wire into its designated port, maintaining a clear distinction between the individual connections. Ensure that the wires are not crossed or tangled within the connector.
- Secure and Inspect Each Connection: After inserting each wire, follow the steps to secure the wires and perform a thorough inspection of each connection. This includes verifying proper clamping, conducting tug tests, and checking for insulation and alignment.
- Consistent Application of Safety Measures: Throughout the process of connecting multiple wires, maintain a high level of attention to safety and precision. Confirm that all safety protocols and best practices are consistently applied to each connection, regardless of the number of wires involved.
- Systematic Verification of All Connections: Once all the wires are secured within the Wago connectors, systematically go through each connection to ensure that they meet the required standards of quality, reliability, and safety. This comprehensive verification process helps prevent oversights and ensures that every connection is sound.
By repeating the established steps for each additional wire, you can uphold the same level of excellence and reliability across all connections within your electrical project. This systematic approach contributes to the overall integrity and performance of the entire electrical installation.