
Preparations
Before you begin unhooking your sectional sofa, it’s important to make a few preparations to ensure a smooth and hassle-free process. Taking the time to plan and organize will save you from potential difficulties and ensure that your furniture remains in good condition throughout the process. Here are some essential steps to follow:
1. Clear the Area
Start by clearing the area around your sectional sofa. Remove any obstacles such as coffee tables, plants, or other furniture that may obstruct the movement of the sections. This will provide you with enough space to work and prevent any accidental damage to your belongings.
2. Gather the Necessary Tools
Before you begin disassembling your sectional sofa, gather all the necessary tools you may need. This may include a screwdriver, pliers, Allen wrenches, or any other tools specific to your sofa’s construction. Having the right tools within reach will make the task easier and more efficient.
3. Read the Manual
If your sectional sofa came with a manual, it’s a good idea to give it a thorough read before proceeding. The manual may provide specific instructions or precautions for disassembling and reassembling your particular sofa model. Familiarize yourself with the manufacturer’s recommendations to ensure you follow the correct procedures.
4. Enlist a Helping Hand
Sectional sofas can be heavy and bulky, making it challenging to handle them alone. Consider enlisting the help of a friend or family member to assist you during the unhooking process. Having an extra pair of hands will make it easier to maneuver the sections and prevent any accidental injuries or damages.
5. Protect the Surroundings
Take a moment to protect the surrounding areas before you start unhooking the sofa. Lay down protective materials, such as blankets or drop cloths, to prevent scratches or damage to the floor or walls. By taking these precautions, you can maintain the condition of your living space while working on the sofa.
By following these preparations, you’ll set yourself up for a successful sectional sofa unhooking process. Now that you’re ready to proceed, let’s move on to the next steps in disassembling your sofa.
Identify the Sofa Sections
Before unhooking your sectional sofa, it’s crucial to identify the different sections that make up the entire piece of furniture. This step will help you understand how the sofa is constructed and how the sections are connected to each other. Here’s what you need to do:
1. Take a Closer Look
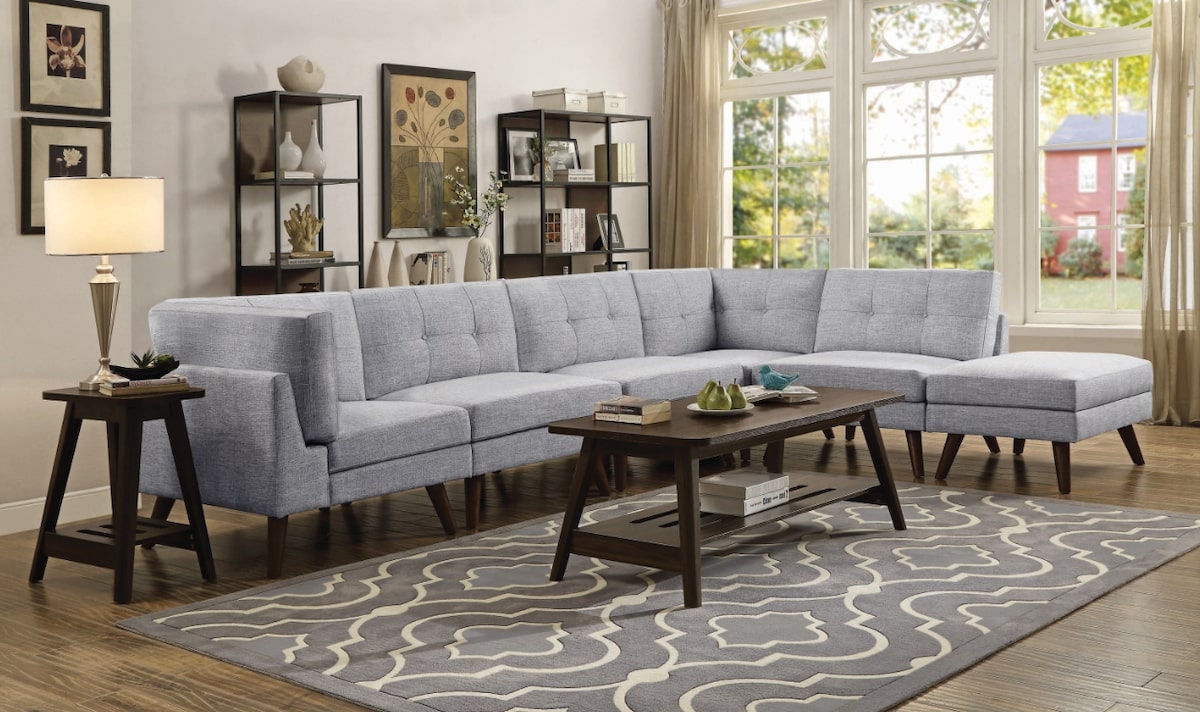
Examine your sectional sofa and visually identify the various sections. Most sectional sofas consist of a combination of a chaise lounge, corner piece, armless chairs, and ottomans. Locate each individual section and make a mental note of their positions and orientations.
2. Check for Labels or Tags
Some sectional sofas may come with labels or tags that indicate the specific section names or numbers. Check for any labeling on the bottom or back of the sections. If you find any, jot down the information or take a picture for reference. This will help you later when you reassemble the sofa.
3. Examine the Connectors
Observe how the sections are connected to each other. Look for any visible connectors or fasteners that hold the sections together. Take note of the type of connectors used, such as metal hooks, clips, or brackets, as this will be crucial in the unhooking process.
4. Determine the Joining Mechanism
Depending on the design and manufacturer, sectional sofas may incorporate various joining mechanisms. It could be a simple interlocking system, screws, or a combination of different connectors. Take the time to understand the specific joining mechanism employed in your sofa.
5. Take Photos or Sketch Diagrams
If you want to be extra cautious, consider taking photos or sketching diagrams of the sectional sofa before you start disassembling it. This will serve as a visual reference that you can consult later when putting the sofa back together.
By carefully identifying and understanding the individual sections of your sectional sofa, you’ll be better prepared to tackle the unhooking process. In the next section, we’ll discuss how to effectively move any obstacles that may hinder your progress.
Move any Obstacles
Before you can begin unhooking your sectional sofa, it’s important to clear the surrounding area of any obstacles that may impede your progress. By removing potential hindrances, you’ll have a smoother and safer disassembling experience. Here’s what you need to do:
1. Assess the Surrounding Space
Take a careful look around the area where your sectional sofa is located. Identify any furniture, decor, or other objects that may obstruct your movement. Pay attention to items that are close to the sofa or in the path of the disassembled sections.
2. Measure the Clearance Space
Measure the available clearance space around the sofa. This will help you determine the amount of room you have to maneuver and temporarily store the sections as you unhook them. Take note of the width, height, and depth of the clearance space to ensure a smooth process.
3. Temporarily Store Nearby Furniture
If there are any nearby furniture pieces that are in the way, consider temporarily moving them to create more space. Slide them to the side, relocate them to another room, or stack them in a safe area, making sure they won’t hinder your access to the sofa sections during the unhooking process.
4. Clear Pathways and Walkways
Ensure that there are clear and unobstructed pathways and walkways around the sectional sofa. Remove rugs, cords, or any other potential tripping hazards. This will make it easier and safer to navigate while carrying the sections and prevent accidents or damages.
5. Protect Fragile Items
If there are any fragile or delicate items in the vicinity of the sofa, take precautions to protect them. Cover them with blankets or move them to a safe location to prevent any accidental knocks or damage during the disassembling process.
By taking the time to clear the area and remove any obstacles, you’ll create a safe and efficient workspace for unhooking your sectional sofa. In the next section, we’ll discuss the importance of planning the process to ensure a successful disassembly.
Plan the Process
Before you dive into unhooking your sectional sofa, it’s crucial to have a well-thought-out plan in place. Planning the process will ensure that you approach the disassembly in an organized and systematic manner, reducing the risk of mistakes or confusion. Here are the essential steps to consider when planning the unhooking process:
1. Refer to the Manual or Instructions
If your sectional sofa came with a manual or specific disassembly instructions from the manufacturer, refer to them. The instructions may provide valuable insights into the recommended order of disassembling the sections and any particular precautions you need to take.
2. Decide on the Unhooking Sequence
Based on the information in the manual or your understanding of the sectional sofa’s construction, determine the sequence in which you’ll unhook the sections. Start with the sections that are easiest to remove or have fewer connectors, and work your way towards the more complex ones. This will make the process more manageable and potentially save you time.
3. Allocate Space for Disassembled Sections
Identify a designated area or space where you’ll temporarily store the disassembled sections. This could be a nearby empty room, a clear corner of the living room, or any other space that provides adequate clearance and protection for the sections. Ensure that the area is sufficiently large to accommodate the size of your sofa sections.
4. Consider the Weight and Size of Sections
Take into account the weight and size of each sectional sofa piece when planning the process. Heavier sections may require additional strength or assistance to lift and move. If certain sections are particularly large or awkwardly shaped, you might need to plan for suitable maneuvering techniques or removal strategies.
5. Anticipate Any Challenges or Obstacles
Think ahead and anticipate any potential challenges or obstacles that may arise during the unhooking process. Consider factors such as tight spaces, fragile connectors, or hidden fasteners. By identifying these challenges in advance, you can plan for alternative solutions or gather the necessary tools to overcome them.
By carefully planning the unhooking process, you’ll approach the disassembly with confidence and minimize the risk of errors or mishaps. In the next section, we’ll discuss how to pull apart the sections of your sectional sofa.
Pull apart the Sections
Once you’ve made the necessary preparations and planned the process, it’s time to start pulling apart the sections of your sectional sofa. This step requires careful handling and coordination to ensure that the sections are separated smoothly and without causing any damage. Here’s how to go about pulling apart the sections:
1. Begin with the End Sections
To start, focus on the end sections of your sectional sofa. These are typically the least complicated to disconnect and remove. Check for any visible connectors or fasteners holding the sections together, such as hooks, clips, or brackets. Follow the specific instructions from the manufacturer, if available, or employ suitable techniques to detach the end sections.
2. Use Gentle and Even Force
As you pull apart the sections, apply gentle and even force to avoid jerking or damaging the sofa. Keep in mind that some sections may be connected more securely than others, so take your time to release the connectors gradually. If you encounter resistance, double-check for any remaining fasteners or connectors that might still be attached.
3. Coordinate with a Partner
If possible, work with a partner for a smoother disassembling process. Coordinate with each other to ensure that you both apply even pressure while pulling apart the sections. You can also take turns supporting the weight of the sections to avoid straining yourself or causing any accidental damage.
4. Separate Each Section Carefully
Once the connectors or fasteners have been released, carefully separate each section from the rest of the sofa. Place the sections in the designated storage area, ensuring that they are adequately supported and protected. If necessary, use furniture blankets or padding to prevent any scratches or dents during the storage process.
5. Label or Take Photos for Reference
To aid in the reassembly process, consider labeling or taking photos of each separated section. This will help you remember the order and arrangement of the pieces when it’s time to put the sofa back together. Additionally, you can also label the connectors or take notes on any specific instructions or observations you make during disassembly.
By following these steps, you’ll be able to successfully pull apart the sections of your sectional sofa. In the next section, we’ll delve into how to find and undo the connectors that hold the sections together.
Find and Undo the Connectors
Once you have separated the sections of your sectional sofa, the next step is to locate and undo the connectors that hold them together. These connectors can vary depending on the specific design and manufacturer of your sofa. It’s important to identify and properly remove these connectors to ensure a successful disassembly. Here’s how to find and undo the connectors:
1. Examine Each Section
Carefully examine each section of the sofa to identify the location of the connectors. Look for visible signs of connectors, such as hooks, clips, screws, bolts, or brackets. Pay attention to any unique or hidden connectors that may require additional effort to locate and access.
2. Follow the Instructions or Manual
If your sectional sofa came with instructions or a manual, refer to them for specific guidance on the connectors. The manual may provide detailed diagrams or explanations on how to remove each type of connector. Follow the manufacturer’s instructions to ensure a proper disassembly.
3. Use the Appropriate Tools
Based on the type of connectors you encounter, gather the appropriate tools to undo them. This may include screwdrivers, pliers, Allen wrenches, or any other tools specific to your sofa’s construction. Using the right tools will help you avoid damaging the connectors or the sections of the sofa.
4. Work methodically
When undoing the connectors, work methodically and focus on one section at a time. Start by locating and removing any visible connectors. Take note of any connectors that require a specific tool or technique. Keep track of the removed connectors, and store them in a safe place for reassembly later.
5. Be Patient and Gentle
Some connectors may require a bit of patience and finesse to remove. Take your time and exercise caution to avoid forcing or damaging the connectors or the sections of the sofa. Apply gentle pressure and follow the direction of the connector’s release. If you encounter any resistance, reassess the connector and check for any remaining fasteners.
By finding and undoing the connectors in a careful and systematic manner, you’ll be well on your way to fully disassembling your sectional sofa. In the next section, we’ll discuss the importance of removing any leftover connectors after separating the sections.
Remove the Leftover Connectors
After separating the sections of your sectional sofa and undoing the primary connectors, it’s essential to check for and remove any leftover connectors that may still be attached. These leftover connectors can interfere with the reassembly process and cause stability issues if not properly addressed. Here’s how to remove the leftover connectors:
1. Inspect Each Section Carefully
Thoroughly inspect each section of the sofa to ensure that all connectors have been removed. Look for any hidden or secondary connectors that may have been overlooked during the initial disassembly. Pay close attention to corners, joints, and any other areas where connectors are commonly placed.
2. Use Appropriate Tools
If you come across any leftover connectors, use the appropriate tools to remove them. This may involve using a screwdriver, pliers, or any other tool that matches the specific type of connector. Take care not to damage the sections or the connectors while removing them.
3. Keep Track of Removed Connectors
As you remove the leftover connectors, keep track of them to ensure you have all the necessary pieces for reassembly. Store the removed connectors in a safe place, ideally labeled or organized for each section, so you can easily identify which connectors go where when the time comes.
4. Inspect Sections for Damage
While removing the leftover connectors, take the opportunity to inspect each section for any damage or wear that may have been caused by the connectors or the disassembly process. Address any issues promptly to prevent further damage or complications during the reassembly.
5. Clean and Prepare for Reassembly
After removing the leftover connectors, clean the sections of the sectional sofa if needed. Dust off any debris or dirt that may have accumulated during the disassembly process. Prepare the sections for reassembly by ensuring they are in the correct orientation and ready to be connected back together.
By carefully checking for and removing any leftover connectors, you’ll ensure that the reassembly of your sectional sofa goes smoothly. In the next section, we’ll discuss how to position the sections in preparation for the reassembly process.
Position the Sections
Once you have disassembled and removed the connectors from the sections of your sectional sofa, it’s time to position them in preparation for the reassembly process. Properly positioning the sections ensures that they fit together seamlessly and form a stable and comfortable piece of furniture. Here’s how to position the sections:
1. Identify the Correct Order
Refer to any labeling, photos, or diagrams you have taken during the disassembly process to identify the correct order of the sections. Take note of any specific orientation requirements or placement instructions provided in the manufacturer’s manual.
2. Clear the Reassembly Area
Clear a suitable space for reassembly, ensuring there is enough room for maneuvering and aligning the sections. Remove any potential obstacles or debris from the area to create a clean and safe working environment.
3. Align the Sections
Start by aligning the sections of the sofa in the correct order and orientation. Carefully match the connectors or attachment points on each section to ensure a proper fit. Take your time to adjust and align the sections until they are in the desired positions.
4. Check for Stability
Once the sections are aligned, check for stability. Gently push and test the connections to ensure they are secure and sturdy. If any sections feel loose or unstable, double-check the connectors and make any necessary adjustments to improve the overall stability of the sofa.
5. Adjust for Comfort
Consider the desired comfort level and seating arrangement when positioning the sections. Pay attention to the height and depth of each section to ensure a comfortable seating experience. Adjust the positioning if needed to achieve the desired balance and comfort for your sectional sofa.
By carefully positioning the sections of your sectional sofa, you’re setting the foundation for a successful reassembly. In the next section, we’ll discuss the step-by-step process of reassembling the individual sections to form a complete and functional sofa.
Reassemble the Sofa
Now that you have positioned the sections of your sectional sofa, it’s time to reassemble them to create a complete and functional piece of furniture. Reassembling the sofa requires careful attention to detail and following the correct steps to ensure a successful outcome. Here’s how to reassemble your sectional sofa:
1. Start with the End Sections
Begin the reassembly process by connecting the end sections of the sofa. Align the connectors or attachment points on both sections and carefully join them together. Make sure the sections fit snugly and securely, ensuring a stable foundation for the rest of the sofa.
2. Proceed with the Middle Sections
After connecting the end sections, move on to the middle sections of your sectional sofa. Align each section with the previously connected sections, matching the connectors or attachment points. Take your time to ensure a proper fit and secure connection.
3. Use the Proper Connecting Method
Depending on your specific sofa model, follow the recommended connecting method provided by the manufacturer. This may involve using screws, bolts, clips, or other connectors. Refer to any labeling, instructions, or diagrams to ensure you’re using the correct connecting method for each section.
4. Double-Check Connections
As you reassemble the sofa, double-check each connection to ensure it is tight and secure. Give each section a gentle shake or check for any wobbling or movement. If you notice any loose connections, carefully tighten the connectors or adjust them to achieve a stable and secure fit.
5. Reattach any Additional Features
If your sectional sofa includes additional features such as a chaise lounge, armrests, or ottomans, reattach them according to the manufacturer’s instructions. Align the connectors or attachment points and secure them in place to complete the reassembly process.
By following these steps, you’ll successfully reassemble your sectional sofa, transforming it from separate sections into a fully functional and comfortable seating arrangement. In the next section, we’ll discuss the importance of testing the stability of the reassembled sofa.
Test the Stability
After reassembling your sectional sofa, it’s crucial to test its stability to ensure that all the sections are securely connected and the sofa is safe to use. Testing the stability will give you peace of mind knowing that the reassembled sofa is sturdy and won’t pose any risk of accidents or discomfort. Here’s how to test the stability of your sectional sofa:
1. Sit on Each Section
Begin by sitting on each section of the sofa individually. Apply a moderate amount of weight and gently test the stability of the section you’re sitting on. Take note of any wobbling, creaking, or shifting that you may feel. If any section feels unstable, investigate the connections and ensure they are correctly secured.
2. Test the Joints
Next, test the joints and connections where each section is joined together. Push or apply gentle pressure to these areas to check for any movement or give. Solidly connected joints should feel secure and not exhibit excessive flexibility. If you notice any instability, readjust or tighten the connectors accordingly.
3. Check for Levelness
Ensure that the reassembled sofa sits level on the floor. If it feels uneven or wobbly, use a level tool to confirm the evenness of the sections. If necessary, make adjustments by carefully readjusting the position of the sections or using additional shims or padding to stabilize any uneven areas.
4. Test the Overall Stability
Give the entire sofa a gentle shake or push to test its overall stability. Check for any excessive movement or swaying. A stable sofa should remain firmly in place without any significant shifting or wobbling. If you notice any instability, revisit the connections and ensure that all the connectors are securely fastened.
5. Sit and Move Around
Finally, sit on the reassembled sofa and move around to simulate regular use. Test the sofa’s stability as you shift your weight, change seating positions, or lean back. Take note of any unexpected movements or discomfort. Address any issues promptly to ensure a safe and enjoyable seating experience.
By thoroughly testing the stability of your reassembled sectional sofa, you can be confident that it is secure and ready for use. In case you encounter any problems during the testing phase, refer back to the reassembly steps or consult the manufacturer’s instructions if needed.