
Setting up the Sound Recording App
When it comes to capturing high-quality audio on your iPhone 13, the built-in sound recording app is a powerful tool that can help you achieve professional results with ease. Whether you're recording a podcast, conducting interviews, or capturing ambient sounds for a project, setting up the sound recording app correctly is crucial for obtaining clear and crisp audio.
To begin, locate the sound recording app on your iPhone 13. It's typically found in the "Utilities" folder or can be accessed directly from the Control Center. Once you've located the app, tap to open it and familiarize yourself with the interface. The sound recording app on the iPhone 13 offers a user-friendly design, making it easy to navigate and utilize its features effectively.
Before you start recording, it's essential to ensure that the app has access to the microphone. To do this, go to your iPhone's settings, select "Privacy," then "Microphone," and enable access for the sound recording app. This step is crucial for the app to capture audio using the built-in or external microphones.
Next, take a moment to explore the app's settings and customize them according to your recording needs. You may have the option to adjust the recording format, quality, and other preferences to suit your specific requirements. For instance, you can choose between different file formats such as WAV or MP3 and select the desired audio quality to optimize the recording for your intended use.
Additionally, familiarize yourself with the app's controls, such as the record, pause, and stop buttons, as well as any additional features like voice activation or background noise reduction. Understanding these controls will enable you to operate the app seamlessly and make real-time adjustments during recording sessions.
Finally, consider testing the app in different environments to gauge its performance and familiarize yourself with its capabilities. This will help you identify any potential issues and make necessary adjustments before embarking on important recording projects.
By setting up the sound recording app on your iPhone 13 effectively, you can harness its full potential and capture high-quality audio for various purposes, from personal projects to professional endeavors. With the right settings and a clear understanding of the app's features, you'll be well-equipped to produce exceptional recordings with ease and confidence.
Adjusting the Microphone Sensitivity
Adjusting the microphone sensitivity on your iPhone 13 can significantly impact the quality of your audio recordings. By fine-tuning this setting, you can ensure that the microphone captures sound at the optimal level, resulting in clear and balanced audio. Whether you're recording a podcast, capturing live music, or conducting interviews, understanding how to adjust the microphone sensitivity can make a substantial difference in the overall sound quality.
To begin, access the sound recording app on your iPhone 13 and navigate to the settings or preferences section. Within this menu, you should find an option to adjust the microphone sensitivity. This setting allows you to control how the microphone responds to sound, determining the volume level at which it starts and stops recording.
When adjusting the microphone sensitivity, it's essential to strike a balance between capturing clear audio and minimizing background noise. If the sensitivity is set too high, the microphone may pick up excessive ambient sounds, leading to a cluttered and distracting recording. Conversely, setting the sensitivity too low could result in a loss of subtle nuances and details in the audio.
One approach to finding the optimal microphone sensitivity is to conduct a test recording in the environment where you'll be capturing audio. Start by setting the sensitivity to a moderate level and begin recording. Pay close attention to the audio levels displayed on the app's interface. If the levels consistently peak into the red or exceed the maximum threshold, it indicates that the sensitivity is too high. In contrast, if the levels remain consistently low and fail to capture the full range of sound, the sensitivity may be too low.
As you adjust the microphone sensitivity, consider the specific sound sources you intend to capture. For instance, if you're recording a conversation, you may want to set the sensitivity to focus on capturing voices while minimizing background noise. On the other hand, if you're recording live music, you might adjust the sensitivity to capture a broader range of frequencies and dynamics.
Furthermore, take into account the distance between the microphone and the sound source. If the microphone is positioned close to the source, you may need to lower the sensitivity to prevent distortion from excessive volume. Conversely, if the source is more distant, increasing the sensitivity can help capture faint sounds more effectively.
By fine-tuning the microphone sensitivity based on the specific recording scenario, you can optimize the audio quality and ensure that your iPhone 13 captures sound with precision and clarity. This level of control over the microphone sensitivity empowers you to adapt to diverse recording environments and achieve professional-grade results with ease.
Choosing the Right Location for Recording
Selecting the appropriate location for recording audio on your iPhone 13 is a critical factor that can significantly impact the quality and clarity of your recordings. The environment in which you choose to capture audio plays a pivotal role in determining the overall sound characteristics, including ambient noise levels, reverberation, and potential disruptions. Whether you're recording a podcast, conducting interviews, or capturing ambient sounds for a project, the following considerations can help you identify the right location for optimal recording outcomes.
First and foremost, prioritize quiet environments with minimal background noise. Selecting a location with low ambient noise levels is essential for capturing clear and pristine audio. Avoid areas near busy roads, construction sites, or other sources of persistent noise that could interfere with your recordings. Additionally, be mindful of potential sources of indoor noise, such as air conditioning units, appliances, or other electronic devices that may introduce unwanted sounds into your recordings.
Furthermore, consider the acoustic properties of the recording location. Spaces with excessive reverberation or echo can impact the clarity of your recordings, leading to a muddied or hollow sound. When possible, opt for environments with controlled acoustics, such as carpeted rooms, furnished spaces, or areas with sound-absorbing materials. These settings can help minimize unwanted reflections and ensure that your recordings maintain a natural and balanced sound.
In addition to noise and acoustics, take into account the overall ambiance of the recording location. The atmosphere and mood of the environment can influence the character of your recordings. For instance, if you're capturing outdoor sounds, selecting a serene and picturesque location can enhance the immersive quality of your recordings. Similarly, for interviews or dialogue recordings, choosing a comfortable and inviting setting can contribute to a relaxed and engaging conversational tone.
Moreover, consider the practical aspects of the recording location, such as accessibility and convenience. Ensure that the chosen location allows for easy setup and operation of your recording equipment, including positioning the iPhone 13 for optimal sound capture. Additionally, assess the availability of power sources and the feasibility of maintaining a consistent recording environment to avoid interruptions.
By carefully evaluating these factors and selecting the right location for recording, you can elevate the quality of your audio recordings and ensure that your iPhone 13 captures sound with precision and fidelity. The strategic choice of recording locations empowers you to create professional-grade recordings that resonate with clarity and authenticity, setting the stage for impactful and immersive audio experiences.
Using External Microphones for Better Quality
In pursuit of achieving superior audio quality, leveraging external microphones with your iPhone 13 can significantly elevate the standard of your recordings. While the built-in microphone of the iPhone 13 is capable, external microphones offer enhanced versatility, control, and performance, making them indispensable tools for professional-grade audio capture.
When selecting an external microphone for your iPhone 13, consider the specific recording scenarios and the desired audio characteristics. There is a wide range of external microphones available, each designed to cater to distinct recording needs. For instance, lavalier microphones are ideal for capturing clear and direct audio in interview settings, while shotgun microphones excel in recording focused sound sources, making them suitable for film and video production. Additionally, handheld dynamic microphones are well-suited for live music performances and vocal recordings, offering robust sound capture and handling high sound pressure levels.
Furthermore, external microphones often feature advanced capabilities such as adjustable polar patterns, gain control, and integrated shock mounts, providing greater flexibility and precision in capturing audio. These features empower you to adapt to diverse recording environments and tailor the microphone's performance to suit specific sound sources and acoustic conditions. Additionally, many external microphones offer superior noise isolation and signal-to-noise ratio, resulting in cleaner and more detailed recordings with reduced background interference.
Incorporating external microphones into your recording setup also allows for seamless integration with accessories such as windshields, pop filters, and microphone stands, further enhancing the quality and versatility of your recordings. These accessories play a crucial role in mitigating unwanted noise, minimizing plosives, and optimizing microphone positioning, ensuring that your recordings maintain a professional and polished sound.
Moreover, external microphones often offer direct connectivity options, including Lightning or USB-C connections, enabling straightforward and reliable integration with the iPhone 13. This direct connection facilitates real-time monitoring, precise level adjustments, and seamless synchronization with recording apps, empowering you to maintain full control over the recording process and monitor the audio with precision.
By harnessing the capabilities of external microphones, you can unlock the full potential of your iPhone 13 as a professional audio recording device. The seamless integration, enhanced features, and superior audio performance offered by external microphones enable you to capture pristine, detailed, and immersive sound, elevating the quality of your recordings to new heights. Whether you're engaged in content creation, music production, or field recording, the utilization of external microphones empowers you to achieve exceptional audio quality with confidence and precision.
Editing and Enhancing Sound Recordings
Once you've captured audio recordings on your iPhone 13, the process of editing and enhancing the sound is essential for refining the raw recordings and achieving a polished and professional result. Whether you're creating podcasts, music tracks, or audio for multimedia projects, the editing and enhancement phase allows you to fine-tune the recordings, correct imperfections, and elevate the overall sonic quality.
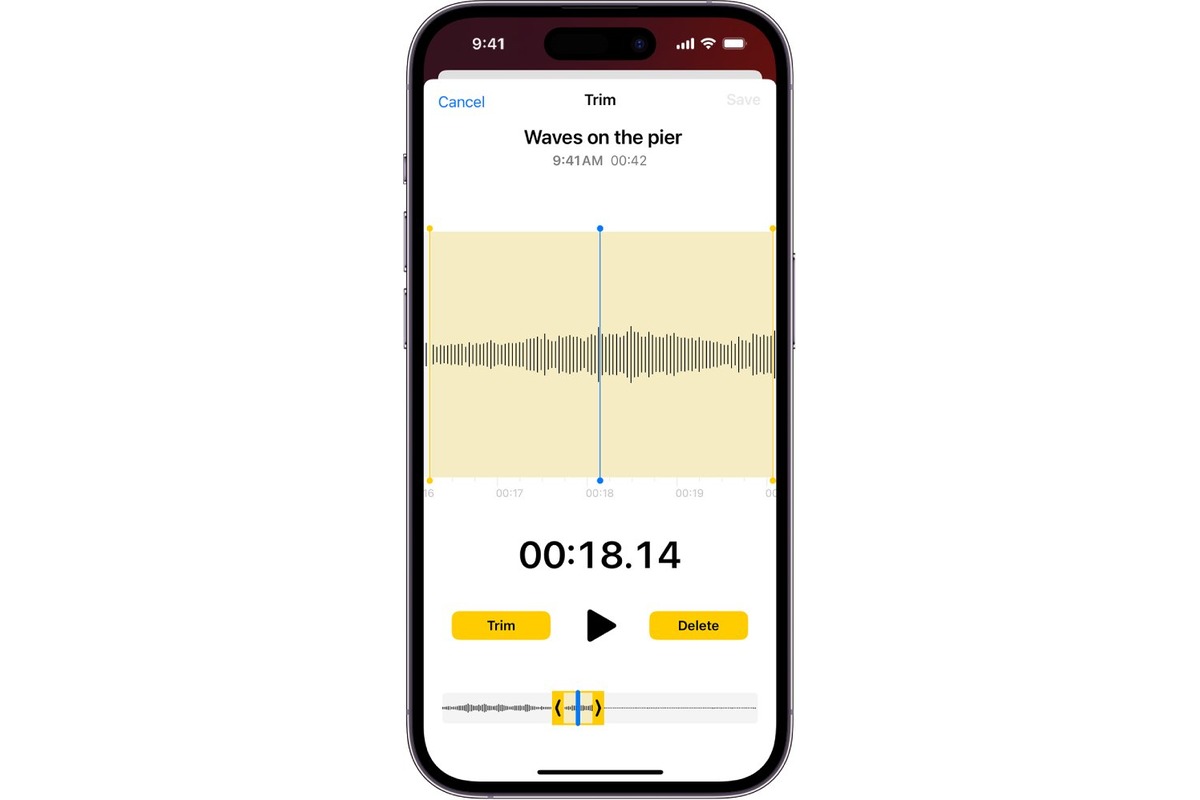
One of the primary tools for editing and enhancing sound recordings on the iPhone 13 is the built-in editing features within the sound recording app or dedicated audio editing applications available on the App Store. These tools offer a range of functionalities, including trimming, splitting, and arranging audio clips, adjusting volume levels, applying equalization and effects, and integrating additional audio elements.
When editing sound recordings, start by reviewing the captured audio and identifying sections that require refinement. Trim any unwanted segments, such as prolonged silences or extraneous noise, to streamline the recordings and maintain a cohesive flow. Additionally, utilize the editing tools to seamlessly merge multiple recordings, creating a cohesive and seamless audio narrative.
Furthermore, leverage the equalization and effects options to enhance the tonal characteristics of the recordings. Adjust the frequency balance to emphasize specific sonic elements, such as vocals, instruments, or ambient sounds, and apply effects such as reverb, compression, and spatial processing to imbue the recordings with depth and dimension.
In addition to basic editing, consider employing noise reduction and audio restoration tools to eliminate unwanted background noise, clicks, pops, and other imperfections. These tools enable you to refine the clarity and fidelity of the recordings, ensuring that the final audio output is free from distractions and artifacts.
Moreover, explore the creative possibilities offered by audio effects and processing. Experiment with modulation effects, time-based effects, and dynamic processing to infuse the recordings with unique textures and sonic character, enhancing their emotive impact and immersive quality.
As you progress through the editing and enhancement process, maintain a critical ear and strive for a balanced and coherent sonic presentation. Pay attention to the overall dynamics, tonal balance, and spatial characteristics of the recordings, aiming to achieve a cohesive and engaging sonic experience for the audience.
Ultimately, the editing and enhancement phase empowers you to transform raw audio recordings into refined and captivating soundscapes. By leveraging the editing tools and creative possibilities available on the iPhone 13, you can elevate the quality of your sound recordings and deliver compelling and immersive audio content that resonates with clarity and impact.