
Step 1: Save and Close all Open Programs
Before safely removing your Dell laptop from the docking station, it's crucial to ensure that all your programs and files are securely saved and closed. This simple yet essential step can prevent data loss and potential system errors. Here's a detailed guide on how to execute this step effectively:
Firstly, assess your current open programs and documents. Take a moment to save any unsaved work by clicking on the respective application’s “Save” or “Save As” option. It’s advisable to develop a habit of saving your work periodically to minimize the risk of losing data in case of unexpected power outages or system issues.
Next, close all the programs and applications that are currently running on your Dell laptop. This can be achieved by clicking on the “X” button located at the top-right corner of each program window. Additionally, you can use the keyboard shortcut “Alt + F4” to swiftly close the active window. Ensure that you have exited all the programs, including web browsers, office suites, image editing software, and any other applications that may be running in the background.
Verify that all your work is saved and closed before proceeding to the next step. It’s beneficial to double-check by glancing at the taskbar to confirm that no application icons are displayed, indicating that all programs have been successfully closed. This meticulous approach can safeguard your data integrity and prevent any potential loss or corruption of files.
By diligently following this preliminary step, you can mitigate the risk of encountering data-related issues when removing your Dell laptop from the docking station. The act of saving and closing all open programs not only promotes a seamless transition but also fosters a proactive approach to data management and system maintenance.
Step 2: Disconnect External Peripherals
As you prepare to disengage your Dell laptop from the docking station, it is imperative to disconnect any external peripherals that may be connected to it. This precautionary measure ensures a smooth and safe transition, minimizing the risk of hardware damage and data loss. Here’s a comprehensive guide on how to effectively execute this step:
Begin by identifying all external devices connected to your laptop, such as USB drives, external hard drives, printers, scanners, and any other peripherals. Safely eject or disconnect these devices to prevent data corruption and ensure that they are not inadvertently removed while separating the laptop from the docking station.
For USB-connected peripherals, such as flash drives or external storage devices, safely remove them by right-clicking on the device icon in the system tray or using the “Safely Remove Hardware” option in the Windows taskbar. This action prompts the operating system to complete any pending read or write operations and ensures that the device can be safely unplugged without risking data loss or device malfunction.
If your Dell laptop is connected to an external monitor, keyboard, mouse, or other accessories through the docking station, carefully disconnect each peripheral to avoid any physical strain or damage to the connectors. Gently unplug the cables and ensure that no obstructions hinder the disconnection process.
Once all external peripherals have been safely disconnected, take a moment to organize and stow them in their designated storage spaces. This practice not only reduces the risk of misplacing or damaging the peripherals but also contributes to a clutter-free workspace, promoting an organized and efficient environment.
By meticulously following this step, you can safeguard your external devices from potential damage and ensure a seamless transition when removing your Dell laptop from the docking station. This proactive approach underscores the significance of maintaining the integrity of external peripherals and contributes to a hassle-free user experience.
Step 3: Eject any External Storage Devices
Prior to disengaging your Dell laptop from the docking station, it is essential to properly eject any external storage devices that may be connected to the system. This precautionary step ensures the integrity of the data stored on these devices and minimizes the risk of data corruption or loss. Here’s a detailed guide on how to effectively execute this crucial process:
Identify all external storage devices, such as USB flash drives, external hard drives, or memory cards, that are currently connected to your Dell laptop. These devices often serve as repositories for important data and require careful handling to prevent potential data-related issues.
In the Windows operating system, ejecting external storage devices is a straightforward process. Locate the device icon in the system tray or open “File Explorer” to view the connected devices. Right-click on the external storage device and select the “Eject” option from the context menu. This action ensures that any pending read or write operations are completed, and the device is safely prepared for removal.
When ejecting external storage devices, it is crucial to wait for the system to confirm that it is safe to remove the device. This notification serves as a confirmation that all data transfer processes have been finalized, reducing the risk of data corruption or damage to the storage device.
Once the system indicates that it is safe to do so, carefully remove the external storage device from the USB port or card reader. Gently disconnect the device to avoid physical damage to the connectors and ensure that it is securely stored in its designated case or storage location.
By diligently adhering to this step, you can safeguard the integrity of your data stored on external storage devices and mitigate the risk of data-related issues when removing your Dell laptop from the docking station. This proactive approach underscores the importance of conscientious data management and contributes to a seamless and secure user experience.
Step 4: Unplug the Power Cable
Before proceeding to remove your Dell laptop from the docking station, it is crucial to unplug the power cable to ensure a safe disconnection from the power source. This step is essential to prevent potential damage to the laptop and its components while promoting a seamless transition. Here’s a comprehensive guide on how to effectively execute this important process:
Firstly, locate the power adapter connected to your Dell laptop. Depending on the model, the power cable may be directly connected to the laptop or to the docking station. Carefully trace the power cable from the laptop to its power source to ensure that you are disconnecting the correct cable.
Once you have identified the power cable, gently grasp the connector near the laptop or docking station and firmly, but carefully, unplug it from the power source. It is essential to exert a steady and even force to detach the connector without causing any strain on the cable or the laptop’s power port.
After unplugging the power cable, take a moment to inspect the cable for any signs of damage, such as fraying or exposed wires. If any damage is observed, refrain from using the cable and seek a replacement to prevent potential electrical hazards and ensure the safe operation of your laptop.
Upon disconnecting the power cable, it is advisable to verify that the laptop has transitioned to battery power or an alternative power source, if available. This confirmation ensures that the laptop remains operational and unaffected by the disconnection from the power supply.
By meticulously following this step, you can safeguard your Dell laptop from potential electrical hazards and ensure a smooth disconnection from the power source. This proactive approach underscores the importance of responsible power management and contributes to a safe and efficient user experience.
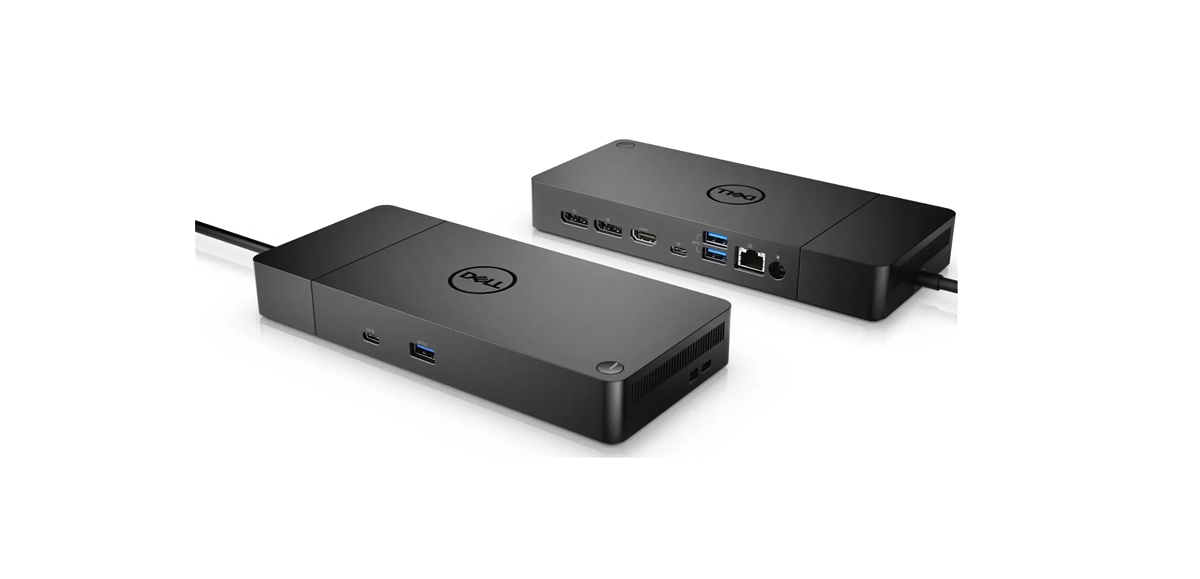
Step 5: Press the Docking Station Eject Button
Before lifting your Dell laptop from the docking station, it is crucial to initiate the ejection process by pressing the designated eject button on the docking station. This step ensures that the laptop is safely released from the docking connector and ready for removal. Here’s a detailed guide on how to effectively execute this important process:
Locate the eject button on the docking station. The eject button is typically designed to release the laptop from the docking connector, allowing for a smooth disengagement. It is essential to identify the precise location of the eject button to avoid inadvertently activating other functions on the docking station.
Once you have located the eject button, gently press it to initiate the ejection process. It is important to apply even pressure to the button, ensuring that the release mechanism is activated without exerting excessive force that may cause damage to the docking station or the laptop.
Upon pressing the eject button, listen for any audible cues or observe visual indicators, such as LED lights, to confirm that the ejection process has been initiated. These cues serve as confirmation that the docking station has disengaged the laptop’s connector, allowing for a safe and seamless removal.
After pressing the eject button, wait for the ejection process to complete. Depending on the docking station model, the disengagement may take a few seconds to ensure that the laptop is safely released from the connector. Exercise patience during this step to allow the ejection mechanism to function effectively.
By diligently following this step, you can ensure that your Dell laptop is safely released from the docking station, minimizing the risk of damage to the connector and promoting a smooth disconnection process. This proactive approach underscores the importance of conscientious handling of docking station components and contributes to a secure and efficient user experience.
Step 6: Lift the Laptop from the Docking Station
After completing the necessary preparatory steps, including saving work, disconnecting peripherals, ejecting storage devices, and unplugging the power cable, it is time to lift your Dell laptop from the docking station. This final step ensures a seamless disengagement, allowing you to transition to a mobile computing environment without compromising the integrity of your system. Here’s a detailed guide on how to effectively execute this pivotal process:
Ensure that the laptop is securely positioned on the docking station, with all connectors disengaged and the eject process completed. Confirm that the laptop is free from any physical obstructions or attachments that may hinder its removal from the docking station.
With a firm grip on the laptop, carefully lift it from the docking station in a smooth and steady motion. It is essential to maintain an even and balanced lift to prevent any undue stress on the connectors or the laptop’s chassis. Exercise caution to avoid abrupt movements that may lead to accidental drops or damage to the laptop.
As you lift the laptop, be mindful of any attached cables or accessories that may still be connected to the docking station. Ensure that the laptop is clear of any entanglements to prevent damage to the connectors and peripherals. This meticulous approach contributes to a safe and efficient disconnection process.
Once the laptop is lifted from the docking station, take a moment to inspect the docking connector to verify that no components or debris have been left behind. This visual check ensures that the docking station is clear and ready for future use, promoting a well-maintained computing environment.
By diligently following this final step, you can successfully disengage your Dell laptop from the docking station, transitioning to a mobile configuration while maintaining the integrity of your system. This proactive approach underscores the importance of careful handling and contributes to a seamless and secure user experience.