
Check the Compatibility of Your Laptop and Docking Station
Before you begin the process of connecting two monitors to your Dell laptop, it’s crucial to ensure compatibility between your laptop and the docking station. Not all laptops support multiple monitors, so it’s essential to check if yours has the necessary ports and capabilities.
Start by identifying the model of your Dell laptop and check its specifications or user manual. Look for details on its video output options, such as HDMI, DisplayPort, or VGA. Additionally, determine if your laptop supports dual-monitor setups and how many external displays it can handle.
Next, examine the specifications of your docking station to see if it supports dual monitors. Verify if the docking station has the appropriate video ports required for connecting two monitors simultaneously. Common ports on docking stations include HDMI, DisplayPort, and VGA. Ensure that the docking station can handle the resolution and refresh rate you desire for your dual-monitor setup.
If you’re unsure about the compatibility, you can refer to Dell’s official website or contact their customer support for assistance. They can provide you with detailed information about your laptop and recommend compatible docking station models if needed.
Remember, a lack of compatibility between your laptop and docking station can cause issues during the setup process. So, it’s crucial to double-check and confirm that your laptop and docking station are compatible before proceeding further.
Gather the Necessary Cables and Adapters
Once you’ve confirmed the compatibility between your Dell laptop and the docking station, the next step is to gather the necessary cables and adapters to connect the monitors. The specific cables and adapters required may vary depending on the ports available on your laptop and dock.
Start by identifying the video ports available on your docking station. Typical options include HDMI, DisplayPort, and VGA. Check the specifications of your monitors to determine which type of video cables they support. It’s essential to have the right cables to ensure a seamless and high-quality connection.
If your docking station and monitors have HDMI ports, using HDMI cables would be the simplest option. However, if your docking station or monitors have other video port options, you’ll need the appropriate cables or adapters to make the connections. For example, if your laptop has a DisplayPort but your monitor only has HDMI, you’ll need a DisplayPort to HDMI adapter.
Make a list of all the cables and adapters you’ll need based on the ports available on your laptop, docking station, and monitors. Check your local electronics store or online retailers to purchase any missing cables or adapters. It’s essential to choose high-quality cables to ensure optimal signal transfer and minimize any potential issues.
Aside from the video cables, consider if you’ll need any additional cables for connecting peripherals such as keyboards, mice, or speakers to the docking station. Some docking stations have built-in USB ports, while others may require separate USB cables to connect your peripherals.
By gathering all the necessary cables and adapters before starting the setup process, you’ll save time and avoid any interruptions. Ensure that you have the right cables and adapters for your specific setup to make the dual-monitor connection as smooth as possible.
Connect the Docking Station to Your Dell Laptop
Now that you have gathered the necessary cables and adapters, it’s time to connect the docking station to your Dell laptop. Follow these steps to ensure a successful connection:
- Locate the docking station’s connection port on the back or side of your laptop. It may be labeled as “Dock” or have a specific symbol indicating the docking station connection.
- Align the docking station’s connector with the corresponding port on your laptop. Gently insert the connector into the port until it clicks into place, ensuring a secure connection.
- Double-check the connection to make sure it’s properly aligned and fully inserted. A loose connection could cause issues when connecting the monitors.
- Connect the power adapter of the docking station to an electrical outlet. This will provide power to both the docking station itself and charge your laptop if necessary.
- Wait for your laptop to detect the docking station. You may see a notification or hear a sound indicating that the connection has been established.
- If prompted, install any necessary drivers or software provided by the docking station manufacturer. These drivers will optimize the performance of the docking station and ensure compatibility with your laptop.
- Once the connection is established and any required software is installed, your Dell laptop should now be connected to the docking station.
It’s important to note that some Dell laptops may have a specific docking station compatibility list. Before purchasing a docking station, ensure that it’s compatible with your laptop model to avoid any potential issues.
By following these steps, you have successfully connected the docking station to your Dell laptop. Now, it’s time to move on to connecting the monitors to complete your dual-monitor setup.
Connect the First Monitor to the Docking Station
With the docking station successfully connected to your Dell laptop, it’s time to connect the first monitor. Follow these steps to ensure a proper connection:
- Identify the video ports available on the docking station. Common options include HDMI, DisplayPort, and VGA.
- Determine the video port on your monitor. It should match one of the available ports on the docking station.
- Connect one end of the appropriate video cable (e.g., HDMI, DisplayPort, or VGA) to the corresponding port on the docking station.
- Connect the other end of the video cable to the video port on your first monitor.
- Ensure that the connections are secure and properly aligned. A loose connection can cause display issues.
- Power on the first monitor and select the correct input source. Most monitors have a button or menu option to switch between different inputs.
- Wait for your Dell laptop to detect the first monitor. It should automatically detect and configure the display settings.
- If necessary, adjust the display settings on your laptop to extend or duplicate the desktop onto the first monitor.
- Test the connection and make sure the first monitor is working correctly.
Keep in mind that the specific steps may vary slightly depending on the model of your docking station and monitor. Refer to the user manuals or documentation for detailed instructions if needed.
By following these steps, you have successfully connected the first monitor to your docking station. Now, it’s time to proceed to the next step and connect the second monitor to complete your dual-monitor setup.
Connect the Second Monitor to the Docking Station
Now that you have successfully connected the first monitor to your docking station, it’s time to connect the second monitor. Follow these steps to ensure a seamless connection:
- Identify the available video ports on your docking station. Ensure that you have an unused video port for connecting the second monitor.
- Check the video ports on your second monitor. Select a cable that matches the available video ports on both the docking station and the monitor.
- Connect one end of the video cable (e.g., HDMI, DisplayPort, or VGA) to the appropriate port on the docking station.
- Connect the other end of the video cable to the corresponding video port on your second monitor.
- Ensure that the connections are secure and properly aligned. A loose connection may result in a poor display or no signal.
- Power on the second monitor and select the correct input source, just like you did with the first monitor.
- Wait for your Dell laptop to detect the second monitor. It should automatically identify the new display and adjust the settings accordingly.
- If necessary, go to your display settings on your laptop and configure the arrangement of the two monitors. You can choose to extend your desktop or duplicate your screen onto the second monitor.
- Take a moment to ensure that both monitors are functioning correctly and that the display settings meet your preferences.
The steps outlined above should work for most dual-monitor setups. However, it’s worth noting that specific models of docking stations and monitors may have slightly different procedures. Consult the user manuals or documentation for detailed instructions if needed.
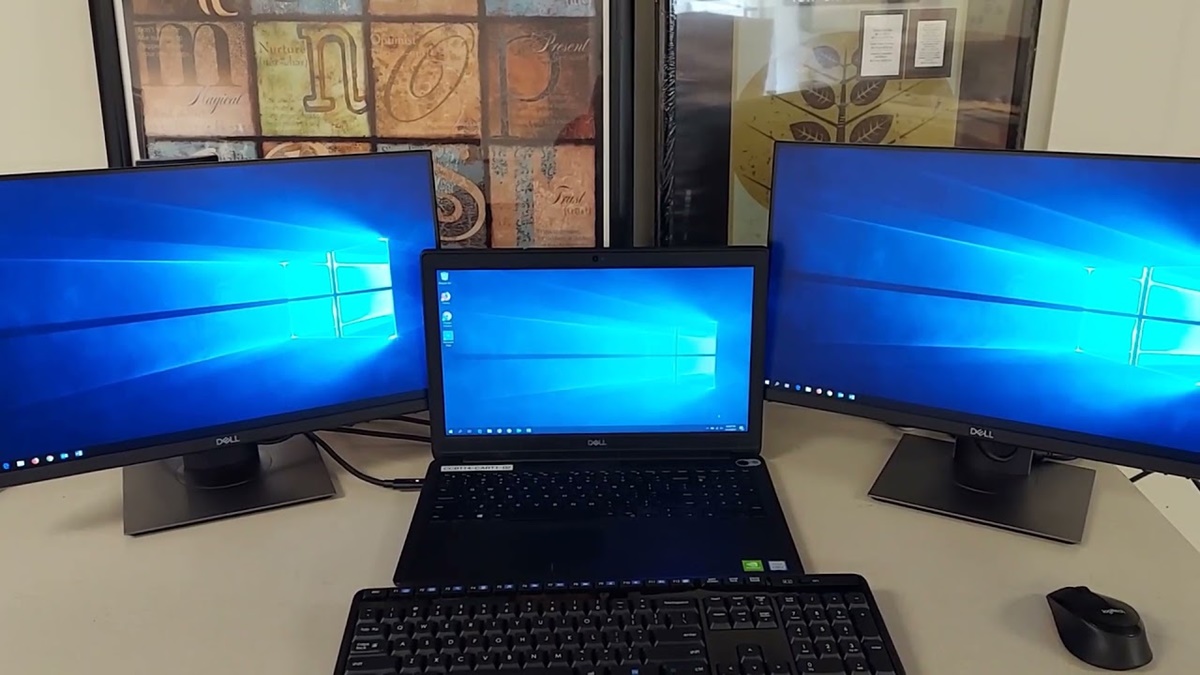
Congratulations! You have successfully connected the second monitor to your docking station, completing your dual-monitor setup. Continue with the next steps to adjust display settings and arrange the monitors in your desired layout.
Adjust Display Settings on Your Laptop
After successfully connecting both monitors to your Dell laptop via the docking station, it’s time to adjust the display settings to optimize your dual-monitor setup. Follow these steps to ensure a seamless viewing experience:
- Right-click on an empty area of your desktop and select “Display settings” from the context menu. Alternatively, you can go to the Windows Control Panel and choose “Display.”
- Under the “Display settings” menu, you’ll see a visual representation of the monitors. Identify and select the monitor you wish to adjust.
- If necessary, scroll down and click on the “Advanced display settings” link to access additional options.
- Configure the resolution of each monitor to your desired preference. It’s recommended to set both monitors to the highest resolution supported for optimal clarity.
- Adjust the orientation of the monitors if needed. You can choose between landscape and portrait modes depending on your specific requirements.
- If one monitor appears to be visually brighter or darker than the other, you can adjust the brightness and contrast settings individually for each monitor.
- For an extended desktop setup, you may need to rearrange the position of the monitors. Click and drag the monitor icons in the “Display settings” menu to match the physical setup of your dual monitors.
- If one monitor is not displaying correctly or not being recognized, click the “Detect” button to force Windows to search for any additional monitors.
- Take a moment to preview and ensure that the display settings meet your preferences. Make any necessary adjustments until you are satisfied with the visual appearance and arrangement of the monitors.
Remember to click the “Apply” or “OK” button to save the changes you made to the display settings. If prompted, keep the new settings and discard the old ones. Windows will refresh the screen and apply the adjustments you’ve made.
By following these steps, you can optimize the display settings on your Dell laptop for a seamless dual-monitor experience. Now, you’re ready to arrange the monitors in your desired layout.
Arrange the Monitors in Your Desired Layout
With the display settings adjusted, it’s time to arrange the monitors in a layout that suits your needs and preferences. Here are the steps to follow:
- Open the “Display settings” menu by right-clicking on an empty area of your desktop and selecting “Display settings.” Alternatively, go to the Windows Control Panel and choose “Display.”
- Scroll down to the section labeled “Multiple displays.” Here, you’ll find options for managing the layout and orientation of your dual monitors.
- Click on the drop-down menu under “Multiple displays” and select “Extend desktop” to have your desktop space stretched across both monitors. This allows you to have separate applications and windows open on each monitor.
- Drag and arrange the monitor icons within the visual representation of the “Display settings” menu to match the physical orientation of your dual monitors. For example, if your second monitor is positioned to the right of your primary monitor, drag and position the monitor icon accordingly.
- Click on one of the monitor icons in the “Display settings” menu to make it the primary monitor. The primary monitor will usually have the taskbar and desktop icons displayed by default.
- If you prefer a specific monitor to be the primary monitor, check the box labeled “Make this my main display” under the display settings for that monitor. This will ensure that any new windows or applications open on the primary monitor by default.
- Preview and ensure that the arrangement of the monitors in the “Display settings” menu matches the physical setup. Make any necessary adjustments until you are satisfied with the layout.
- Click the “Apply” or “OK” button to save the changes. Windows will rearrange the desktop space according to your chosen layout.
By following these steps, you can arrange the monitors in your desired layout and make the most of your dual-monitor setup. Experiment with different orientations and arrangements to find the configuration that works best for your workflow and productivity.
Congratulations! You have successfully arranged your monitors in the desired layout. Before wrapping up, it’s a good practice to test your dual-monitor setup to ensure everything is functioning correctly.
Test Your Dual Monitor Setup
After configuring the display settings and arranging your dual monitors, it’s essential to test the setup to ensure everything is working as expected. Follow these steps to verify the functionality of your dual monitor setup:
- Open a few different applications or windows on your primary monitor.
- Click and drag some of the open windows onto the second monitor. Observe if they move smoothly and if the content appears correctly on the second screen.
- Maximize a window on each monitor to ensure that both monitors can display full-screen applications without any issues.
- Try moving the mouse cursor from one monitor to another. It should seamlessly transition between the two monitors.
- Launch a video or media file and play it on one of the monitors. Check if both the video and audio are synchronized and playing correctly.
- Adjust the volume on your laptop to confirm that the audio is coming from the correct source. If necessary, change the audio settings to output sound through the dual monitor setup.
- Open a web browser or document on one monitor and a different application on the other. Test the ability to multitask and work across both monitors smoothly.
- Try disconnecting and reconnecting the docking station to ensure that the dual monitor setup is automatically detected and configured.
- If you encounter any issues during the testing process, double-check the connections and settings. Confirm that the cables are securely connected and that the display and audio settings are configured correctly.
- Make any necessary adjustments or troubleshoot any issues you encounter until the dual monitor setup is working smoothly.
By thoroughly testing your dual monitor setup, you can identify and address any potential issues early on. This will ensure a seamless and productive experience when using multiple monitors for work, gaming, or other purposes.
Once you have confirmed that your dual monitor setup is functioning correctly, you can start enjoying the benefits of increased screen space, improved multitasking capabilities, and enhanced productivity.
Troubleshooting Common Issues
While setting up a dual monitor configuration is generally straightforward, you may encounter some common issues along the way. Here are a few troubleshooting tips to help you resolve common problems that may arise:
- Check the connections: Ensure that all cables are securely connected to both the docking station and the monitors. A loose connection can result in no signal or a distorted display.
- Update drivers and firmware: Make sure that you have the latest drivers installed for your graphics card, docking station, and monitors. Check the manufacturers’ websites for any available updates.
- Restart your laptop and docking station: Sometimes, a simple restart can resolve connectivity or display issues. Restart your laptop and docking station to refresh the system and establish a fresh connection.
- Adjust display settings: Double-check the display settings on your laptop and ensure that the resolution, orientation, and arrangement are set correctly for your dual monitor setup.
- Switch video ports or cables: If you’re experiencing issues with one particular monitor, try connecting it to a different video port on the docking station or using a different cable to rule out any issues with the port or cable itself.
- Check for hardware compatibility: Verify that your laptop, docking station, and monitors are compatible with each other and can support a dual monitor setup. Refer to the user manuals or contact customer support for assistance.
- Test with a different docking station or monitor: If available, try connecting your laptop to a different docking station or using a different monitor. This helps determine if the issue lies with the particular device or configuration you’re currently using.
- Update operating system: Ensure that your laptop’s operating system is up to date, as newer updates often include bug fixes and compatibility improvements that could resolve any issues you encounter.
- Reset display settings: If all else fails, you can try resetting the display settings on your laptop to their default values. This can help eliminate any conflicting configurations that may be causing issues.
- Contact customer support: If you’ve exhausted all troubleshooting steps and are still experiencing issues, don’t hesitate to reach out to the customer support team of your laptop, docking station, or monitor manufacturer. They can provide further assistance and guidance specific to your hardware setup.
By following these troubleshooting tips, you can address common issues that may occur when setting up a dual monitor configuration. Remember to stay patient and methodical in your approach, and seek professional support if needed.