
Overview of Disk Utility’s First Aid
Disk Utility’s First Aid is a powerful tool available on Mac that helps diagnose and repair issues with your computer’s drives. Whether you’re experiencing performance problems, file corruption, or disk errors, First Aid is a reliable solution to restore the health and functionality of your drives.
By performing a series of checks and repairs, First Aid aims to identify and fix issues related to directory structure, permissions, file system errors, disk corruption, and more. It works with both internal and external drives, making it a versatile tool for troubleshooting and maintaining your Mac’s storage devices.
With Disk Utility’s intuitive interface, users can easily analyze and repair their drives with just a few simple clicks. It provides a comprehensive overview of the drive’s health, allowing you to identify any issues that may be causing performance degradation or data loss.
One of the major advantages of First Aid is its ability to repair drives while preserving your data. It performs non-destructive repairs, meaning it attempts to fix errors without deleting or modifying your files. This is crucial for preserving important data and avoiding data loss.
Furthermore, Disk Utility’s First Aid is an essential tool for maintaining the longevity of your drives. Over time, disks can become fragmented, accumulate errors, or develop bad sectors. By regularly running First Aid, you can prevent these issues from escalating and potentially endangering your data.
Moreover, First Aid is a versatile tool that can be used with various types of drives, including hard drives, solid-state drives (SSD), external drives, and even disk images. This makes it a valuable resource for users with different storage configurations.
What is Disk Utility’s First Aid?
Disk Utility’s First Aid is a built-in feature in the macOS that allows users to diagnose and repair issues with their computer’s drives. It is a powerful tool that can help resolve a variety of problems that may impact the performance and functionality of your Mac.
The First Aid feature primarily focuses on checking and repairing the directory structure and file system of your drives. It scans for errors, inconsistencies, and corruption in the file system and attempts to fix them to ensure the smooth operation of your drives.
First Aid can also address issues related to permissions on your drives. If you’re experiencing difficulties accessing certain files or folders due to permission restrictions, First Aid can help restore the appropriate permissions, allowing you to regain access to your data.
Another important function of Disk Utility’s First Aid is its ability to detect and repair disk errors. Over time, disks can develop bad sectors or other errors that can lead to data corruption or data loss. First Aid scans for these errors and attempts to repair them, ensuring the integrity of your data.
It is worth noting that First Aid is a non-destructive repair tool, which means it tries to fix errors without deleting or modifying your files. However, it’s always recommended to have a backup of your important data before running any disk repair operations, as a precautionary measure in case of unexpected data loss.
First Aid is also capable of verifying and repairing both internal and external drives connected to your Mac. Whether you have a faulty internal hard drive or encounter issues with an external SSD, First Aid can help diagnose and possibly resolve the underlying problems.
Overall, Disk Utility’s First Aid is a valuable tool for Mac users to maintain the health and functionality of their drives. It provides an easy-to-use interface and performs comprehensive checks and repairs to ensure the optimal performance and reliability of your storage devices.
When should you use Disk Utility’s First Aid?
Disk Utility’s First Aid is a useful tool that should be employed in various scenarios to troubleshoot and resolve drive-related issues on your Mac. Here are some situations where you should consider using First Aid:
- File System Errors: If you encounter errors while accessing or saving files, such as “Disk not readable” or “File system out of sync,” running First Aid can help identify and repair any file system errors that are causing the problem.
- Performance Issues: If your Mac is slowing down or experiencing frequent freezes and crashes, it could be an indication of disk-related performance issues. First Aid can help detect and address any underlying disk errors or file system inconsistencies that may be causing these performance problems.
- Disk Corruption: In the event of disk corruption or data corruption on your drives, running First Aid can help restore the integrity of your data. It can detect and repair corrupted files, directories, or directory structures, ensuring the proper functioning of your drives.
- Unexpected Disk Ejections: If you encounter issues with your external drives being unexpectedly ejected or not mounting properly, running First Aid on these drives can help identify and resolve any issues related to the drive’s file system or directory structure.
- Disk Not Mounting: If you are unable to mount a disk on your Mac, whether it’s an external drive or a disk image, First Aid can analyze the issue and attempt to repair it. It can resolve mounting issues caused by corrupted volume headers or file system errors.
- Hard Drive Errors: If you suspect that your internal hard drive has developed bad sectors or other physical errors, running First Aid can help identify and repair these disk errors, potentially prolonging the lifespan of your hard drive.
Remember that First Aid is a powerful tool, but it may not be able to solve all drive-related problems. In some cases, if the issues persist or if you suspect hardware failure, it is advisable to seek professional assistance or contact the manufacturer for further guidance.
Regularly running First Aid as part of your system maintenance routine can help prevent potential disk issues before they escalate, ensuring the smooth operation of your Mac and safeguarding your important data.
How to access Disk Utility’s First Aid
Accessing Disk Utility’s First Aid is straightforward and can be done through the Disk Utility application, which is built into macOS. Here’s how you can access First Aid:
- Open Disk Utility: Launch Disk Utility by navigating to the “Applications” folder, then the “Utilities” folder, and selecting “Disk Utility.”
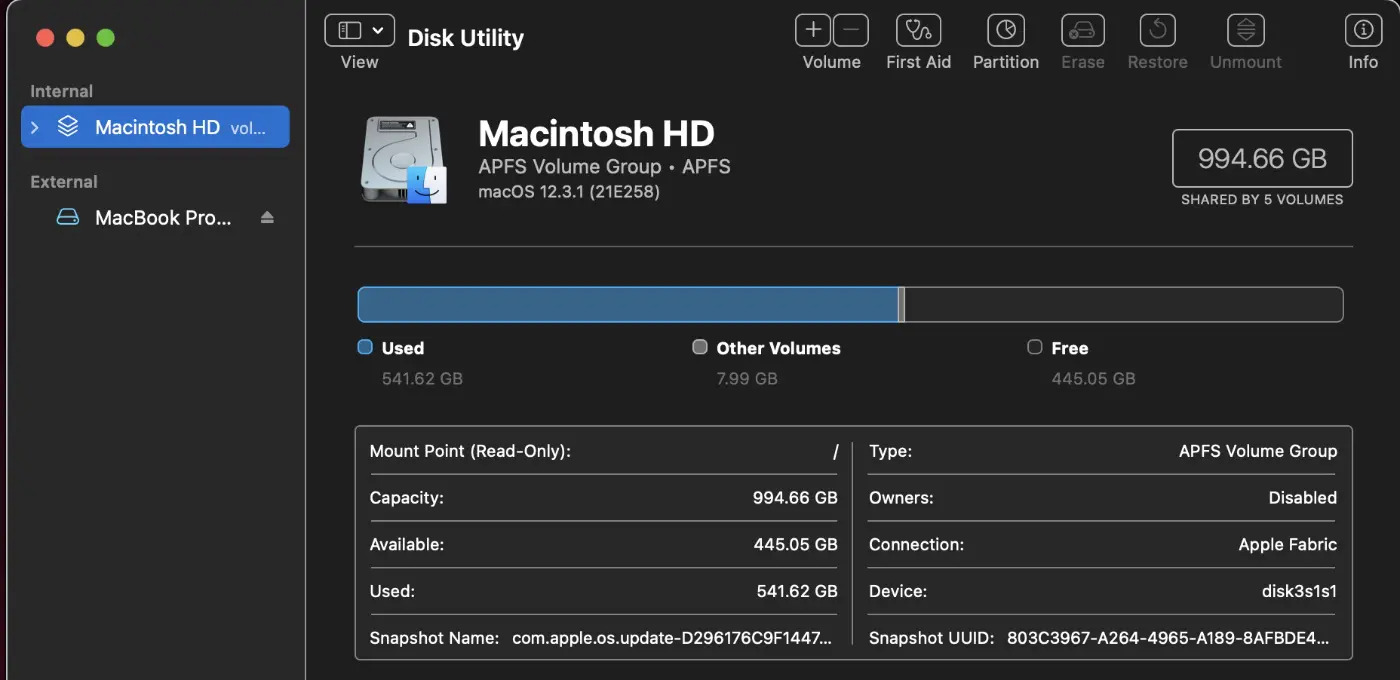
- Select the Drive: In the left sidebar of Disk Utility, you’ll see a list of drives connected to your Mac. Choose the drive or volume where you want to run First Aid. This can be an internal drive or external drive.
- Click on the “First Aid” button: At the top of the Disk Utility window, you’ll find several buttons, including “First Aid.” Click on this button to initiate the First Aid process for the selected drive.
- Start the First Aid process: A new window will appear, providing you with options to run different First Aid operations. The default option is to “Run” First Aid. Choose this option and click on the “Run” button to begin the First Aid process.
- Wait for the analysis and repair: Disk Utility will now analyze the selected drive, checking for errors, inconsistencies, and corruption. If any issues are detected, Disk Utility will attempt to repair them automatically.
- Monitor progress: You can monitor the progress of the First Aid process on the screen. Depending on the size and condition of the drive, the process may take some time to complete.
- Review the results: Once the First Aid process is complete, Disk Utility will display a summary of the analysis and repair results. This will indicate whether any issues were found and if they were successfully repaired.
It’s important to note that while First Aid is generally safe and non-destructive, it’s always a good practice to have a recent backup of your important data before running any disk repair operations, as a precautionary measure.
If you need to run First Aid on a different drive or volume, simply repeat the steps mentioned above, selecting the appropriate drive or volume in Disk Utility.
By following these simple steps, you can easily access and utilize Disk Utility’s First Aid to diagnose and repair any drive-related issues on your Mac.
Running Disk Utility’s First Aid on internal drives
Running Disk Utility’s First Aid on internal drives is essential for maintaining the health and performance of your macOS system. Whether you’re experiencing issues with disk errors, file corruption, or performance degradation, First Aid can help diagnose and repair these issues. Here’s how you can run First Aid on internal drives:
- Open Disk Utility: Launch Disk Utility by navigating to the “Applications” folder, then the “Utilities” folder, and selecting “Disk Utility.”
- Select the internal drive: In the left sidebar of Disk Utility, you’ll see a list of all the drives connected to your Mac. Choose the internal drive on which you want to run First Aid. This will typically be the startup disk labeled “Macintosh HD” or “Macintosh SSD.”
- Click on the “First Aid” button: Located at the top of the Disk Utility window, click on the “First Aid” button to initiate the First Aid process for the selected internal drive.
- Select “Run”: In the First Aid window that appears, click on the “Run” button to start the diagnostic and repair process.
- Wait for the process to complete: Disk Utility will now analyze the internal drive for any errors, inconsistencies, or corruption. It will attempt to repair any issues found during the process.
- Review the results: Once the First Aid process is complete, Disk Utility will display a summary of the analysis and repair results. This will indicate whether any issues were found and if they were successfully repaired.
It’s important to note that running First Aid on an internal drive may require you to restart your Mac. If prompted, click on the “Restart” button to allow Disk Utility to perform the repair tasks during the startup process.
By regularly running First Aid on your internal drives, you can proactively identify and resolve any disk-related issues that may be impacting the performance and stability of your macOS system. This can help prevent data loss, improve system responsiveness, and extend the lifespan of your hardware.
If First Aid fails to repair the internal drive or if the issues persist, it is advisable to seek professional assistance or contact Apple Support for further guidance and troubleshooting.
Running Disk Utility’s First Aid on external drives
Running Disk Utility’s First Aid on external drives can help resolve disk-related issues and ensure the proper functioning of your external storage devices. Whether you’re experiencing connectivity problems, performance issues, or file system errors, First Aid can help diagnose and repair these issues. Here’s how you can run First Aid on external drives:
- Connect the external drive: Ensure that the external drive is properly connected to your Mac via USB, Thunderbolt, or another compatible interface.
- Open Disk Utility: Launch Disk Utility by navigating to the “Applications” folder, then the “Utilities” folder, and selecting “Disk Utility.”
- Select the external drive: In the left sidebar of Disk Utility, you’ll see a list of all the drives connected to your Mac. Choose the external drive on which you want to run First Aid.
- Click on the “First Aid” button: Located at the top of the Disk Utility window, click on the “First Aid” button to initiate the First Aid process for the selected external drive.
- Select “Run”: In the First Aid window that appears, click on the “Run” button to start the diagnostic and repair process.
- Wait for the process to complete: Disk Utility will now analyze the external drive for any errors, inconsistencies, or corruption. It will attempt to repair any issues found during the process.
- Review the results: Once the First Aid process is complete, Disk Utility will display a summary of the analysis and repair results. This will indicate whether any issues were found and if they were successfully repaired.
- Eject the external drive: After running First Aid and verifying that the repair process was successful, it’s important to properly eject the external drive before disconnecting it from your Mac. Right-click on the drive in the sidebar and select “Eject.”
By regularly running First Aid on your external drives, you can ensure the stability and reliability of your external storage devices. This can help prevent data loss, improve transfer speeds, and maintain the overall performance of your Mac.
If First Aid fails to repair the external drive or if the issues persist, try connecting the drive to another computer or port to rule out any connection-related issues. If the problems persist, it may be necessary to consult the manufacturer’s support or seek professional assistance for further troubleshooting and repair.
Understanding the First Aid process
Understanding how the First Aid process works can help you grasp the intricacies of Disk Utility’s diagnostic and repair capabilities. Here’s an overview of the key aspects of the First Aid process:
- Analysis: When you initiate the First Aid process, Disk Utility performs a thorough analysis of your selected drive. It scans the file system, directory structure, and metadata to identify any errors or inconsistencies.
- Error Detection: During the analysis, First Aid checks for various types of errors, such as file system errors, corrupted metadata, permission issues, and disk errors. It identifies any problems that may be affecting the drive’s performance or data integrity.
- Error Repair: After detecting errors, First Aid attempts to repair them. Depending on the type and severity of the error, First Aid performs appropriate repair actions to restore the affected components to a healthy state. This can involve restructuring the directory hierarchy, fixing corrupted metadata, restoring proper file permissions, or repairing disk errors.
- Non-Destructive Repairs: First Aid is designed to perform non-destructive repairs whenever possible. This means it tries to fix errors without deleting or modifying your files. This ensures that your data remains intact while resolving disk-related issues.
- Repairing Permissions: In addition to file system and disk errors, First Aid also checks and repairs file permissions. This process ensures that appropriate access privileges are granted to files and folders, allowing you to access and modify them as needed.
- Repair Confirmation: Once the repair process is complete, First Aid provides a summary of the analysis and repair results. It indicates whether any errors were found and repaired successfully, or if further action is required.
It’s important to note that the First Aid process may take some time to complete, depending on the size and condition of the drive. Patience is key during this process, and it’s advisable not to interrupt or manually stop the First Aid process to avoid potential data loss or further drive damage.
If First Aid is unable to repair certain errors or if it repeatedly encounters the same issues, it may be necessary to explore alternative solutions or seek professional assistance. Disk Utility’s First Aid, although a powerful tool, has certain limitations and may not be able to fix all types of drive-related problems.
Understanding the First Aid process empowers you to effectively diagnose and repair drive issues, helping to maintain the health and performance of your Mac’s storage devices.
Common issues that can be fixed with Disk Utility’s First Aid
Disk Utility’s First Aid is a powerful tool that can address a variety of drive-related issues on your Mac. Here are some common problems that can often be fixed using First Aid:
- File System Errors: First Aid can detect and repair file system errors, such as corrupted directory structures or metadata. This can resolve issues like missing files, improper file organization, or inaccessible folders.
- Disk Errors: Disk Utility’s First Aid can repair disk errors, including bad sectors and other physical issues with the drive. By marking and isolating these errors, it helps prevent further data corruption and potential disk failure.
- Volume Corruption: First Aid can resolve volume corruption issues by repairing the underlying file system. This helps ensure that your volumes are correctly mounted, recognized, and accessible by your Mac.
- Permissions: Disk Utility’s First Aid can fix permission-related issues on your drives. This includes restoring correct ownership and access permissions for files and folders, resolving issues with restricted access or permission denied errors.
- Startup Issues: If your Mac’s startup disk is experiencing problems, First Aid can help identify and repair the root cause. It can fix issues that prevent your Mac from booting properly, helping to restore normal startup functionality.
- Data Corruption: First Aid can repair data corruption issues, such as damaged files or corrupted file extensions. By restoring the integrity of your data, it helps prevent potential data loss and ensures that your files can be accessed and used without errors.
- External Drive Connectivity: Disk Utility’s First Aid can troubleshoot and repair issues with external drives that are not recognized, not mounting, or experiencing connectivity problems. It can fix issues with the file system, directory structure, or metadata that may be causing the connectivity issues.
It’s important to remember that while Disk Utility’s First Aid is a robust tool, it may not be able to fix every issue. In cases where First Aid fails to resolve the problem, or if you suspect hardware failure, it is recommended to seek professional assistance or contact the drive manufacturer for further support.
Regularly running First Aid on your drives as part of your maintenance routine can help catch and fix these common issues early on, promoting a healthier and more reliable storage environment for your Mac.
What to do if Disk Utility’s First Aid fails to repair the drive
In some cases, Disk Utility’s First Aid may not be able to successfully repair all drive-related issues. If you find that First Aid fails to fix the problems you’re experiencing, here are some steps you can take:
- Restart your Mac: Sometimes a simple restart can resolve minor issues. Try restarting your Mac and running First Aid again to see if the repair process is successful the second time around.
- Try a different repair tool: There are other third-party disk repair tools available that may have additional features or be more effective in certain situations. Research and consider using an alternative repair tool that is compatible with macOS.
- Restore from a backup: If you have a recent backup of your data, you can restore your files and data from that backup. This can be especially useful if the drive is experiencing severe corruption or other critical issues.
- Contact professional assistance: If the drive continues to have issues even after attempting different repair methods, it may be necessary to seek assistance from professional data recovery services or contact the drive manufacturer’s support for further diagnostics and repair.
- Replace the drive: If all other repair attempts have failed, it is possible that the drive may have suffered from significant hardware failure. In such cases, it may be necessary to replace the drive with a new one and restore your data from backups.
It’s important to note that before attempting any repair methods that involve data recovery or drive replacement, it is crucial to have recent backups of your important data. This ensures that your data remains protected and accessible even if the drive repair efforts do not succeed.
Remember, prevention is always better than a failed repair. Regularly backing up your data and maintaining good drive health practices, such as avoiding sudden power cuts and using reliable storage devices, can help mitigate the risk of encountering severe drive issues.
Should you encounter persistent drive-related issues that are beyond your expertise, it is wise to consult with professionals or reach out to the drive manufacturer’s support for further guidance and assistance with resolving the problem.
Additional tips and tricks for using Disk Utility’s First Aid
While Disk Utility’s First Aid is a powerful tool for diagnosing and repairing drive issues, here are some additional tips and tricks to enhance your experience and maximize its effectiveness:
- Run First Aid in Safe Mode: If your Mac is experiencing persistent issues or if First Aid is unable to repair the drive in normal mode, try running it in Safe Mode. To enter Safe Mode, restart your Mac and hold down the Shift key until the Apple logo appears. Running First Aid in Safe Mode can help address underlying software conflicts that may be hindering the repair process.
- Use First Aid on a regular basis: To maintain optimal drive health and prevent potential issues, it’s recommended to run First Aid on your drives regularly, particularly if you frequently connect or disconnect external drives. By proactively addressing any emerging problems, you can avoid more severe issues in the future.
- Create a bootable macOS installer: If you’re unable to access Disk Utility or run First Aid from within macOS, you can create a bootable macOS installer on a USB drive and use it to launch Disk Utility. This can be useful in cases where your Mac experiences startup issues or when you need to repair the startup disk.
- Perform disk verification: Before running First Aid, consider performing a disk verification to check for potential issues. Disk verification scans the drive for errors without making any changes. It gives you a snapshot of the drive’s current condition and can help determine if running First Aid is necessary.
- Backup your data: It’s always a good practice to have backups of your important data before running any disk repair operations. While First Aid aims to be non-destructive, unforeseen circumstances can lead to data loss. Regular backups ensure that your files are safe even if issues arise during the repair process.
- Seek expert assistance for critical data: If you have critical or irreplaceable data on a failing drive, consider seeking professional assistance or data recovery specialists. They have the expertise and specialized tools to potentially recover data from severely damaged drives.
- Check S.M.A.R.T. status: S.M.A.R.T. (Self-Monitoring, Analysis, and Reporting Technology) is a feature that predicts drive failures. Before running First Aid, you can check the S.M.A.R.T. status of your drives using third-party apps or terminal commands. If a drive displays warning signs, it’s advisable to consider replacing it to avoid potential data loss.
Remember to exercise caution when using Disk Utility’s First Aid and to follow best practices for drive maintenance. Regularly monitoring and maintaining the health of your drives can significantly prolong their lifespan and ensure the safety and accessibility of your valuable data.