
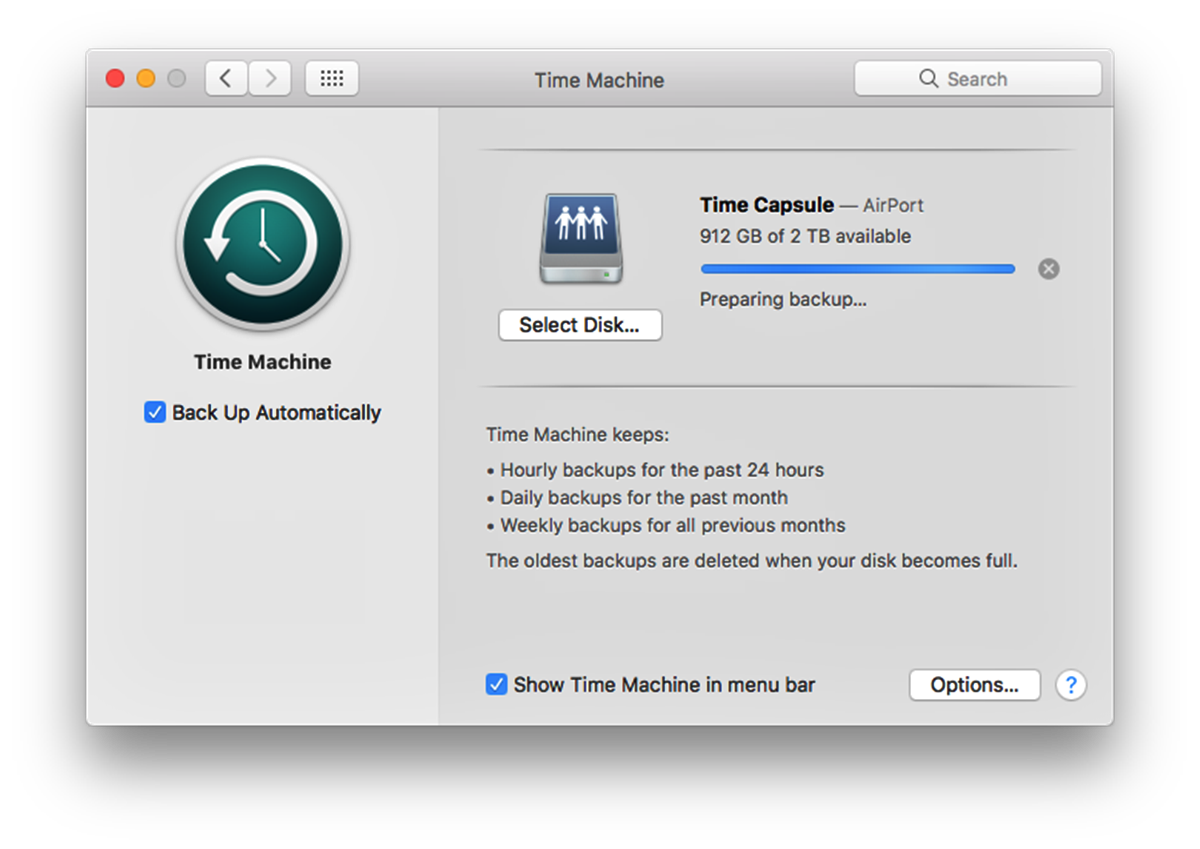
Check Time Machine Preferences
One of the first things you should do when Time Machine gets stuck preparing a backup is to check your Time Machine preferences. Start by clicking on the Apple menu and selecting “System Preferences.” From there, click on the “Time Machine” icon.
Once you’re in the Time Machine preferences, make sure that the “Back Up Automatically” option is enabled. If it’s already enabled, try toggling it off and then back on again. This can sometimes help to kickstart the backup process.
Additionally, make sure that your backup disk is selected correctly. You should see the name of your external drive listed under the “Select Disk” section. If it’s not selected, choose the correct drive from the dropdown menu.
Another important setting to check is the “Exclusions” list. Time Machine excludes certain system files and directories by default, but you may have inadvertently added other files or folders to the exclusion list. Click on the “Options” button and review the list of excluded items. If you see any files or folders that you don’t need to exclude, select them and click the “-” button to remove them from the list.
Once you have reviewed and adjusted the Time Machine preferences, close the System Preferences window and monitor the backup process to see if it progresses without getting stuck on “Preparing Backup.”
Make Sure Your External Drive is Connected Properly
One common reason for Time Machine getting stuck on “Preparing Backup” is a connectivity issue with your external drive. To ensure that your drive is connected properly, follow these steps:
- Check the physical connection: Make sure that the USB, Thunderbolt, or other cables connecting your external drive to your Mac are securely plugged in. Inspect the cables for any damage or fraying that may hinder the connection.
- Use a different port/cable: Try connecting your external drive to a different USB or Thunderbolt port on your Mac. In some cases, the current port or cable may be faulty, causing the backup to get stuck.
- Power cycle your drive: Unplug the power cable from your external drive, wait for a few seconds, and then plug it back in. This can help reset the connection and resolve any temporary issues.
- Restart your Mac: Sometimes, a simple restart can resolve connectivity issues. Save any unsaved work, click on the Apple menu, and select “Restart.” Once your Mac restarts, check if Time Machine proceeds with the backup process.
- Check the drive status: Open the Disk Utility application (located in the Utilities folder within the Applications folder), and select your external drive. In the “First Aid” tab, click “Verify Disk” to scan for any errors. If any issues are found, click “Repair Disk” to fix them.
By ensuring that your external drive is properly connected and in good working condition, you can eliminate any potential issues that might be causing Time Machine to get stuck on “Preparing Backup.”
Check Available Disk Space on Your External Drive
Another reason why Time Machine may get stuck on “Preparing Backup” is limited disk space on your external drive. Here’s how you can check the available disk space:
- Open a new Finder window and locate your external drive in the sidebar under the “Devices” section. Right-click on the drive and select “Get Info.”
- In the Info window that opens, you will see the capacity and available space of your external drive. Ensure that there is enough free space for Time Machine to create backups.
- If the available space is running low, you can free up space by deleting unnecessary files or transferring them to another storage device. Consider removing large files, duplicate files, or old backups that are no longer needed.
- If you are running low on disk space consistently, you may need to consider investing in a larger or additional external drive to accommodate your backups.
It’s important to have an adequate amount of free space on your external drive to allow Time Machine to function properly. If the available disk space is limited, Time Machine may encounter issues and get stuck on “Preparing Backup.” Regularly monitoring and managing the available disk space will help ensure a smooth backup process.
Restart Your Mac
If you’re experiencing issues with Time Machine getting stuck on “Preparing Backup,” a simple restart of your Mac may help resolve the problem. Here’s how to do it:
- Save any open work and close all applications to avoid any potential data loss.
- Click on the Apple menu in the top left corner of your screen and select “Restart.”
- Wait patiently as your Mac shuts down and starts up again. This process may take a few minutes.
- Once your Mac has restarted, log back in and check if Time Machine proceeds with the backup process without getting stuck on “Preparing Backup.”
Restarting your Mac can often clear temporary glitches and refresh system processes, which may help resolve any issues causing Time Machine to hang during the preparation stage. If the problem persists after restarting, there are other troubleshooting steps you can take to further troubleshoot the issue.
Remember, restarting your Mac regularly can also help maintain system performance and resolve other software-related issues. It’s a simple yet effective step that can help ensure a smoother experience with Time Machine and other applications on your Mac.
Reset Time Machine
If Time Machine continues to get stuck on “Preparing Backup,” resetting Time Machine can often help resolve the issue. Follow these steps to reset Time Machine:
- Open a Finder window and navigate to the “/Applications/Utilities” folder.
- Locate and open the “Terminal” application.
- In the Terminal window, type the following command and press Enter:
tmutil reset - You will be prompted to enter your admin password. Type it in and press Enter.
- Once the command is executed, Time Machine will be reset to its default settings.
- Restart your Mac to ensure the changes take effect.
By resetting Time Machine, you are essentially clearing any configuration issues or corrupted settings that may be causing it to hang during the preparation stage. This can provide a fresh start for Time Machine and allow it to create backups without any problems.
After resetting Time Machine, monitor the backup process to see if it proceeds successfully without getting stuck. If the issue persists, there are further troubleshooting steps you can take to pinpoint and resolve the specific cause of the problem.
Verify and Repair Your External Drive
If Time Machine is stuck on “Preparing Backup,” it’s worth checking the health of your external drive. Here’s how you can verify and repair your external drive:
- Open the Disk Utility application. You can find it in the Utilities folder within the Applications folder.
- In the Disk Utility window, select your external drive from the list of available drives.
- Click on the “First Aid” tab at the top of the window.
- Click on the “Verify Disk” button to scan for any potential issues with your external drive.
- If Disk Utility detects any problems, click on the “Repair Disk” button to attempt to fix them.
- Wait for the verification and repair process to complete. This may take some time depending on the size and condition of your drive.
Verifying and repairing your external drive can help identify and fix any errors or inconsistencies that may be hindering the backup process. By ensuring the health of your drive, you increase the chances of Time Machine proceeding smoothly without getting stuck.
It’s important to note that in some cases, Disk Utility may not be able to repair certain issues. If the problem persists even after attempting to repair the drive, it may be necessary to consider replacing the drive or seeking further assistance from a professional.
Exclude Certain Files and Folders from Backup
If Time Machine is consistently getting stuck on “Preparing Backup,” you can try excluding certain files and folders from the backup process. This can help reduce the amount of data being backed up and potentially resolve any issues related to specific files. Here’s how to exclude files and folders from Time Machine:
- Open the Time Machine preferences by clicking on the Apple menu, selecting “System Preferences,” and then clicking on the “Time Machine” icon.
- Click on the “Options” button located at the bottom right corner of the Time Machine preferences window.
- A new window will appear, showing the list of items that are currently excluded from backup. To add additional exclusions, click on the “+” button.
- Navigate to the file or folder you wish to exclude and select it. Repeat this step for any additional items you want to exclude.
- Click on “Exclude” to add the selected files/folders to the exclusions list.
- Once you have finished excluding items, click on “Save” to apply the changes.
By excluding certain files and folders, you can prioritize important data for backup while excluding less critical or unnecessary items. This can help reduce the backup size and potentially resolve any issues related to specific files that may be causing Time Machine to get stuck during the preparation stage.
It’s important to carefully select exclusions to ensure that you’re not omitting any important data from your backups. Regularly review the exclusions list to make any necessary adjustments as your file organization and backup needs may change over time.
Remove Any Problematic Files or Folders
If Time Machine is stuck on “Preparing Backup,” there may be specific files or folders causing the issue. By removing these problematic items, you can potentially resolve the backup problem. Here’s what you can do:
- Identify potential problematic files or folders: Take note of any files or folders that you suspect might be causing issues with the Time Machine backup. Look out for large files, corrupted files, or files with special characters in their names.
- Move the problematic files or folders: Create a new folder on your desktop or another location on your drive. Move the files or folders you identified in step 1 into this folder. By removing them from their original location, you’re essentially excluding them from the backup process.
- Restart Time Machine: Open the Time Machine preferences by clicking on the Apple menu, selecting “System Preferences,” and then clicking on the “Time Machine” icon. Toggle Time Machine off and then back on again to restart the backup process.
- Monitor the backup progress: Keep an eye on the Time Machine backup process to see if it proceeds without getting stuck on “Preparing Backup.” If it completes successfully, you can be reasonably confident that the problematic files or folders were causing the issue.
- Review and fix the problematic files or folders: Once the successful backup is complete, you can further analyze the files or folders you moved in step 2. Repair any corrupted files, delete unnecessary files, or rename files with special characters to ensure they won’t cause issues in the future.
By removing problematic files or folders, you can potentially resolve the backup issue and allow Time Machine to finish the backup process without getting stuck. Remember to regularly review and maintain your files to ensure a smooth backup experience.
Use Disk Utility to Repair Disk Permissions
If Time Machine is consistently stuck on “Preparing Backup,” using Disk Utility to repair disk permissions can help resolve any underlying issues with the file permissions on your Mac. Follow these steps:
- Open the Disk Utility application from the Applications/Utilities folder.
- Select your startup disk from the list on the left side of the Disk Utility window.
- Click on the “First Aid” tab at the top of the window.
- Click on the “Repair Disk Permissions” button to initiate the repair process.
- Allow Disk Utility to scan and repair the disk permissions. This may take some time depending on the size of your disk.
- Once the process is complete, restart your Mac and try running Time Machine again to see if it gets past the “Preparing Backup” stage.
Repairing disk permissions can help resolve any inconsistencies or errors that may be affecting the Time Machine backup process. It ensures that the correct permissions are set for files and folders, preventing any conflicts that could lead to backup issues.
Keep in mind that newer versions of macOS do not rely heavily on disk permissions, so the impact on Time Machine may vary depending on your specific operating system. However, it’s still worth trying this step as part of your troubleshooting process.
Restart Time Machine Using Terminal
If you’re still encountering issues with Time Machine getting stuck on “Preparing Backup,” you can try restarting Time Machine using the Terminal application. Here’s how:
- Open the Terminal application. You can find it in the Utilities folder within the Applications folder.
- Type the following command and press Enter:
sudo tmutil killall backupd - You will be prompted to enter your admin password. Type it in and press Enter.
- Wait for the command to execute. This will force Time Machine to terminate its processes.
- Once the command is complete, type
tmutil startbackupand press Enter to restart Time Machine. - Monitor the backup progress to see if Time Machine now proceeds without getting stuck on “Preparing Backup.”
Restarting Time Machine using the Terminal application can sometimes solve underlying issues that may be interfering with the backup process. By forcing Time Machine to stop and then initiating a new backup, you give it a fresh start and a chance to work smoothly.
If the issue persists even after restarting Time Machine, it may be necessary to explore further troubleshooting steps or seek professional assistance to resolve the problem.
Reset NVRAM/PRAM
Resetting the NVRAM (Non-Volatile Random-Access Memory) or PRAM (Parameter Random-Access Memory) can help resolve various issues with your Mac, including problems with Time Machine getting stuck on “Preparing Backup.” Here’s how you can reset NVRAM/PRAM:
- Ensure your Mac is turned off completely.
- Press the power button and immediately hold down the following keys: Command (⌘), Option, P, and R.
- Keep holding the keys down until you hear the Mac startup sound for the second time or see the Apple logo appear and disappear for a second time.
- Release the keys once the Mac restarts.
- Go to the System Preferences, then click on the “Time Machine” icon.
- Verify that Time Machine is enabled and select the appropriate backup disk.
- Monitor the backup process to see if Time Machine gets past the “Preparing Backup” stage without any issues.
Resetting NVRAM/PRAM can clear the settings related to your Mac’s hardware, including Time Machine. This allows for a fresh start and can help resolve any conflicts or glitches that may have been causing Time Machine to get stuck during the preparation stage.
Note that resetting NVRAM/PRAM will not delete any of your data or settings, but it will revert certain system settings back to their default values. If the issue persists after resetting NVRAM/PRAM, there may be other factors contributing to the problem that require further investigation.
Delete Existing Backups and Start Anew
If you’ve tried various troubleshooting steps and Time Machine is still stuck on “Preparing Backup,” you may need to delete your existing backups and start fresh. While this step can be a last resort, it can help resolve any underlying issues with the backups. Here’s how to proceed:
- Open a new Finder window and navigate to your Time Machine backup drive.
- Locate the Backups.backupdb folder, which contains your previous backups.
- Select the folder and move it to the Trash.
- Empty the Trash to permanently delete the backups.
- Open the Time Machine preferences by clicking on the Apple menu, selecting “System Preferences,” and then clicking on the “Time Machine” icon.
- Toggle Time Machine off and then back on to create a new backup.
- Select the appropriate backup disk and wait for Time Machine to start the backup process.
- Monitor the backup progress to ensure that Time Machine no longer gets stuck on “Preparing Backup.”
Deleting your existing backups and starting anew can provide a clean slate for Time Machine. It removes any potential corrupted data or configuration issues that may have been causing the backup process to stall. This step may take some time as it involves creating a completely new backup, so be patient during the initial backup process.
Remember that deleting your existing backups means you won’t have access to any previous versions of files or folders. If you need to retain any important data from the previous backups, make sure to manually copy them to another storage location before deleting the backups.
If the problem still persists after starting a new backup, it may be beneficial to seek additional assistance or consult with a professional to diagnose and resolve the underlying issue.