
Why would you want to receive email replies at a different address than you send from?
When it comes to managing your email correspondence, there are various scenarios where it might be beneficial to receive replies at a different address than the one you initially used to send the email. Here are a few reasons why you might consider implementing this feature:
- Privacy and Security: By using a separate email address for receiving replies, you can maintain a level of privacy and protect your personal or professional identity. This is particularly useful when communicating with individuals or organizations that you may not fully trust or when dealing with sensitive information.
- Organization and Efficiency: Having separate email addresses for sending and receiving can help you maintain a more streamlined and efficient workflow. By segregating your incoming replies, you can better prioritize and manage your email by categorizing them according to your preferences or the nature of the communication.
- Delegation and Collaboration: In certain situations, you may want to delegate email management to another person or team within your organization. By setting up a different address for receiving replies, you can ensure that the designated person or team can handle the incoming messages seamlessly without accessing your primary sender address.
- Email Filtering and Sorting: Receiving replies at a separate address allows you to implement specific filtering or sorting rules for better email organization. You can create rules or filters to automatically route certain types of replies to specific folders or labels, making it easier to locate and respond to important messages.
Whether you need to protect your identity, improve organization, delegate tasks, or enhance email management, having the ability to receive replies at a different address than you send from can offer numerous benefits. In the following sections, we will explore various methods to set up this feature in popular email clients such as Gmail, Outlook, Apple Mail, and more.
Setting up a forwarding rule in Gmail
Gmail provides a convenient method to forward incoming email replies to a different address. This allows you to send emails from your primary Gmail address while receiving the replies at a separate designated address. Here are the steps to set up a forwarding rule:
- Open your Gmail account and click on the gear icon in the top right corner of the screen. Select “Settings” from the dropdown menu.
- Navigate to the “Forwarding and POP/IMAP” tab.
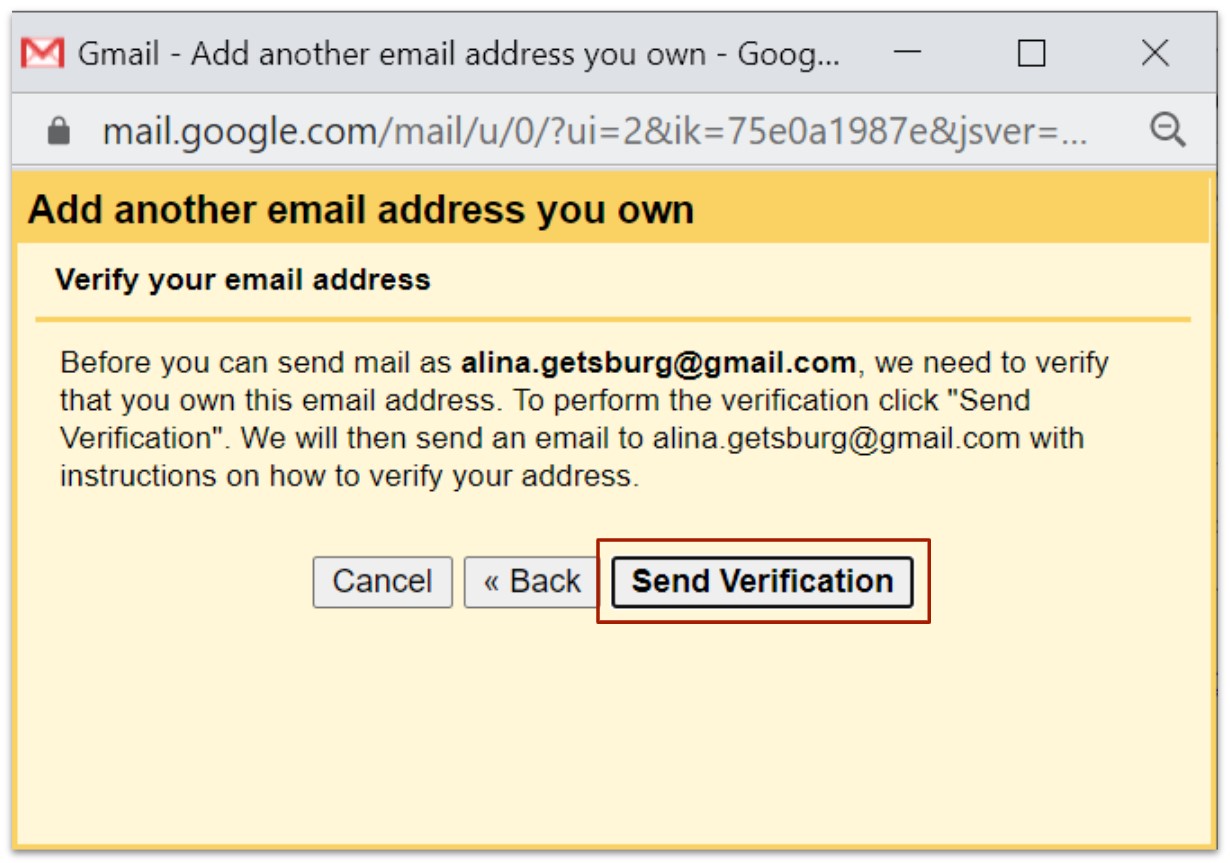
- Click on the “Add a forwarding address” button and enter the email address where you want to receive your replies. Follow the prompts to verify the forwarding address.
- Once the forwarding address is verified, return to the “Forwarding and POP/IMAP” tab.
- Select the option “Forward a copy of incoming mail to” and choose the verified forwarding address from the dropdown menu.
- Choose your desired action for Gmail to perform on the forwarded messages. You can keep the forwarded copy in your Gmail inbox, archive it, mark it as read, or delete it.
- Click the “Save Changes” button at the bottom of the page to finalize the forwarding rule.
With the forwarding rule in place, any replies to the emails you send from your primary Gmail address will be automatically forwarded to the designated address. This method allows you to maintain your primary sender identity while conveniently receiving the replies at a separate address.
It’s worth noting that Gmail may mark forwarded messages as “via” the original sender’s address. This serves as a security measure to prevent email spoofing and informs recipients that the email was originally sent from a different address. Keep this in mind, especially if you are forwarding emails to a professional or business-related address.
Setting up a rule in Outlook
Microsoft Outlook offers powerful rule-based functionality to manage email messages, including setting up rules to forward email replies to a different address. Follow these steps to create a rule in Outlook:
- Open Outlook and go to the “File” tab.
- Choose “Manage Rules & Alerts” from the dropdown menu. The Rules and Alerts window will open.
- Click on the “New Rule” button to start creating a new rule.
- In the Rules Wizard window, select “Apply rule on messages I send” under the “Start from a blank rule” section. Click “Next” to proceed.
- Leave the “Step 1: Select condition(s)” checkbox empty and click “Next” to skip the condition selection.
- A warning will appear asking if you want to apply the rule to all outgoing messages. Click “Yes” to confirm.
- In the “Step 1: Select action(s)” section, check the box for “Forward it to people or public group(s)”.
- In the “Step 2: Edit the rule description” section, click on the “people or public group(s)” link. Enter the email address where you want to receive the replies and click “OK”.
- If desired, you can add more actions or exceptions to the rule. For example, you can add a condition to forward emails only if they contain specific keywords.
- Click “Next” to proceed to the next step.
- Specify any exceptions to the rule (if applicable) and click “Next”.
- Enter a name for the rule and choose whether to apply it to all email accounts or only your current account. Click “Finish” to save the rule.
With the rule successfully created, Outlook will automatically forward the email replies to the specified address. This allows you to use your Outlook account to send emails while receiving the responses at a separate address.
Make sure to review and test the rule to ensure it is functioning as intended. Additionally, keep in mind that some email clients or organizations may have restrictions on email forwarding, so it’s best to consult with your IT department or email service provider if you encounter any issues.
Using a separate email client
If you prefer to use a separate email client for receiving email replies, there are several options available that allow you to send emails from one address while receiving the replies at a different address. Here are a few popular email clients and how to set up this feature:
1. Thunderbird:
To configure Thunderbird to receive replies at a different address, follow these steps:
- Open Thunderbird and go to “Tools” in the menu bar.
- Select “Account Settings” from the dropdown menu.
- Choose the email account you want to modify and click on “Composition & Addressing”.
- Check the box that says “Automatically quote the original message when replying” and specify the address where you want to receive your replies.
- Click “OK” to save the changes.
2. Mailbird:
To set up Mailbird to receive replies at a different address:
- Open Mailbird and click on the menu icon (three horizontal lines) in the top left corner of the screen.
- Select “Settings” from the dropdown menu.
- Go to the “Identities” tab and choose the email account you want to modify.
- Enter the email address where you want to receive your replies and click “Save”.
3. eM Client:
In eM Client, you can receive replies at a different address by following these steps:
- Launch eM Client and select “Menu” from the toolbar.
- Choose “Tools” and then “Accounts” from the dropdown menu.
- Select the email account you want to modify and click on the “General” tab.
- In the “Reply-To” field, enter the email address where you want to receive your replies.
- Click “OK” to save the changes.
Using a separate email client allows you to have better control over the email addresses you send from and receive replies in. Explore the settings of your preferred email client to find the options to specify a different reply-to address.
Creating a filter in Apple Mail
If you use Apple Mail as your email client, you can create a filter to receive email replies at a different address. Here’s how you can set up this feature:
- Open Apple Mail and go to the “Mail” menu in the top menu bar.
- Select “Preferences” from the dropdown menu to open the Preferences window.
- Click on the “Rules” tab in the Preferences window.
- Click the “Add Rule” button to create a new rule.
- In the “Description” field, give your rule a name that describes its purpose.
- Set the conditions for the rule. You can specify criteria such as sender, subject, or other characteristics of the email.
- In the “Perform the following actions” section, select “Reply-To Address” from the dropdown menu.
- Enter the email address where you want to receive your replies in the adjacent text field.
- Click “OK” to save the rule.
With the filter in place, Apple Mail will automatically forward any email replies to the designated address. This allows you to use your Apple Mail account to send emails while conveniently receiving the responses at a separate address.
It’s worth noting that depending on the version of Apple Mail you are using, the interface and options may slightly differ. However, the general process of creating a rule or filter to receive replies at a different address should be similar across versions.
Remember to periodically review and update your filters as needed, especially if your email communication needs change over time.
Benefits of receiving email replies at a different address than you send from
Receiving email replies at a different address than the one you send from offers several benefits that can enhance your email management and overall experience. Here are some of the advantages:
- Enhanced Privacy and Security: By using a separate email address for receiving replies, you can protect your personal or professional identity. This reduces the risk of exposing your main email address to potential security threats or unwanted solicitations.
- Improved Organization and Efficiency: Having a designated email address for receiving replies makes it easier to keep track of important conversations. You can separate replies from different senders or projects, allowing for more organized and efficient email management. By using filters or labels, you can automatically route replies to specific folders for better organization.
- Effortless Delegation and Collaboration: If you need to delegate email management or work collaboratively with others, setting up a separate reply address can enhance teamwork. Your team members or assistants can handle the incoming replies without accessing your main sender address, ensuring effective collaboration and delegation.
- Flexible Email Filtering and Sorting: Receiving replies at a different address allows you to apply specific filtering or sorting rules. You can create filters based on keywords, sender information, or other criteria to automatically move or categorize incoming replies. This ensures that you can quickly identify and prioritize important replies while keeping your inbox organized.
These benefits can significantly improve your email workflow, saving you time and reducing the clutter in your inbox. Whether you prioritize privacy, collaboration, organization, or efficient email management, receiving replies at a different address provides a practical solution.
It’s important to note that while utilizing a separate reply address offers advantages, it is essential to regularly check and monitor both your main sender address and the designated reply address to avoid missing any important conversations or inquiries.
Considerations before implementing this feature
Before implementing the feature of receiving email replies at a different address than you send from, there are a few important considerations to keep in mind:
- Email Platform Limitations: Some email platforms may have limitations or restrictions on forwarding or redirecting emails. It’s crucial to check the policies and terms of service of your email provider and ensure that the desired functionality is supported.
- Email Filtering and Spam: When using a separate reply address, it’s possible that some email providers or filters may mark forwarded messages as spam. Be aware of this potential issue, as it might affect the deliverability or visibility of important replies. Regularly check spam folders and adjust filtering settings if necessary.
- Consistency in Communication: Using a separate reply address may confuse recipients who expect replies from the same address. Ensure that you communicate the use of the alternate reply address to your contacts or include a note in your email signature to avoid any misunderstandings about the identity of the sender.
- Verification and Authentication: If you set up forwarding or filtering rules, it’s important to periodically verify that the messages are being correctly redirected to the designated reply address. Regularly monitor the effectiveness of the setup to prevent any potential issues or disruptions in communication.
- Email Management: Implementing a separate reply address adds complexity to your email management process. Ensure that you are prepared for the additional organization and monitoring required to manage emails across multiple addresses effectively. Consider using email management tools or techniques to streamline your workflow.
Taking these considerations into account will help you make an informed decision when implementing the feature. Assess your specific needs, evaluate the potential impact on your email management, and ensure compatibility with your email platform to optimize the benefits of receiving email replies at a different address.
Remember to regularly review and evaluate the effectiveness of the setup to ensure it continues to meet your requirements as your email communication evolves.