
Why you might want to change the default account in Outlook
Outlook is a popular email client used by millions of people worldwide. It allows you to manage multiple email accounts from different providers, such as Gmail, Yahoo, or Hotmail, all in one place. However, by default, Outlook selects the primary account as the default account for sending and receiving emails. While this setup may be suitable for some users, there are various scenarios where you might want to change the default account. Let’s explore a few reasons why you might consider making this adjustment.
1. Multiple email accounts: If you have multiple email accounts configured in Outlook, you may find that you primarily use one account for personal correspondence and another for work-related emails. In this case, changing the default account allows you to streamline your workflow and ensures that emails are sent from the appropriate account by default.
2. Branding consistency: For business owners or professionals representing a company, it is crucial to maintain branding consistency in communications. By setting a specific email account as the default, you can ensure that all outgoing messages, including replies and forwards, are consistently associated with the desired email address, reinforcing your professional identity.
3. Avoiding accidental mishaps: Have you ever inadvertently sent an email from the wrong account? Changing the default account can help you avoid these embarrassing situations. By carefully selecting the desired default account, you can minimize the chances of accidentally sending an email from the wrong address.
4. Email sorting and organization: If you use Outlook’s rules and filters to automatically sort your emails into different folders, changing the default account can help ensure that incoming messages are directed to the appropriate folders associated with each email account. This can aid in keeping your inbox organized and improving overall productivity.
5. Separating personal and professional communication: If you use Outlook for both personal and professional email correspondence, changing the default account can help maintain a clear separation between the two. You can set your personal account as the default for personal emails and your work account for professional communications, ensuring you don’t accidentally mix them up.
Step 1: Open Outlook and go to the File tab
The first step in changing the default account in Outlook is to open the application and navigate to the File tab. This tab is located in the top-left corner of the Outlook window, next to the Home tab.
To begin, launch Outlook by double-clicking on the application icon on your desktop or finding it in your Start menu. Once Outlook is open, you will see a toolbar at the top of the screen with different tabs, including Home, Send/Receive, Folder, View, and more. Look for the tab labeled “File” and click on it.
Clicking on the File tab will open a dropdown menu with various options related to managing your Outlook account and settings. This menu includes options such as Account Information, Options, Help, and more. The File tab serves as a central hub for accessing different features and settings within Outlook.
By selecting the File tab, you will have access to important functions like adding or removing email accounts, modifying account settings, creating new folders, and more. The File tab is often the starting point for making changes to your Outlook configuration, including changing the default email account.
Please note that the appearance and layout of the File tab may vary slightly depending on the version of Outlook you are using. However, the general concept and location should remain the same across different versions.
Once you have successfully navigated to the File tab and are ready to proceed, you can move on to the next step in the process of changing the default account in Outlook.
Step 2: Access the Account Settings menu
After opening the File tab in Outlook, the next step in changing the default account is to access the Account Settings menu. This menu allows you to manage and configure your email accounts, including setting the default account.
To access the Account Settings menu, start by locating and clicking on the “Options” or “Account Settings” button within the File tab. The exact label and placement may vary depending on the version of Outlook you are using, but it is typically found in the top-left section of the File tab menu.
Clicking on the Options or Account Settings button will open a new window or dialog box dedicated to managing various account settings within Outlook.
The Account Settings menu provides you with a comprehensive view of all the email accounts that are currently set up in Outlook. It displays information such as the account name, email address, account type (IMAP, POP, Exchange), and more.
In addition to the account overview, the Account Settings menu also provides access to a range of account-related actions, including adding new accounts, changing passwords, modifying server settings, and managing data file locations.
To proceed with changing the default account, focus on the options related to email accounts. Look for an option that allows you to set or designate the default email account.
Note that the location and wording of the default account setting may vary depending on the version of Outlook you are using. It is typically found in the Account Settings menu under the “Email” or “Email Accounts” section.
Once you have located the option to change the default account, you are ready to move on to the next step in the process.
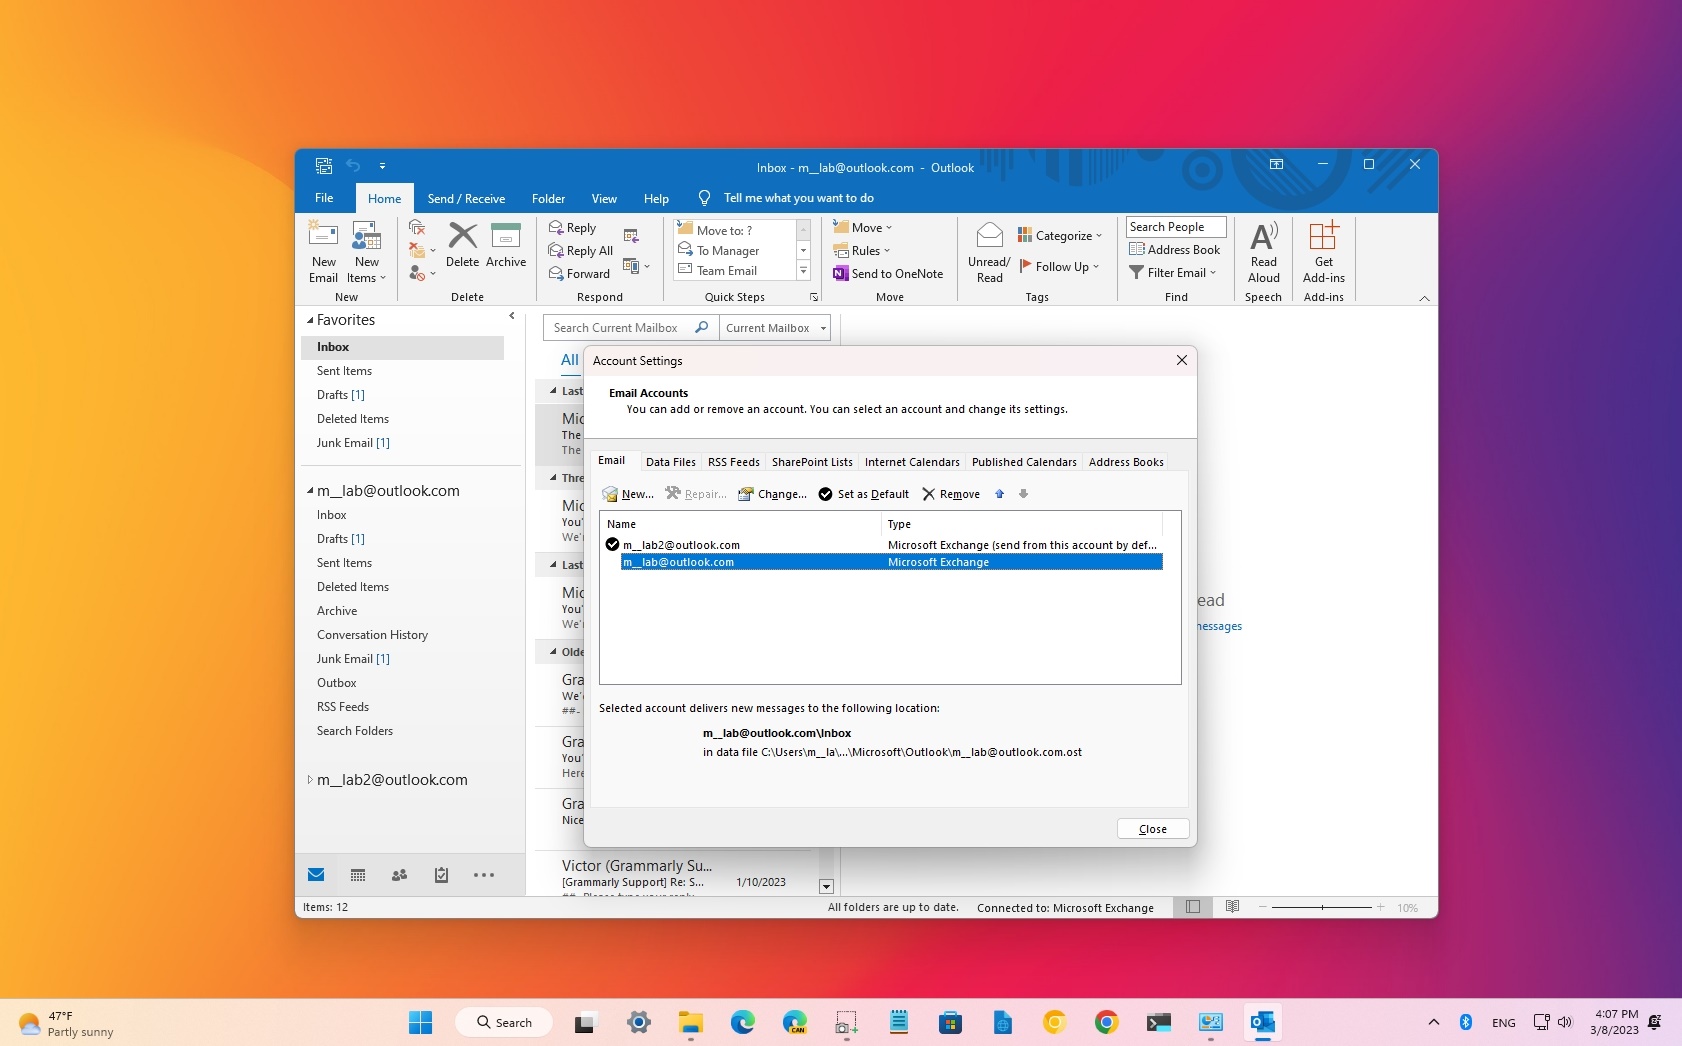
Step 3: Select the Email tab
After accessing the Account Settings menu in Outlook, the next step in changing the default account is to select the Email tab. This tab contains settings specifically related to email accounts and their configurations.
Within the Account Settings menu, you may see multiple tabs such as General, E-mail, Data Files, and more. Look for the tab labeled “Email” and click on it.
The Email tab allows you to view and manage various settings related to your email accounts, including synchronization options, send and receive settings, and default account selection.
By selecting the Email tab, you will be presented with a list of all the email accounts associated with your Outlook profile. The list will include the account name, email address, and other relevant details.
This overview of your email accounts provides you with a quick reference to ensure you are selecting the correct account for modifying the default settings.
It’s important to note that the Email tab is specifically dedicated to email-related settings and configurations. This tab is where you will find options to specify the preferred default account for sending and receiving emails.
Once you have located and clicked on the Email tab, you have successfully reached the section where you can make changes to the default account settings in Outlook.
Now that you have selected the Email tab, you are ready to proceed to the next step in the process of changing the default account in Outlook.
Step 4: Choose the desired default email account
After selecting the Email tab in the Account Settings menu of Outlook, the next step in changing the default account is to choose the desired email account that you want to set as the default.
On the Email tab, you will see a list of all the email accounts associated with your Outlook profile. This list provides an overview of each account’s details, such as the account name, email address, and account type.
To select the desired default email account, locate the account from the list that you want to set as the default. Typically, the default account is marked with the word “Default” or a checkmark symbol next to it.
If the account you want to set as the default is not already marked as such, you can change the default account by clicking on the account name and then selecting the “Set as Default” or similar option. This action designates the chosen account as the default for sending and receiving emails.
It’s crucial to double-check your selection to ensure that you have chosen the correct email account for the desired default account setting. Verifying the account details, such as the provided email address, can help ensure accuracy.
Remember that you can always revisit the Account Settings menu and the Email tab to modify the default account setting in the future if needed.
By selecting the desired email account as the default within the Account Settings menu, you have successfully completed this crucial step in changing the default account in Outlook.
Now that you have chosen the desired default email account, you can proceed to the next step to configure the default account for new messages.
Step 5: Set the default account for new messages
Once you have chosen the desired default email account in Outlook, the next step is to set it as the default account for new messages. This ensures that any new emails you compose will automatically be sent from the selected account.
To set the default account for new messages, follow these steps:
- Click on the “New Email” button in the Outlook toolbar to create a new email.
- Within the new email composition window, locate the “From” field. This field is typically found in the “Options” or “Message” tab of the email editing interface.
- Click on the drop-down arrow next to the “From” field to reveal a list of available email accounts.
- From the list of email accounts, select the desired default account that you previously set in the Account Settings menu.
- After selecting the default account for new messages, you can now proceed to compose and send emails as usual.
By setting the default account for new messages, you ensure that any email you create from scratch will automatically be sent from the chosen account. This is particularly useful if you have different email accounts assigned for various purposes, such as personal and professional communication.
Remember that the default account for new messages can be changed at any time by following these steps again and selecting a different account from the “From” field.
With the default account for new messages set, you are now ready to move on to the next step and configure the default account for replies and forwards.
Step 6: Set the default account for replies and forwards
After setting the default account for new messages in Outlook, the next step is to configure the default account for replies and forwards. This ensures that when you reply to or forward an email, it is sent from the selected default account.
To set the default account for replies and forwards, follow these steps:
- Open a received email in Outlook by double-clicking on it to view its content.
- In the email window, locate the “Reply” or “Forward” button, depending on which action you want to perform.
- Click on the drop-down arrow next to the “Reply” or “Forward” button to reveal a list of available email accounts.
- From the list of email accounts, select the desired default account that you previously set for new messages in the Account Settings menu.
- You can now compose your reply or forward the email, and it will be automatically sent from the selected default account.
By setting the default account for replies and forwards, you ensure that your responses to received emails are consistently sent from the chosen account. This helps maintain professionalism and consistency in your communication with others.
Remember that the default account for replies and forwards can be changed at any time by following these steps again and selecting a different account from the drop-down list.
With the default account for replies and forwards set, you have now completed the necessary steps to configure both the default account for new messages and responses in Outlook.
Now, you can move on to the next step and save the changes you have made in the Account Settings menu.
Step 7: Save the changes and exit the Account Settings menu
After setting the default account for new messages and replies/forwards in Outlook, the next step is to save the changes you have made and exit the Account Settings menu. This ensures that your updated preferences are applied and ready for use.
To save the changes and exit the Account Settings menu, follow these steps:
- Within the Account Settings menu, ensure that you have selected the desired default account for both new messages and replies/forwards.
- Look for a button or option labeled “OK” or “Save” at the bottom or top-right corner of the Account Settings window.
- Click on the “OK” or “Save” button to apply your changes and exit the Account Settings menu.
Once you have clicked the “OK” or “Save” button, Outlook will save your updated default account settings. These changes will take effect immediately, and any new emails you compose or replies/forwards you send will be sent from the designated default account.
It is crucial to ensure that you have saved the changes, as exiting the Account Settings menu without doing so may discard your modifications and revert to the previously set default account.
If you need to make additional changes to other account settings or preferences, you can continue exploring the Account Settings menu before exiting.
With the changes saved and the Account Settings menu exited, you have successfully completed the process of setting the default account for new messages, replies, and forwards in Outlook.
Now you can verify that the default account has been set correctly by following the next step.
Step 8: Verify the default account has been set correctly
After making changes to your default account settings in Outlook, it’s essential to verify that the changes have been applied correctly. This step ensures that emails are being sent from the desired default account.
To verify the default account, follow these steps:
- Compose a new email by clicking on the “New Email” button in the Outlook toolbar.
- Observe the “From” field in the email composition window. It should display the email address of the default account you previously set. This confirms that the default account for new messages has been set correctly.
- Select a received email and click on the “Reply” or “Forward” button to initiate a response or forward the email.
- Check the “From” field in the reply or forward composition window. It should display the email address of the default account you previously set for replies and forwards. This confirms that the default account for responses has been set correctly.
- Send the new email, reply, or forward as a test to confirm that it is being sent from the expected default account.
By following these steps, you can validate that the emails you send from Outlook are indeed being sent from the desired default account.
If the default account is not what you expected, you can revisit the Account Settings menu and make any necessary changes to ensure the correct default account is set for both new messages and replies/forwards.
Verification of the default account is an important final step in the process, as it ensures that your emails are consistently sent from the intended account and maintains a professional and organized email communication experience.
With the default account verified, you have successfully completed the process of setting and confirming the default account in Outlook.
Congratulations! You can now enjoy the benefits of having your preferred default account set in Outlook.
Troubleshooting: Common issues and solutions
While setting the default account in Outlook is usually straightforward, there can be some common issues that users may encounter. Here are a few common problems and possible solutions:
1. Default account not appearing: If you are unable to see your desired email account in the list of options when setting the default account, ensure that the account is properly added to Outlook. You may need to add the account manually or check your account settings for any errors or misconfigurations.
2. Default account not saving: If you have set the default account but it does not seem to save or apply the changes, try closing and reopening Outlook. Sometimes, a simple restart can resolve the issue and ensure that the default account settings are saved correctly.
3. Incorrect default account selection: If you find that emails are still being sent from the wrong account, double-check your settings and confirm that you have successfully set the desired default account for both new messages and replies/forwards. It’s possible that you may have overlooked a step or accidentally selected the wrong account.
4. Conflicting account settings: In some cases, conflicting account settings or third-party add-ins can interfere with the default account configuration. To troubleshoot this, disable any unnecessary add-ins and review any rules or filters that may be affecting the account selection. Additionally, ensure that your Outlook software is updated to the latest version to avoid any known compatibility issues.
5. Multiple default accounts: If you have multiple email accounts set up and inadvertently set more than one as the default account, Outlook may encounter conflicts when determining which account to use. In such cases, review your account settings and ensure that only one email account is designated as the default.
If you are still experiencing issues with setting or managing your default account in Outlook, referring to the official Microsoft support documentation or seeking assistance from technical support can provide further guidance and tailored solutions to address your specific situation.
By troubleshooting common issues and finding suitable solutions, you can ensure that your default account is set correctly and enjoy a seamless email experience in Outlook.